How to Change a Flat Tire
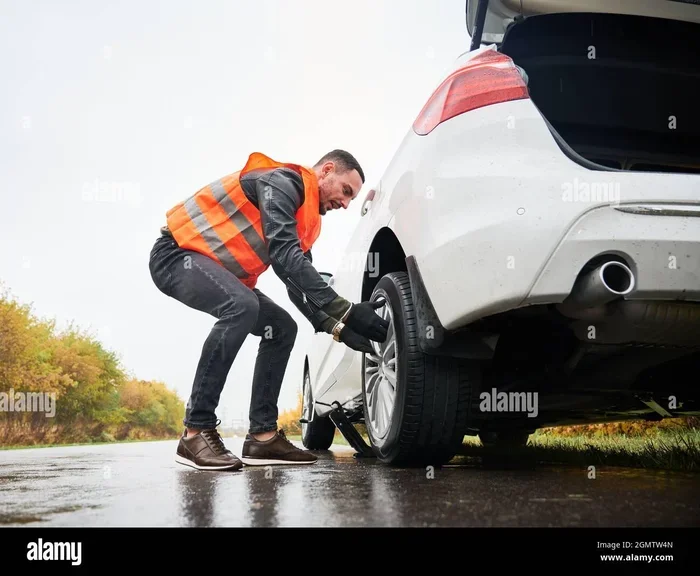
Changing a flat tire is a simple skill every driver and cyclist should know. This guide walks you through the entire process, from spotting a flat tire to getting back on the road safely. You will learn the tools you need, the step-by-step tire changing method, and how to prevent future punctures.
There is nothing quite like the sinking feeling when you hear that hiss of air escaping from your tire. Whether you are driving to work or cruising down a scenic bike path, a flat tire can bring your day to a sudden halt. But here is the good news: changing a flat tire is a skill that anyone can learn with a little practice and the right guidance.
In this complete guide, we will walk you through everything you need to know about tire changing. From the tools you need to the step-by-step process, we cover it all. Whether you are dealing with a car tire or a bike tire, this article has you covered. We will also share tips on preventing future flats and knowing when to call for professional help. By the end, you will feel confident handling a puncture on your own.
A flat tire does not have to be a disaster. With the right knowledge and a few basic tools, you can handle the situation quickly and safely. Let us dive into the details.
Key Takeaways
- Know your tools: A jack, lug wrench, and spare tire are essential for any roadside tire change.
- Safety first: Always pull over to a flat, stable surface before attempting a tire repair.
- Check tire pressure regularly: Preventing a flat is easier than fixing one.
- Practice at home: Familiarize yourself with the process before you actually need it.
- Know when to call for help: Some situations require professional roadside assistance.
- Reuse and maintain: Proper tire maintenance extends the life of your tires and saves money.
📑 Table of Contents
What Causes a Flat Tire
Understanding why tires go flat is the first step toward prevention. Several common culprits can lead to a flat tire situation, and knowing them helps you stay prepared.
Punctures from Sharp Objects
The most frequent cause of a flat tire is a puncture. Nails, screws, glass, and sharp rocks can all pierce your tire. A small puncture may cause a slow leak, while a larger object can deflate the tire rapidly. This is why it helps to know how to tell if a bike tire needs air before the situation gets worse. Catching a slow leak early can save you from a full emergency later.
Valve Stem Issues
The valve stem is the small protrusion on your tire that allows you to add or release air. Over time, valve stems can crack, leak, or become damaged. A faulty valve stem can cause gradual air loss that you might not notice right away. Regular inspection of your valve stem can help you catch this problem early. For bike tires, the valve stem is especially vulnerable to damage from dust and debris buildup.
Road Hazards and Potholes
Driving over potholes, curbs, or rough terrain can damage your tire internally. These impacts can cause the tire sidewall to bulge or the inner tube to rupture. In bikes, hitting a sharp pothole at speed is a common reason for a flat tire. Slow down when you see rough patches on the road to reduce your risk. Good shock absorption from properly inflated tires also helps minimize damage from road hazards.
Wear and Tear
Tires degrade over time. The tread wears down, and the rubber becomes brittle. Old tires are more susceptible to flats because they cannot absorb impacts as well. Checking your tire age and tread depth regularly helps you replace tires before they fail. A tire with low tread depth has less grip and is far more vulnerable to punctures. Keep an eye on your tire pressure too, since underinflated tires wear out faster on the sides.
Tools You Need to Change a Flat Tire
Having the right tools makes all the difference when you need to change a tire. Before you find yourself stranded, assemble these essentials and keep them organized in your vehicle or bike bag.
Essential Car Tire Changing Tools
- Spare tire: A fully inflated spare is your best friend during a roadside emergency. Check its pressure every few months.
- Jack: A hydraulic or scissor jack lifts your vehicle off the ground safely. Make sure it is rated for your vehicle weight.
- Lug wrench: This tool loosens and tightens the lug nuts on your wheel. A cross-shaped wrench provides better leverage.
- Wheel wedges: These prevent your car from rolling while you work. Chocks or bricks work as good alternatives.
- Gloves and flashlight: Protect your hands and see what you are doing in low light conditions.
Essential Bike Tire Repair Tools
- Tire levers: These plastic tools help you pry the tire off the rim without causing damage to the rim or tube.
- Tube patch kit: A quick fix for small punctures in your inner tube. It includes adhesive patches and sandpaper.
- Hand pump or CO2 inflator: You need a reliable way to fill up a bike tire with air after the repair. CO2 inflators are fast and compact for on-the-go use.
- Multi-tool: A compact tool with hex keys, screwdrivers, and other essentials for on-road adjustments.
Keeping these tools organized in a dedicated bag means you will always be prepared. Trust us, it is much easier to practice at home than to figure it out on the side of a dark road at night.
Step-by-Step: How to Change a Flat Tire
Now for the main event. Here is a detailed walkthrough of the tire changing process. Follow these steps carefully, and you will be back on the road in no time.
Step 1: Find a Safe Location
As soon as you notice a flat, signal and pull over to a flat, stable surface. Avoid soft ground, hills, or narrow shoulders. Turn on your hazard lights and apply the parking brake. If you are on a bike, move to a safe area away from traffic. Put on reflective gear if you have it. Your safety always comes first, no matter how urgent the tire change feels.
Step 2: Gather Your Tools and Prepare
Take out your jack, lug wrench, and spare tire. Place wheel wedges behind the tires opposite the flat to prevent rolling. If you are changing a bike tire, flip your bike onto its side or use a bike stand for stability. Make sure your workspace is well-lit if it is dark. Lay out your tools so they are easy to reach.
Step 3: Loosen the Lug Nuts
Before you lift the vehicle, use the lug wrench to loosen the lug nuts. Turn them counterclockwise, but do not remove them completely. This step is crucial because the tire needs to be on the ground to provide resistance. For a bike tire, use your tire levers to carefully pry the tire off the rim. Work slowly to avoid pinching the inner tube.
Step 4: Lift the Vehicle
Place the jack under the vehicle’s designated jack point. Refer to your owner’s manual if you are unsure where this is. Raise the vehicle until the flat tire is about six inches off the ground. Never put any part of your body under the vehicle while it is on a jack. The jack should feel stable and secure before you proceed.
Step 5: Remove the Flat Tire
Now fully unscrew the lug nuts and set them aside in a safe spot. A small bowl or your pocket works well for this. Pull the tire straight toward you to remove it. For a bike, use your tire levers to completely remove the tire and tube. If you need to get air out of a bike tire during this process, simply press on the valve stem to release the remaining air.
Step 6: Install the Spare Tire
Lift the spare tire onto the hub and align the holes with the bolts. Push it in until the bolts show through. Hand-tighten the lug nuts in a star pattern to ensure even pressure. Do not fully tighten them yet. For bikes, seat the tire bead back onto the rim first. Then tuck the tube inside, making sure it is not pinched between the tire and rim.
Step 7: Lower the Vehicle and Final Checks
Carefully lower the vehicle until the tire touches the ground but does not bear full weight. Tighten the lug nuts firmly with the wrench in a star pattern. Then lower the vehicle completely and give the nuts one final tighten. If you are dealing with a bike tire, you can now use your pump to inflate to the recommended PSI. Check that the spare tire pressure is adequate before driving. A spare that is also flat will not help you at all.
After completing the tire change, drive cautiously to a service station. Spare tires are not designed for long distances or high speeds. Get your regular tire repaired or replaced as soon as possible.
How to Handle a Flat Bike Tire
A flat bike tire is extremely common, especially for regular commuters and mountain bikers. The process differs slightly from a car tire change, but the principles are the same.
Removing the Wheel
For a front tire, simply flip the quick-release lever or loosen the axle nuts. For a rear tire, you may need to shift the chain to the smallest cog first. This makes removal much easier. If you are unsure about the full bike maintenance process, check out this guide on putting air in a flat bike tire for additional context on bike tire maintenance.
Patching the Tube
Once the tire is off, remove the inner tube. Inflate it slightly and listen for the hissing sound to locate the puncture. Clean the area around the hole with a cloth. Apply the patch with the adhesive side down and press firmly. Let it set for a few minutes before reinserting the tube. If the tube is damaged beyond repair, replace it entirely. After patching or replacing, use a hand pump or CO2 inflator to inflate to the proper PSI level for your tire size.
Reinstalling the Tire
Seat one side of the tire back onto the rim first. Then tuck the tube inside, making sure it is not pinched. Work the other side of the tire back onto the rim carefully. Inflate to the recommended pressure and check that the tire sits evenly on the rim. A properly seated tire should feel firm and bounce back when pressed. Run your fingers along the tire to make sure the tube is not sticking out anywhere.
Preventing Future Flat Tires
The best way to deal with a flat tire is to avoid getting one in the first place. These preventive steps can save you time, money, and frustration on the road.
Check Tire Pressure Regularly
Underinflated tires are more prone to flats and wear out faster. Use a tire gauge to check your pressure at least once a month. The recommended PSI is usually printed on the tire sidewall. Keeping your tires properly inflated is the single most effective way to prevent flats. A tire pressure monitoring system, or TPMS, can also alert you to pressure drops in real time.
Inspect Your Tires Before Rides
Before every ride or drive, do a quick visual check. Look for embedded objects, cuts, bulges, or uneven wear. Removing a small nail early can prevent a full puncture later. This simple habit takes less than a minute and can save you from a roadside repair. Pay special attention to the sidewalls, where damage is not always visible from the tread side.
Invest in Quality Tires
Cheap tires are more vulnerable to punctures. Investing in puncture-resistant or reinforced tires may cost more upfront but saves you from frequent repairs. For bikes, consider tires with built-in protection layers. For cars, all-season tires with good tread depth offer better puncture resistance. Look for tires with a high thread per inch count for added durability.
Avoid Road Hazards When Possible
Stay alert for debris, glass, potholes, and construction zones. When you see hazards, safely change lanes or slow down. This is especially important for cyclists who share roads with traffic. If you frequently ride the same route, note any recurring hazards and report them to local authorities when possible.
When to Call a Professional
Not every flat tire situation is a DIY job. Knowing when to call for help keeps you safe and prevents further damage to your vehicle or bike.
Situations That Require Professional Help
- Blowouts: If the tire has completely disintegrated, do not attempt to drive or ride. Call for roadside assistance immediately.
- Damaged rims: A bent or cracked rim requires professional replacement. Riding or driving on a damaged rim can cause further vehicle damage.
- No spare available: If you do not have a spare or your spare is also flat, call for help. Roadside assistance can handle tire changes quickly.
- Unsafe location: If you are on a highway, narrow road, or in bad weather, it is safer to wait for professional help.
Roadside assistance services can handle tire changes quickly and safely. Keep their number saved in your phone for emergencies. It is always better to be safe than sorry when you are stranded. Many insurance policies and car memberships include roadside assistance, so check your coverage before you need it.
Final Thoughts
Changing a flat tire is a fundamental skill that everyone should have in their toolkit. Whether you drive a car or ride a bike, knowing how to handle a puncture gives you confidence and independence. Practice the steps at home so you are prepared when the real situation comes up. Keep your tools ready, your tires maintained, and your spare tire properly inflated.
A flat tire does not have to ruin your day. With the right preparation and a calm approach, you can handle it like a pro. Remember to check your tire pressure regularly, inspect your tires before every trip, and invest in quality tires that resist punctures. These small habits add up to fewer emergencies and more peace of mind on the road.
Now that you know how to change a flat tire, you are better equipped than most people. Share this knowledge with friends and family. Everyone benefits from knowing how to handle a roadside emergency. Stay safe, stay prepared, and keep rolling.
Frequently Asked Questions
How long does it take to change a flat tire?
For most people, changing a flat tire takes between 15 and 30 minutes. If you have practiced at home, you can do it even faster. The key is staying calm and following each step carefully. First-timers should allow extra time and not rush the process.
Can you drive on a flat tire?
No, you should never drive on a flat tire. It damages the rim, reduces control, and creates a serious safety hazard. Pull over safely as soon as you notice the flat and change the tire or call for assistance. Even driving a short distance on a flat can ruin your rim and lead to much more expensive repairs.
How often should you check your tire pressure?
Check your tire pressure at least once a month and before any long trips. Temperature changes can affect pressure, so check more often during seasonal shifts. A good habit is to check pressure every time you fill up with fuel or at the start of each week for bike tires.
What should you do if you don’t have a spare tire?
If you do not have a spare, call roadside assistance or a tow truck. Driving without a spare is dangerous and can damage your vehicle further. Some services can bring a replacement tire or repair the flat on the spot. Always keep a roadside assistance number saved in your phone for exactly this situation.
How do you know which tire is flat?
You may feel vibration, hear a hissing sound, or see the tire visibly deflate. For cars, the TPMS light on your dashboard may also illuminate. For bikes, the tire will feel soft when you press on it. If you are unsure, visually inspect each tire and use a pressure gauge to check the PSI of all tires.
Can you change a flat tire by yourself?
Yes, most people can change a flat tire by themselves with the right tools and a little practice. It is a great skill to learn and builds self-reliance. Start by practicing at home in a safe, well-lit environment. Once you are comfortable with the process, you will be able to handle it confidently in any situation.