
How to Tell If a Bike Tire Needs Air
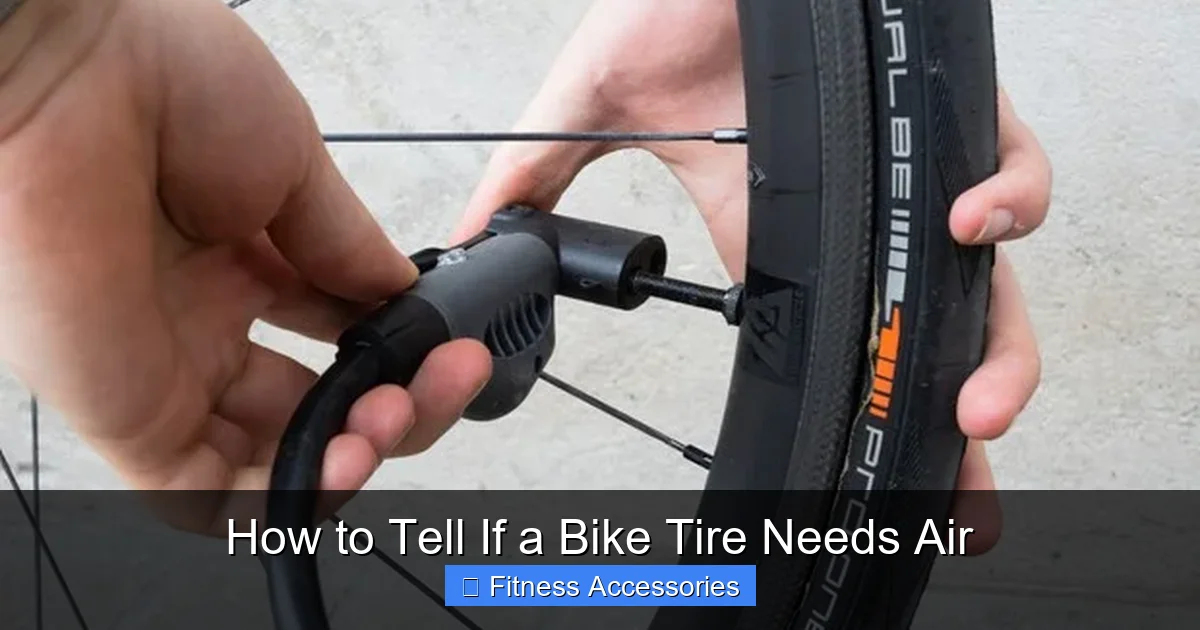
Riding on underinflated tires is a silent safety hazard and performance killer. It increases rolling resistance, causes premature wear, risks pinch flats, and makes handling unpredictable. Knowing how to spot low pressure—through simple squeeze tests, visual cues, and ride feel—is a non-negotiable skill for every cyclist. This guide breaks down exactly what to look for, why it matters, and how to maintain the perfect PSI for your specific bike and terrain.
Let’s be honest: checking bike tire pressure often feels like one of those chores—like flossing or changing the furnace filter. We know we should do it, but it’s easy to forget until something goes wrong. That “something” is usually a flat tire, a wobbly ride, or a sudden loss of control. But what if I told you that the single most important maintenance task for your bike’s safety, efficiency, and fun factor is something you can master in under 30 seconds? Understanding how to tell if a bike tire needs air isn’t just about avoiding a flat; it’s about unlocking a smoother, faster, and more confident ride every single time you pedal.
Think of your bike tires as the foundational link between you and the earth. They absorb shock, provide traction, and determine how efficiently your effort turns into forward motion. When they’re underinflated, that link breaks down. You work harder, your bike handles poorly, and your components wear out prematurely. The good news? You don’t need to be a mechanic to spot the signs. Your eyes, fingers, and even your butt are excellent diagnostic tools. This guide will walk you through every telltale sign, from the obvious to the subtle, and transform you into a tire pressure pro.
Key Takeaways
- The “Squeeze Test” is your first line of defense: A properly inflated road tire should feel very firm, almost rock-hard, with minimal give when squeezed. Mountain bike tires will have a slight, uniform give but should not feel squishy or collapse easily.
- Visual inspection reveals critical clues: Look for excessive tire bulge on the sidewall when the bike is loaded, visible cracks or cuts in the rubber, and the tire’s “contact patch” (the part touching the ground). An overly wide, flat contact patch signals low pressure.
- Performance symptoms are loud warning signs: If you feel increased “mushiness,” sluggish acceleration, poor cornering grip, or hear/feel a “thump-thump” rhythm, your tires are almost certainly underinflated.
- Pressure is not one-size-fits-all: The ideal PSI (pounds per square inch) is printed on your tire’s sidewall and depends on your weight, tire width, and terrain. Heavier riders and smoother roads need higher pressure; lighter riders and rough trails need lower pressure.
- Check pressure when tires are cold: Tire pressure rises as the rubber heats up from riding. For an accurate reading, check and inflate tires before you ride or at least 2-3 hours after stopping.
- Use a proper gauge, don’t guess: Floor pumps with built-in gauges are accurate and efficient. Cheap pencil gauges can be inconsistent. Your “feel” is a good supplement but not a replacement for a gauge.
- Underinflation causes more damage than overinflation: While overinflation can lead to a harsh ride and reduced traction, chronic underinflation causes sidewall damage, rim strikes, heat buildup, and catastrophic tire failure.
📑 Table of Contents
- Why Tire Pressure Is The #1 Cycling Priority
- The Science of Squeeze: Your Primary Diagnostic Tool
- Visual Inspection: What Your Eyes Can Reveal
- Performance Symptoms: How Your Ride Tells You
- Finding the Perfect Pressure: It’s Not a Guess
- How to Inflate Properly: Tools and Techniques
- Special Cases: Tubeless, E-Bikes, and Storage
- Conclusion: Make It a Habit, Not a Crisis
Why Tire Pressure Is The #1 Cycling Priority
Before we dive into the “how,” we must understand the “why.” Why does a few PSI matter so much? The answer lies in physics, material science, and plain old common sense.
The Rolling Resistance Rollercoaster
Rolling resistance is the energy lost as your tire deforms while rolling. An underinflated tire is like a wet noodle—it flattens out excessively, creating a large, saggy contact patch. This increased surface area creates more friction against the ground, siphoning off your pedaling power. Studies show that for every 10 PSI below the recommended pressure, you can lose up to 5% more energy. On a long ride, that translates to you feeling exhausted for no good reason. Properly inflated tires are firm and round, minimizing deformation and maximizing the efficiency of every watt you produce.
Safety and Control: The Grip Equation
Tire grip is a function of two things: the rubber compound and the tire’s shape. Underinflation wrecks the latter. A squishy tire will distort unpredictably during cornering, causing the sidewall to fold or the tread to squirm. This leads to a vague, sliding feeling, especially in wet conditions or on loose surfaces. Worse, a severe impact with a pothole or curb can cause a “pinch flat” or “snake bite,” where the tube is pinched between the rim and the obstacle, resulting in two parallel slashes. In extreme cases, the tire can literally roll off the rim. Correct pressure keeps the tire’s profile stable, ensuring predictable handling and maximum traction.
The Silent Killer: Premature Wear and Tear
Your wallet feels the pain of low pressure, too. An underinflated tire’s sidewalls flex excessively with every rotation. This constant flexing generates heat and stresses the fabric carcass inside the rubber, leading to sidewall cracks, tread separation, and overall tire degradation. The rim can also suffer, as the tire fails to absorb impacts, transmitting sharp blows directly to the wheel’s aluminum or carbon structure. You’ll wear through expensive tires in half the expected time and risk damaging costly wheels.
The Science of Squeeze: Your Primary Diagnostic Tool
This is the classic, instant-check method every cyclist should know. It’s not 100% precise, but it’s 95% effective at telling you if you’re in a dangerous range.
How to Perform the Squeeze Test Correctly
First, understand that the “correct” feel differs between tire types. Road bikes (narrow tires, high pressure): Grip the tire firmly between your thumb and fingers. A properly inflated 700x25c tire at 90 PSI should feel incredibly firm. You might be able to depress it a millimeter or two with significant effort, but it should not feel soft, spongy, or hollow. Mountain bikes & hybrids (wider tires, lower pressure): These are designed to deform more. A properly inflated 2.2″ mountain bike tire at 25 PSI should have a noticeable, uniform give. You should be able to pinch the sidewall inward, but the tread should resist your squeeze and not collapse easily. The key is uniformity—it shouldn’t feel soft on one side and hard on the other.
What “Wrong” Feels Like
The Squish: This is the dead giveaway. If you can easily collapse the tire with one hand, or if it feels like a partially inflated basketball, it’s critically low. The Mush: Less obvious. The tire offers some resistance but feels “mushy” or “bouncy” rather than firm and resilient. The Rim Feel: When you squeeze, you can distinctly feel the hard rim edge just beneath the tire’s surface. This means the tire is so low it’s not supporting the rim, which is a major hazard.
The Limitations of Feel
Your fingers are great for spotting major deficiencies but poor for fine-tuning. A 5 PSI difference on a high-pressure road tire is imperceptible to the touch but significant for performance and safety. This is why a gauge is the ultimate tool. The squeeze test is for spotting a problem, not for achieving the perfect pressure.
Visual Inspection: What Your Eyes Can Reveal
Sometimes, the evidence is right there on the surface. A quick visual scan can confirm what your squeeze test suspects or catch issues you might miss by feel alone.
The Contact Patch Test
Look at your bike from the side while it’s upright (not on a stand). Observe the flat spot where the tire touches the ground—the contact patch. Normal: A small, neat, roughly oval or rectangular patch. For a road bike, it might be the size of a stamp. For a mountain bike, it’s wider but still contained. Problematic: A large, sprawling, almost flat patch that extends far up the tire’s sidewall. This is a classic sign of severe underinflation. The tire is splayed out, unable to hold its shape.
Sidewall Bulge and Deformation
Inspect the tire’s sidewall (the part between the tread and the rim). Normal: A smooth, continuous curve. Warning Signs: Look for a distinct bulge or ” hernia” in the sidewall. This indicates that the internal structure is damaged or that the tire is so underinflated the sidewall is folding over itself under load. Also, check for any cuts, cracks, or pieces of missing rubber. Underinflation makes tires more susceptible to damage from curbs and debris.
Rim Alignment and Tire Seating
Make sure the tire bead (the edge that locks into the rim) is sitting evenly all the way around the rim. An underinflated tire can sometimes “unseat” slightly, creating a visible gap or a wobble in the tire line. This is dangerous and can cause a sudden blowout if you try to inflate it further without reseating the bead properly.
Performance Symptoms: How Your Ride Tells You
This is often the most convincing evidence because it directly impacts your experience. If your bike feels “off,” start with the tires.
The Thump-Thump and Wobble
A rhythmic thumping sound or vibration that matches your wheel rotation speed is rarely the tire itself—it’s almost always a sign of a severe flat or extreme underinflation causing the tire to collapse unevenly. A wobble or shimmy at speed, especially in the front wheel, can also be caused by a low-pressure tire that’s not stable.
Mushy Handling and Sluggish Acceleration
Does your steering feel vague and unresponsive? Does the bike seem to “wallow” in corners or feel like you’re pedaling through syrup? This is the lack of lateral stiffness from an underinflated tire. The energy you put into pedaling is being absorbed by tire deformation instead of propelling you forward.
Difficulty in Turns and Braking
Underinflated tires have a larger, flatter contact patch. While this *can* provide more mechanical grip in some soft-surface scenarios, it generally reduces the tire’s ability to “bite” during quick direction changes. The tire will scrub and slide rather than grip and carve. Braking distances can also increase because the tire is less efficient at transferring the braking force to the ground.
Finding the Perfect Pressure: It’s Not a Guess
Once you’ve determined your tires need air, the next step is filling them to the right amount. This is where many people go wrong.
Decoding the Sidewall: Your Pressure Prescription
Look at the embossed text on your tire’s sidewall. You’ll see something like: Inflate to 85-120 PSI or Max Pressure: 4.5 BAR. This is the manufacturer’s tested safe range based on the tire’s construction. The minimum is the lowest pressure you can safely run without risking rim damage or pinch flats. The maximum is the absolute ceiling; exceeding it can cause a blowout. Your ideal pressure lives between these two numbers.
Variables That Change Your Ideal PSI
Your body weight is the biggest factor. A 150lb rider on a 700x28c tire might run 70 PSI for comfort and grip. A 200lb rider on the same tire might need 85 PSI to prevent excessive bottoming out. Terrain is the second. Rough, gravelly roads or trails call for lower pressure (within the safe range) to allow the tire to conform to bumps and maintain traction. Smooth pavement allows for higher pressure for lower rolling resistance. Rule of thumb: Start in the middle of the recommended range, then adjust in 5 PSI increments based on feel. If you feel every little vibration, go up a few PSI. If you’re getting pinch flats on rough stuff, go down a few.
The Cold Inflation Rule
Tire pressure is a gas (air), and gases expand with heat. When you ride, your tires heat up, and the pressure reading can be 5-10 PSI higher than when they were cold. Always check and adjust your tire pressure when the tires are cold—meaning they haven’t been ridden on for at least 2-3 hours or have been sitting overnight. This gives you a consistent, accurate baseline.
How to Inflate Properly: Tools and Techniques
Knowing you need air is step one. Getting the right amount in safely and efficiently is step two.
Essential Tools: Pump and Gauge
Forget the tiny frame pump for home inflation. A good floor pump with a sturdy hose and a reliable, easy-to-read built-in gauge is the gold standard. It’s faster, easier, and more accurate. For on-the-go fixes, a compact pump is fine, but you should still have a separate, accurate pencil or digital gauge to verify pressure. Schrader valves (the wide, car-type) are simpler. Presta valves (the narrow, bike-specific with a locknut) require unscrewing the tiny tip before attaching the pump head.
The Step-by-Step Inflation Process
1. Identify Valve Type: Presta or Schrader. 2. Prepare Valve: For Presta, unscrew the small top nut all the way (you’ll hear a hiss). For Schrader, press the pin lightly with a tool to release any debris. 3. Attach Pump Head: Secure it firmly. You should hear a seal. 4. Pump: Use your body weight on the floor pump stroke for efficiency. Check the gauge frequently. 5. Stop at Target: Don’t max out the pressure. Aim for your calculated ideal PSI. 6. Detach Carefully: For Presta, you may hear a small hiss as you remove the head—this is normal. Re-tighten the valve nut. 7. Re-check: Give the tire a final squeeze and visual check.
Common Mistakes to Avoid
Overinflation: This is tempting for road racers seeking ultimate speed, but it leads to a harsh, vibrating ride, reduced traction, and increased risk of rim damage from impacts. Underinflation: The main villain of our story. Relying on Gas Station Pumps: These are designed for car tires and are wildly inaccurate for bike tires, often over-inflating them dangerously. Not Seating the Bead: If a tire looks low and the bead is not evenly seated in the rim, add a tiny bit of air to pop it into place before inflating to full pressure.
Special Cases: Tubeless, E-Bikes, and Storage
The basic principles hold, but some modern setups have unique considerations.
Tubeless Tires
Tubeless setups (using sealant inside the tire) often run at slightly lower pressures than tube-type tires because there’s no tube to pinch. The squeeze test and contact patch inspection are even more critical. A tubeless tire that loses pressure slowly can be tricky to detect. Look for sealant weeping around the valve stem or a very slight, slow deformation over days. Use a gauge frequently. The sealant can also dry out, reducing its effectiveness, so regular pressure checks are part of the maintenance routine.
E-Bikes and Cargo Bikes
Electric assist and heavy loads mean your tires are working much harder. The manufacturer’s recommended pressure range is your starting point, but you will almost always need to run at the higher end of that range, or even slightly above it if the tire is robustly built. The extra weight dramatically increases the risk of pinch flats and rim damage from underinflation. Check pressure even more frequently—weekly is a good rule.
Long-Term Storage
If you’re putting your bike away for the season, inflate the tires to the maximum recommended pressure before storing. This prevents the tires from developing flat spots from the bike’s weight resting on them for months. Check them every few months and top them up, as air slowly permeates through the rubber.
Conclusion: Make It a Habit, Not a Crisis
Mastering the art of tire pressure is the single highest-ROI skill you can develop as a cyclist. It costs nothing but a few minutes of your time, requires no special tools beyond a decent pump, and pays dividends in safety, savings, and sheer riding joy. The signs are clear: the suspiciously soft squeeze, the overly wide contact patch, the thumping rhythm, the sluggish acceleration. These aren’t just quirks; they’re your bike’s way of asking for help. By incorporating a quick visual and tactile check into your pre-ride routine—maybe while you’re locking your bike or putting on your helmet—you catch problems before they strand you or cause an accident. Remember, your tires are your only point of contact with the world. Treat them with respect, keep them properly inflated, and they’ll return the favor with countless miles of smooth, safe, and efficient adventure. Now go grab your pump, check those PSI, and feel the difference on your next ride.
Frequently Asked Questions
How often should I check my bike tire pressure?
You should visually and tactilely check your tire pressure before every single ride. For accurate pressure readings with a gauge, check at least once a week for road bikes and every 1-2 weeks for mountain bikes, as they naturally lose air faster. Always check after a temperature drop, as cold air reduces pressure.
What is the ideal tire pressure for my bike?
Your ideal pressure is found on the tire’s sidewall as a range (e.g., 85-120 PSI). Your specific pressure within that range depends on your weight, the terrain, and your preference for comfort vs. speed. Heavier riders and smooth pavement favor higher pressure; lighter riders and rough trails favor lower pressure. Start in the middle and adjust in 5 PSI increments.
Is it worse to have tires overinflated or underinflated?
Chronic underinflation is far more damaging and dangerous. It causes excessive flexing, leading to sidewall damage, heat buildup, pinch flats, and poor handling. While overinflation can cause a harsh ride and reduce traction, it is generally less destructive to the tire and wheel structure than sustained underinflation.
Can I use a car tire inflator at a gas station for my bike?
It’s not recommended. Gas station pumps are designed for high-volume car tires and are notoriously inaccurate for the precise, lower pressures of bicycle tires. They often over-inflate, which can cause a dangerous blowout. Use a dedicated bicycle floor pump with a reliable gauge instead.
Do tubeless tires need the same pressure checks as tube tires?
Yes, and arguably more diligence. Tubeless setups can lose pressure very slowly through the sealant or the tire/rim interface. Because there’s no tube to pinch, riders might be tempted to run too low, risking rim damage or the tire unseating. Regularly check pressure with a gauge and replenish sealant as per manufacturer guidelines.
Why does my tire lose air so quickly?
All tires lose air over time due to air permeating through the rubber and valve. This is normal. However, a rapid loss (more than 10-15 PSI per week) indicates a problem: a puncture (even a small one that sealed itself), a leaky valve stem, or a damaged/improperly seated tire bead. Inspect the tire and valve for debris or damage if pressure drops abnormally fast.


