How to Set Up a Rowing Machine 2

Setting up your rowing machine correctly is the first step to a great workout. This guide walks you through every step of the rowing machine setup process, from unboxing to fine-tuning your form. You will learn how to adjust the foot straps, damper, and seat for the best results.
So you just got a new rowing machine. Maybe it is the popular Concept 2 Rowing Machine 2, or maybe you picked up a different model. Either way, the excitement of having a new piece of home fitness gear is real.
But here is the thing. Before you hop on and start pulling those handles, you need to set it up the right way. A proper rowing machine setup makes a huge difference. It affects your comfort, your performance, and even your safety. A machine that is not set up correctly can lead to poor form, wasted effort, and even injury over time.
This guide will take you through every step of the rowing machine assembly and adjustment process. We will cover unboxing, putting the pieces together, making the right adjustments, and getting ready for your first workout. Whether you are a complete beginner or someone who wants to double-check their setup, you will find practical tips here.
Let us get into it. By the end of this article, your rowing machine will be ready to go, and you will feel confident about every setting.
Key Takeaways
- Unbox and inspect all parts: Make sure every piece is present before you start assembly.
- Adjust the foot straps and footrests: Proper foot placement prevents injury and improves power.
- Set the damper level correctly: A setting between 3 and 5 works well for most beginners.
- Level the machine on a flat surface: This ensures smooth rowing and protects your floor.
- Check the seat and rail: A clean, lubricated rail makes every stroke feel effortless.
- Follow the performance monitor setup: Input your stats to track progress accurately.
📑 Table of Contents
Unbox and Inspect All Parts
The first step in any rowing machine setup is unboxing. This might sound boring, but it is one of the most important steps. When you rush through unboxing, you might miss a part or notice damage later.
What to Look For in the Box
Open the box carefully and lay out all the pieces. Most rowing machines come with a parts checklist in the manual. Go ahead and check off each item as you find it. Here are the common parts you should see:
- The main rail or track
- The seat
- The flywheel and housing
- The footrests and foot straps
- The handle and chain or strap
- The performance monitor
- Legs or feet for stability
- Allen keys and bolts for assembly
Check for Damage
While you inspect the parts, look for any visible damage. Scratches on the rail are normal from shipping. But if you see a bent rail or a cracked flywheel housing, contact the seller right away. It is much easier to swap a damaged part before you start assembling everything.
Quick Tip: Keep all the packaging materials until you have fully tested the machine. If you need to return it, the original packaging makes the process much easier.
Assemble the Rowing Machine Step by Step
Now comes the fun part. Putting your rowing machine together. Do not worry. Most modern machines come with clear instructions. But there are a few things that can make this process smoother.
Step 1: Attach the Legs or Feet
Start by attaching the legs to the main frame. These provide the base and stability for your machine. Most rowing machines use bolts to secure the legs. Use the Allen key that came in the box. Tighten each bolt firmly, but do not over-tighten. You want a snug fit, not a stripped thread.
Step 2: Mount the Rail and Seat
Next, attach the rail to the frame. The rail is the track that the seat slides along. Make sure it is aligned straight. A crooked rail will cause the seat to jam or wobble. Once the rail is secure, slide the seat on and test the movement. It should glide smoothly from one end to the other.
Step 3: Connect the Flywheel and Chain
The flywheel is the weighted wheel that creates resistance when you row. Connect the chain or strap to the flywheel and the handle. Make sure the chain is not twisted. A twisted chain will cause jerky movements and uneven resistance.
Step 4: Install the Footrests and Straps
Attach the footrests to the base of the machine. These are where your feet go during each stroke. Then thread the foot straps through the buckles. You want the straps tight enough to hold your feet in place but loose enough to slip out quickly if needed.
Quick Tip: If you are using a Concept 2 Rowing Machine 2, check out our detailed guide on how to set up a Concept 2 Rowing Machine 2 for model-specific tips.
Make the Right Adjustments
This is where most people skip steps. They set up the machine and jump straight into rowing. But the adjustments you make can completely change your experience. Taking five extra minutes here saves you from frustration later.
Adjust the Damper Setting
The damper controls how much air flows into the flywheel. Think of it like a gear on a bicycle. A higher damper setting means more resistance. A lower setting means less resistance.
For beginners, a damper setting between 3 and 5 is ideal. This gives you a smooth, manageable workout without burning out your muscles too fast. You can always adjust it later as you get stronger.
Here is a quick reference:
- Setting 1-2: Light resistance. Good for warm-ups and recovery rows.
- Setting 3-5: Medium resistance. Best for general fitness and beginners.
- Setting 6-8: High resistance. Great for building strength and power.
- Setting 9-10: Maximum resistance. Only for advanced athletes.
Set the Foot Strap Position
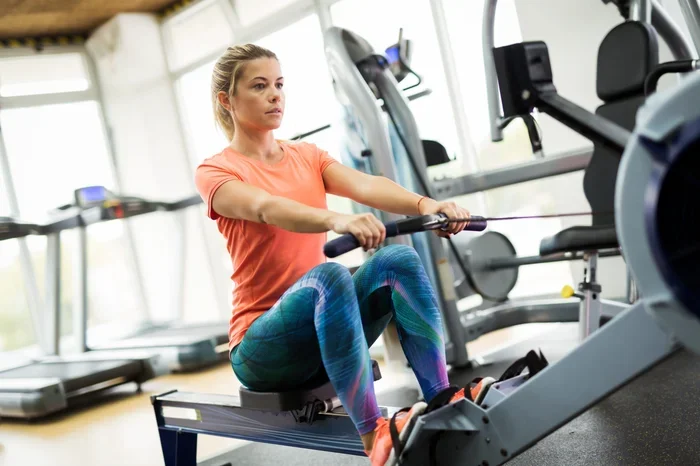
Your foot straps should sit across the balls of your feet, not your toes. When you pull the handle back, your heels should lift slightly. If the straps are too low, your feet will slip. If they are too high, they will dig into your ankles and cause pain.
Adjust the strap angle so it fits snugly across the widest part of your foot. You should be able to slide your feet in and out easily but feel secure during each stroke.
Level the Machine
A level machine is a safe machine. If your floor is uneven, use the adjustable feet to balance the rowing machine. Place a level on the rail to check. The seat should glide without any tilting or wobbling.
An unlevel machine can also put extra stress on the frame and joints. Over time, this can lead to wear and tear. So take the extra minute to level it properly.
Set Up the Performance Monitor
The performance monitor is the brain of your rowing machine. It tracks your distance, pace, strokes per minute, and calories burned. Setting it up correctly ensures you get accurate data.
Enter Your Profile
Most monitors let you input your weight, height, and age. This information helps the machine calculate your calorie burn and distance more accurately. If you skip this step, the numbers will be off.
For the Concept 2 Rowing Machine 2, the monitor is more advanced than older models. It connects to apps and tracks your progress over time. If you want to learn more about using the monitor, check out our guide on how to properly use a Concept 2 Rowing Machine 2.
Calibrate the Monitor
Some monitors need calibration before first use. This usually involves rowing a short distance and letting the machine record your baseline. Check your manual for specific calibration steps. A calibrated monitor gives you reliable data from day one.
Prepare for Your First Workout
Your machine is assembled, adjusted, and calibrated. Now what? Before you jump into a intense session, take some time to prepare your body and your space.
Choose the Right Location
Place your rowing machine on a flat, hard surface. Carpet can create resistance and make the machine harder to slide. A garage, basement, or spare room with a smooth floor works best. Make sure you have enough space behind the machine for the seat to slide back fully.
Do a Warm-Up Row
Before your first real workout, do a light warm-up row. Set the damper to a low level and row at a comfortable pace for 5 to 10 minutes. This gets your joints moving and your muscles warmed up. It also helps you get comfortable with the machine’s feel.
Quick Tip: If you are new to indoor rowing, focus on your technique before speed. A proper rowing technique guide can help you build good habits from the start.
Common Mistakes to Avoid During Setup
Even with the best intentions, people make mistakes when setting up a rowing machine. Here are the most common ones and how to avoid them.
- Skipping the assembly manual: Every machine is different. Read the manual. It saves time and prevents damage.
- Over-tightening bolts: This can strip threads or crack plastic parts. Tighten until snug, then stop.
- Ignoring floor protection: Place a mat under the machine. It protects your floor and reduces noise.
- Setting the damper too high: This is the number one beginner mistake. High resistance does not mean a better workout. It just means you burn out faster.
- Forgetting to lubricate the rail: A dry rail creates friction. Use the lubricant that came with your machine or a silicone-based spray.
- Not checking the chain tension: A loose chain will slip off. A tight chain will wear out faster. Find the sweet spot.
If you want to learn more about avoiding setup errors, our guide on putting together a Concept 2 Rowing Machine 2 covers common assembly pitfalls in detail.
Maintenance Tips After Setup
Once your rowing machine is set up, a little maintenance goes a long way. Regular care keeps your machine running smoothly and extends its lifespan.
- Wipe down the rail after each use: Sweat and dust build up over time. A quick wipe keeps the seat gliding smoothly.
- Lubricate the rail monthly: Use the recommended lubricant. This reduces friction and prevents wear.
- Check the chain or strap regularly: Look for signs of fraying or stretching. Replace worn parts promptly.
- Inspect the foot straps: Frayed straps can snap mid-workout. Replace them when you notice wear.
- Store the machine properly: If you move it, lift it rather than dragging it. Dragging can damage the legs and rail.
For more on keeping your machine in top shape, check out our article on how to properly use a Concept 2 Rowing Machine for long-term care tips.
What to Do After Setup
Now that your machine is ready, it is time to use it. But where do you start? If you are brand new to rowing, start with short sessions. Aim for 10 to 15 minutes of easy rowing, three times a week. Focus on your form and let your body adapt to the movement.
As you get more comfortable, you can increase the duration and intensity. Try adding interval training or longer steady-state rows. The rowing machine setup you did in this guide will support every type of workout you want to try.
And remember, proper setup is not a one-time thing. Every time you move your machine or change your workout style, revisit your settings. A quick check of the foot straps, damper, and seat position can make a big difference in how your workout feels.
If you are ready to start a weight loss journey with your new machine, our guide on how to use a rowing machine to lose weight has everything you need to get started.
Setting up a rowing machine does not have to be intimidating. With the right steps and a little patience, you will have a machine that is ready to deliver great workouts for years to come. Follow this guide, trust the process, and enjoy the ride.
Frequently Asked Questions
How long does it take to set up a rowing machine?
Most rowing machines take between 20 and 45 minutes to assemble. The Concept 2 Rowing Machine 2 is known for being relatively easy to set up. If you are new to assembly, give yourself an extra 15 minutes and keep the manual nearby.
What damper setting should I use as a beginner?
A damper setting between 3 and 5 is ideal for beginners. This provides moderate resistance that is challenging but not overwhelming. You can always adjust the setting as you build strength and confidence.
Do I need a special mat for my rowing machine?
While not required, a mat is highly recommended. It protects your floor from scratches, reduces noise, and prevents the machine from sliding during intense workouts. A thick rubber mat works best for most setups.
How do I know if my rowing machine is level?
Place a bubble level on the seat rail. The bubble should sit in the center. If it is off to one side, adjust the leveling feet at the base of the machine until the rail is perfectly flat.
Can I assemble a rowing machine by myself?
Yes, most rowing machines are designed for single-person assembly. However, having a second person to hold parts in place can make the process easier and faster. Always follow the manufacturer’s instructions carefully.
How often should I re-check my rowing machine setup?
You should check your setup once a month. Look at the bolt tightness, chain tension, strap condition, and rail cleanliness. Regular checks prevent small issues from becoming big problems down the road.
=== CONCLUSION ===
Setting up your rowing machine the right way is the foundation of every great workout. From unboxing and assembly to adjusting the damper, foot straps, and monitor, each step matters. A well-set-up machine gives you smoother strokes, better data, and a safer workout experience.
Take your time with the process. Do not rush through the rowing machine setup. Follow the steps in this guide, and you will be ready for your first session in no time. And once you are comfortable with the setup, you can focus on what really matters: building a consistent rowing machine workout routine that brings you results.
Your rowing journey starts with a solid setup. Now go enjoy the ride.