How to Set Up Concept 2 Rowing Machine
Setting up your Concept 2 rowing machine is simpler than you think. This guide walks you through every step, from unboxing and assembly to fine-tuning the damper and calibrating the monitor. You will learn how to adjust foot straps, seat position, and resistance so your machine is ready for a smooth, effective workout every time.
Unboxing a new Concept 2 rowing machine is exciting. You can almost feel the workout ahead. But before you start pulling those handles, you need to set things up correctly. A proper setup makes a huge difference in comfort, performance, and safety. This guide breaks down every step of the Concept 2 rowing machine setup process in plain, simple language. Whether you are a complete beginner or a seasoned athlete, you will find practical tips here to get your rower ready fast.
The Concept 2 rower is one of the most popular indoor rowing machines in the world. Its air resistance design gives you a smooth, realistic rowing feel. But like any piece of fitness equipment, it needs proper assembly and adjustment. Taking a few extra minutes during setup pays off for years of use. Let us walk through the entire process together.
Key Takeaways
- Unbox and organize all parts before starting assembly. Having everything laid out saves time and prevents missing pieces.
- Follow the step-by-step assembly process carefully. Proper assembly ensures safety, performance, and longevity of your rower.
- Adjust the damper setting to match your fitness level. The right resistance makes your indoor rowing sessions more effective and enjoyable.
- Calibrate the performance monitor for accurate readings. Tracking distance, pace, and calories correctly helps you measure progress over time.
- Set up foot straps and seat position for comfort. Proper body alignment during rowing prevents injury and maximizes power output.
- Regular maintenance keeps your Concept 2 running smoothly. Simple upkeep routines extend the life of your machine and improve performance.
📑 Table of Contents
What Comes in the Box
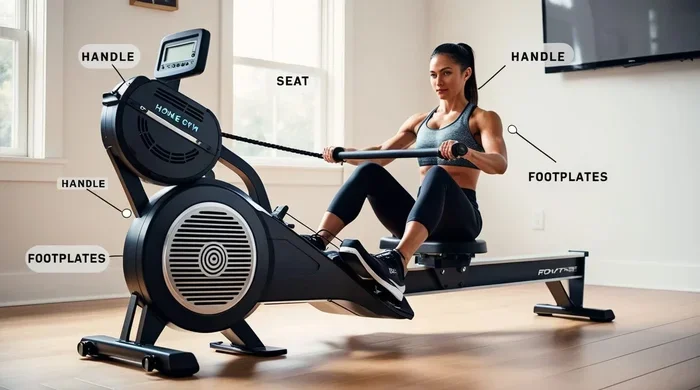
Before you start assembling, it helps to know what is inside the box. The Concept 2 rowing machine comes in several main parts. The monorail (also called the track or rail) is the long bar the seat slides along. The flywheel and housing sit at one end and create the resistance. The performance monitor is the digital display that tracks your stats. You also get the seat, foot stretcher, heel straps, and various bolts and tools.
Here is a quick list of what you should find:
- Monorail (track) – the long aluminum rail
- Flywheel housing – the fan unit at one end
- Performance monitor – the digital display screen
- Seat – the sliding seat that glides along the rail
- Foot stretcher – the adjustable platform at the front
- Heel straps – the straps that secure your feet
- Hardware bag – bolts, nuts, and tools for assembly
Lay everything out on a clean floor before you begin. Check each piece against the inventory list in the manual. Missing a part early saves headaches later. If something is damaged or missing, contact Concept 2 customer support right away. They are known for fast replacement service.
Assembling Your Concept 2 Rowing Machine
Now comes the fun part. Putting your rower together does not require a PhD in engineering. The instructions in the manual are clear, but we will walk you through the key steps too. If you prefer a visual guide, you can also check out our article on how to put together a Concept 2 rowing machine for extra help.
Step 1: Attach the Feet to the Monorail
Start by flipping the monorail upside down on a soft surface. This protects the rail from scratches. Locate the two foot brackets at the front of the rail. Insert the bolts through the brackets and tighten them by hand first. Then use the included wrench to snug them up. Do not overtighten. You want the brackets secure but not stripped.
Step 2: Connect the Flywheel Housing
The flywheel housing attaches to the opposite end of the monorail. Slide it onto the rail until it clicks into place. Use the provided bolts to secure it. Make sure the housing sits flush against the rail. A loose connection here can cause wobbling during your workouts.
Step 3: Mount the Performance Monitor
The performance monitor is the brain of your rower. It attaches to the top of the monorail using a bracket and screw. Slide the bracket onto the rail, position it where you can easily read the screen, and tighten the screw. Plug the monitor cable into the connector on the flywheel housing. The screen should light up when you turn it on.
Step 4: Install the Seat and Rollers
The seat slides onto the monorail and sits on two small rollers. Simply place the seat onto the rail and push it back and forth a few times. It should glide smoothly. If it catches or sticks, check that the rollers are seated properly and the rail is clean.
Adjusting the Damper and Resistance
The damper is the dial on the flywheel housing that controls how much air flows into the fan. Think of it like a gear shift on a bicycle. A lower damper setting (1 to 3) feels lighter and faster. A higher setting (5 to 10) creates more resistance and feels heavier. Many beginners make the mistake of cranking the damper to 10 right away. This is not a good idea.
Here is a simple guide to finding your right damper setting:
- Beginners: Start at damper 3 to 5. This gives a gentle but effective workout.
- Intermediate rowers: Try damper 5 to 7 for a balanced challenge.
- Advanced athletes: Use damper 6 to 8 for high-intensity training.
Remember, the damper does not control resistance the way a dial on a stationary bike does. It controls airflow, which changes how the flywheel feels. You can always adjust it later as you get more comfortable. If you want to learn more about tweaking resistance, our article on how to increase resistance on Concept 2 rowing machine has great tips.
Quick Tip: Find Your Sweet Spot
A good rule of thumb is to set the damper where you can maintain a steady rhythm for 20 minutes without feeling completely wiped out. The goal is smooth, controlled pulls. If you feel like you are struggling to complete each stroke, the damper is probably too high. Ease it down a notch and try again.
Setting Up the Foot Straps and Seat Position
Proper body positioning is one of the most overlooked parts of the Concept 2 rowing machine setup. Getting this right prevents injury and helps you generate more power with each stroke. It also makes the workout feel much more natural.
Adjusting the Foot Straps
The foot stretcher at the front of the rower adjusts to fit different shoe sizes. Slide the stretcher forward or backward along the rail until your feet sit comfortably. The ball of your foot should line up with the strap. Wrap the heel strap around your foot and tighten it so your foot does not slide during the drive phase of the stroke. You should be able to slip your heel out easily if needed, but the strap should hold your foot firmly in place during the pull.
Finding the Right Seat Position
Sit on the seat and slide forward until your knees are over your ankles when your shins are vertical. This is your starting position. Your arms should be extended, reaching forward to grab the handle. From this position, you are ready to begin the rowing motion. The seat should glide freely without any catching or grinding.
The Rowing Stroke Breakdown
Understanding the basic rowing stroke helps you set up correctly. The stroke has two main phases:
- The Drive: Push with your legs, then lean back slightly, and finally pull the handle to your lower chest.
- The Recovery: Extend your arms forward, lean your torso slightly forward, and then bend your knees to slide the seat back to the starting position.
Getting the sequence right matters more than pulling hard. Legs first, then back, then arms on the drive. Arms first, then back, then legs on the recovery. This smooth sequence protects your lower back and distributes the effort across your entire body.
Calibrating the Performance Monitor
The performance monitor on your Concept 2 rower tracks all your key metrics. It measures distance, split time, strokes per minute, calories burned, and more. Before your first real workout, take a moment to make sure the monitor is set up correctly.
When you first turn on the monitor, it will ask you to select units. Choose between meters or miles for distance, and pounds or kilograms for weight. These settings affect the accuracy of your readings. You can change them anytime by pressing the Menu button and scrolling to Settings.
Calibrating the Monitor
Calibration ensures your monitor reads accurately. To calibrate, follow these steps:
- Make sure the rower is on a level surface.
- Turn the monitor on by pressing any button.
- Go to Menu and select “Monitor Settings.”
- Choose “Calibrate” and follow the on-screen prompts.
- Slide the seat to the front and back of the rail to confirm the distance reading.
A properly calibrated monitor gives you reliable data. This matters whether you are tracking progress for weight loss or training for a competition. Accurate numbers keep you motivated and help you set realistic goals.
Tips for Your First Rowing Session
Now that your Concept 2 is assembled and adjusted, it is time to row. But do not jump into a sprint right away. Your first session should focus on learning the rhythm and building confidence. Here are some practical tips to make the most of it.
- Start with a 5-minute warm-up. Row at a relaxed pace to get your joints and muscles ready.
- Focus on form over speed. A smooth, controlled stroke is far more effective than a fast, sloppy one.
- Keep your back straight. Rounding your back puts unnecessary strain on your spine. Engage your core throughout each stroke.
- Breathe naturally. Exhale during the drive and inhale during the recovery. Do not hold your breath.
- Cool down for 3 to 5 minutes. Row slowly at the end of your session to bring your heart rate down gradually.
After your first few sessions, you will start to feel more comfortable with the motion. The rowing stroke will begin to feel natural and fluid. If you want to check whether you are getting the most out of your workouts, read our guide on how to properly use a Concept 2 rowing machine for detailed technique tips.
Common Mistakes to Avoid
Even experienced rowers sometimes fall into bad habits. Here are a few common mistakes to watch out for:
- Overgripping the handle. Hold the handle lightly. A death grip wastes energy and fatigues your forearms quickly.
- Bouncing on the seat. Keep the seat movement smooth. Bouncing indicates you are using too much momentum instead of controlled power.
- Ignoring the recovery phase. The recovery is just as important as the drive. Use it to rest and prepare for the next powerful stroke.
- Setting the damper too high. More resistance does not always mean a better workout. Find a setting where you can maintain good form.
Maintaining Your Concept 2 Rowing Machine
A well-maintained rower lasts for decades. The Concept 2 is built to take a beating, but a little care goes a long way. Here is a simple maintenance routine to keep your machine in top shape.
- Wipe down the rail after each use. A dry cloth removes sweat and dust that can slow the seat.
- Check the heel straps regularly. Frayed straps lose grip. Replace them when they show signs of wear.
- Inspect the chain or belt. Depending on your model, the drive chain or belt may need occasional lubrication or tightening.
- Keep the monitor clean and dry. Avoid spraying water directly on the screen. A slightly damp cloth works fine for cleaning.
- Store the rower in a dry place. Moisture can damage the flywheel and electronic components over time.
Concept 2 offers replacement parts for everything from heel straps to seat rollers. Their customer support team is helpful and responsive. Keeping spare parts on hand means you can fix small issues quickly without waiting for shipping.
When to Call a Professional
Most assembly and maintenance tasks are straightforward. But if you notice unusual noises, a wobbling frame, or a monitor that will not turn on, it may be time to seek help. Concept 2 has a dedicated support line and a network of authorized service centers. Do not try to repair the flywheel or electronic components yourself. These parts are delicate and expensive to replace.
Final Thoughts
Setting up your Concept 2 rowing machine does not have to be intimidating. Follow the steps in this guide, take your time, and enjoy the process. A proper setup leads to better workouts, fewer injuries, and a machine that lasts for years. From adjusting the damper to calibrating the monitor to nailing your rowing form, every detail matters. Once your rower is dialed in, you are ready to crush your fitness goals from the comfort of home.
Remember, the best setup is one that feels comfortable and works for you. Do not be afraid to experiment with damper settings, foot positions, and stroke technique. Every rower is different, and finding your personal sweet spot is part of the journey. Now go ahead, hop on that seat, and start pulling. Your indoor rowing workout awaits.
Frequently Asked Questions
How long does it take to set up a Concept 2 rowing machine?
Most people can assemble their Concept 2 rower in 20 to 45 minutes. If you have read the manual beforehand and have all your tools ready, it goes even faster. Having a second person help with holding parts in place can save you several minutes too.
What damper setting should I use as a beginner?
Start with a damper setting between 3 and 5. This provides a comfortable amount of resistance that lets you focus on learning proper rowing form without feeling overwhelmed. You can always increase the setting as you build strength and confidence over time.
Do I need any special tools to assemble the Concept 2 rower?
The Concept 2 comes with all the tools you need for assembly, including an Allen wrench and a small screwdriver. You may also want to have a soft cloth on hand to protect the rail during assembly. No power tools are required for the setup process.
How often should I calibrate the performance monitor?
Calibrating the monitor once a month is usually sufficient for most users. You should also recalibrate if you move the rower to a new location or if you notice inaccurate distance or pace readings. A quick calibration takes only a few minutes and ensures your data stays reliable.
Can I row every day on my Concept 2 machine?
Yes, many people row daily on their Concept 2 rowers. However, it is important to listen to your body and allow for rest days, especially when starting out. A balanced routine of 3 to 5 rowing sessions per week gives your muscles time to recover while still building fitness steadily.
What is the best way to store a Concept 2 rowing machine at home?
The Concept 2 rower is designed to be stored upright against a wall to save floor space. Make sure the surface is level and use the provided feet or floor protectors to prevent scratching. Keep it away from direct sunlight and moisture to protect the monitor and flywheel components over time.