What Resistance to Use on Rowing Machine 2

Choosing the right resistance on a rowing machine depends on your fitness level and goals. This guide covers damper settings, stroke rates, and how to adjust resistance for cardio, strength, and endurance training.
Key Takeaways
- Damper setting vs. resistance: The damper controls airflow, not how heavy the row feels.
- Beginners should start low: A setting of 3–5 is ideal for learning proper form.
- Higher settings build strength: Settings 6–8 mimic heavier loads for power training.
- Stroke rate matters: Your pace changes how hard the row feels at any damper level.
- Listen to your body: If you can’t maintain form, the resistance is too high.
- Adjust for your goal: Fat loss, endurance, and strength need different settings.
📑 Table of Contents
- What Resistance to Use on Rowing Machine 2
- Understanding How Rowing Machine Resistance Works
- Best Resistance Settings for Beginners
- Resistance Settings for Different Fitness Goals
- How Stroke Rate and Damper Work Together
- Common Mistakes When Adjusting Resistance
- Pro Tips for Fine-Tuning Your Rowing Resistance
- Expert Insights on Rowing Resistance
- Conclusion
What Resistance to Use on Rowing Machine 2
So you want to know what resistance to use on a rowing machine? You are not alone. Most people hop on a rower, glance at the damper setting, and just guess. That is a mistake. The right resistance can change your entire workout. It affects your speed, muscle engagement, and even how long you can last. Too high and you burn out fast. Too low and you barely break a sweat. This guide breaks it all down for you.
We will cover how the damper actually works, what settings suit different goals, and how to adjust your rowing machine resistance like a pro. By the end, you will know exactly what number to dial in. No more guessing. Let us get into it.
Understanding How Rowing Machine Resistance Works
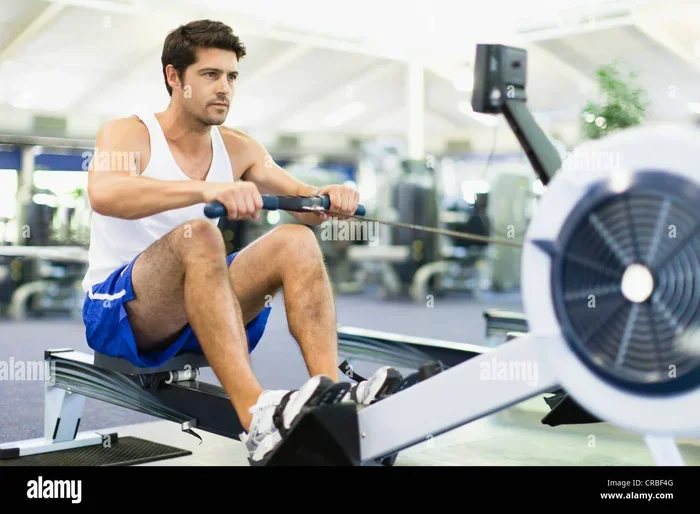
Before picking a number, you need to understand what that number actually does. Most rowers use a damper setting instead of a true resistance knob. The damper controls how much air flows into the flywheel housing. Think of it like a fan. Open the damper wide and more air rushes in. That makes the flywheel harder to pull. Close it down and the row feels lighter.
Damper Setting vs. Actual Resistance
Here is the big confusion. The damper setting is not the same as resistance. A higher damper number does not always mean a harder row. Your rowing stroke and pace matter just as much. A setting of 8 at a slow stroke rate can feel easier than a setting of 4 at a fast pace. The flywheel speed and your effort combine to create the real feel. So keep that in mind.
Most air rowers, like the Concept 2, use a scale from 1 to 10. Some models go up to 12 or even higher. But the sweet spot for most people sits between 3 and 8. Anything above 10 is rarely useful unless you are training for competitive powerlifting-style sessions.
The Role of the Flywheel
The flywheel spins when you pull the handle. The damper controls airflow around it. The faster it spins, the more momentum it carries. That momentum gives the row a smooth, consistent feel. When you match your pull to the flywheel speed, the row becomes fluid. When you fight it, the row becomes jerky. Your goal should always be to work with the machine, not against it.
Best Resistance Settings for Beginners
If you are new to rowing, starting low is smart. A beginner rowing resistance setting of 3 to 5 gives you enough load to learn the movement without straining. It also protects your back, knees, and shoulders from poor form under heavy load.
Why Starting Low Matters
Your body needs to learn the sequence. Legs first, then the back, then the arms. Many beginners try to pull too hard and end up using only their arms. That defeats the purpose. A lower damper lets you focus on technique. Once your form locks in, you can raise the setting safely.
Recommended Settings by Fitness Level
Here is a simple breakdown to start with:
- Complete beginner: Damper 2–4. Focus on rhythm and posture.
- Intermediate: Damper 4–6. Add longer intervals and moderate pace.
- Advanced: Damper 5–8. Use for power, sprints, and heavy pulls.
These ranges are not set in stone. They are just a solid starting point. Your body weight, stroke style, and machine type all play a role. Some heavier rowers may find a 4 feels light, while a lighter athlete might feel a 6 as heavy. Test and adjust.
Resistance Settings for Different Fitness Goals
Your goal decides your optimal rowing resistance. Fat loss, endurance, and strength training all need different approaches. Here is how to match your damper setting to your aim.
Fat Loss and Calorie Burning
For burning fat, you want sustained effort at a moderate pace. A damper of 4 to 6 works well. Pair it with a stroke rate of 22 to 26 spm (strokes per minute). This keeps your heart rate in the fat-burning zone. You can hold it for 20 to 40 minutes without gassing out. The key is consistency. Do not chase a high damper number just because it feels tough. That will slow you down and cut your calorie burn short.
Cardio and Endurance Training
Endurance rowers benefit from a lower to mid-range damper. Stick with 3 to 5 for long sessions. Your focus here is steady output over time. Think 30 to 60 minutes at a comfortable pace. The resistance should feel manageable. You should be able to breathe through your nose in the early stages. If you cannot, drop the damper down. Cardiovascular fitness improves with volume, not just intensity.
Strength and Power Training
Want to build strength? Go higher. A damper of 6 to 8 creates a heavier pull. This targets your legs, back, and core harder. Combine this with short, powerful strokes. Aim for 18 to 22 spm. Think of it like a deadlift on wheels. Short bursts. Full recovery. Repeat. Do not use high damper settings for long durations. Your form will break down and injury risk rises fast.
Comparison Table: Goals and Damper Settings
| Goal | Damper Setting | Stroke Rate (spm) | Session Length |
|---|---|---|---|
| Fat Loss | 4–6 | 22–26 | 20–40 min |
| Endurance | 3–5 | 18–24 | 30–60 min |
| Strength | 6–8 | 18–22 | 10–25 min |
| Recovery | 2–4 | 16–20 | 15–30 min |
Use this as a general guide. Adjust based on how your body responds. No single setting works for everyone.
How Stroke Rate and Damper Work Together
This is where most people miss the point. The damper is only half the equation. Your stroke rate is the other half. Together, they control the total load on your body. Let us break it down.
Low Stroke Rate + High Damper
This combo creates a slow, heavy pull. It feels like rowing through mud. Great for strength work. Bad for long sessions. Your muscles fatigue quickly. Keep this combo to short intervals. Think 10 to 15 strokes at a time, then rest.
High Stroke Rate + Low Damper
Here you have a fast, light pull. This is your cardio zone. It burns calories and builds aerobic capacity. You can hold it for a long time. Most endurance sessions fall into this category. If you want to build a base, train here often.
Moderate Stroke Rate + Moderate Damper
This is the balanced middle. It works for general fitness. A damper of 5 and a stroke rate of 22 spm is a solid all-around choice. It challenges you without exhausting you. Most indoor rowing classes use this approach. It is effective, sustainable, and safe.
Common Mistakes When Adjusting Resistance
Even experienced rowers make errors with their rowing machine resistance. Avoiding these will save you time and injury.
Setting the Damper Too High
This is the number one mistake. Many people think a higher number equals a better workout. It does not. A damper above 8 on most rowers creates too much inertia. Your form falls apart. You pull with your arms instead of your legs. Your back rounds. The risk of muscle strain and joint injury goes up. Stay smart. Keep it moderate unless you are specifically training for power.
Ignoring Your Body Signals
Your body gives you feedback. If your shoulders pinch, your lower back aches, or your knees hurt, something is off. The resistance might be too high. Or your technique needs work. Do not push through pain on a rowing machine. Back off the damper. Check your form. Fix the issue first, then gradually increase load.
Copying Others Settings
What works for your gym buddy might not work for you. Body weight, height, flexibility, and experience all affect what feels right. Someone at 200 pounds may row smoothly at a 7. Someone at 130 pounds might struggle at a 5. Respect your own needs. Adjust based on how the row feels, not what the person next to you is doing.
Not Reassessing Over Time
As your fitness improves, your settings should change. A damper that felt tough three months ago might feel easy now. That is progress. Bump it up gradually. Add 0.5 to 1 to your damper every few weeks. Pair it with slightly faster stroke rates. Keep challenging yourself, but do it step by step.
Pro Tips for Fine-Tuning Your Rowing Resistance
Once you have the basics down, these tips help you level up your rowing machine resistance game.
Use the Damper as a Dial, Not a Switch
Small changes make big differences. Moving from 5 to 6 feels very different from 6 to 7. Take tiny jumps. Give each setting a few sessions before changing again. Let your body adapt.
Pair Damper with Pace
Track your split time. A 500-meter split tells you a lot. If your split drops when you raise the damper, you are getting stronger. If it stays the same or gets worse, the load may be too much. Use data to guide you. Most modern rowers have monitors that show this in real time.
Warm Up at Low Settings
Always start with a damper of 2 to 4 for your warm-up. Move your joints through full range. Let your muscles warm up. This takes 5 to 10 minutes. Then shift to your working resistance. Skipping warm-ups at high settings is a recipe for pulled muscles.
Experiment with Intervals
Interval training is powerful. Try 30 seconds at damper 7, then 60 seconds at damper 4. Repeat 6 to 8 rounds. This builds both strength and cardio fitness. It also keeps your workouts fresh. Your body never fully adapts, which drives continuous improvement. High-intensity interval training on a rower burns serious calories in short bursts.
Pay Attention to the Catch and Finish
The catch is when your legs start the drive. The finish is when your arms pull in at the ribs. A clean catch and finish mean better power transfer. If the damper is too high, the catch becomes jerky. The finish becomes rushed. Stay smooth. Slow the movement down mentally if needed. Quality beats quantity every time.
Expert Insights on Rowing Resistance
Coaches who specialize in indoor rowing often share the same advice. They say most people under-use the lower settings. A damper of 3 to 4 with strong technique produces better results than a sloppy 8. The rower rewards efficiency. It does not reward brute force.
Many elite rowers spend months training at low to moderate damper levels. They build rhythm, timing, and body control first. Only then do they add heavy loads. This approach protects joints and builds lasting power. You can borrow the same approach regardless of your level.
One more thing. Coaches also warn against checking the damper too often during a workout. Pick your setting, commit, and focus on your effort. Constantly tweaking the number breaks your concentration. Trust the setting. Trust the process.
Conclusion
So what resistance to use on rowing machine 2? The honest answer depends on you. Your goals, your body, and your experience all matter. Start with a damper of 3 to 5 if you are new. Adjust based on your target, whether that is fat loss, endurance, or strength. Pay attention to stroke rate and how your body feels. Avoid the common traps like going too heavy too soon. Use the tips above to fine-tune your sessions over time.
The right rowing machine resistance is the one that lets you train hard, stay safe, and improve consistently. There is no magic number. But now you have the tools to find your own. Get on that rower, dial in your setting, and make every stroke count.
Frequently Asked Questions
What is the ideal damper setting on a rowing machine?
The ideal damper setting depends on your goal. For general fitness, a 4 to 6 works well. Beginners should start at 3 to 5. For strength training, aim for 6 to 8. Always adjust based on how the row feels and your form.
Is a higher damper setting better for burning calories?
Not necessarily. A higher damper can slow you down, reducing total calorie burn. A moderate damper with a faster stroke rate burns more calories over time. Focus on sustained effort rather than just a heavy pull.
What resistance should I use for weight loss?
For weight loss, a damper of 4 to 6 paired with a stroke rate of 22 to 26 spm is effective. This keeps your heart rate elevated for longer sessions. Combine this with interval training for best results.
How does stroke rate affect resistance feel?
Stroke rate and damper work together. A low damper with fast strokes feels light and cardio-focused. A high damper with slow strokes feels heavy and strength-focused. Your total effort comes from both factors combined.
Can I use a high damper setting every day?
It is not recommended. Heavy damper settings put more stress on joints and muscles. Use high settings for short, targeted sessions. Keep other days at moderate or lower settings to allow recovery.
What is the difference between damper setting and resistance level?
The damper controls airflow into the flywheel housing. It does not directly set resistance. Your effort and stroke speed create the actual resistance you feel. A higher damper makes the flywheel harder to move, but your body still controls the load.