How High Should Handlebars Be on Stationary Bike
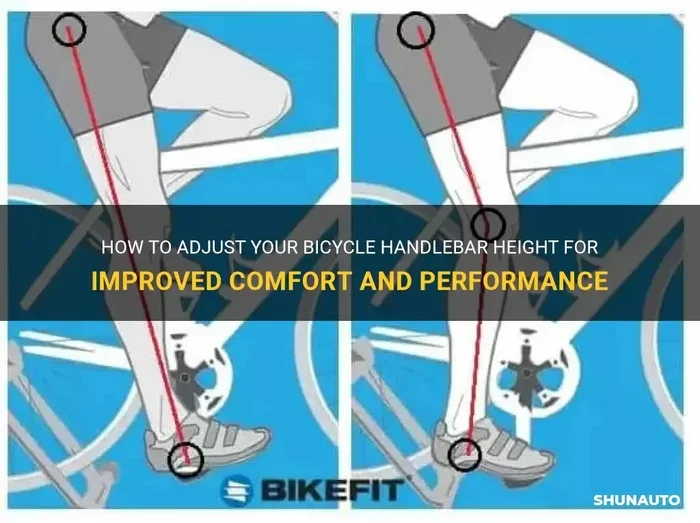
Setting your stationary bike handlebars at the right height prevents pain, improves your cycling posture, and boosts your workout efficiency. The correct handlebar height depends on your fitness level, bike type, and riding goals. Whether you are a beginner or a seasoned rider, this guide covers everything you need to know about stationary bike handlebar height and proper bike setup.
Have you ever hopped on a stationary bike and felt a nagging ache in your back, neck, or wrists within minutes? The problem might not be your workout routine. It could be your handlebar height.
Getting the handlebar position right on your stationary bike is one of the most overlooked aspects of indoor cycling. Most people focus on resistance levels, workout duration, or calorie tracking. But if your handlebars are off, none of that matters much. You will feel uncomfortable, your form will suffer, and you might even quit your routine early.
The good news? Adjusting your handlebars is quick, easy, and free. In this guide, we will walk you through everything you need to know about how high your handlebars should be on a stationary bike. We will cover the basics, common mistakes, and expert tips to help you ride smarter and pain-free.
Key Takeaways
- Handlebar height affects your comfort, posture, and workout results: Setting them too high or too low can cause pain and reduce performance.
- There is no one-size-fits-all answer: The right height depends on your body, bike type, and fitness goals.
- Beginners should start with a neutral or slightly raised position: This reduces strain on your back, neck, and wrists.
- Adjusting handlebars is simple: Most stationary bikes have a quick-release or bolt system that makes changes easy at home.
- Pair handlebar adjustments with seat height for best results: Both work together to create a balanced, comfortable riding position.
- Listen to your body: Discomfort during a ride is a clear signal that your handlebar setup needs tweaking.
📑 Table of Contents
- Why Handlebar Height Matters on a Stationary Bike
- How to Find the Right Handlebar Height for You
- Step-by-Step Guide to Adjusting Your Handlebars
- Common Handlebar Mistakes and How to Fix Them
- Expert Tips for Optimal Handlebar Positioning
- How Handlebar Height Connects to Your Overall Bike Fit
- When to Seek Professional Help
- Conclusion
Why Handlebar Height Matters on a Stationary Bike
Your handlebar height shapes your entire riding position. It controls how your weight distributes across the bike, how your spine aligns, and how your arms and shoulders feel during a workout. Getting this detail right can transform your experience on the bike.
Impact on Comfort and Pain Prevention
When handlebars are too low, you hunch forward. This puts extra pressure on your lower back, shoulders, and wrists. Over time, this can lead to chronic pain and even injury. On the flip side, handlebars set too high can cause you to slump backward, straining your neck and making it hard to reach the pedals properly.
Finding the sweet spot means your body stays in a neutral, relaxed position. Your back stays straight. Your shoulders drop. Your arms bend slightly. This is the foundation of proper cycling posture.
Effect on Workout Performance
Did you know that handlebar alignment directly affects how much power you can generate? When your body is aligned correctly, you can push harder on the pedals without wasting energy on compensating for poor posture. This means better cardio results and more calories burned per session.
Proper handlebar height also lets you breathe more easily. A hunched chest restricts your diaphragm. A relaxed, upright position opens up your airways. More oxygen means more endurance and better stationary bike performance.
How to Find the Right Handlebar Height for You
There is no single magic number for handlebar height. The right setting depends on several personal factors. Let us break them down.
Consider Your Body Type and Flexibility
Taller riders often benefit from lower handlebars because it helps maintain a natural spine angle. Shorter riders may prefer higher handlebars to avoid overreaching. Your flexibility also plays a role. If you have tight hamstrings or a stiff back, a higher handlebar position will feel more comfortable right away.
Quick Tip: Stand next to your bike. The handlebar tops should roughly align with your hip bones. This is a great starting point before making fine adjustments.
Match Handlebar Height to Your Bike Type
Not all stationary bikes are the same. The type of bike you have changes the ideal handlebar height settings.
- Upright stationary bikes: These mimic traditional bikes. Handlebars should be at or slightly above seat height for a comfortable, upright ride.
- Recumbent bikes: These have a reclined seat and forward-facing handlebars. Handlebars should be high enough that you can reach them without rounding your back.
- Spin bikes: These allow more aggressive riding positions. Handlebars can be set lower for a racing feel, but beginners should keep them at a moderate height.
Each bike type serves different cycling ergonomics needs. Understanding your bike is the first step toward proper setup.
Adjust for Your Fitness Goals
Your riding goals also influence handlebar height. If you are focusing on low-impact recovery rides, a higher handlebar reduces joint strain. If you are training for intensity and want to mimic outdoor cycling, a lower position engages your core more and builds functional strength.
For general fitness and weight loss on a stationary bike, a neutral position works best for most people. It balances comfort with effort, letting you sustain longer workouts.
Step-by-Step Guide to Adjusting Your Handlebars
Adjusting your handlebars does not require a mechanic or fancy tools. Follow these simple steps to dial in your setup.
Step 1: Set Your Seat Height First
Before touching the handlebars, make sure your seat is at the right height. Your knee should have a slight bend when the pedal is at its lowest point. A properly adjusted seat creates the foundation for correct handlebar positioning. For a detailed guide on seat adjustments, check out our article on how to adjust the seat on a stationary bike.
Step 2: Loosen the Handlebar Clamp
Most stationary bikes have a quick-release lever or an Allen bolt at the base of the handlebar stem. Loosen it just enough to allow the handlebars to move freely. Do not remove the bolt entirely.
Step 3: Raise or Lower the Handlebars
Slide the handlebars up or down the stem to your desired height. Use the hipbone guideline mentioned earlier as your starting point. Tighten the clamp securely once you are happy with the position.
Step 4: Test Ride and Fine-Tune
Take your bike for a short test ride of 5 to 10 minutes. Pay attention to how your back, neck, arms, and wrists feel. Make small adjustments in 1-centimeter increments until everything feels balanced. Small tweaks make a big difference in how your body responds to the bike.
Common Handlebar Mistakes and How to Fix Them
Even with the best intentions, many riders make avoidable mistakes when setting up their handlebars. Here are the most common ones.
Setting Handlebars Too Low
This is the number one mistake, especially among beginners who want to look like professional cyclists. A low handlebar position forces you to lean forward aggressively. This compresses your chest, strains your lower back, and puts excessive weight on your hands and wrists. Unless you are an experienced rider with good flexibility, avoid setting your handlebars too low.
Ignoring Handlebar Reach
Height is only half the equation. Handlebar reach, or how far forward you have to stretch to grab the bars, matters just as much. If the handlebars are too far away, you will overextend your shoulders and upper back. If they are too close, you will hunch forward. Your arms should rest comfortably with a slight bend at the elbows.
Copying Someone Else’s Setup
Your friend’s perfect handlebar height is not your perfect height. Body proportions, flexibility, and riding style vary from person to person. Always adjust based on how your body feels, not what someone else does.
Expert Tips for Optimal Handlebar Positioning
Want to take your stationary bike setup to the next level? These expert-backed tips will help.
- Use a mirror or record yourself: Check your side profile while riding. Your back should be straight, not rounded or arched.
- Wear your riding shoes: If you use clip-in shoes, your pedal position changes slightly, which can affect your overall posture on the bike.
- Reassess every few months: As your fitness improves and your flexibility increases, your ideal handlebar height may shift.
- Pair adjustments with good workout habits: Proper form on the bike complements your handlebar setup and maximizes results.
- Consider padded handlebar grips: If you cannot raise your handlebars high enough for comfort, quality grips can reduce wrist and hand strain.
For those just starting out, remember that beginner riders benefit from a higher, more upright position. It keeps the pressure off your joints and lets you focus on building endurance without pain. You can always lower the handlebars as your comfort and flexibility improve.
Key Takeaway: The best handlebar height is the one that lets you ride comfortably for 30 minutes or more without pain. If you feel discomfort, something needs adjusting.
How Handlebar Height Connects to Your Overall Bike Fit
Handlebar height does not exist in isolation. It works hand in hand with your seat position, pedal alignment, and overall bike fit. Think of it as one piece of a larger puzzle. When all pieces align, your rides feel effortless and effective.
For example, if you raise your handlebars but keep your seat too low, you will still feel strained. Similarly, a perfect handlebar height will not fix poor cycling posture if your seat is misaligned. Always review your entire bike setup together. Small changes in one area ripple through the others.
If you want to learn more about building a complete and effective routine, our guide on how long a beginner should ride a stationary bike covers workout duration and frequency to complement your new setup.
Another great resource is our article on interval training on a stationary bike, which explains how to structure workouts that pair perfectly with a well-fitted bike.
When to Seek Professional Help
Most handlebar adjustments are straightforward and can be done at home. But there are times when professional guidance makes sense. If you have a history of back, neck, or joint injuries, a professional bike fit session can tailor every detail to your body. Many bike shops and fitness centers offer this service.
Also, if you have tried multiple adjustments and still feel pain, consult a physical therapist or a certified cycling coach. Persistent discomfort is your body telling you something is wrong, and it deserves attention.
Conclusion
Getting your stationary bike handlebar height right is one of the simplest and most impactful changes you can make. It reduces pain, improves your posture, and enhances every workout you do. Start with the basic guidelines in this article, test ride your bike, and make small adjustments until you find your sweet spot.
Remember, the perfect handlebar position is the one that feels natural and comfortable to you. Do not chase someone else’s setup. Listen to your body, trust the process, and enjoy the ride. Your stationary bike is a powerful tool for fitness, and with the right bike setup, it will serve you well for years to come.
Frequently Asked Questions
What happens if my handlebars are too low on a stationary bike?
Too-low handlebars force you to hunch forward, straining your lower back, neck, and wrists. Over time, this poor cycling posture can lead to chronic pain and discomfort. Raise them gradually until you feel a neutral, relaxed spine position.
Can I adjust handlebar height on any stationary bike?
Most stationary bikes have an adjustable stem that allows height changes. However, some budget models may have limited adjustment range. Check your bike’s manual or look for a quick-release lever or Allen bolt at the base of the handlebar stem.
How often should I reassess my handlebar height?
Reassess every 2 to 3 months or whenever you feel discomfort during a ride. As your flexibility and fitness improve, your ideal handlebar position may shift. Also, if you change your riding goals or bike type, a fresh setup check is a good idea.
Should handlebar height change for different types of workouts?
Yes, it can. For low-impact, recovery rides, a higher handlebar reduces joint strain. For intense interval training on a stationary bike, a slightly lower position engages your core more. Adjust based on the workout you are doing and how your body responds.
Is handlebar height more important than seat height?
Both matter equally and work together. Your seat height controls leg alignment and pedal efficiency, while handlebar height controls upper body comfort and posture. Always adjust your seat first, then fine-tune the handlebars for a balanced stationary bike setup.
How can I tell if my handlebar height is correct?
During a ride, your back should stay straight, your shoulders relaxed, and your arms slightly bent. If you feel no pain in your neck, back, wrists, or shoulders after 20 to 30 minutes, your handlebar height is likely correct. Discomfort is the clearest sign that an adjustment is needed.