Turning your regular bicycle into a stationary bike is a simple, cost-effective way to enjoy indoor cycling year-round. By using a bicycle trainer or a set of rollers, you can stabilize your bike and create a reliable workout station. This guide covers everything from choosing the right equipment to safe setup and maintenance, helping you get the most from your DIY stationary bike.
Key Takeaways
- Cost-Effective Solution: Converting your existing bike is significantly cheaper than buying a dedicated stationary bike, utilizing gear you already own.
- Trainer Types Matter: Choose between wheel-on trainers, direct-drive trainers, and rollers based on your budget, noise tolerance, and realism desired.
- Proper Setup is Crucial: A stable, level surface and correct bike mounting prevent damage to your bike and ensure a safe, effective workout.
- Maintenance Extends Life: Regular cleaning, lubrication, and inspection of both your bike and trainer are essential for longevity and performance.
- Workout Variety is Key: Use resistance levels, virtual apps, and structured routines to keep your indoor sessions engaging and challenging.
- Safety First: Always secure your bike, use a protective mat, and listen to your body to avoid injury during indoor training.
- Realistic Expectations: While convenient, indoor cycling differs from outdoor riding; focus on consistent effort rather than mimicking exact outdoor conditions.
📑 Table of Contents
- Introduction: Why Convert Your Bike?
- Understanding the Core Equipment: Trainers vs. Rollers
- Choosing the Right Trainer for Your Bike and Goals
- Step-by-Step: Setting Up Your Bicycle on the Trainer
- Safety, Maintenance, and Protecting Your Bike
- Creating Effective Workouts and Maximizing Your Setup
- Troubleshooting Common Issues and FAQs
Introduction: Why Convert Your Bike?
Have you ever wished you could keep up your cycling fitness when the weather turns bad, or when your schedule simply doesn’t allow for a long outdoor ride? You’re not alone. Many dedicated cyclists face this exact challenge. The good news is, you don’t need to invest in a bulky, expensive piece of equipment called an “exercise bike.” You can learn how to turn my bicycle into a stationary bike with relative ease and for a fraction of the cost. This transformation opens the door to consistent, high-quality indoor training right in your living room, garage, or basement.
The core concept is beautifully simple: you use a device that holds your bicycle upright and provides resistance against the rear wheel (or the entire bike, in the case of rollers). This allows you to pedal in place, just like on a classic stationary bike. It’s a fantastic way to maintain cardiovascular health, build leg strength, and work on your pedal stroke during the off-season or on busy days. In this comprehensive guide, we will walk through every single step, from understanding the different types of equipment to final setup, safety, and creating killer workouts. Let’s get started on turning your two-wheeled companion into your new favorite fitness machine.
Understanding the Core Equipment: Trainers vs. Rollers
Before you can turn my bicycle into a stationary bike, you need to understand the primary tools available. There are two main categories: bicycle trainers and cycling rollers. Each has its own mechanics, benefits, and learning curve. Choosing the right one is the first and most important step.
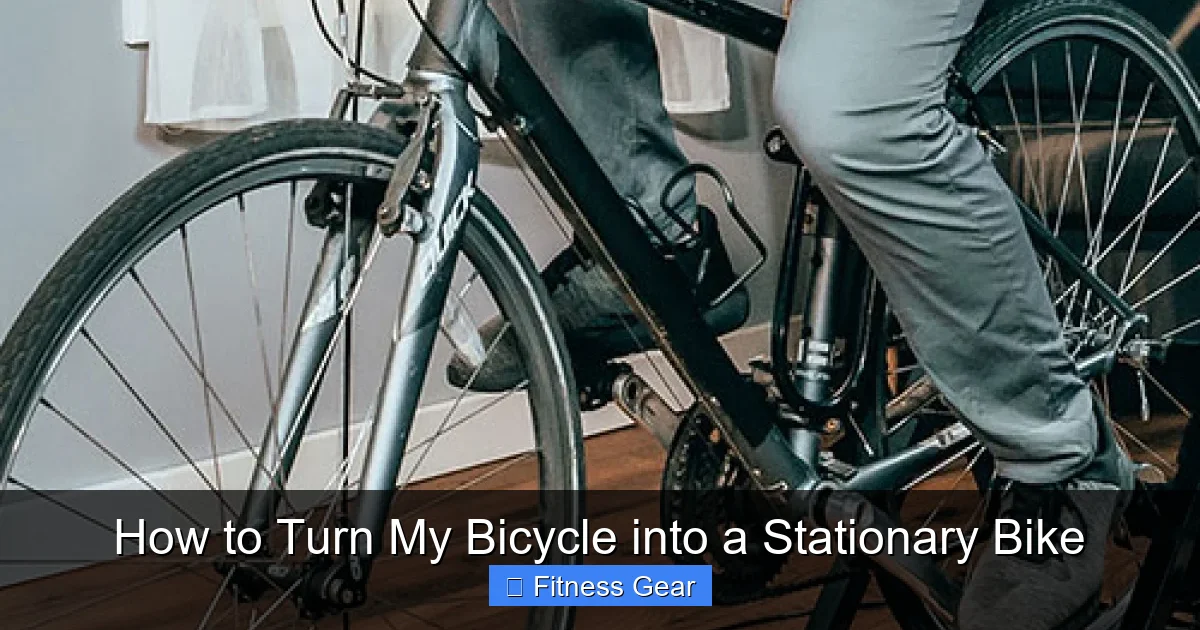
Visual guide about How to Turn My Bicycle into a Stationary Bike
Image source: helios-i.mashable.com
Bicycle Trainers: The Stable Choice
A bicycle trainer is a frame that clamps onto your bike’s rear wheel axle and holds the bike upright. The rear wheel sits on a resistance unit, which can be a simple fan, a magnetic unit, or a fluid-filled chamber. When you pedal, the wheel spins against this resistance, creating the workload. The key advantage is stability. Once your bike is locked into the trainer, it won’t wobble or tip. This makes trainers ideal for beginners, high-intensity interval training (HIIT), and anyone who wants to watch TV or use training apps without worrying about balance. They are generally quieter than rollers and put less demand on your bike-handling skills.
Cycling Rollers: The Skill-Based Option
Rollers are a set of three cylindrical drums (two for the wheels, one for the front) connected by a belt. Your bike rides freely on top of them. To stay upright, you must actively balance the bike, engaging your core and upper body much more than on a trainer. This provides a more “realistic” road feel and improves bike handling skills. However, they have a steep learning curve; falling off is common for new users. They are also less suitable for very high-power sprints, as the bike can slip off if you surge too hard. Rollers are favored by purists and those focusing on smooth pedal strokes and endurance.
Which One is Right for You?
For most people looking to simply turn my bicycle into a stationary bike for effective cardio and strength workouts, a bicycle trainer is the recommended starting point. It’s safer, more user-friendly, and allows for a wider range of resistance levels. Rollers are a specialized tool. Consider your primary goal: if it’s brutal, focused fitness with minimal fuss, choose a trainer. If it’s skill development and a dynamic core workout, and you don’t mind a learning period, rollers could be your pick.
Choosing the Right Trainer for Your Bike and Goals
If you’ve decided a trainer is your path, the next step is selecting the specific model. Not all trainers work with all bikes, and features vary widely. Here’s what you need to evaluate to make a smart purchase.

Visual guide about How to Turn My Bicycle into a Stationary Bike
Image source: oglf.org
Compatibility: Wheel Size and Axle Type
This is non-negotiable. You must ensure the trainer fits your bike’s wheel size (most commonly 26″, 27.5″, or 29″/700c) and, crucially, your rear axle type. Modern bikes often have through-axles or quick-release skewers. Many trainers include adapters for different axle standards, but you must verify this before buying. Check your bike’s rear axle and consult the trainer manufacturer’s compatibility chart. A mismatched axle means the bike won’t secure properly, which is dangerous and can damage your bike frame or dropout.
Resistance Types: From Simple to Smart
Trainers create resistance in several ways, affecting cost, noise, and feel.
- Wind/Fan Trainers: The most basic and affordable. A fan blade spins against the air. They are loud and offer a less realistic, “steppy” resistance curve but are very durable.
- Magnetic Trainers: Use magnets to create resistance, often controlled by a lever on the handlebar. They are quieter than wind trainers and offer more consistent resistance.
- Fluid Trainers: Combine a fan with a fluid chamber. They are known for being exceptionally quiet and providing a smooth, road-like resistance that increases with speed. They are a popular mid-range choice.
- Smart Trainers: The premium option. These connect via Bluetooth or ANT+ to apps like Zwift, TrainerRoad, or Rouvy. They automatically adjust resistance to match virtual hills, provide accurate power meter data, and offer the most immersive experience. They are pricey but represent the pinnacle of home training technology.
Key Features and Budget Considerations
Think about what matters to you. Do you need a quick-release lever for easy mounting? How much noise can your household tolerate? A fluid or smart trainer will be much quieter. Is portability important? Some trainers fold flat. Set a realistic budget. You can find a functional basic magnetic trainer for under $150, a good fluid trainer for $250-$400, and a top-tier smart trainer for $800-$1500. Remember, you’re saving the $1,000+ cost of a dedicated stationary bike. For most recreational cyclists, a mid-range fluid trainer offers the best balance of performance, noise level, and value when you want to turn my bicycle into a stationary bike.
Step-by-Step: Setting Up Your Bicycle on the Trainer
You have your trainer. Now, let’s get your bike mounted correctly. A proper setup is critical for safety, bike integrity, and workout quality. Follow these steps carefully.

Visual guide about How to Turn My Bicycle into a Stationary Bike
Image source: biketoworkday.us
Preparation: Find the Perfect Spot
First, choose your location. You need a solid, level floor—concrete or a heavy-duty exercise mat is ideal. Avoid carpet if possible, as it can be unstable. Ensure you have enough clearance around you, especially to the sides and front, to prevent hitting walls or furniture if you sway. Good ventilation is a plus, as indoor cycling can get warm. Place a bike mat down to protect your floor from sweat and tire wear and to dampen noise and vibration.
The Mounting Process: A Detailed Walkthrough
With your bike and trainer on the mat:
- Adjust the Trainer: Most trainers have a knob or lever to adjust the width of the resistance unit cradle. Open it wide enough to easily guide your rear wheel into place.
- Position the Bike: Gently roll or lift your bike and align the rear wheel axle with the trainer’s clamping mechanism. For quick-release skewers, you will usually remove your bike’s existing skewer and use the one that came with the trainer, as it’s designed to fit the trainer’s cups precisely.
- Secure the Axle: Insert the axle into the trainer’s cups. For a quick-release, close the lever firmly. It should be very tight—you should need significant hand pressure to close it. If your bike uses a through-axle, thread it through the axle hole in the trainer’s cup and tighten the lever or bolt to the manufacturer’s torque specification (usually very firm).
- Check the Front Wheel: The front wheel will be off the ground. To keep the bike level and stable, you must use a front wheel stand or a block. Many trainers include a simple riser block that fits under the front wheel. Place it under the front tire. The bike should now sit nearly level, with both wheels roughly parallel to the floor. A slight downward slope of the front wheel (1-2 inches lower than the rear) is sometimes recommended for better stability and to simulate a slight downhill, but level is perfectly fine.
- Final Stability Check: Give the bike a firm side-to-side shake. It should not wobble at all. Try to spin the rear wheel by hand. It should rotate freely without rubbing against the resistance unit casing. If it rubs, the wheel may be misaligned in the cups.
Calibration and First Spin
Before your first real workout, do a brief test ride. Clip in or place your feet on the pedals. Pedal slowly. Listen for any rubbing or clicking from the wheel or drivetrain. Check that the shifter cables aren’t catching on anything. If your trainer has a resistance lever, try shifting through its range. The wheel should slow down smoothly. Make any final micro-adjustments to the axle tightness or front block height. You are now ready to ride.
Safety, Maintenance, and Protecting Your Bike
Transforming your garage into a cycling studio is exciting, but it comes with responsibilities. Proper safety protocols and maintenance will protect you, your family, and your valuable bicycle.
Essential Safety Rules for Indoor Training
Your bike is now a fixed machine, but it still has moving parts and can cause injury.
- Secure Everything: Always double-check that the rear axle is fully and firmly locked into the trainer before mounting the bike. A loose axle can cause the wheel to slip or the bike to tip.
- Use a Fan: Indoor cycling generates a lot of heat. Use a separate fan to keep air moving and prevent overheating.
- Hydrate: You will sweat more than you think. Keep a water bottle within easy reach on a bottle cage or nearby table.
- Clear the Area: Ensure there are no tripping hazards like power cords, rugs, or toys around your training zone.
- Listen to Your Body: The confined space can make you feel more exertion. Pay attention to signs of dizziness or extreme fatigue. Stop if you feel unwell.
Protecting Your Bicycle: Wear and Tear Management
Using a trainer does place unique stresses on your bike. The rear tire and wheel are in constant contact with the resistance roller, leading to accelerated wear.
- Tire Wear: Trainer-specific tires are available (they are often harder and smoother). Alternatively, use a dedicated, worn-out rear tire for trainer use only to save your good road tires. Check the tire for cuts, wear, and heat damage regularly.
- Wheel True: The constant lateral pressure from the trainer’s roller can, over thousands of miles, slightly affect your wheel’s true (roundness). Periodically check for wheel wobble.
- Drivetrain: Your chain, cassette, and chainrings will see use without the cleansing effect of rain and road grit, but they will still get sweaty. Wipe down and lightly lube your chain after sweaty rides to prevent corrosion.
Trainer Maintenance: Keep It Running Smoothly
Your trainer needs love too.
- Clean Regularly: Sweat and dust are corrosive. After each use, wipe down the trainer’s frame and resistance unit with a damp cloth. Pay special attention to the roller that contacts your tire.
- Lubricate Moving Parts: Consult your manual. Some trainers have bearings in the roller that may need occasional light lubrication. Do not over-lubricate, as excess grease will attract dirt.
- Inspect for Damage: Before each ride, do a quick visual check. Look for cracks in the plastic housing, frayed cables (if applicable), and ensure all bolts and knobs are tight.
- Store Properly: When not in use for extended periods, fold it up and store it in a dry place away from direct sunlight, which can degrade plastic components.
Creating Effective Workouts and Maximizing Your Setup
Now for the fun part: actually training. Simply pedaling is good, but structured sessions will yield far better results. Your converted stationary bike can be a powerful tool for targeted fitness.
Building a Basic Indoor Workout Structure
A good workout has a purpose. Structure your sessions with these three phases:
- Warm-Up (5-10 minutes): Start with easy spinning in a low gear. Gradually increase your cadence (pedal strokes per minute). Include dynamic stretches for your legs and hips.
- Main Set (20-45 minutes): This is your work. Examples: Sustained tempo (moderate, steady effort), intervals (e.g., 5 x 2 minutes hard with 3 minutes easy recovery), or hill simulations (increase resistance and stand up to climb).
- Cool-Down (5-10 minutes): Gradually reduce resistance and cadence. Pedal slowly to let your heart rate come down. Finish with static stretching for your quads, hamstrings, calves, and lower back.
Leveraging Technology and Apps
This is where smart trainers shine, but even a basic trainer can benefit from tech. Use a cadence sensor (cheap and attaches to your crank) and a heart rate monitor (chest strap or optical) to train by feel and effort. Apps like Zwift (requires a smart trainer for full resistance control, but works with basic sensors for gaming), Rouvy, and Kinomap provide virtual worlds, structured training plans, and social competition. They make the miles fly by. Simply place your tablet or phone on a handlebar mount and ride through digital courses. For a non-smart trainer, you can still follow along with video workouts from YouTube channels dedicated to trainer sessions.
Variety is the Spice of Indoor Life
To avoid boredom and plateaus, vary your workouts. One day do a long, steady endurance ride at a comfortable pace. The next day, blast through a HIIT session with short, all-out sprints. Try “pyramid” intervals (1 min hard, 2 min easy, 2 min hard, 4 min easy, etc.). Stand up on the pedals for climbs, sit for flats. Change your hand position on the handlebars. This variety engages different muscles and keeps your mind fresh, making it easier to stick with your routine of using your converted bicycle.
Troubleshooting Common Issues and FAQs
Even with perfect setup, you might encounter some quirks. Here’s how to handle them and answers to the most common questions.
Problem: Excessive Noise or Vibration
First, ensure your trainer is on a solid, non-hollow surface. A thick exercise mat can help. Check that your rear tire is properly inflated (firm, but not over-inflated). A slightly under-inflated tire can cause a “thumping” noise. Ensure the wheel is seated correctly and centrally in the trainer’s roller. Finally, some trainers are just loud (especially wind trainers). If noise is a deal-breaker, consider upgrading to a fluid or magnetic model in the future.
Problem: Wheel Slippage or “Bouncing”
This usually means the axle isn’t tight enough. Re-check the skewer or through-axle clamp. It must be extremely firm. Also, check your tire pressure. A very high-pressure road tire on a roller can have less contact patch, leading to slip. Slightly lowering the pressure (by 5-10 PSI from your normal road pressure) can improve grip. Finally, ensure the roller is clean and free of debris or old tire rubber.
Problem: The Bike Feels Unstable or Wobbly
Confirm your front wheel stand is the correct height. The bike should be level or with the front wheel very slightly lower. If the front wheel block is too low or too high, it can create a tipping sensation. Also, make sure the trainer itself is on a perfectly flat surface. Use a level if needed. Finally, tighten the rear axle again—any play there will cause instability.
Frequently Asked Questions
Can I use any bicycle to turn it into a stationary bike?
Almost any standard road bike or mountain bike can be used with a compatible trainer. The main limitations are wheel size (26″, 27.5″, 29″/700c) and rear axle type (quick-release or through-axle). Always check the trainer manufacturer’s compatibility list before purchasing to ensure a safe fit.
Will this setup damage my bike’s tires or frame?
With proper setup and maintenance, damage is minimal. The rear tire will wear faster due to constant contact with the trainer’s roller—using a dedicated trainer tire or an old tire solves this. The frame is generally safe if the axle is clamped correctly and you don’t apply extreme lateral force (like aggressive side-to-side rocking). Always ensure the trainer is adjusted to match your bike’s axle to avoid stress on the dropouts.
How much noise does a converted stationary bike make?
Noise levels vary dramatically by trainer type. Wind trainers are the loudest, sounding like a small jet engine. Magnetic trainers are moderately quiet. Fluid and direct-drive smart trainers are the quietest, often described as a soft hum. Using a thick exercise mat and ensuring your bike tire is properly inflated also significantly reduces noise and vibration transmission to the floor.
Do I need special shoes or pedals for indoor training?
No, you can use your regular athletic shoes on flat pedals. However, for a more efficient and secure workout, clipless pedals (like Shimano SPD or Look Keo) are highly recommended. They allow you to pull up as well as push down, engaging more muscle groups and preventing your foot from slipping off during hard efforts. Just remember to use the same cleat/pedal system you use on your outdoor rides for consistency.
What’s the difference between a trainer and a smart trainer?
A standard trainer provides a fixed or manually adjustable level of resistance. A smart trainer contains electronics that connect to apps via Bluetooth or ANT+. It automatically changes resistance to match virtual hills in apps like Zwift, provides highly accurate power data, and often allows for controlled, automated workouts. Smart trainers offer a vastly more interactive and data-rich experience but come at a significantly higher price point.
How do I prevent my bike from getting dusty or sweaty during indoor sessions?
Sweat is the main enemy. Use a dedicated indoor training towel that you drape over the top tube and handlebars. Wipe down the bike, especially the stem, handlebars, and seatpost, after every session with a damp cloth. For dust, a quick weekly wipe-down is sufficient. Consider using a simple bike cover when the bike is on the trainer but not in use to keep dust off the drivetrain.