You don’t need to buy a $1,500+ Peloton bike to enjoy their world-class workouts. By pairing your existing spin bike with a tablet, the right apps, and a few key accessories, you can create a nearly identical immersive cycling experience for a fraction of the cost. This guide walks you through every step, from checking your bike’s compatibility to setting up cadence tracking and choosing the best streaming apps, so you can start riding live and on-demand classes today.
Key Takeaways
- Compatibility is Key: Most traditional spin bikes with a standard 48mm or 50mm crank arm and a smooth, stable frame can be transformed. The main limitation is the lack of built-in resistance and cadence sensors.
- The Tablet is Your New “Console”: A dedicated tablet (iPad, Android, Fire) mounted securely to your handlebars is the heart of your setup, running the Peloton Digital or other fitness apps.
- You’ll Need Accessories for Full Metrics: To get resistance, cadence, and output metrics like a real Peloton, you must add separate Bluetooth sensors (cadence sensor, resistance sensor) to your bike.
- Multiple App Options Exist: While the Peloton Digital app is the obvious choice, apps like Kinomap, iFit, and Zwift offer fantastic alternatives, some with scenic rides and competitive features.
- Safety and Stability Come First: Invest in a high-quality, adjustable mount that clamps securely to your handlebars or stem to prevent your tablet from falling during intense rides.
- The Experience is 90% There: You’ll get the same live leaderboard, instructor motivation, and vast class library. You’ll miss automatic resistance adjustments and the sleek all-in-one design, but the core workout is identical.
- Total Cost is Significantly Lower: Even with a new tablet, sensors, and mount, your investment will typically be 60-80% less than purchasing a brand-new Peloton bike.
📑 Table of Contents
- Why Bother? The Allure of the Peloton Experience
- Step 1: The Compatibility Check – Is Your Bike a Candidate?
- Step 2: The Brain – Choosing and Mounting Your Tablet
- Step 3: The Senses – Adding Bluetooth Sensors for Real Metrics
- Step 4: The Software – Choosing Your Streaming Platform
- Step 5: The Polish – Essential and Nice-to-Have Accessories
- Step 6: Putting It All Together & Your First Ride
- Conclusion: The Smart, Savvy Cyclist’s Path
Why Bother? The Allure of the Peloton Experience
Let’s be honest. The Peloton bike is an engineering marvel. It’s beautiful, quiet, and seamlessly integrates hardware and software into a fitness ecosystem that has people obsessed. The live leaderboard, the charismatic instructors, the perfectly curated playlists—it’s a powerful cocktail of motivation. But that price tag? For many, it’s a non-starter. The good news is that the magic of Peloton isn’t locked inside their proprietary hardware. The true secret sauce is their software and community. This means if you already have a decent spin bike—the kind you bought on sale or found on Craigslist—you can tap into that same electric group fitness atmosphere from your living room. Turning a spin bike into a Peloton isn’t about cheating the system; it’s about being a savvy fitness consumer. It’s about understanding that the experience lives in the app, not the bike. This guide will be your blueprint, breaking down the process from “huh?” to “I’m on the leaderboard!” in simple, actionable steps.
Step 1: The Compatibility Check – Is Your Bike a Candidate?
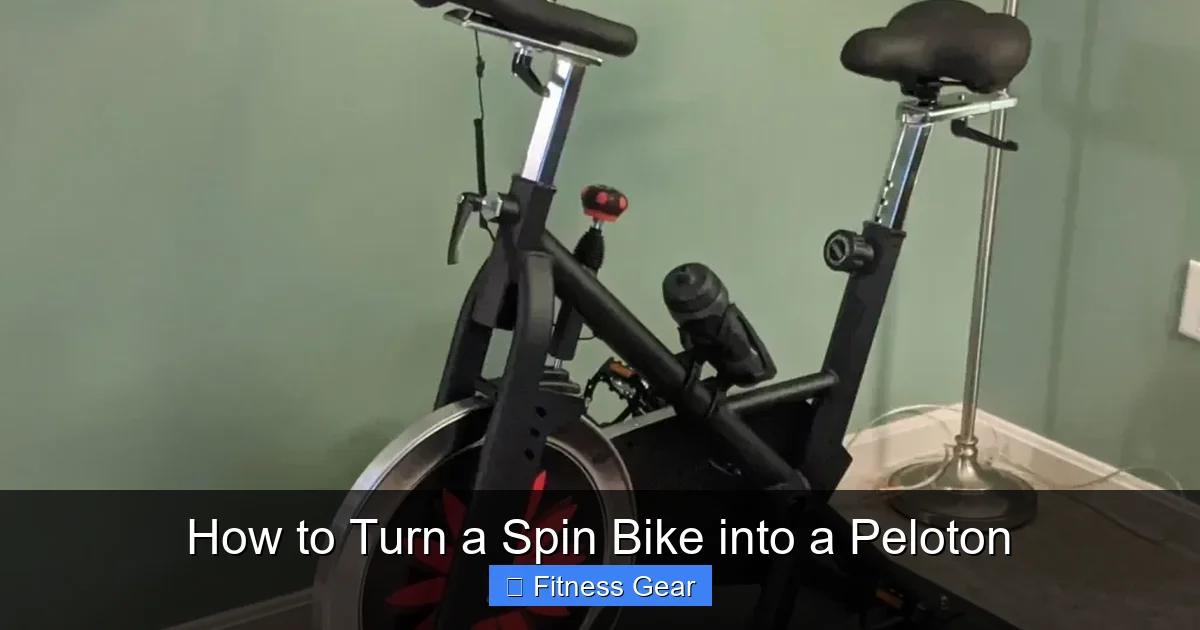
Before you spend a dime on a mount or sensor, you need to play detective with your current spin bike. The vast majority of traditional spin bikes—from brands like Sunny Health & Fitness, Schwinn, JOROTO, and many others—are excellent candidates. The transformation process works best with bikes that have a few key characteristics.

Visual guide about How to Turn a Spin Bike into a Peloton
Image source: i1.wp.com
The Physical Checklist
Sit on your bike and look around. First, check your handlebars. They need to be relatively wide and flat or slightly curved, providing a stable platform. The critical factor is the diameter of the handlebar stem where a mount would clamp on. Most aftermarket mounts are designed for standard 22mm or 25mm diameter stems, which is common on most spin bikes. If your stem is an odd shape or very small, you might need a specific adapter, but this is rare.
Next, consider the crank arm. This is the arm that holds your pedal. For the most accurate cadence tracking (RPMs), you’ll want to attach a small sensor here. Most modern spin bikes have a standard 48mm or 50mm crank arm. You can measure this with a ruler or just know that it’s the most common size. If you have an older, very small bike, double-check this.
Finally, assess your bike’s stability and adjustability. Does it feel sturdy when you stand up and pedal? Is the resistance knob or lever easy to reach and adjust while riding? You’ll be reaching for it frequently during classes to match the instructor’s calls. A wobbly bike or a resistance knob hidden behind your leg will ruin the experience.
What You’re Missing (The “Peloton Gap”)
A real Peloton bike has everything integrated: resistance, cadence, power output, and your heart rate, all communicating automatically with the tablet. Your spin bike has none of this. Your transformation project is essentially about bridging this data gap. You will manually adjust resistance (just like on your old bike) and use separate, clip-on Bluetooth sensors to measure your cadence and, if you want, power. This is the single most important concept to grasp: you are adding the “smart” layer to a “dumb” bike.
Step 2: The Brain – Choosing and Mounting Your Tablet
Your tablet is the command center. It will stream the class, show the leaderboard, display your metrics, and play the music. Choosing the right device and, more importantly, mounting it correctly, is crucial for safety and usability.
Visual guide about How to Turn a Spin Bike into a Peloton
Image source: i0.wp.com
Tablet Selection: Size, Power, and Ecosystem
You don’t need the latest, most expensive iPad Pro. You need a tablet that is:
– Responsive: At least 2-3 years old is fine, but it should handle streaming video without constant buffering.
– Size-Appropriate: A 9-11 inch screen is the sweet spot. It’s large enough to see the instructor and metrics clearly but not so large that it becomes a sail catching wind as you ride. An iPad Mini, standard iPad, or a 10-inch Android/Fire tablet is perfect.
– Connected: Must have Bluetooth (for sensors) and Wi-Fi. Ensure your tablet’s OS is still supported for app updates.
– Ecosystem Lock-in: If you plan to use the official Peloton Digital app, it works on iOS, Android, and Fire OS. If you prefer other apps like Kinomap or Zwift, check their compatibility. Most are cross-platform.
Mounting Solutions: Security is Non-Negotiable
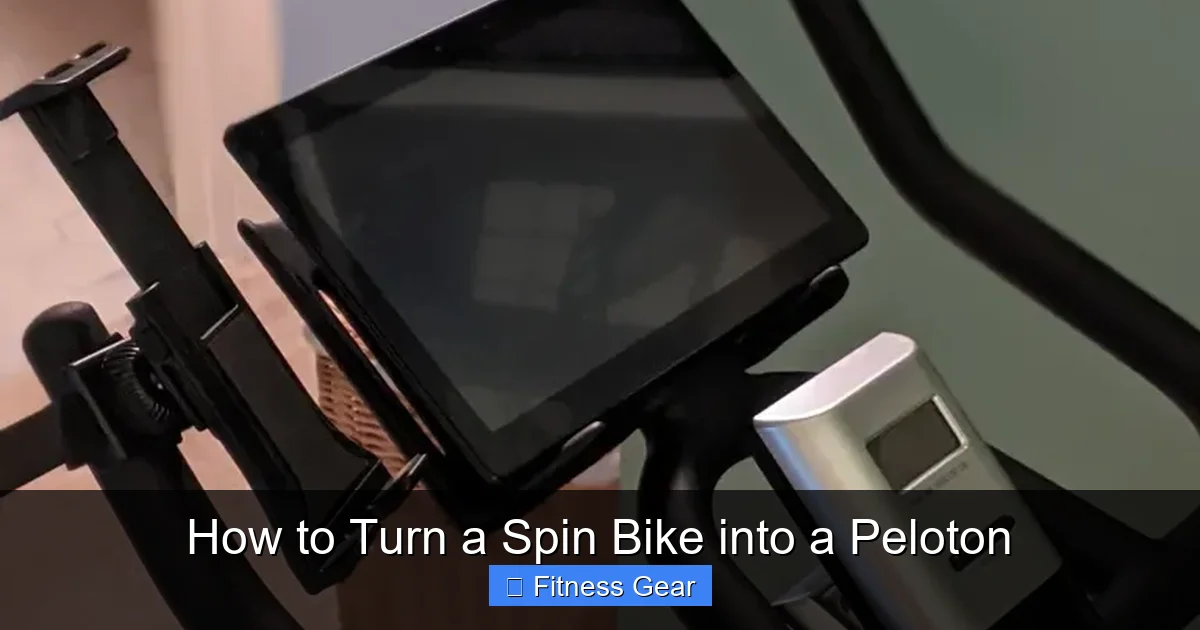
Do not, under any circumstances, try to prop your tablet against a water bottle or balance it on the console. You need a purpose-built mount. There are two primary types:
1. Stem Clamp Mount: This is the gold standard. It clamps directly onto the vertical stem of your handlebars. It’s incredibly stable, puts the tablet at a perfect viewing angle, and keeps your handlebars clear for your hands. Look for mounts with rubber padding to prevent scratches and a quick-release lever for easy removal. Popular brands include Quad Lock, Rokform, and Tacx.
2. Handlebar Wrap Mount: This strap-style mount wraps around the entire handlebar tube. It’s more universal and works on bikes with bulky or oddly shaped stems. Ensure it’s a high-strength velcro or ratchet-strap system, not a flimsy rubber band. Test it vigorously before your first ride.
Pro Tip: Position the mount so the bottom of the tablet is just above your front wheel. This gives you a clear view of the road ahead (or your TV screen) and prevents the tablet from blocking your forward vision. Always double-check the clamp is tight before every ride.
Step 3: The Senses – Adding Bluetooth Sensors for Real Metrics
This is where you go from “watching a video” to “riding a smart bike.” Without sensors, your Peloton app will show no metrics for your ride. You’ll just be a ghost on the leaderboard. You need at least one sensor, but for the full experience, two are recommended.
Visual guide about How to Turn a Spin Bike into a Peloton
Image source: i0.wp.com
The Essential: Cadence Sensor
Cadence is your pedaling speed in revolutions per minute (RPM). It’s the most fundamental metric in indoor cycling. The Peloton bike measures this with a sensor on the crank arm. You replicate this with a simple, wireless Bluetooth cadence sensor (or ANT+ if your tablet supports it). These are small, magnetic devices that strap to your crank arm with a rubber band or zip tie. The most popular and reliable is the Wahoo RPM Cadence Sensor or the Garmin Speed/Cadence Sensor (used for cadence). Pair it in your app’s settings (usually under “Bike Setup” or “Sensors”) and you’ll see your RPMs fly by in real-time on the screen.
The Game-Changer: Resistance Sensor
This is the trickier one. A real Peloton bike digitally reports its resistance level (1-100). Your spin bike has a physical knob or lever. To get a resistance number on your screen, you need a way to measure it. There are two paths:
– The DIY “Resistance Calibration” Method: The Peloton Digital app has a feature where you manually input your resistance level. During class, when the instructor says “add 10 points,” you turn your knob and tap a “+” button on your screen. It’s not automatic, but it’s effective and costs nothing extra. You just have to be diligent.
– The Hardware Sensor Method: Companies like Wahoo make a “KICKR CLIMB” resistance sensor that can be adapted, but it’s complex and expensive. A more practical (but still advanced) hack involves using a rotary encoder and an Arduino board to physically measure knob turns and broadcast it via Bluetooth. This is for tech enthusiasts only. For 99% of users, the manual input method is the way to go.
The Bonus: Heart Rate Monitor
While not Peloton-specific, a Bluetooth chest strap heart rate monitor (like from Polar or Wahoo) is the best way to track effort and calories accurately. Arm-based optical monitors are less reliable during intense cycling. Pair it once, and your data will flow into any compatible app.
Step 4: The Software – Choosing Your Streaming Platform
Now for the fun part. What will you actually watch? You have several excellent options, each with a different vibe.
Option 1: The Peloton Digital App (The Obvious Choice)
This is the direct portal to the Peloton universe. For $24.99/month, you get unlimited access to all live and on-demand cycling classes, plus strength, yoga, and more. The experience is identical to owning a Peloton bike, minus the automatic resistance control. You’ll see the live leaderboard, your cadence (if sensor is paired), and the instructor’s stats. The community is massive. Downside: You cannot use the “Peloton Bike” profile to get resistance metrics automatically; you’ll be in the “Bike+” or “Other Bike” profile, which requires manual resistance input.
Option 2: Kinomap (The Scenic & Social Alternative)
Kinomap is a fantastic app that focuses on real-world video rides. You pedal along a GPS-tracked video of a famous climb or city street. If you have a cadence sensor, your speed on the video matches your pedaling speed. It also has a “multiplayer” mode where you can ride with others virtually. It’s incredibly immersive and costs about $15/month. It works with most Bluetooth sensors and has a great library of global routes.
Option 3: iFit (The Trainer-Driven Experience)
iFit (often paired with NordicTrack/ProForm bikes) offers a huge library of trainer-led outdoor rides. The coach will call out resistance and cadence changes based on the terrain. The app is included with an iFit membership ($39/month or $399/year), which also gives you access to their smart treadmills and rowers if you ever expand. The production quality is high.
Option 4: Zwift (The Gamified Racing World)
If you’re competitive, Zwift is a virtual world where you ride your bike (with a sensor) as a customizable avatar. You race against real people, draft, and climb virtual mountains like Watopia. It’s less about following an instructor and more about the game. It’s a blast and costs $14.99/month. It requires a cadence sensor at minimum.
Recommendation for Beginners: Start with the Peloton Digital app on a month-to-month basis. The instructor-led format is the easiest to follow and most motivating. Once you’re hooked, you can explore other apps for variety.
Step 5: The Polish – Essential and Nice-to-Have Accessories
To make your hybrid setup feel professional and comfortable, consider these upgrades.
Must-Haves for Comfort & Hygiene
- Padded Cycling Shorts: This is not optional. A good pair of padded shorts (from Pearl Izumi, Castelli, or even affordable Champion brands) will save your sit bones. Wear them without underwear.
- Proper Cycling Shoes: If your spin bike has SPD-compatible pedals (look for a small hole on each side of the pedal), get SPD cleat shoes. They provide a more efficient, secure pedal stroke and allow you to pull up as well as push down. Brands like Shimano, Giro, and Tommaso make affordable options.
- Two Water Bottles & A Holder: One on the frame, one on the mount. Hydration is critical. If your bike doesn’t have bottle cages, simple clamp-on holders work.
- Two Towels: One on the handlebars for your hands, one on the top tube for your face.
Nice-to-Haves for the Pro Feel
- A Front Stabilizer/Block: If your bike has a front stabilizer bar (the bar that goes from the front stem to the floor), ensure it’s secure. Some people add a non-slip pad or a small block under the front wheel to prevent any rocking.
- Ventilation: A small, clip-on fan (like from Vornado) aimed at your torso can be a game-changer for heat management during intense HIIT rides.
- Mat: A thick exercise mat (at least 1/2 inch) under your bike protects your floors from sweat and vibration and stabilizes the bike.
- Bluetooth Speaker: While the tablet audio is fine, a good Bluetooth speaker placed behind you can provide richer, more immersive sound than the tablet’s small speakers.
Step 6: Putting It All Together & Your First Ride
You have your bike, your mounted tablet, your paired cadence sensor, and your app subscription. It’s go time. Here is your pre-ride checklist:
- Physical Setup: Ensure your bike is on a level surface. The front stabilizer should be touching the floor. Tighten all quick-release levers on the seat and handlebars. Place your mat down.
- Tablet & Mount: Secure your tablet in the mount. Log into your chosen app and connect it to your Wi-Fi. Make sure it’s charged or plugged in.
- Sensor Pairing: In your app’s bike setup or sensor settings, put your cadence sensor in pairing mode (usually by removing and re-attaching the battery or holding a button). Pair it. If you have a heart rate monitor, pair that too. Do this before every ride to ensure connection.
- Calibration & Manual Input: If using the Peloton app, you will need to do a one-time “resistance calibration” where you turn your knob to its loosest and tightest points and tap the corresponding on-screen buttons. Remember, you will now be responsible for manually adjusting resistance during class via the on-screen +/- buttons.
- Start Riding: Filter for a beginner or low-impact class to start. Follow the instructor’s cues for cadence. When they say “add resistance,” turn your knob a click or two, then immediately tap the “+” button on your screen. Get a feel for the rhythm. Don’t worry about the leaderboard at first; focus on matching the cadence calls and enjoying the music and instruction.
Final Pro-Tip: The first few rides will feel awkward. You’re learning a new system. The second nature will come quickly. The community on the leaderboard is supportive and won’t know you’re on a “souped-up spin bike.” They’ll just see your name and stats. Get out there, say hi in the chat, and enjoy the ride.
Conclusion: The Smart, Savvy Cyclist’s Path
Turning a spin bike into a Peloton is not a compromise; it’s a strategic upgrade. You are leveraging the best-in-class software and community of Peloton (or its competitors) with reliable, often more robust, hardware you already own or can acquire inexpensively. You gain immense flexibility—you can use your setup for multiple apps, you’re not locked into one brand’s ecosystem, and the total cost is a fraction of the all-in-one solution. The main trade-offs are the manual resistance adjustment and a slightly less sleek aesthetic. But for the vast majority of riders, these are minor inconveniences compared to the monumental savings and customization. You become the architect of your own fitness studio. So, check your bike’s stem, order that Quad Lock mount and Wahoo cadence sensor, and get ready to clip in. The leaderboard awaits, and it has no idea you’re riding on a budget. Now, go turn that spin bike into your personal Peloton.
Frequently Asked Questions
Can I use any spin bike for this setup?
Most traditional spin bikes with a standard 22mm-25mm handlebar stem and a 48mm/50mm crank arm are compatible. The main requirement is a stable frame and accessible resistance knob. Very cheap, wobbly bikes or highly specialized road bikes on trainers may not be suitable.
Do I really need the cadence sensor?
Yes, it’s essential. Without it, your app will not show your pedaling speed (RPM), which is a core metric in every class. You’ll just be a ghost on the leaderboard with no personal stats. A basic Bluetooth cadence sensor is the single most important accessory for the authentic experience.
How do I handle resistance if my bike doesn’t report it automatically?
You use the manual “+” and “-” buttons in the Peloton Digital app (or similar feature in other apps). When the instructor says “add 10 points of resistance,” you physically turn your bike’s knob and then tap “+” on your screen to log that change. It requires a bit of attention but becomes second nature quickly.
What’s the total cost to convert my bike?
It varies. If you already have a tablet, you might only need a mount ($30-$60) and a cadence sensor ($40-$60), totaling $70-$120. If you need a new tablet (a used iPad or Fire HD 10), add $150-$250. Even at the high end, it’s $300-$400, which is 75% less than the starting price of a new Peloton bike.
Will my stats and leaderboard position be accurate?
Your cadence (RPM) will be very accurate with a proper sensor. Your “output” (watts) and “resistance” numbers will be estimates. The Peloton bike’s output is calculated from its precise resistance and cadence sensors. Your manual resistance input is a rough estimate, so your output will not match a real Peloton bike’s numbers exactly. However, your effort and relative position on the leaderboard will be consistent and meaningful.
Is the Peloton Digital app the only option?
No! While it’s the most direct, great alternatives include Kinomap (for scenic real-world rides), Zwift (for gamified virtual racing), and iFit (for trainer-led outdoor videos). All work with a cadence sensor and a mounted tablet. Try their free trials to see which community and style you prefer.