How to Tighten the Belt on a Proform Treadmill
A loose or misaligned belt on your Proform treadmill is a common but fixable issue. First, always unplug the machine for safety. You’ll typically need a 5/16″ Allen wrench and a screwdriver to access the rear roller adjustment bolts. Turn both bolts in small, equal increments (usually 1/4 to 1/2 turn clockwise) to increase tension. After each adjustment, manually center the belt and plug in the treadmill to test at low speed. The goal is a taut belt that doesn’t slip but isn’t overly tight, which strains the motor. If the belt continues to slip or the problem persists, the belt or rollers may be worn and need replacement.
You’re in the middle of a great run, heart rate up, focused on your pace, and suddenly—you feel it. That familiar, frustrating slip. Your foot pushes down, but the belt beneath you hesitates, skidding slightly against the deck. Or maybe you’ve noticed the belt slowly creeping its way to the right or left, threatening to ride up onto the side plastic. These are the two most common signs of a treadmill belt issue: either slippage or misalignment. For owners of Proform treadmills, a beloved and often-used piece of home gym equipment, this can be an annoying interruption to your fitness routine. The good news? In the vast majority of cases, you don’t need to call a service technician or ship your heavy machine somewhere. With a few simple tools, a little patience, and a clear understanding of the process, you can learn how to tighten the belt on a Proform treadmill yourself, getting your equipment back to peak performance quickly and safely.
This guide is designed for the everyday Proform owner. We’ll walk through everything from diagnosing whether you truly have a tension issue or an alignment problem, to gathering the correct tools, executing the precise adjustment steps, and performing crucial post-adjustment tests. We’ll also cover essential preventive maintenance to keep your belt running true for years to come. Think of this as your personal treadmill tune-up manual. By the end, you’ll have the confidence and knowledge to handle this routine maintenance task, saving you time, money, and the hassle of a workout interruption.
Key Takeaways
- Safety is Paramount: Always disconnect the treadmill from the power outlet before performing any inspection or adjustment to prevent accidental startup.
- Identify the Correct Issue: A slipping belt (moves under your feet) needs tension adjustment. A belt that drifts to one side needs alignment adjustment via the rear roller bolts.
- Use the Right Tools: Most Proform models require a 5/16″ Allen wrench for the rear roller bolts. Some may need a screwdriver to remove a rear cover shroud.
- Make Incremental Adjustments: Turn both rear roller adjustment bolts equally in small increments (¼ to ½ turn). Over-tightening can damage the belt, rollers, and motor.
- Test After Every Adjustment: Manually center the belt, plug in the machine, and run it at 2-3 MPH to check for slipping, drifting, or smooth operation before making further changes.
- Regular Maintenance Prevents Recurrence: Check belt tension and alignment monthly, clean around the deck and rollers, and lubricate the deck as per your model’s manual to extend component life.
- Know When to Seek Help: If adjustments don’t fix the problem, or if you see significant wear, cracks, or fraying on the belt, contact Proform support or a qualified technician.
📑 Table of Contents
- Understanding Your Treadmill Belt: Tension vs. Alignment
- Gathering Your Tools and Preparing the Treadmill
- The Step-by-Step Adjustment Process
- Testing, Fine-Tuning, and the “Feel” of a Properly Adjusted Belt
- Preventive Maintenance: Keeping Your Belt in Top Shape
- Troubleshooting: When Adjustments Aren’t Enough
- Conclusion: Your Confidence in Treadmill Care
Understanding Your Treadmill Belt: Tension vs. Alignment
Before you even think about grabbing a wrench, it’s critical to understand what’s actually wrong. A “loose belt” is often a blanket term, but the fix differs significantly based on the symptom. Diagnosing correctly is the first and most important step to a successful repair.
The Problem of Slippage (A Tension Issue)
This is the classic “loose belt” scenario. You’re running or walking, and you feel the belt skid backward under your feet for a split second, especially when you push off forcefully. You might also hear a squeaking or chirping noise from the front roller area. This happens because the belt does not have enough grip on the front drive roller. The motor is turning the roller, but the roller isn’t effectively pulling the belt along. The solution is to increase the belt tension. This is done by tightening the rear roller, which pulls the belt tighter across the entire deck. The belt must be taut enough to grip both rollers firmly without stretching excessively.
The Problem of Drifting (An Alignment Issue)
Here, the belt isn’t necessarily slipping underfoot, but it slowly migrates to one side, often needing to be manually pushed back to center every few minutes. If left unchecked, it will eventually ride up onto the side plastic shrouds, causing friction, noise, and potential damage. This is an alignment problem. The rear roller is not perfectly parallel to the front roller, causing the belt to track in one direction. The solution is a delicate adjustment of the rear roller’s position, which we’ll detail in the adjustment section. Often, a belt that drifts may also have slightly uneven tension, so you might need to address both.
Why Do These Problems Occur?
Understanding the cause helps prevent recurrence. Normal wear and tear is the primary culprit. As you walk or run, the belt stretches minutely over time. The lubricant (usually silicone-based) on the deck can dry out or get pushed to the edges, increasing friction and causing the belt to work harder, which can contribute to stretching. Temperature and humidity changes in your workout room can affect belt material. Also, if the treadmill isn’t on a perfectly level surface, it can encourage belt drift. Finally, excessive weight on the edges of the belt (a common habit) accelerates wear and misalignment.
Gathering Your Tools and Preparing the Treadmill
Now that you know what you’re looking at, it’s time to get prepared. Having the right tools at your side will make this a 10-minute job instead of a 30-minute hunt through the garage.
Visual guide about How to Tighten the Belt on a Proform Treadmill
Image source: devicesmag.com
The Essential Toolkit
For nearly all modern Proform home treadmills (like the popular Proform Performance, Carbon, and T-series models), the adjustment mechanism is standardized. You will need:
- A 5/16″ Allen Wrench (Hex Key): This is the single most important tool. It fits into the socket head of the rear roller adjustment bolts. These bolts are usually located at the tail end of the treadmill, behind the belt. A metric 8mm Allen wrench often works as a substitute, but 5/16″ is the standard size for Proform. If you have the original tool kit that came with your treadmill, use that.
- A Standard Screwdriver (Flathead or Phillips): You may need this to carefully pry off or unscrew the rear shroud/cover. This plastic piece conceals the roller and adjustment bolts. Not all models have a removable rear cover; some have access holes. But having a screwdriver ready is wise.
- A Clean, Soft Cloth: For wiping away any dust or old lubricant debris from the deck and rollers after you move the belt.
- Your Treadmill’s Owner’s Manual: If you have it, keep it nearby. It will have your model-specific diagram and any unique instructions.
Safety First: Power Down and Clear the Area
This cannot be stressed enough. Before you do anything, ensure the treadmill is completely powered off and unplugged from the wall outlet. The electrical system is separate from the adjustment bolts, but you must eliminate any chance of the belt moving unexpectedly. Once unplugged, remove any items from the treadmill’s deck—water bottles, towels, headphones. You need clear access to the entire belt surface and the rear of the machine. If your treadmill has a safety key, remove it as an extra precaution.
Accessing the Rear Roller
Move to the back of the treadmill. You’ll see the large rear roller that the belt wraps around. Often, there is a plastic shroud covering the ends of this roller. Look for screws (usually Phillips-head) holding this shroud in place. Carefully remove them and set the shroud aside. If there are no screws, there might be small plastic clips. Gently pry the shroud upward and off. If your model has pre-cut access holes in the rear foot or frame, you may be able to insert the Allen wrench directly without removing anything. Your goal is to expose the bolt head on the left and right sides of the rear roller axle. These are your adjustment points.
The Step-by-Step Adjustment Process
With your tools ready and the treadmill safely unplugged and accessible, we move to the core procedure. The golden rule here is: small, equal adjustments, followed by testing. Making large turns is the #1 cause of over-tightening, which creates a new set of problems.
Visual guide about How to Tighten the Belt on a Proform Treadmill
Image source: i.ytimg.com
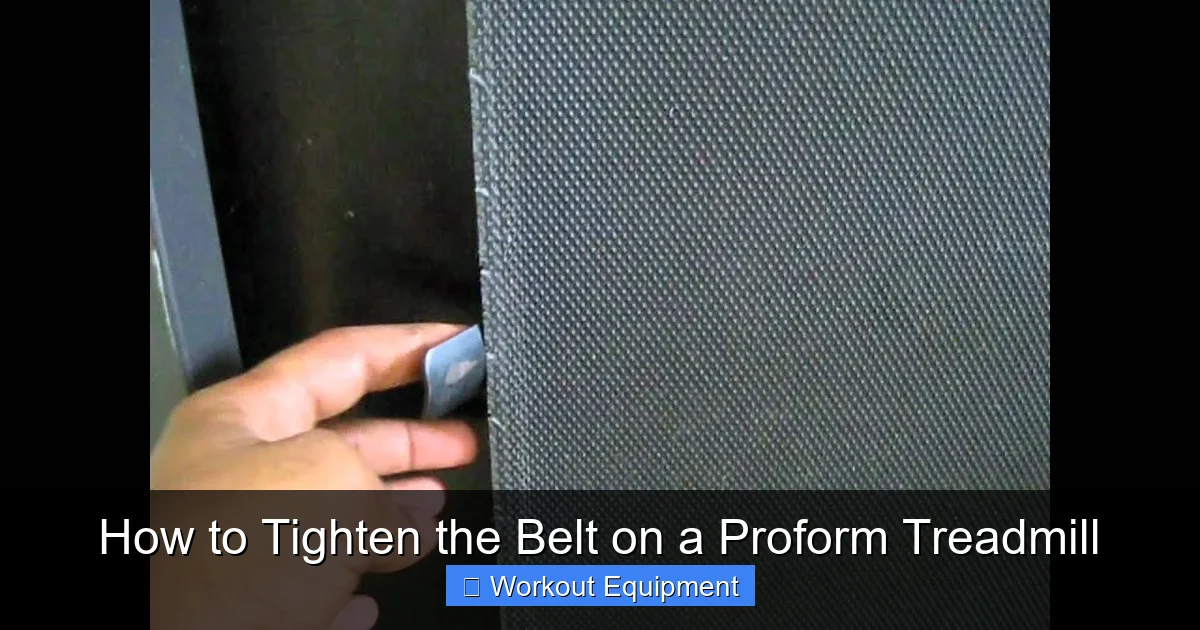
Step 1: Locate and Loosen the Lock Nuts
On most Proform models, the rear roller bolt has a nut on the outside of the frame, on the side of the machine. This nut locks the bolt’s position after you’ve made your tension adjustment. Using your fingers or the wrench, turn these lock nuts counter-clockwise to loosen them. You only need to loosen them about ½ to 1 full turn—just enough so that the bolt can be turned with your Allen wrench. Do not remove the nuts completely. Loosen the nut on the left side first, then the right side. Keeping them loose allows you to adjust the bolt while maintaining alignment control.
Step 2: Making the Tension Adjustment (For Slippage)
Now, insert your 5/16″ Allen wrench into the bolt head on the right side. You will turn this bolt clockwise to increase tension. Why start on the right? Because when you turn the right bolt clockwise (as you face the rear of the treadmill), it pulls the right side of the rear roller back, tightening the belt on that side. The left bolt is adjusted in the opposite direction to keep the roller straight and prevent drift. For now, we’re focusing on tension. Turn the right bolt in by ¼ of a full turn. That’s it. Stop. Now, go to the left side. You need to turn the left bolt in the same direction to maintain alignment, but the direction relative to the bolt is different. To understand this, imagine you are looking at the left bolt from the left side of the machine. To pull that side back and increase tension, you must turn the left bolt counter-clockwise. It’s confusing, but the simple rule is: To tighten the belt, you always turn both bolts so that the rear roller is pulled backward, toward the motor. A foolproof method: after making your ¼ turn on the right (clockwise), go to the left and turn that bolt so that the roller moves away from you if you’re standing behind the treadmill. This usually means turning the left bolt counter-clockwise. The key is that both bolts are turned to shorten the distance between the roller’s mounting points, increasing belt tension.
Step 3: Checking and Adjusting for Alignment (For Drift)
If your primary issue is drifting, the process is similar but the goal is different. You want to adjust the bolts to make the rear roller perfectly parallel to the front roller. Here’s the trick: the side the belt is drifting towards is too tight. If the belt drifts to the right, the right side of the rear roller is pulled too far back, making that side too tense. To fix this, you would loosen the right bolt (turn it counter-clockwise) by a tiny amount, and then tighten the left bolt (turn it clockwise, from the right-side perspective) by the same tiny amount. This pivots the roller, bringing the belt back to center. Always make these alignment adjustments in pairs—a slight loosening on one side, a slight tightening on the other—in equal, tiny increments (1/8 to ¼ turn).
Step 4: Re-tighten the Lock Nuts
Once you have made your ¼ turn adjustments on both sides for tension (or your paired adjustments for alignment), firmly tighten the lock nuts on each side by turning them clockwise. Hand-tighten them as much as you can, then use the wrench for a final quarter-turn to secure them. These nuts are critical; if they vibrate loose during operation, your adjustment is lost and you risk damage.
Testing, Fine-Tuning, and the “Feel” of a Properly Adjusted Belt
This is the most critical phase. Rushing to the big test without proper preliminary checks is a mistake. We’ll start slow and build up.
Visual guide about How to Tighten the Belt on a Proform Treadmill
Image source: static-data2.manualslib.com
The Manual Check: Centering and Tautness
Before you plug anything in, with the treadmill still unplugged, grab the belt in the middle of the deck with both hands. Try to lift it. A properly tensioned belt should have a very slight, elastic give. You shouldn’t be able to lift it more than about 1 to 1.5 inches (2.5 – 4 cm) at the center point. If it lifts 2+ inches easily, it’s still too loose. If you can’t lift it at all, it’s too tight. Now, push the belt side-to-side with your palm. It should move freely but not have excessive play. It should feel uniformly taut along its entire length. Finally, look at the belt’s position relative to the deck. It should be centered, with roughly equal space (about 1/2 to 1 inch) between the belt edge and the side rails on both left and right. If it’s off-center, you can manually shift it by pushing it gently toward the side with more space. Do this now.
The Low-Speed Test
Now, plug the treadmill back into the wall outlet. Do not stand on the deck yet. Turn the machine on using the console. Set the speed to the lowest setting, typically 1.0 or 1.5 MPH. Stand beside the treadmill, not on it, and observe. Watch the belt as it moves. Is it tracking straight? Does it drift noticeably to one side within 30 seconds? Listen for any squeaking or chirping from the front roller (slippage noise). If it drifts, you need another small alignment tweak (see Step 3 above). If it looks straight and quiet, it’s time for the next test.
The Load Test (The Most Important Test)
This is where you confirm the fix. With the treadmill still at 1.5-2.0 MPH, carefully step onto the belt near the rear, straddling it if you’re nervous. Get a feel for the motion. Now, walk normally. Pay attention to two things:
- Feel for Slippage: As you push off with your back foot, does the belt feel solid under your foot, or is there a brief moment of skidding? A properly tensioned belt will feel like it’s gripping the deck firmly. Your foot’s push should translate immediately into forward motion of the belt.
- Watch the Belt Edge: Glance down at the side of the belt. Is it staying centered, or is it slowly inching toward one side? A well-aligned belt will stay put under your normal walking gait.
If you feel slippage, the belt is still too loose. Unplug the machine and add another ¼ turn to both rear roller bolts (remembering the correct direction for each side). If the belt drifts to one side under your weight, you need a minor alignment correction. If it passes both tests—no slip, no drift—increase the speed to a moderate walking pace (3.0-3.5 MPH) and repeat the feel/watch test. Finally, if you’re a runner, test it at your typical running speed (5-7 MPH). The belt should remain perfectly stable and silent.
Recognizing “Too Tight”
Over-tightening is just as bad as under-tightening. Signs of an excessively tight belt include:
- A high-pitched whining or grinding noise from the motor area.
- The motor struggling to start the belt, or the belt feeling jerky.
- Excessive wear on the edges of the belt as it’s pulled too hard against the side rails.
- Increased current draw, which can trip breakers or shorten motor life.
If you encounter these, you must loosen both bolts equally by ¼ turn until the noise and strain cease. The ideal tension is the minimum tension required to prevent slippage under your heaviest expected load.
Preventive Maintenance: Keeping Your Belt in Top Shape
You’ve fixed the issue. Now, let’s make sure it doesn’t happen again too soon. Proactive care is simple and will dramatically extend the life of your belt, deck, and rollers.
Regular Cleaning is Non-Negotiable
Sweat, dust from your shoes, and carpet fibers are the enemies of your treadmill. They act as an abrasive between the belt and deck and can get caught in the roller bearings. Once a week: With the treadmill unplugged, use a vacuum cleaner with a crevice tool to clean out all the debris from the rear roller area, the front roller area, and especially the space between the belt and the deck along the sides. Monthly: Wipe down the top of the belt with a slightly damp cloth. For a deeper clean, you can carefully lift the belt (it will lift easily if tension is correct) and wipe the deck surface with a cloth dampened with a 50/50 water-vinegar solution or a dedicated treadmill deck cleaner. Never spray liquid directly onto the belt or into any motor/roller openings.
Proper Lubrication: The Lifeline of Your Deck
This is the most critical maintenance task. The belt slides over the deck on a thin layer of lubricant. When this lubricant is depleted, friction skyrockets, causing the belt to stretch, wear faster, and make the motor work harder—leading directly to slippage. Consult your owner’s manual for the exact lubrication schedule and type of lubricant (usually 100% pure silicone). A common schedule is every 150 miles of use or every 3-6 months. The process involves lifting the belt, applying a small amount (1-2 oz) of lubricant in a zig-zag pattern down the center of the deck, and then running the treadmill at a low speed for a few minutes to distribute it evenly. Never use WD-40, petroleum jelly, or household oils—they degrade the belt and deck materials.
Environmental and Usage Tips
- Level Surface: Use a bubble level to check that your treadmill is sitting perfectly flat on the floor. Adjust the leveling feet under the front and rear stabilizers. An unlevel machine is a prime cause of belt drift.
- Mind Your Footwear: Use clean, dedicated athletic shoes. Dirt and gravel from outdoor shoes will contaminate the belt and deck.
- Load Distribution: Train yourself to run or walk in the center of the belt. Constantly pounding on the edges will warp the belt and accelerate wear, leading to alignment problems.
- Weight Limit: Exceeding the manufacturer’s maximum user weight is a fast track to belt and component failure.
Troubleshooting: When Adjustments Aren’t Enough
You’ve followed all the steps, made careful adjustments, but the belt still slips or drifts persistently. Now it’s time to investigate other potential culprits.
Worn or Glazed Belt
Over time, the underside of the belt can become smooth and glazed from friction, losing its ability to grip the rollers. Inspect the belt’s underside. Does it look shiny, almost plastic-like? Are there visible cracks, especially along the seam where the belt is joined? A cracked or severely glazed belt has lost its elasticity and grip and must be replaced. No amount of tension adjustment will fix it. Replacement belts are available from Proform or third-party suppliers specific to your model number.
Worn or Dirty Rollers
The rollers (front drive and rear idler) have rubber surfaces that the belt grips. If this rubber is worn smooth, cracked, or covered in a layer of old lubricant and debris, the belt will slip. Visually inspect the rollers. They should have a distinct, slightly textured tread pattern. If they’re shiny or damaged, they need replacement. Also, check that the roller bearings spin freely. A seized or gritty bearing will cause the roller to not spin true, leading to belt tracking issues.
Deck Issues
A warped or damaged deck (the wooden or composite surface you walk on) can cause the belt to track erratically. Look down the length of the deck. Is it perfectly flat, or does it have a noticeable bow or high spot? Also, check for deep scratches or gouges. A severely damaged deck needs professional assessment or replacement.
Motor or Controller Problems (Rare)
In very rare cases, a failing drive motor or a malfunctioning motor control board (PCB) can cause inconsistent torque, making the belt feel like it’s slipping even with perfect tension. This is usually accompanied by other symptoms like error codes on the console, unusual motor sounds, or failure to maintain a set speed. If you’ve ruled out belt, roller, and deck issues, this may require a professional diagnosis.
Conclusion: Your Confidence in Treadmill Care
Learning how to tighten the belt on a Proform treadmill demystifies a common maintenance hurdle and puts you back in control of your home gym. The process is a blend of careful diagnosis, precise, incremental mechanical adjustment, and patient testing. Remember the core philosophy: small turns, frequent tests. You are not just tightening a bolt; you are tuning a system. The goal is harmony—a belt that is taut enough to transmit the motor’s power without slipping, yet relaxed enough to spin freely without straining components, all while tracking perfectly straight down the center of the deck.
By incorporating the simple preventive steps of regular cleaning, proper lubrication, and environmental awareness into your routine, you can often go years between major adjustments. This knowledge saves you significant money on service calls and extends the joyful, reliable life of your investment. Your Proform treadmill is built to last, and with this guide in your toolkit, you’re now equipped to keep it running smoothly, mile after mile, workout after workout. So the next time you feel that tell-tale slip, you can smile, grab your Allen wrench, and know exactly what to do.
Frequently Asked Questions
How often should I check my Proform treadmill belt tension and alignment?
As part of routine maintenance, perform a visual and manual check of your belt’s position and tension at least once a month. Listen for unusual noises during each workout. A more thorough inspection, including lifting the belt to check the deck and rollers, should be done every 3-6 months or according to the schedule in your owner’s manual.
What’s the single biggest mistake people make when tightening a treadmill belt?
The most common and damaging mistake is over-tightening. People often turn the adjustment bolts multiple full turns at once, thinking “more is better.” This creates excessive friction, strains the motor, causes premature belt/roller wear, and can even lead to a snapped belt. Always adjust in ¼ turn increments and test thoroughly before making any more changes.
Can I use any lubricant on my Proform treadmill deck?
Absolutely not. Only use lubricant specifically approved for your treadmill model, which is almost always 100% pure silicone. Products like WD-40, silicone sprays with propellants, petroleum-based oils, or household oils will degrade the belt and deck materials, causing them to become gummy, cracked, and eventually fail. Check your manual for the exact product recommendation.
My belt is centered but still slips when I run hard. Is it definitely a tension issue?
Yes, if the belt is centered but slips under heavy load, it is a classic sign of insufficient tension. The belt is stretching under the force of your stride and losing grip on the front roller. Follow the tension adjustment steps, making small, equal turns on both rear roller bolts to increase overall tightness. Retest after each adjustment.
Is it normal for a new treadmill belt to need frequent adjustments for the first few months?
Yes, it can be. A new belt has not yet been broken in and may stretch slightly during the first 20-50 hours of use. It’s normal to make one or two minor tension adjustments in the first few months. However, if adjustments are needed very frequently (weekly) after that initial period, it could indicate a defective belt or an underlying issue with the rollers or deck.
My treadmill is under warranty. Should I still attempt this adjustment myself?
Generally yes. Adjusting belt tension and alignment is considered standard user maintenance, not a warranty-covered repair. Your warranty typically covers defects in materials or workmanship, not normal wear and tear adjustments. Attempting this simple adjustment yourself will almost certainly be faster than scheduling a service call. However, if you discover a broken part (like a cracked belt) during the process, that part may be covered by warranty, and you should contact Proform support with your model number and the issue.