How to Row on a Water Rowing Machine
Rowing on a water rowing machine is one of the most effective full-body workouts you can do at home or in the gym. This guide walks you through the proper rowing technique, stroke phases, and common mistakes to avoid. You will learn how to set up your water rower correctly, adjust resistance, and build a routine that delivers real results.
Few pieces of workout equipment deliver the kind of full-body burn that a water rowing machine does. Whether you are a complete beginner or a seasoned athlete, learning how to row on a water rowing machine can transform your fitness routine. The smooth, gliding motion mimics real boating, and the water resistance adjusts naturally as you push harder.
But here is the thing. A water rower is only as good as your technique. Many people hop on, yank the handle, and wonder why their back hurts after five minutes. That is exactly why I put this guide together. By the time you finish reading, you will know the proper rowing technique, how to set up your machine, and how to build a session that actually works.
The beauty of a water resistance rower is that it meets you where you are. Pull lightly, and the water barely moves. Pull hard, and the resistance scales up automatically. This makes it perfect for all fitness levels. Let us dive into the details.
Key Takeaways
- Proper form is everything: Mastering the catch, drive, and recovery phases will protect your joints and maximize your workout.
- Water rowers offer smooth, natural resistance: The water tank creates a realistic rowing feel that builds strength and endurance.
- Start slow and build up: Beginners should focus on technique before chasing speed or intensity.
- Consistency beats intensity: Rowing for 20-30 minutes several times a week delivers better results than occasional long sessions.
- Avoid common mistakes: Rounding your back, rushing the recovery, and overgripping the handle are the top errors to watch for.
- Track your progress: Monitoring split time, stroke rate, and distance helps you stay motivated and improve over time.
📑 Table of Contents
- Understanding Your Water Rowing Machine
- Setting Up Your Water Rowing Machine Correctly
- The Proper Rowing Stroke: Catch, Drive, Recovery
- Common Mistakes to Avoid
- Building a Water Rowing Workout
- Tracking Your Progress and Metrics
- Benefits of Rowing on a Water Machine
- Maintenance Tips for Your Water Rowing Machine
- Final Thoughts
Understanding Your Water Rowing Machine
How a Water Rower Works
A water rowing machine uses a fan-style flywheel submerged in a tank of water. As you pull the handle, the flywheel spins, and the water creates resistance. The faster you pull, the more resistance you feel. This is very different from air rowers or magnetic rowers, which use fans or magnets instead.
The water tank gives the rowing motion a natural, fluid feel. Many people say it sounds like a gentle splash, which adds a calming element to your workout. The resistance cannot be set to a fixed number like on a magnetic machine. Instead, it responds to your effort in real time.
Key Parts of a Water Rowing Machine
Before you start rowing, it helps to know the main parts of your machine:
- The tank: Holds the water and houses the flywheel. This is what creates your resistance.
- The rail: The track the seat slides along. Make sure it is clean and smooth.
- The handle: What you grip and pull. Keep a loose but firm hold.
- The foot straps: Secure your feet in place. Adjust them so the strap sits across the widest part of your foot.
- The damper: A small lever on the side of the tank that controls how much water flows into the flywheel housing. More water means more resistance.
Knowing these parts helps you troubleshoot issues and make adjustments on the fly. For example, if the rowing feels too easy, you can adjust the damper to add more water. If it feels too hard, dial it back.
Setting Up Your Water Rowing Machine Correctly
Seat and Foot Placement
Start by sitting on the seat and sliding forward until your knees are bent and your shins are roughly vertical. Attach the foot straps and make sure they cross the ball of your foot, not your toes. Your heels should stay flat on the footplates throughout the stroke.
This setup position is your starting point, also called the catch position. Getting this right matters more than most people realize. If your feet are too far forward or too far back, your rowing form falls apart fast.
Damper Settings for Beginners
The damper lever controls how much water enters the flywheel housing. Most machines have settings from 1 to 10. For beginners, I recommend starting at a 3 or 4. This gives you enough resistance to feel the water without exhausting your muscles too quickly.
Here is a quick reference for damper settings:
- Setting 1-3: Light resistance. Best for warm-ups, recovery rows, and beginners learning the stroke.
- Setting 4-6: Medium resistance. The sweet spot for most workouts and steady-state rowing.
- Setting 7-10: Heavy resistance. Best for advanced users doing strength-focused intervals.
Remember, a higher damper setting does not automatically mean a better workout. It just means more resistance. Your goal is to maintain good rowing technique throughout the session.
The Proper Rowing Stroke: Catch, Drive, Recovery
The rowing stroke has four distinct phases. Mastering each one is the key to an effective and safe indoor rowing session. Let me break them down for you.
Phase 1: The Catch
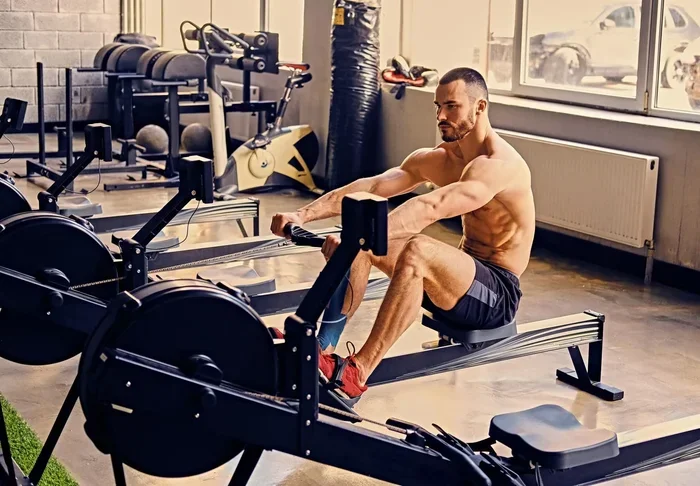
The catch is your starting position. Sit tall, reach forward with your arms extended, and lean your torso slightly over your knees. Your shins should be vertical, and your heels should stay flat on the footplates.
This is where the rowing drive begins. Think of it like loading a spring. Your body is coiled and ready to push. A common mistake is rounding your back at the catch. Keep your spine neutral and your shoulders relaxed.
Phase 2: The Drive
The drive is the power phase. It happens in three sequential movements:
- Legs push: Extend your legs and press through your heels. Your arms stay relaxed and extended at this point.
- Torso opens: Once your legs are nearly straight, lean your torso back slightly from the hips.
- Arms pull: Finally, pull the handle toward your lower chest. Keep your elbows close to your body.
The sequence matters a lot. Legs first, then torso, then arms. Reversing this order puts unnecessary strain on your arms and back. Think of it as a chain reaction where each movement builds on the one before it.
Phase 3: The Recovery
The recovery is the return to the catch position. It happens in the reverse order of the drive:
- Arrows extend: Push the handle away from your chest first.
- Torso leans forward: Hinge at the hips and bring your torso forward over your knees.
- Knees bend: Slide the seat forward toward the flywheel as your knees bend.
The recovery should feel controlled and smooth, not rushed. Many beginners make the mistake of flying back to the catch too quickly. A good rule of thumb is that the recovery should take about twice as long as the drive. This rhythm is what makes water rowing feel so rhythmic and meditative.
The Complete Stroke in One Motion
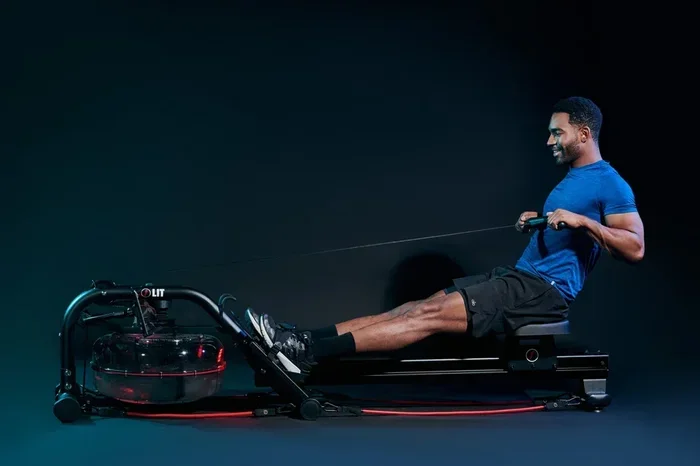
When you put it all together, the stroke flows like this: Catch (position) to Drive (push, open, pull) to Recovery (extend, lean, bend). The entire cycle should feel fluid and connected. Practice this slowly at first. Speed will come naturally as your muscle memory develops.
Common Mistakes to Avoid
Rounding Your Back
This is the number one mistake on a water rower. Rounding your back during the drive puts serious stress on your lower spine. Keep your chest lifted and your core engaged throughout the stroke. If you feel your back starting to round, slow down and reset your form.
Overgripping the Handle
A death grip on the handle wastes energy and can cause forearm fatigue. Hold the handle lightly, almost as if you are holding a bird. Your grip should be firm enough to control the handle but relaxed enough to let your legs do the heavy lifting.
Rushing the Recovery
Going from the finish position back to the catch too quickly throws off your rhythm and reduces the effectiveness of your rowing workout. Slow down during the recovery. Use this phase to breathe and prepare for the next powerful drive.
Lifting Your Heels
Your heels should stay connected to the footplates throughout the entire stroke. Lifting your heels shifts power away from your legs and can cause instability. If your heels are coming up, check your foot strap placement and sit tall.
Using Only Your Arms
Rowing is a leg-driven movement. Your arms and back assist, but your legs generate about 60 percent of the power. If you are pulling with your arms only, you are leaving most of your potential on the table and risking arm and shoulder strain.
Building a Water Rowing Workout
Beginner Rowing Session
If you are new to the water rower, start with this simple session:
- Warm-up: 3 minutes of easy rowing at a low stroke rate (18-22 strokes per minute).
- Main set: 10 minutes of steady rowing at a moderate pace. Focus entirely on your form.
- Cool-down: 3 minutes of relaxed rowing, gradually slowing your stroke rate.
This gives you about 16 minutes of actual work, which is a perfect starting point. Do this three times a week for two weeks before increasing the duration. Consistency with good form beats long sessions with bad technique every time.
Intermediate Interval Session
Once you feel comfortable with the basic stroke, try this interval workout:
- Warm-up: 5 minutes easy rowing.
- Work intervals: 1 minute of hard rowing (stroke rate 26-30), followed by 1 minute of easy recovery rowing.
- Repeat: 8 rounds.
- Cool-down: 5 minutes easy rowing.
This type of rowing machine workout builds both endurance and power. The water resistance naturally increases during your hard pushes, giving you a challenging and dynamic session without any manual adjustments.
How Long Should You Row?
The amount of time you spend on the rower depends on your goals and fitness level. For general fitness, 20 to 30 minutes per session is a solid target. If your goal is weight loss, you may want to aim for longer sessions or add interval training to burn more calories.
For specific time targets, you might also want to check out how long it takes to row a mile or a 5K on a rowing machine to set benchmarks for your progress. These benchmarks help you measure improvement and stay motivated.
Tracking Your Progress and Metrics
Key Metrics to Watch
Most water rowing machines come with a performance monitor. Here are the key metrics to track:
- Stroke Rate: The number of strokes per minute. A good steady-state rate is 20-26 strokes per minute.
- Split Time: How long it takes to row 500 meters. Lower is better. A beginner might start around 2:30-3:00 per 500 meters.
- Distance: Total meters or miles rowed during your session.
- Calories: An estimate of energy burned. Use this as a general guide, not an exact number.
- Pace: Your speed per 500 meters. This tells you how hard you are working.
You do not need to obsess over every number. Pick one or two metrics to focus on each session. Over time, you will see your split times improve and your stroke rate become more consistent.
Tips for Staying Motivated
Rowing can feel repetitive, especially during longer sessions. Here are a few ways to keep things interesting:
- Listen to music or a podcast during your rows.
- Set small distance goals, like rowing 1,000 meters without stopping.
- Track your progress weekly and celebrate improvements.
- Try different workouts, like steady-state rows one day and intervals the next.
- Join an online rowing community for tips and accountability.
Staying consistent with your water rowing machine practice is what turns occasional sessions into real fitness gains. Even 15 minutes of focused rowing is better than skipping a workout entirely.
Benefits of Rowing on a Water Machine
Water rowing machines offer unique advantages that make them worth the investment. Here are some of the top benefits:
- Full-body workout: Rowing engages about 86 percent of your muscles, including legs, back, arms, and core.
- Low impact: Unlike running, rowing puts minimal stress on your joints. It is excellent for people with knee or hip issues.
- Smooth resistance: The water provides a natural, fluid resistance that feels more like actual rowing than any other type of machine.
- Calorie burn: A moderate rowing session can burn 400 to 600 calories per hour, depending on your weight and intensity.
- Mental health benefits: The rhythmic motion of water rowing can be meditative and stress-relieving.
- Scalable resistance: The water adjusts to your effort level automatically, so the machine works for you whether you are a beginner or an elite athlete.
These benefits make the water rower one of the most versatile pieces of home workout equipment you can own. It is a great alternative to running, cycling, or using an elliptical, and it takes up relatively little space.
Maintenance Tips for Your Water Rowing Machine
Taking care of your water rower ensures it lasts for years and performs smoothly. Here are a few simple maintenance tips:
- Check the water level: Top off the tank with distilled water every few months. The water level affects resistance, so keeping it correct matters.
- Wipe down the rail: Sweat and dust can build up on the rail. Wipe it down after each session to keep the seat gliding smoothly.
- Inspect the seat: Make sure the seat rolls freely along the rail without sticking or making noise.
- Tighten bolts: Check that all bolts and screws are snug, especially after heavy use.
- Store properly: If your rower folds up, store it in a dry place away from direct sunlight. Excessive heat can affect the water and the rail.
A well-maintained water rower gives you a smoother stroke and a more enjoyable workout experience. It is a small investment of time that pays off in the long run.
Final Thoughts
Learning how to row on a water rowing machine is one of the best decisions you can make for your fitness. The smooth water resistance, the full-body engagement, and the meditative rhythm of the stroke make it a workout you will actually want to do again and again.
Start with proper form. Focus on the catch, drive, and recovery. Do not rush. Build your sessions gradually. And most importantly, enjoy the process. The water rower is a forgiving machine that rewards good technique with better performance over time. Whether your goal is weight loss, general fitness, or training for a rowing competition, this machine has you covered.
Now that you know the basics, grab the handle, set your damper, and take your first stroke. Your body will thank you.
Frequently Asked Questions
Is rowing on a water machine good for beginners?
Yes, water rowing machines are excellent for beginners. The water resistance adjusts naturally to your effort, so you can start slow and build up gradually. Focus on learning the proper stroke technique before increasing speed or intensity.
How often should I row on a water rowing machine?
For most people, rowing 3 to 5 times per week is ideal. Start with 15 to 20 minute sessions and gradually increase the duration as your fitness improves. Consistency matters more than any single workout.
Can I lose weight by rowing on a water rowing machine?
Absolutely. A water rowing machine provides a high-calorie-burning, full-body workout that can support weight loss when combined with a balanced diet. For specific guidance on duration and intensity for weight loss goals, check out how long you should row on a rowing machine to lose weight.
What is the right damper setting for a water rower?
Most beginners should start with a damper setting between 3 and 5. This provides enough resistance to feel the water without overloading your muscles. You can adjust the damper up or down based on how the stroke feels during your session.
How long does it take to see results from water rowing?
Most people notice improvements in endurance and strength within 2 to 4 weeks of consistent rowing. Visible changes in body composition may take 6 to 8 weeks, depending on your diet and overall fitness routine.
What muscles does a water rowing machine work?
A water rowing machine engages your legs, glutes, core, back, shoulders, and arms. It is one of the few exercises that provides a true full-body workout in a single, fluid motion. The legs do most of the work during the drive phase.