How to Set Up Barbell Hip Thrust at Gym
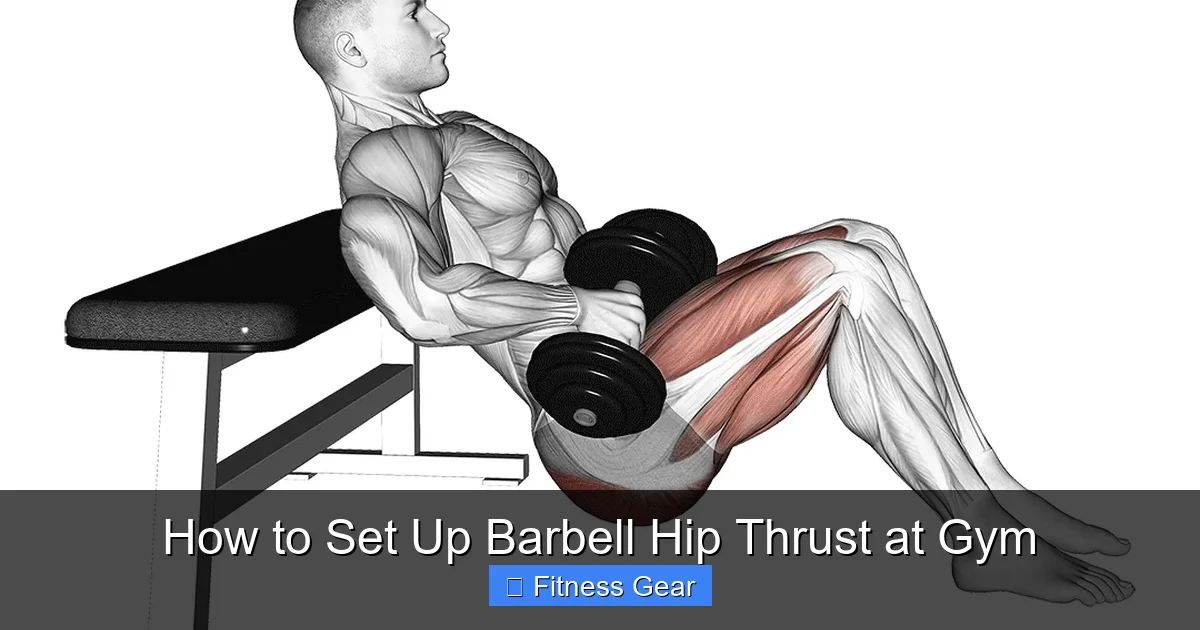
Ready to master the barbell hip thrust? This guide walks you through every detail—from choosing the right bench to loading the bar—so you can boost glute strength safely and confidently at the gym. Follow the simple setup steps, avoid common mistakes, and start seeing results fast.
Key Takeaways
- Proper bench height matters: A bench that’s too low or too high compromises range of motion and safety.
- Bar placement is crucial: Position the bar over your hips, not your pelvis, to target glutes and protect the spine.
- Foot placement influences activation: Adjust stance width and toe angle to feel the burn in the glutes rather than the quads.
- Warm‑up sets are essential: Light sets prepare the muscles and teach your body the movement pattern before loading heavy.
- Use padding for comfort: A bar pad, towel, or specialized hip‑thrust pad reduces pressure on the pelvis.
- Progress safely: Follow a linear progression plan—add 5 lb each week—to keep strength gains steady without injury.
- Spotter or safety bars add confidence: They catch the bar if you can’t complete a rep, especially when you’re pushing limits.
📑 Table of Contents
- Introduction: Why the Barbell Hip Thrust Deserves a Spot in Your Routine
- 1. Choosing the Right Equipment
- 2. Setting Up the Bench and Bar
- 3. Getting Into Position
- 4. Executing the Hip Thrust
- 5. Programming the Hip Thrust Into Your Workouts
- 6. Safety Tips and Common FAQs
- Conclusion: Your Path to Stronger Glutes Starts With a Solid Setup
Introduction: Why the Barbell Hip Thrust Deserves a Spot in Your Routine
If you’ve ever tried to grow a stronger, rounder backside, you know the struggle. Squats, deadlifts, and lunges all work the glutes, but many lifters still feel a gap in their development. The barbell hip thrust has become the go‑to exercise for athletes, bodybuilders, and casual gym‑goers who want to isolate the glutes more effectively.
What makes the hip thrust so powerful is its ability to place the hips in a position of maximal hip extension, where the gluteus maximus is strongest. When you add a barbell, you’re loading that position, forcing the muscles to adapt quickly. The result? Bigger, tighter glutes and a stronger posterior chain that translates to better performance in sports, lifts, and everyday activities.
But before you jump on the bench and start loading plates, you need to know the proper setup. A good setup protects your lower back, ensures the glutes do the work, and lets you lift heavier safely. In the next sections we’ll break down everything you need—from choosing the right equipment to fine‑tuning your foot placement—so you can execute the barbell hip thrust like a pro.
1. Choosing the Right Equipment
1.1. The Bench: Height and Stability
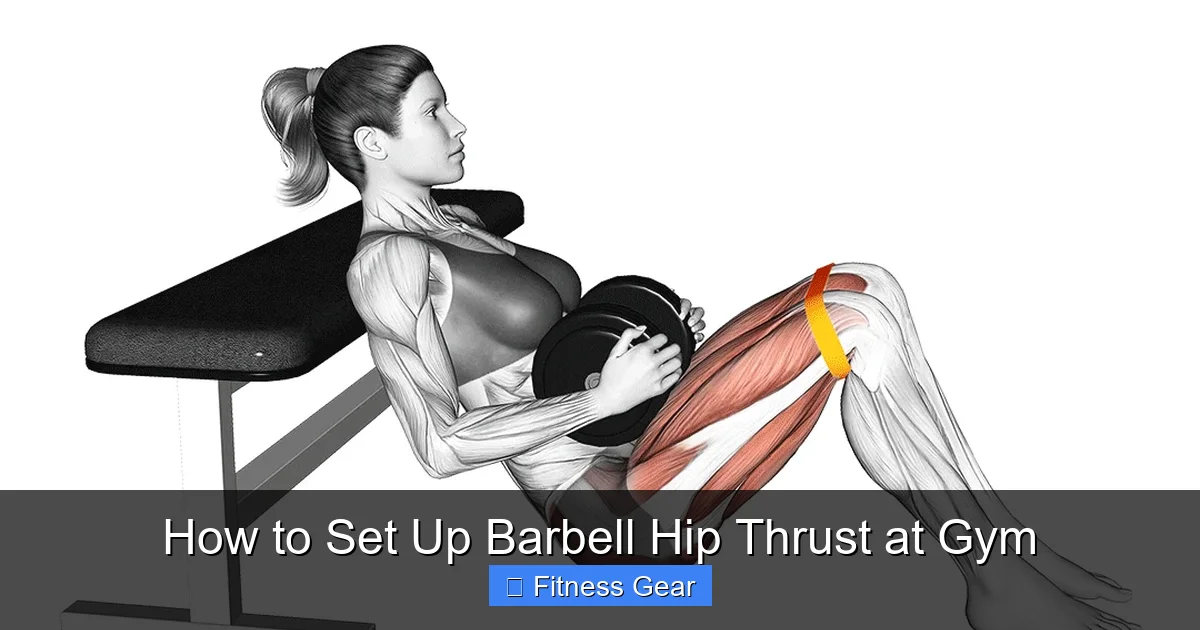
The bench is the cornerstone of a successful hip thrust. Ideally, you want a bench that’s about 16‑18 inches tall. This height lets you rest the top of your shoulder blades comfortably while keeping your knees at a 90‑degree angle when your feet are planted.
Visual guide about How to Set Up Barbell Hip Thrust at Gym
Image source: inspireusafoundation.org
- Flat bench vs. adjustable bench: A flat bench is usually sufficient, but an adjustable bench lets you fine‑tune the height if you’re exceptionally tall or short.
- Stability matters: Make sure the bench doesn’t wobble. A sturdy, commercial‑grade bench will stay put when you thrust heavy loads.
1.2. The Barbell: Type and Size
Standard 20‑kg (45‑lb) Olympic barbells work perfectly. If your gym has a specialty “hip‑thrust bar” with a slightly wider grip, you can use it, but it’s not required. The key is to have a bar that can hold the weight you plan to lift and fit comfortably over your hips without hitting the bench.
1.3. Padding: Comfort Is Not Optional
Direct contact between the bar and your pelvis can be uncomfortable, especially as the weight climbs. Use one of the following:
- Commercial hip‑thrust pad (usually foam covered in vinyl).
- A thick towel folded several times.
- A piece of gym‑flooring rubber or a small yoga mat.
Secure the padding with a rubber band or a piece of athletic tape so it doesn’t shift mid‑set.
1.4. Safety Equipment
While the hip thrust isn’t a “drop‑set” lift, having safety bars or a spotter can give you confidence when you’re near your max. Most power racks have safety pins you can set just below the bar’s lowest point.
2. Setting Up the Bench and Bar
2.1. Position the Bench Against a Wall (Optional)
Placing the bench with its back against a wall prevents it from sliding forward when you thrust. If your gym’s bench has rubber feet, you may not need a wall, but the extra stability never hurts.
Visual guide about How to Set Up Barbell Hip Thrust at Gym
Image source: i.pinimg.com
2.2. Load the Bar Correctly
Start with a light warm‑up plate on each side (2.5 kg or 5 lb). Add weight in 5‑lb increments as you feel comfortable. Use collars to keep the plates from sliding.
Pro tip: Keep a weight‑lifting log. Write down the exact weight, reps, and how you felt. This habit helps you spot trends and avoid over‑loading too quickly.
2.3. Center the Bar Over Your Hips
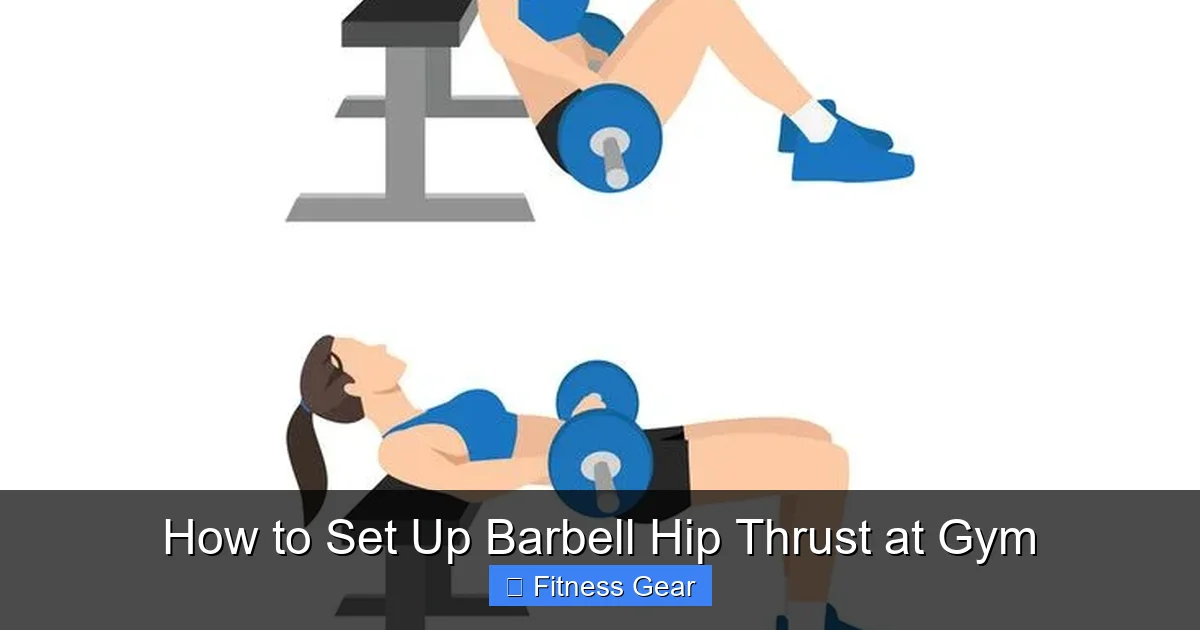
When you sit on the floor with your back against the bench, slide the bar so it rests directly over the crease of your hips (the bony ridge just below the pelvis). The bar should not be too far forward (over the abdomen) or too far back (over the tailbone). A quick visual check: the bar should line up with the middle of your thigh when your legs are extended.
2.4. Secure the Bar with a Spotter or Safety Pins
If you’re lifting heavy, ask a gym buddy to hold the bar’s ends while you get into position. Alternatively, set the safety pins on a power rack just a few inches below the bar’s lowest point. This way, if you can’t finish a rep, the bar will rest safely on the pins.
3. Getting Into Position
3.1. Sit and Lean Back
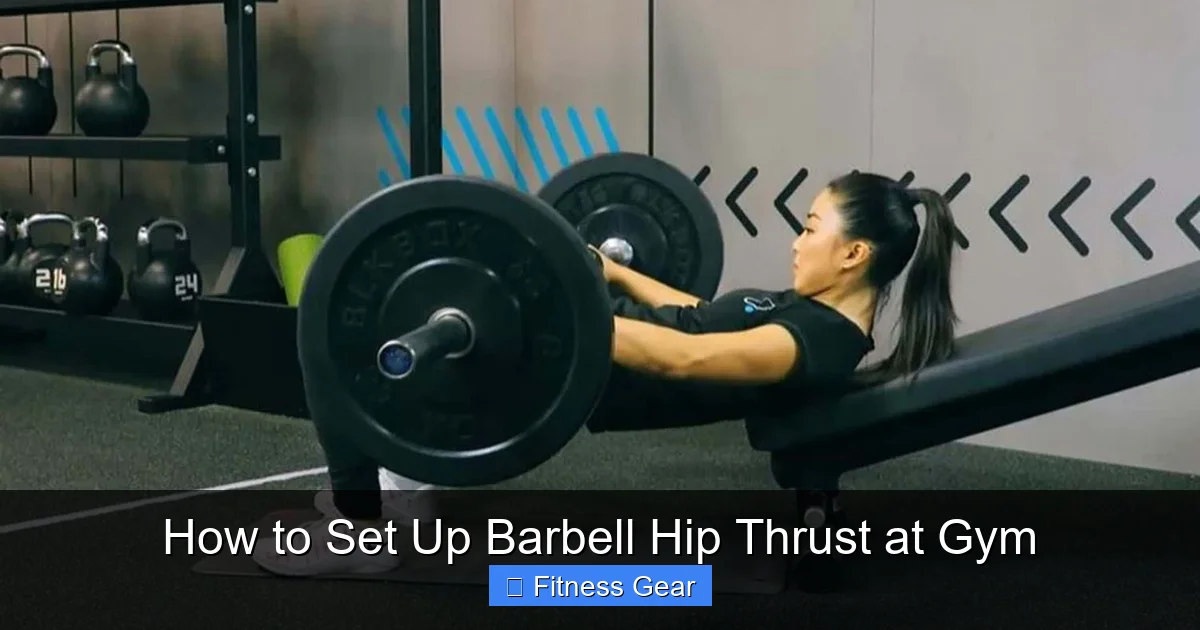
Start seated on the floor with your knees bent and feet flat. Slide your upper back onto the bench so that the bench supports the area from the shoulder blades to the mid‑back. Your shoulder blades should be firmly planted; think of “pinching” them together.
Visual guide about How to Set Up Barbell Hip Thrust at Gym
Image source: puregym.com
3.2. Plant Your Feet
Place your feet hip‑width apart, toes pointing slightly outward (about 15‑30 degrees). The distance from the heels to the bench should be roughly a knuckle length—enough that when you thrust, your shins are almost vertical.
- Foot positioning tip: If you feel the quadriceps doing most of the work, move your feet a little higher (closer to the bench). If you feel the glutes more, bring the feet slightly lower.
3.3. Align Your Spine
Maintain a neutral spine throughout the movement. Avoid overarching or rounding your lower back. A good cue is “keep your chest up and gaze forward.” This alignment protects the lumbar region while allowing the glutes to take the load.
3.4. Grip the Bar
Wrap your hands around the bar just outside the pads, keeping elbows close to your body. Your grip width should be comfortable—usually just a few inches wider than shoulder width. Some lifters prefer a double‑overhand grip; others use a mixed grip (one over, one under) for extra security on heavy sets.
4. Executing the Hip Thrust
4.1. The Lift Phase
Drive through your heels, squeeze your glutes, and lift the hips upward until your torso forms a straight line from shoulders to knees. At the top, your hips should be fully extended, and you should feel a strong contraction in the glutes.
- Breathing cue: Inhale as you set up, then exhale sharply as you thrust up.
- Pause: Hold the top position for 1‑2 seconds to maximize tension.
4.2. The Lowering Phase
Lower the hips in a controlled manner until your glutes lightly touch the floor. Do not bounce; a smooth descent keeps tension on the muscles and reduces injury risk.
4.3. Repetition Range and Tempo
For hypertrophy (muscle growth), aim for 8‑12 reps per set with a 2‑second lift and 2‑second descent. For strength, 4‑6 reps with a slightly slower 3‑second eccentric (lowering) phase works well.
4.4. Common Form Mistakes and Fixes
- Over‑extending the lower back: If you feel arching, reduce the weight and focus on glute activation before the hips fully extend.
- Knees caving inward: Press the knees outward against a resistance band to keep them aligned with the toes.
- Bar sliding off the hips: Ensure the bar is centered and that the padding stays in place. Use a wider grip if necessary.
5. Programming the Hip Thrust Into Your Workouts
5.1. Frequency
Most lifters benefit from 2‑3 hip thrust sessions per week, spaced at least 48 hours apart. This frequency provides enough stimulus for growth while allowing recovery.
5.2. Sample Weekly Split
- Day 1 – Lower Body Power: Squats, deadlifts, hip thrusts (4 × 6 heavy).
- Day 3 – Upper Body Push/Pull: Bench press, rows, accessory work (no hip thrusts).
- Day 5 – Glute Focus: Hip thrusts (5 × 10 moderate), lunges, ab work.
5.3. Progressive Overload Strategies
Use one of these methods to keep the lifts challenging:
- Linear weight increase: Add 5 lb (2.5 kg) each week.
- Volume increase: Keep the weight constant but add an extra set after two weeks.
- Tempo manipulation: Slow the eccentric phase by 1‑2 seconds to increase time under tension.
5.4. Accessory Movements for Glute Balance
Complement hip thrusts with exercises that target the glute medius and minimus, such as:
- Band‑resisted clamshells.
- Single‑leg Romanian deadlifts.
- Side‑lying hip abductions.
Balancing these muscles reduces the risk of hip thrust‑related imbalances and improves overall hip stability.
6. Safety Tips and Common FAQs
6.1. Warm‑Up Essentials
Spend 5‑10 minutes on dynamic moves: leg swings, glute bridges, and body‑weight hip thrusts. Follow with 2 light sets of the barbell hip thrust (empty bar or 20 % of your working weight).
6.2. When to Skip the Hip Thrust
If you have acute lower‑back pain, a recent hip injury, or severe knee issues, substitute with glute bridges or machine hip thrusts until cleared by a professional.
6.3. Managing Discomfort
Discomfort in the pelvic region often stems from insufficient padding or an excessively heavy load. Reduce the weight, add a thicker pad, and re‑check bar placement.
6.4. Tracking Progress
Keep a simple log: date, weight, reps, RPE (Rate of Perceived Exertion), and any notes on form. Review weekly to see trends and adjust the program accordingly.
6.5. Partner vs. Solo Work
Having a partner spot you adds confidence, especially on heavy days. If you work alone, always set safety pins and never load more than you can safely return the bar to the pins.
Conclusion: Your Path to Stronger Glutes Starts With a Solid Setup
Setting up the barbell hip thrust may feel like a small detail, but it’s the foundation for safe, effective training. By choosing the right bench height, positioning the bar correctly, using proper padding, and following the step‑by‑step setup outlined above, you’ll protect your spine, isolate the glutes, and lift heavier with confidence.
Remember, consistency beats intensity. Stick to a progressive program, keep your form tight, and listen to your body. Within weeks you’ll notice stronger lifts, a tighter backside, and better performance in other lower‑body movements. So grab that bar, set it up right, and thrust your way to glute greatness!
Frequently Asked Questions
What is the ideal bench height for a hip thrust?
The best bench height is around 16‑18 inches. This allows your shoulder blades to rest comfortably while keeping your knees at about a 90‑degree angle.
Do I need a special hip‑thrust bar?
No. A standard 20‑kg Olympic bar works perfectly. A hip‑thrust bar can be nice for comfort, but it isn’t required.
How many reps should I do for muscle growth?
For hypertrophy aim for 8‑12 reps per set with a 2‑second lift and 2‑second descent. Keep the weight challenging but manageable.
Can I do hip thrusts without a bench?
You can perform glute bridges on the floor, but a bench provides a greater range of motion and better hip extension, making the barbell hip thrust more effective.
Is it safe to do hip thrusts every day?
Not usually. Muscles need recovery. Most people benefit from 2‑3 sessions per week, spaced at least 48 hours apart.
What should I do if I feel lower‑back pain during the thrust?
Stop the lift, check your form, and reduce the weight. Make sure your spine stays neutral and consider adding more padding or lowering the bar position.