How to Make a Bicycle into a Stationary Bike

Converting your regular bicycle into a stationary bike is a smart, budget-friendly way to enjoy indoor cycling year-round. By using a simple bike trainer or a custom stand, you can reuse your existing bike for effective cardio workouts at home. This method saves money compared to buying a dedicated stationary bike and allows you to train on your own familiar, properly fitted equipment. With the right setup and safety checks, you’ll have a reliable workout station ready in minutes.
Key Takeaways
- Choose Your Method: The two primary conversion methods are using a bike trainer (which engages your rear wheel) or building a custom stand that lifts the bike frame.
- Tool & Equipment Essentials: At minimum, you’ll need a compatible trainer or sturdy stand, a front wheel riser block, and your bicycle. Optional tools include a bike repair stand for easier assembly.
- Safety is Non-Negotiable: Always secure your bike properly, check for stability and wobble before riding, and ensure the resistance unit is correctly engaged to prevent accidents or damage.
- Setup Affects Performance: Proper alignment, correct tire pressure, and using a front wheel block are critical for a smooth, quiet, and realistic road feel that protects your bike and trainer.
- It’s a Cost-Effective Fitness Solution: This conversion is significantly cheaper than purchasing a new spin bike, lets you use your own saddle and geometry, and is easy to store when not in use.
- Maintenance Extends Life: Regularly check tightness on all clamps, wipe down sweat after workouts, and inspect your rear tire for wear, as indoor training can wear it down faster than outdoor riding.
- Customize Your Workout: Most trainers offer adjustable resistance. Pair your setup with a cycling app, heart rate monitor, or simple timer to create structured and progressive indoor training sessions.
📑 Table of Contents
- Why Convert Your Bike? The Smart Path to Indoor Fitness
- Method 1: The Bike Trainer – Your Quickest & Most Popular Path
- Method 2: The DIY Stationary Stand – A Custom, Low-Cost Approach
- Essential Tools, Materials & Pre-Ride Checklist
- Maximizing Your Workout: From Basic Spinning to Structured Training
- Safety, Maintenance & Troubleshooting Common Issues
- Conclusion: Your Journey to Effective Indoor Cycling Starts Now
Why Convert Your Bike? The Smart Path to Indoor Fitness
Let’s be honest. The weather outside is frightful, or your schedule is so packed that a trip to the gym feels impossible. Yet, you still crave that heart-pumping, leg-burning cycling workout. What if we told you the perfect solution is probably leaning against a wall in your garage or basement? Converting your existing bicycle into a stationary bike is one of the most practical, economical, and effective hacks for home fitness. It bridges the gap between your love for your own bike and the need for a reliable indoor trainer.
This isn’t just about saving a few hundred dollars—though it certainly does that. It’s about reclaiming your equipment. Your bike is molded to your body. You know its exact saddle height, reach, and handlebar position. Why subject yourself to the often awkward geometry of a cheap spin bike when you can pedal in comfort on your own trusted steed? Furthermore, this conversion is remarkably low-tech. There’s no complex electronics to fail or massive footprint to consume your living room. When you’re done, you can often fold the trainer and stow your bike away in a closet. In this comprehensive guide, we will walk you through every single method, tool, safety consideration, and pro tip to transform your two-wheeler into a powerhouse indoor cycling machine.
Method 1: The Bike Trainer – Your Quickest & Most Popular Path
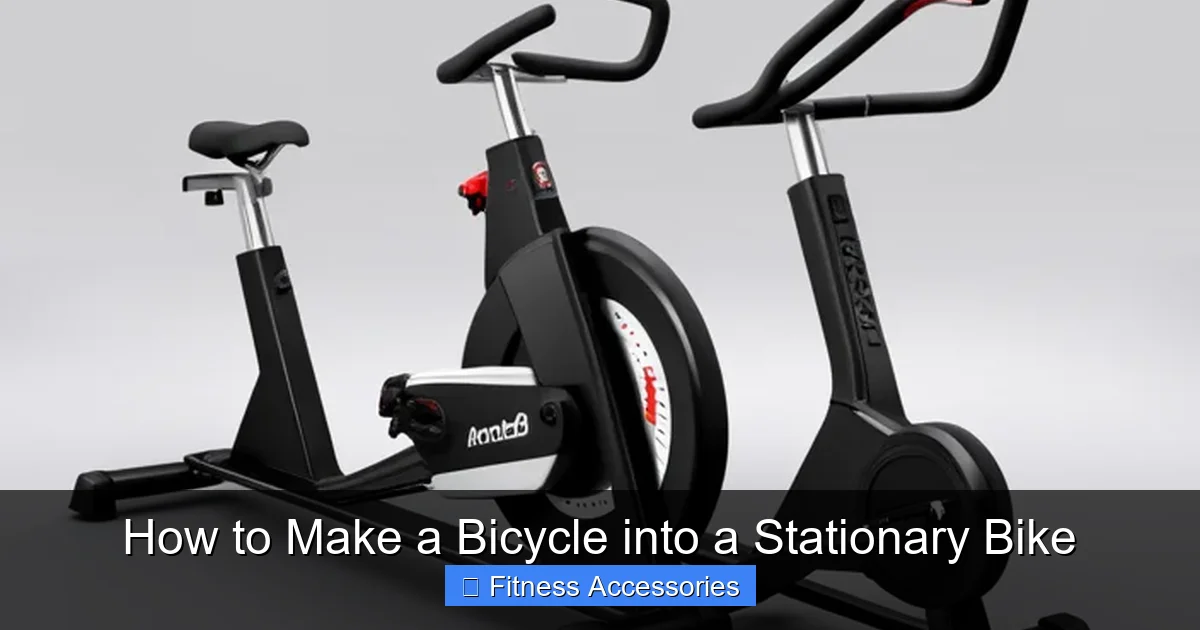
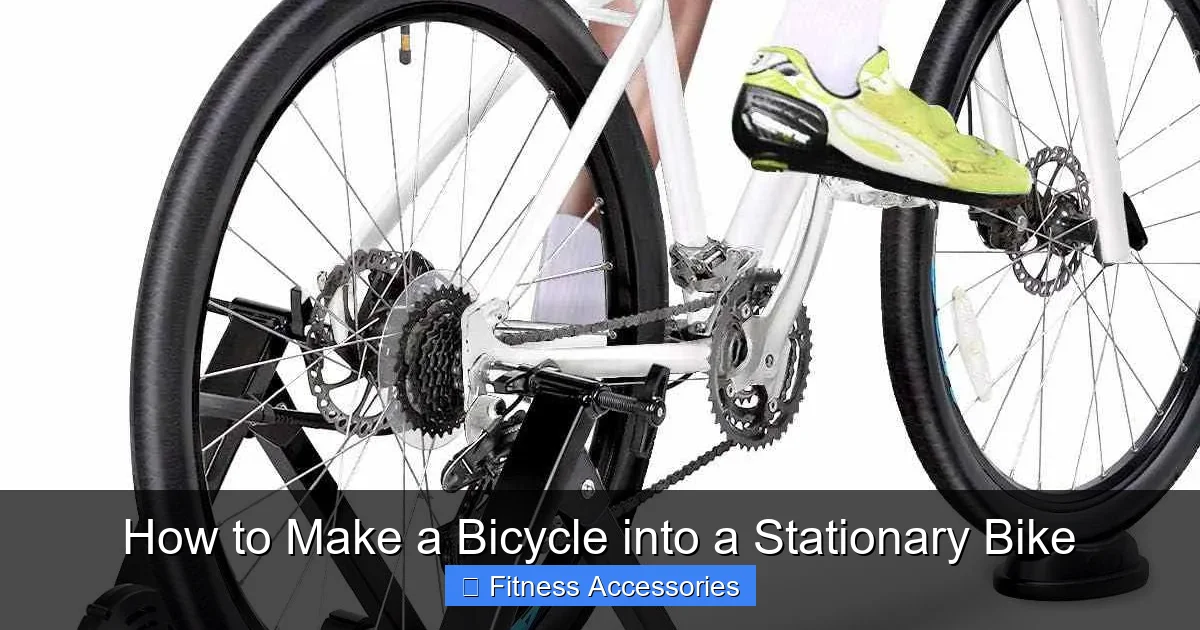
When people think of making a bike stationary, a bike trainer is almost always the first thing that comes to mind, and for good reason. It’s the commercialized, engineered solution to this exact problem. A trainer is a triangular or A-frame stand that your bike’s rear wheel drops into. The wheel then rests against a resistance unit—usually a fan, magnetic, or fluid flywheel—that creates the workout difficulty as you pedal.
Visual guide about How to Make a Bicycle into a Stationary Bike
Image source: flatironbike.com
Types of Bike Trainers: Which One Fits Your Needs?
Not all trainers are created equal. The type you choose dictates the feel, noise level, and cost of your setup.
- Wheel-On (Friction) Trainers: The most common and affordable. Your bike’s rear wheel presses directly against a roller. They’re simple but can be noisy and wear out your rear tire quickly. Great for casual use.
- Magnetic Trainers: Use magnets to create resistance. They are quieter than friction models and offer a more consistent feel, often with a control unit to adjust difficulty. A solid mid-range choice.
- Fluid Trainers: Considered the gold standard for home use. A sealed fluid chamber provides incredibly smooth, quiet, and road-like resistance that progressively gets harder as you pedal faster. They are more expensive but offer the best experience for serious training.
- Direct Drive (Smart) Trainers: The premium option. These replace your rear wheel entirely. You remove the wheel, and the bike’s chain drives a large, built-in resistance unit directly. They are extremely quiet, offer the most realistic road feel, and are “smart,” meaning they connect to apps like Zwift or TrainerRoad to control resistance automatically for virtual rides. This is the most expensive route but the ultimate for interactive training.
Setting Up a Wheel-On Trainer: A Step-by-Step
Assuming you’ve chosen a standard wheel-on trainer, the setup is straightforward but must be done correctly.
- Prepare Your Bike: Ensure your rear tire is properly inflated to the pressure recommended on the tire sidewall. Under-inflated tires will slip on the roller; over-inflated tires can be unsafe and uncomfortable.
- Position the Trainer: Place the trainer on a solid, level floor. A thick exercise bike mat underneath is highly recommended to protect your floor from sweat and reduce vibration noise.
- Mount the Rear Wheel: Squeeze the trainer’s quick-release lever or open the clamp. Align your bike’s rear axle with the trainer’s dropout cups and lower the bike into place until the axle seats fully. Release the lever/clamp and tighten it firmly. Give the wheel a firm tug to ensure it’s locked in.
- Engage the Resistance Unit: Most trainers have a lever or knob that pushes the resistance roller against your tire. Engage this until you feel firm contact. You should not be able to spin the wheel freely by hand.
- Add the Front Wheel Riser Block: This is a critical, often overlooked step. When your rear wheel is elevated, your bike’s front end dips down. Placing a sturdy block (often included with the trainer) under your front wheel levels the bike. This prevents you from sliding forward off the saddle and puts your body in a more natural, efficient riding position. It also ensures the bike is stable and doesn’t tip.
- Final Safety Check: Spin the pedals by hand. The rear wheel should spin against the roller smoothly without excessive wobble or rubbing against the trainer frame. Ensure the bike is rock-solid in the trainer. Tightness is key.
Method 2: The DIY Stationary Stand – A Custom, Low-Cost Approach
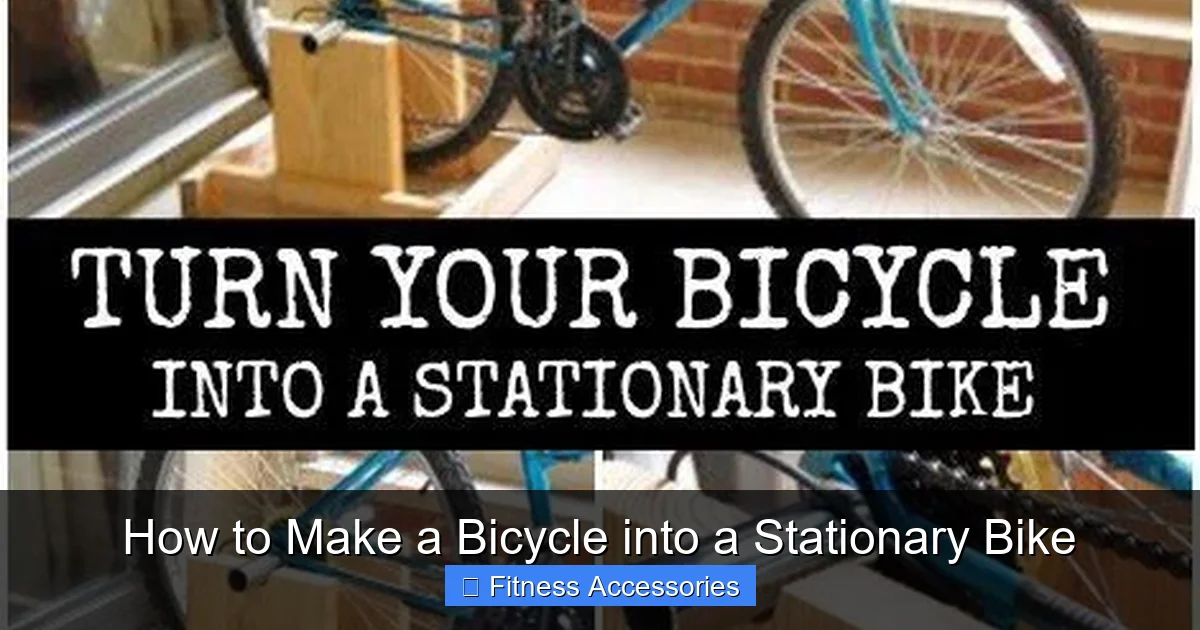
If you’re a hands-on DIY enthusiast with basic tools and welding or metalworking skills, you can build a custom stand that holds your entire bike frame off the ground. This method lifts both wheels and uses your bike’s own drivetrain (chain/cassette) for resistance, often by adding a simple friction roller against the rear tire or even using a bottle cage-mounted fan for wind resistance. While more involved, it’s a permanent, rock-solid solution that can be tailored to any bike size.
Visual guide about How to Make a Bicycle into a Stationary Bike
Image source: i.pinimg.com
Design Principles for a Safe DIY Stand
The core principle is to create a wide, heavy, and stable base that prevents the stand—and you on the bike—from tipping over during vigorous pedaling. Think low center of gravity.
- Base: Use heavy timber (e.g., 4×4 lumber), steel plate, or a pre-made industrial cart base. The wider the base, the more stable.
- Uprights: Two vertical posts (pipe or sturdy wood) that will support the bike frame. They need to be adjustable in height to accommodate different frame sizes.
- Frame Cradles: At the top of each upright, you need a secure cradle or V-block to hold the bike’s down tube and seat tube (or rear stays) without damaging the frame. Padding with rubber or foam is essential.
- Resistance Unit: This is the creative part. You can bolt a heavy-duty roller (like a skateboard wheel or a PVC pipe) to a movable arm that presses against the rear tire. The pressure on the roller adjusts resistance. Simpler designs just let the tire spin freely (no resistance), making it a pure spinning bike.
Building Steps & Critical Safety Considerations
This is not a project for beginners without guidance. Always prioritize structural integrity over aesthetics.
- Plan & Measure: Measure your bike’s wheelbase and frame dimensions. Sketch a design with adjustable uprights (using holes and bolts) to fit different bikes.
- Build the Base: Construct a wide, rectangular base. Weld or bolt the uprights securely to the base. A base weighing 40+ pounds is ideal for stability.
- Fabricate Cradles: Create two cradles that will contact the frame. They should be positioned to match your bike’s geometry. Line them with rubber.
- Install Resistance (Optional): If adding resistance, build a pivoting arm with a roller. A simple spring or threaded rod can apply pressure to the tire. Test for even contact and minimal slippage.
- Test Rigorously: Without a rider, slowly pedal the bike to check for any wobble in the stand. Then, carefully apply body weight. Listen for creaks and watch for flex. If anything feels unstable, reinforce it immediately. Never trust an untested DIY stand.
Note: For most people, purchasing a ready-made trainer is safer, faster, and more reliable. DIY is best suited for those with specific needs (e.g., a very unique bike frame) and the requisite skills.
Essential Tools, Materials & Pre-Ride Checklist
Before you even touch your bike, gathering the right tools and performing checks will save you time and frustration. Whether you bought a trainer or are building a stand, this prep phase is universal.
Visual guide about How to Make a Bicycle into a Stationary Bike
Image source: bikesreviewed.com
The Toolkit: What You’ll Actually Need
For a commercial trainer setup, your needs are minimal:
- Your Bicycle: Obviously. Ensure it’s in good mechanical condition. Check that the rear axle is compatible with your trainer’s dropout cups (most modern trainers fit standard quick-release and thru-axles, but verify).
- The Trainer or Stand: Your primary investment.
- Front Wheel Riser Block: Usually included. If not, a sturdy, flat block of wood or plastic that is 2-4 inches high, depending on your trainer model.
- Bike Repair Stand (Optional but Helpful): Clamping your bike in a repair stand makes initial mounting and adjustments much easier, as you can work at waist height.
- Basic Hand Tools: A set of Allen keys (hex wrenches) is often needed to adjust trainer feet or resistance units. A wrench for your bike’s axle may be needed if your trainer doesn’t use a quick-release system.
The Pre-Ride Safety & Setup Checklist
Do this every single time you set up, especially if you move the setup between rooms or store it.
- Level Ground: Place the trainer on a perfectly flat surface. Use a spirit level on the trainer’s base feet and adjust them until level.
- Secure the Bike: Double-check that the rear axle is fully seated and the quick-release lever or thru-axle is tightened to the manufacturer’s specified torque. A loose axle is a major failure point.
- Engage All Clamps: If your trainer has a front fork stabilizer or a clamp to hold the front wheel straight (common on some models), engage it.
- Check the Riser Block: Ensure it is centered and stable under the front wheel. The front tire should sit flat on it.
- Spin Test: Pedal by hand. The rear wheel should spin freely against the roller with no side-to-side rub. Listen for grinding. The bike should not rock or shift in the trainer.
- Resistance Unit: Start with the resistance on its lowest/easiest setting. Pedal a few strokes. Ensure the roller engages smoothly without sudden jerks.
- Clear the Area: Remove all obstacles, pets, and children from the immediate vicinity. Have a towel and water bottle within reach.
Maximizing Your Workout: From Basic Spinning to Structured Training
Once your bike is securely stationary, the real fun begins. But pedaling in place can become monotonous if you don’t have a plan. The beauty of using your own bike is that you can integrate modern tech to make indoor training engaging and highly effective.
Leveraging Technology: Apps, Sensors, and Smart Trainers
If you have a smart trainer (direct drive or some high-end wheel-on models), the world of virtual cycling is your oyster. These trainers use Bluetooth or ANT+ to connect to:
- Virtual Worlds (Zwift, RGT Cycling): Ride through digital landscapes, race other riders, and join group events. The app automatically controls your trainer’s resistance to simulate hills and drafting.
- Structured Training Platforms (TrainerRoad, The Sufferfest): Follow scientifically designed workouts that target specific fitness metrics like Functional Threshold Power (FTP). The app dictates your effort level by changing resistance.
- Basic Apps (Kinomap, Rouvy):strong> Follow real-world video routes where the resistance changes to match the terrain of the filmed ride.
If you have a standard trainer, you can still use these apps in “manual” mode, where you adjust the resistance knob based on on-screen instructions. To track your power, speed, and cadence accurately, invest in a cadence sensor (for your crank arm) and a speed/cadence sensor (for your rear wheel). These affordable devices send data to your phone or bike computer, giving you real feedback.
Designing Effective Indoor Workouts Without Tech
Don’t want to use an app? No problem. Structure your time with these timeless indoor cycling formats:
- The Interval: Warm up for 10 minutes. Then perform 5-10 rounds of 2 minutes at a hard, sustainable effort (you can speak only in short phrases) followed by 2 minutes of easy recovery. Cool down for 10 minutes.
- The Tempo Ride: After warming up, sustain a “comfortably hard” effort—a pace where you can talk in broken sentences—for 20-30 minutes. This builds muscular endurance.
- The Hill Climb Simulation: On a fluid or magnetic trainer, gradually increase the resistance knob every 2-3 minutes while maintaining a steady cadence (rpm). Hold the hardest resistance for 5 minutes, then gradually decrease. This builds raw strength.
Always remember: ventilation is key. Use a fan. Indoor cycling generates a lot of heat, and a lack of wind resistance means you don’t get the natural cooling you do outdoors. Overheating will end your workout prematurely and reduce its quality.
Safety, Maintenance & Troubleshooting Common Issues
Your safety and the longevity of your equipment depend on proactive care. Ignoring small issues can lead to costly repairs or, worse, an injury.
Non-Negotiable Safety Rules
- Never Stand on the Pedals Initially: When first getting on a trainer, clip in or place your feet on the pedals while seated. Get a feel for the stability. Standing up sprints can generate immense side-to-side force that can unseat your bike from a marginally tight trainer.
- Use a Protective Mat: This protects your floor from sweat and metal cleats, and damps vibration that could cause the trainer to “walk” across a slick floor.
- Stay Hydrated: You’ll sweat more indoors than you think. Have a bottle within easy reach.
- Secure Loose Clothing & Cables: Tie up long pant legs and ensure your bike’s brake and shifter cables won’t catch on the trainer frame.
- Listen to Your Body: Indoor cycling can be deceptively intense due to the constant effort. Start with shorter sessions (20-30 minutes) and build up duration and intensity gradually to avoid overuse injuries.
Maintaining Your Trainer and Bike
Indoor training is actually harder on some components than outdoor riding.
- Rear Tire Wear: This is the #1 consumable. The constant friction and heat on a single spot of your tire will wear it down quickly. Consider using a dedicated trainer tire—they are made of harder rubber to resist heat and wear. Inspect your tire before every ride for cuts, wear, or deformation.
- Trainer Maintenance: For fluid trainers, check for fluid leaks annually. For all trainers, periodically check and tighten all bolts, especially those connecting the resistance unit to the frame. Wipe down the roller and contact point to remove tire debris and dust.
- Bike Check: Before and after each ride, quickly check that your quick-release or thru-axle is tight. Listen for any new creaks from your bike’s cockpit or bottom bracket, which can indicate a loose component from the increased vibration.
Troubleshooting: Slipping, Noise, and Wobble
- Slipping Tire: The roller isn’t gripping the tire. Fix: Inflate your tire to the high end of its recommended pressure. Clean the roller and tire with a cloth. Ensure the roller is properly engaged against the tire (tighten the engagement knob/lever).
- Excessive Noise/Vibration: A common issue. Fix: Ensure the trainer is on a solid, level surface and the feet are all touching the ground. Tighten all bolts. A worn or under-inflated tire is a prime culprit. A mat can also dampen resonance noise.
- Wobble or Side-to-Side Movement: This is dangerous. Fix: Your bike is not securely clamped in the trainer. Re-seat the rear axle, ensuring it’s fully in the dropout cups. Tighten the clamping mechanism with significantly more force. Check that the trainer’s own frame is not damaged or loose.
- Feeling of “Bumping” or Stutter: Often occurs on fluid trainers at low speeds. Fix: This can be normal for some fluid units at very low cadences. Try maintaining a higher cadence (80+ RPM). If it’s severe, the fluid may need replacing or the trainer may be worn.
Conclusion: Your Journey to Effective Indoor Cycling Starts Now
Making a bicycle into a stationary bike is more than a weekend project; it’s an investment in consistent, enjoyable fitness. You’ve now seen that the path is clear: for the vast majority of riders, purchasing a quality bike trainer that matches your budget and training goals is the simplest, safest, and most rewarding route. The few minutes of setup are a small price to pay for endless hours of dry, warm, and effective cardio. You’ll keep your beloved bike in active service, maintain your perfect bike fit, and have a piece of equipment that’s as portable as your fitness needs.
Remember the golden rules: level ground, secure clamping, front wheel block, and a tight tire. Start with the basics, listen to your body, and don’t be afraid to experiment with structured workouts or virtual worlds once you’re comfortable. That old bike gathering dust is now your ticket to a stronger, fitter you, regardless of the season or time of day. So, get that trainer, follow the steps, and start pedaling. The road to fitness is now right where you want it to be—at home.
Frequently Asked Questions
Is any bicycle compatible with a standard bike trainer?
Most modern bicycles with standard quick-release or thru-axle rear wheels are compatible with trainers. However, you must check your bike’s axle type and the trainer’s specifications. Some older bikes or unique models (like certain BMX or recumbent bikes) may require adapters or may not fit at all. Always verify compatibility before purchasing.
Will using a trainer damage my bicycle or its tires?
With proper setup and maintenance, your bike will be fine. The main wear item is the rear tire, which can wear out much faster due to the constant friction and heat from the trainer roller. Using a dedicated, harder-compound trainer tire dramatically extends its life. The bike frame and components are not damaged by normal trainer use, as the forces are similar to outdoor riding.
How is a bike trainer different from a spin bike?
A bike trainer is an accessory that converts your existing bike into a stationary bike. A spin bike is a standalone, dedicated piece of equipment with its own frame, saddle, and handlebars. Trainers are cheaper, more portable, and let you use your own bike. Spin bikes often have heavier flywheels and are designed specifically for the upright, aggressive riding position of indoor cycling classes.
What is the most important safety tip when using a bike trainer?
The absolute most critical step is ensuring your bike is securely and correctly clamped in the trainer’s rear dropout cups. A loose axle is the single biggest cause of accidents, where the rear wheel can slip out during hard pedaling. Always perform a firm “tug test” on the wheel after mounting to confirm it’s locked in place before you even sit on the bike.
Can I use my bike trainer without the front wheel riser block?
Technically yes, but you absolutely should not. Without the riser block, your bike’s front end will dip down significantly. This forces you into an awkward, forward-leaning position that strains your neck, back, and shoulders, and can cause you to slide off the saddle. The block levels the bike, providing a safe, comfortable, and efficient riding position.
Are expensive “smart trainers” worth the investment for a beginner?
For a beginner just looking for a simple, reliable way to spin at home, a smart trainer is likely overkill and not cost-effective. A good quality basic magnetic or fluid wheel-on trainer is perfect to start. Consider a smart trainer only if you are deeply committed to structured training plans, virtual riding apps like Zwift, and want the most realistic, interactive, and quiet experience money can buy.