How to Adjust Rear Air Suspension on Mountain Bike
Unlock your bike’s full potential by learning to adjust its rear air suspension. This process, centered on setting the correct sag and fine-tuning rebound and compression, personalizes your bike’s feel for your weight and riding style. With a few simple tools and a systematic approach, you can transform your bike’s handling, traction, and comfort on every descent and climb.
Key Takeaways
- Sag is the Foundation: Setting the correct static sag (typically 25-30% of total shock travel) is the single most important adjustment for a properly functioning rear air suspension system.
- Rebound Controls Recovery: Rebound damping dictates how fast the shock extends after a compression. Too fast = uncontrolled bouncing; too slow = packing down and loss of traction.
- Compression Tunes Feel: Compression damping (often low-speed and high-speed) controls how the shock resists initial impact and big hits, affecting pedaling efficiency and bottom-out resistance.
- Air Pressure is Your Starting Point: You adjust sag by adding or releasing air from the shock with a dedicated shock pump, not a tire pump. Always consult your shock’s pressure chart first.
- One Change at a Time: Make small, incremental adjustments (5-10 PSI or one click) and test on a familiar trail to feel the difference. Keeping a logbook is highly recommended.
- Weight Distribution Matters: Your rear sag setting works in tandem with your front fork’s sag. Aim for a balanced feel, usually with slightly more sag in the rear for most modern geometries.
- Maintenance is Key: Regularly check for air leaks, service the air canister, and replace seals/oil as per the manufacturer’s schedule to ensure consistent performance and longevity.
📑 Table of Contents
- Introduction: Why Bother Adjusting Your Rear Air Suspension?
- Understanding the Language: What Is Rear Air Suspension Actually Doing?
- Gathering Your Arsenal: The Essential Tools for the Job
- The Step-by-Step Guide: Setting Your Sag Perfectly
- Fine-Tuning for Trail Magic: Rebound and Compression
- Advanced Scenarios and Troubleshooting
- Maintenance: Keeping Your Air Shock Performing
- Conclusion: Your Bike, Your Rules
Introduction: Why Bother Adjusting Your Rear Air Suspension?
You’ve just bought a shiny new mountain bike with a rear air shock. It looks cool, it’s lighter than a coil spring, and the salesman said it’s “adjustable.” But what does that really mean? And more importantly, why should you spend a Saturday afternoon with a shock pump instead of riding? The answer is simple: your bike’s rear air suspension is its most critical interface with the trail, especially on the descents. Factory settings are a generic guess, designed for an “average” rider who doesn’t exist. By learning to adjust your rear air suspension, you take control. You transform your bike from a good machine into an extension of your own body, tuned precisely for your weight, strength, and the brutal, beautiful terrain you ride. This isn’t just for pros or mechanics; it’s a fundamental skill every mountain biker should own. It’s the difference between feeling like you’re fighting your bike and feeling like you’re dancing with it.
This guide will walk you through everything, from the absolute basics of what all the dials and numbers mean to a foolproof, step-by-step process for dialing in your perfect setup. We’ll talk about sag, rebound, compression, and air pressure in plain language. No PhD in physics required. Just a willingness to learn, a shock pump, and a desire to have more fun and go faster on your bike. So, grab your tools, and let’s get started on making your rear air suspension work for you.
Understanding the Language: What Is Rear Air Suspension Actually Doing?
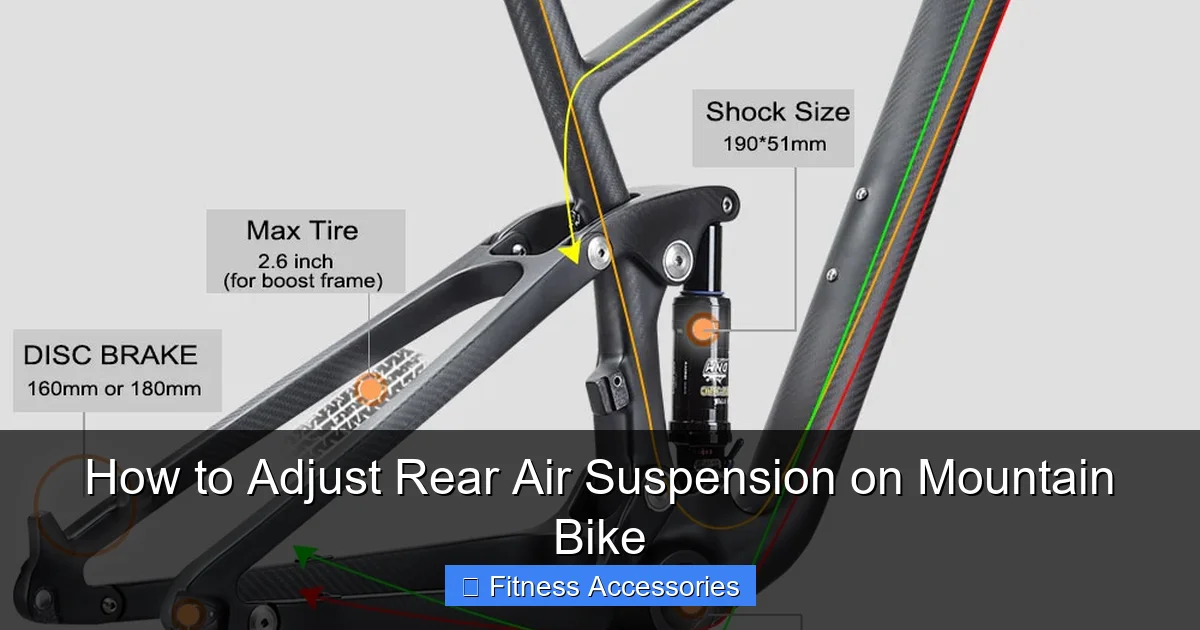
Before we touch a single tool, we need to understand the job of your rear shock. Think of it as a sophisticated spring and a smart shock absorber, all in one. The “air” part is the spring. You pump it up with air pressure, and that pressurized air resists being compressed, pushing the rear wheel back down. That’s what holds you up and absorbs bumps. The “suspension” part is the damping. Inside the shock, there’s oil and a series of valves or a piston. As the shock compresses and extends, oil is forced through these small passages. This creates friction, which controls the speed of the movement. This is damping. Without it, your bike would just bounce up and down like a pogo stick on every rock and root.
Visual guide about How to Adjust Rear Air Suspension on Mountain Bike
Image source: airwolfcarbonbike.com
The Three Pillars: Sag, Rebound, and Compression
All adjustments you make fall into three core categories, and they all interact with each other.
- Sag: This is the amount the shock compresses under your static riding weight (you, in your normal riding position, with gear). It’s measured as a percentage of the shock’s total available travel. It’s the baseline setting. If your sag is wrong, no amount of rebound or compression tweaking will make the bike feel right. It determines your bike’s initial ride height, weight distribution, and how much travel you have available for bumps.
- Rebound Damping: This controls how fast the shock extends back to its full length after a bump. Imagine pushing the shock down and letting go. Rebound damping is what slows that return. It’s crucial for traction and control. If rebound is too fast (low damping), the wheel will bounce wildly off the ground after a hit, losing grip. If it’s too slow (high damping), the shock can’t recover in time for the next bump, “packing down” and making the bike feel harsh and unresponsive.
- Compression Damping: This controls how easily the shock compresses in the first place. Most modern air shocks have two types: Low-Speed Compression (LSC) and High-Speed Compression (HSC). LSC affects small bumps, pedaling inputs, and body movements. HSC affects big, sudden impacts like landing a jump or hitting a rock garden. Adjusting compression changes how “plush” or “supportive” the bike feels. More compression damping makes the bike feel more efficient and resistant to bottoming out but can also make it feel harsh on small chatter.
Gathering Your Arsenal: The Essential Tools for the Job
You don’t need a full workshop. In fact, for 90% of rear air suspension adjustments, you only need two things. Having the right tools makes the job precise and prevents damage.
Visual guide about How to Adjust Rear Air Suspension on Mountain Bike
Image source: airwolfcarbonbike.com
- A High-Quality Shock Pump: This is non-negotiable. Do not use a tire pump. A shock pump is designed to push air into a high-pressure, low-volume chamber. It has a built-in pressure gauge and a bleed valve to let out air in precise increments. Cheap pumps can be inaccurate; invest in a reliable brand like RockShox, Fox, Topeak, or Lezyne. Some pumps even have a secondary chamber for fine adjustments.
- Your Bike’s Suspension Manual: This could be a printed booklet or a PDF from the manufacturer’s website (Fox, RockShox, Cane Creek, etc.). It contains the critical pressure range for your specific shock model and your body weight. It also explains where the adjustment knobs are and what they do. Always consult this first.
Optional but helpful tools include a small zip-tie or a sag indicator (a piece of string or rubber band), a ruler or caliper for measuring sag, and a bike stand to lift the rear wheel off the ground for easier measurements. A friend to hold the bike steady is also a huge help.
The Step-by-Step Guide: Setting Your Sag Perfectly
Sag is your starting point. Get this wrong, and everything else will feel off. We’re going to set “Static Sag,” which is the compression from the fully extended (no weight) position to your normal riding position.
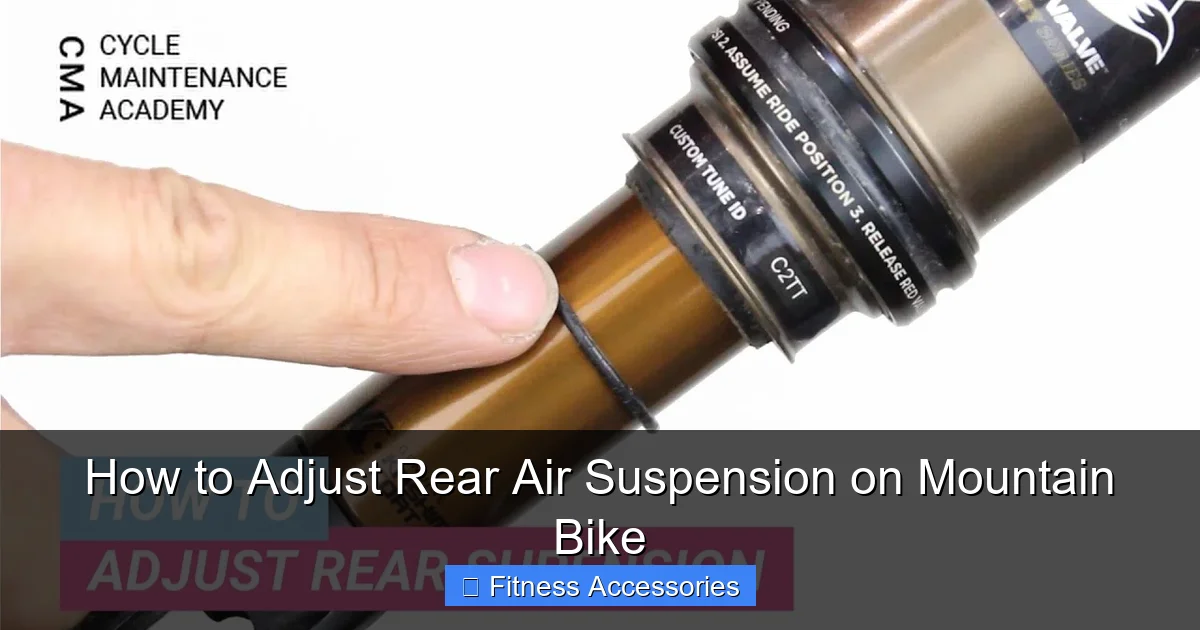
Visual guide about How to Adjust Rear Air Suspension on Mountain Bike
Image source: cyclemaintenanceacademy.com
Step 1: Prepare the Bike and Shock
First, make sure your shock is in the fully open or “climb” setting for compression and rebound if it has a three-position switch. This removes those variables while we set sag. Put on all your normal riding gear—helmet, shoes, pack, etc. You want your total riding weight on the bike. Find a flat, stable wall or have a friend hold the bike upright. If your bike has a lockout, engage it so the rear suspension doesn’t move while you get on.
Step 2: Zero Out the Shock
This is the most important technical step. You need to measure the shock’s fully extended length, called “eye-to-eye” (distance between the two mounting bolts). With the bike on the ground, but without you on it, carefully measure this distance with a ruler or caliper. Write this number down. This is your “Zero” or “Fully Extended” measurement. If your shock has a sag indicator o-ring or a zip-tie already on the stanchion, now is the time to slide it up to the top seal so it’s flush with the wiper seal.
Step 3: Get Into Riding Position
Now, carefully mount the bike. Get into your normal, aggressive riding stance: pedals level, hands on the bars, elbows and knees bent, looking forward. Don’t just sit on the saddle; you need to simulate the weight distribution of actual riding. Have your friend hold the bike or lean it against the wall. Let the suspension settle for a few seconds. If you have a sag indicator, it will have moved down the stanchion.
Step 4: Measure and Calculate
Carefully, without bouncing, measure the new eye-to-eye distance of the shock. Subtract this number from your “Zero” measurement. That difference is your total sag in millimeters. Now, for the magic number: divide your sag (in mm) by the shock’s total stated travel (e.g., 50mm, 60mm, 65mm, etc.). Multiply by 100 to get a percentage.
Formula: (Sag in mm / Total Shock Travel in mm) x 100 = Sag Percentage
For most trail and all-mountain bikes, the target is 25-30% sag. Downhill bikes might run 30-35%. XC bikes might run 20-25%. Your manual will give the recommended range. If your sag is 15%, you need more (lower pressure). If it’s 40%, you need less (higher pressure).
Step 5: Adjust Air Pressure
Deflate the shock completely using the bleed valve on your shock pump. Then, reconnect the pump and add air in increments of 10-20 PSI, based on the manufacturer’s chart for your weight. After each addition, repeat Steps 2-4. Be patient. It takes 3-5 pumps sometimes to see a real change. Once you’re in the ballpark, fine-tune with 5 PSI adjustments. When you hit your target percentage (e.g., 28%), you’ve set your sag! Write this pressure and sag number down in your logbook. This is your baseline for that bike and that set of conditions.
Fine-Tuning for Trail Magic: Rebound and Compression
Great, your sag is set. The bike now has the correct baseline ride height. But it might still feel too bouncy, too harsh, or like it’s “packing down.” Time to tune the damping.
Taming the Bounce: Rebound Damping Adjustment
Find the rebound knob. It’s usually red or blue and has a “+” (slower/more damping) and “-” (faster/less damping) symbol, or a range from 1 to 10 or 1 to 20. Start with it in the middle or at the manufacturer’s recommended setting for your weight (often found in the manual). Now, you need to test it. Find a small, repetitive series of bumps—a set of whoops, a rocky section, or even just repeatedly pushing down on the rear of the bike and letting it rebound.
- Too Fast (Too Little Damping): The shock will extend quickly and overshoot, then bounce again. You’ll feel a “pumping” or “boing” sensation. The rear wheel can lose contact with the ground. Solution: Turn the rebound knob clockwise (towards “+” or a higher number) to slow it down.
- Too Slow (Too Much Damping): The shock will extend slowly and may not fully recover before the next bump. It will feel “stuck down” or “packed out.” Small bumps will feel harsh because the shock is already partly compressed. Solution: Turn the rebound knob counter-clockwise (towards “-” or a lower number) to speed it up.
Your goal is a smooth, controlled return. The shock should follow the terrain without excessive kickback. A good rule: for faster, more aggressive riding with large impacts, you generally need slightly more rebound damping (slower return). For slower, more technical climbing or smooth trails, slightly less can feel more lively.
Finding the Sweet Spot: Compression Damping
Compression is where personal preference really comes in. Locate the compression knob(s). If you have a three-position switch (“Open/Pedal/Lock”), “Open” is your baseline for descending. If you have separate low-speed and high-speed adjusters (usually on the shock body), start with both fully open (counter-clockwise).
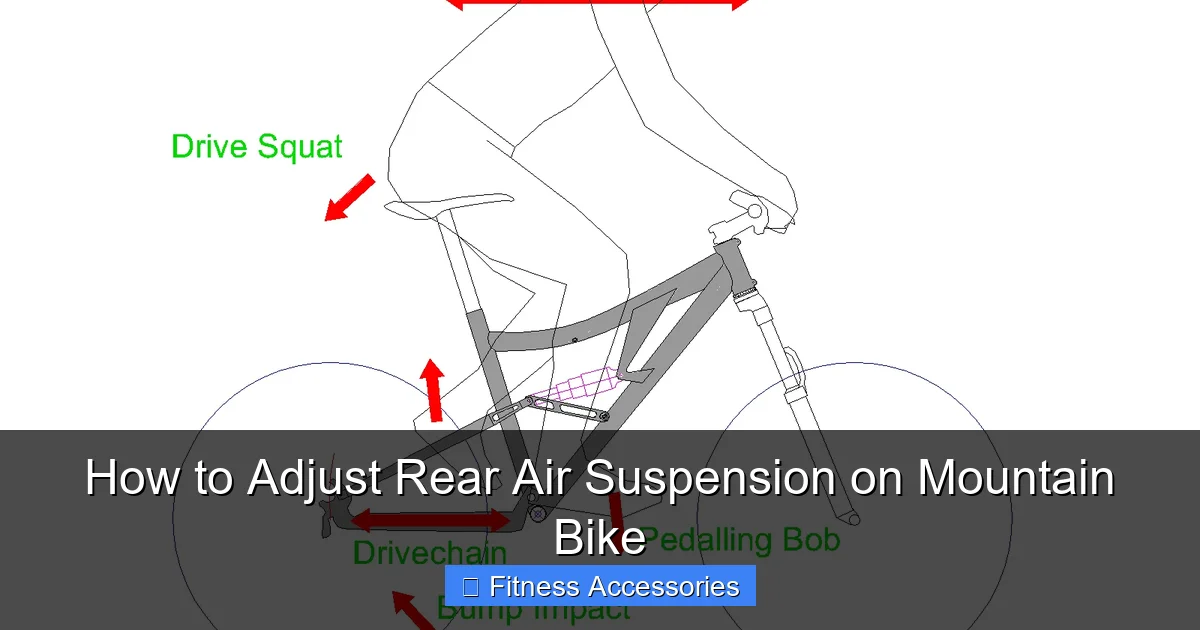
- Feeling a Lot of “Pedal Bob”? When you pedal hard out of the saddle, the rear squats excessively. This means you need more Low-Speed Compression (LSC) damping. Add a click or two of LSC. This supports the bike better under body weight shifts without affecting small-bump sensitivity too much.
- Bottoming Out Harshly on Big Hits? If you’re constantly hitting the end of the shock’s travel with a thud on drops or big jumps, you need more High-Speed Compression (HSC) damping. This makes the shock more resistant to very fast, deep compressions. Add a click or two of HSC. Be careful not to add too much, or the shock will feel harsh on all impacts.
- Feeling Too Harsh on Small Bumps? If the bike feels like it has no small-bump compliance, you likely have too much LSC damping. Back it off a click. More LSC = more pedaling support but less plushness. Less LSC = plusher but more potential for bob.
Pro Tip: Changes to compression can subtly affect your perceived sag. A firmer compression setting might make the shock sit slightly higher at rest. Always re-check your sag after making significant compression changes.
Advanced Scenarios and Troubleshooting
Even with perfect adjustments, you might encounter specific issues. Here’s how to diagnose them.
The “Spiking” or “Harsh” Feeling
This is when every small rock and root feels like a hammer blow. First, ensure your sag is correct. Too little sag (over-inflated) makes the shock too stiff initially. Second, check your compression damping. Too much LSC is the most common culprit. Try reducing LSC by 1-2 clicks. Third, consider your tire pressure. High tire pressure can amplify trail vibration. Finally, if the harshness is only on very high-speed, successive impacts (a rock garden), you might need a touch more HSC to prevent the shock from diving too deep too fast, which can also feel harsh.
The “Squatting” or “Pedal Bob” Problem
This is the rear shock compressing excessively with every pedal stroke, especially when standing. The primary fix is increasing Low-Speed Compression (LSC) damping. This supports the shock against slow, body-weight-induced movements. Also, check your sag. If sag is set too high (too soft), the bike will inherently squat more. A firmer spring rate (more air pressure) can help, but often a small LSC increase is the better fix as it doesn’t sacrifice small-bump sensitivity as much.
Adjusting for Different Riders or Conditions
Your settings are not universal. They change with your weight, riding style, and the trail.
- Heavier Rider: You’ll need higher air pressure for the same sag percentage. You may also need slightly more rebound damping to control the higher forces.
- Lighter Rider: Lower air pressure. Be careful not to go below the manufacturer’s minimum, or you risk damaging the shock. You might need less rebound damping.
- Slow, Technical Climbing: Consider a firmer compression setting (more LSC) to maximize pedaling efficiency. You might even use the “Pedal” or “Climb” switch if your shock has one.
- Fast, Rough Descents: Open up all compression damping. Prioritize a smooth, controlled rebound. You might run slightly more sag (30%) for maximum traction and comfort.
Maintenance: Keeping Your Air Shock Performing
Adjustments are useless if your shock isn’t functioning properly. Air shocks need love.
Regular Checks and Simple Care
After every few rides, do a quick visual check. Look for oil leaking from the seal (a thin film or drops). Check the air pressure—it can slowly decrease over time. Listen for any unusual noises (clunks, squeaks). Wipe down the stanchion with a clean cloth to prevent dirt and grime from working into the seal. If you ride in wet, muddy conditions, a quick post-ride clean is especially important.
Service Intervals
This is the big one. Air shocks require periodic full service. The interval depends heavily on the brand, model, and how hard/where you ride, but a general rule is every 50-100 hours of riding. A full service involves: replacing the air canister seal, replacing the bladder seal (if applicable), changing the damping oil, and replacing all internal O-rings. This is not a beginner job. It requires special tools and a clean workspace. You should send your shock to an authorized service center or a reputable suspension tuner. A neglected shock will develop inconsistent damping, air leaks, and eventually fail. A serviced shock will feel like new and last for years. Keep a log of your service dates.
Conclusion: Your Bike, Your Rules
Adjusting your rear air suspension isn’t a one-time chore; it’s an ongoing conversation with your bike. It’s the process of listening to what the trail is telling you through the handlebars and seat, and then making a small, deliberate change to answer back. Start with the fundamentals: get your sag dead-on using the formula. Then, venture into the world of rebound and compression, making one tiny change at a time and riding the same section of trail to feel the difference. Embrace the experimentation. Your perfect setup might be 28% sag, 8 clicks of rebound, and 3 clicks of LSC. Or it might be something entirely different that makes your specific bike on your local trails feel like magic.
Remember, there are no “wrong” settings, only settings that don’t work for you. The goal is confidence, control, and comfort. A well-tuned rear air suspension allows you to carry more speed through corners, scrub off momentum more effectively on descents, and conserve energy on long climbs. It makes the trail smoother, and it makes you faster. So, take that shock pump out of the closet. Read your manual. Measure twice, adjust once. And get ready to experience your mountain bike in a whole new way. The perfect ride is waiting for you in the clicks of a knob and the psi of an air chamber.
Frequently Asked Questions
What is the ideal sag percentage for my rear shock?
The ideal sag is typically between 25-30% of the shock’s total travel for trail and all-mountain bikes. Downhill bikes often run 30-35%, while cross-country bikes might use 20-25%. Always start with your shock manufacturer’s recommended range based on your body weight as a baseline.
Can I adjust my rear air suspension without a special shock pump?
No. A standard tire pump cannot accurately or safely adjust air suspension. You must use a dedicated high-pressure shock pump with a built-in gauge and bleed valve. Using a tire pump can over-pressurize and damage the shock’s air canister or give wildly inaccurate readings.
How often should I service my rear air shock?
For optimal performance and longevity, a full service (seal replacement, oil change) is recommended every 50-100 hours of riding, depending on usage and conditions. Regular visual checks for leaks and pressure loss should be done before every few rides. Always follow your specific shock manufacturer’s service interval guidelines.
My shock feels harsh even after setting sag. What should I try first?
First, double-check your sag calculation to ensure it’s accurate. If sag is correct, the most common fix is to reduce your Low-Speed Compression (LSC) damping by 1-2 clicks. Too much LSC is the primary cause of a harsh, “spikey” feeling on small bumps while still supporting against pedaling bob.
Is my rear air suspension compatible with a coil spring conversion kit?
Generally, no. Air shocks and coil shocks are entirely different systems with different internals, mounting hardware, and tuning philosophies. Most air shocks are not designed to accept a coil spring. Converting requires a specific coil-sprung shock model designed for your bike’s mounting standards.
When should I consider taking my bike to a professional suspension tuner?
Consider professional help if you’ve followed all adjustment steps (sag, rebound, compression) and still cannot achieve a satisfactory feel, if you suspect internal damage or a seal leak, or if you want to explore advanced tuning like volume spacer changes or custom damping valving. They have the tools and expertise to diagnose complex issues and perform precise services.