There is no single correct pressure for road bike tires; the optimal amount depends primarily on your rider weight and the specific tire width. While a common starting range is 80-110 PSI, modern wider tires often perform better at surprisingly lower pressures (60-80 PSI) for improved grip, comfort, and speed. Experiment within the manufacturer’s recommended range to find your personal sweet spot for different road conditions.
How Much Air to Put in Road Bike Tires
Remember that feeling? You hop on your road bike after a long winter, give the tires a quick squeeze, and they feel rock solid. You ride off, and every little crack in the pavement sends a shock up your spine. Or maybe the opposite: tires are so soft they wobble under you, making steering feel mushy and slow. I’ve been there, and it took me years to realize that the secret to a smoother, faster, and safer ride isn’t just in the bike’s frame or gears—it’s in the air inside your tires. Getting the pressure right is a bit of an art, but once you master it, your bike will feel like it’s been transformed.
So, how much air should you put in your road bike tires? There’s no single magic number. It depends on you, your bike, and where you ride. But don’t worry—by the end of this guide, you’ll know exactly how to find your perfect pressure, why it matters, and how to avoid the most common mistakes. Let’s dive in.
Think of tire pressure as the foundation of your ride. Too little air, and you risk pinch flats, poor handling, and excessive wear. Too much, and you’ll buzz along the road with a harsh, uncomfortable ride that actually slows you down. The goal is to balance rolling resistance, grip, comfort, and safety. And the best part? You don’t need to be a physicist to get it right. Just a little knowledge, the right tools, and some experimentation. Ready to unlock your bike’s true potential? Let’s get started.
Key Takeaways
- Check tire sidewall: Locate the manufacturer’s recommended PSI range.
- Adjust for weight: Heavier riders require higher pressure for support.
- Lower for rough roads: Reduce PSI to enhance comfort and traction on bumps.
- Use a pressure gauge: Always measure accurately; don’t rely on touch.
- Experiment within range: Test different pressures to find your optimal setting.
- Avoid over-inflation: Exceeding max PSI risks blowouts and reduces grip.
- Monitor temperature effects: Cold weather lowers pressure; check before rides.
📑 Table of Contents
- Why Getting Tire Pressure Right Transforms Your Ride
- The Science of Pressure: Understanding PSI, Bar, and Tire Volume
- Key Factors That Affect Your Ideal Pressure
- How to Find and Set Your Perfect Pressure
- Checking and Adjusting Pressure Correctly
- Pressure Myths and Real-World Scenarios
- Conclusion: Your Perfect Pressure Is a Personal Journey
Why Getting Tire Pressure Right Transforms Your Ride
Imagine two rides. In the first, your bike feels like it’s glued to the road—smooth, responsive, and fast. In the second, every bump jars your bones, and you feel like you’re pushing through quicksand. The difference? Often, it’s just a few PSI in your tires. Getting your pressure right isn’t a minor detail; it’s the foundation of your entire riding experience. Here’s why it matters so much.
Speed and Efficiency
Rolling resistance is the energy lost as your tire deforms against the road. If your pressure is too high, the tire can’t absorb small vibrations, causing the bike to bounce and waste energy. Too low, and the tire squirms, increasing friction. The sweet spot minimizes this loss, making your pedaling more efficient. On smooth pavement, a slightly higher pressure can reduce resistance, but on rough roads, a bit lower pressure lets the tire conform, actually decreasing resistance by reducing bounce.
Comfort and Control
Your tires are your first line of suspension. Lower pressure allows them to absorb bumps and cracks, reducing fatigue on long rides. But go too low, and you’ll get a “mushy” feel, with poor steering response and a higher risk of rim strikes on potholes. The right pressure gives you a plush ride without sacrificing handling.
Grip and Cornering Stability
Pressure affects the size and shape of your tire’s contact patch—the area touching the road. Lower pressure increases the patch, improving grip on uneven or wet surfaces. However, on smooth, dry roads, a smaller patch from higher pressure can be just as effective and more efficient. In corners, consistent pressure ensures predictable traction; sudden loss of pressure can lead to a slide.
Safety and Puncture Risk
Under-inflated tires are prone to “pinch flats” (also called snake bites) when hitting a curb or pothole. The tube gets crushed between the rim and the impact. Over-inflated tires are more likely to blow out from heat buildup or sharp impacts, and they reduce traction, especially in wet conditions. Proper pressure keeps you safe and extends tire life.
The Science of Pressure: Understanding PSI, Bar, and Tire Volume
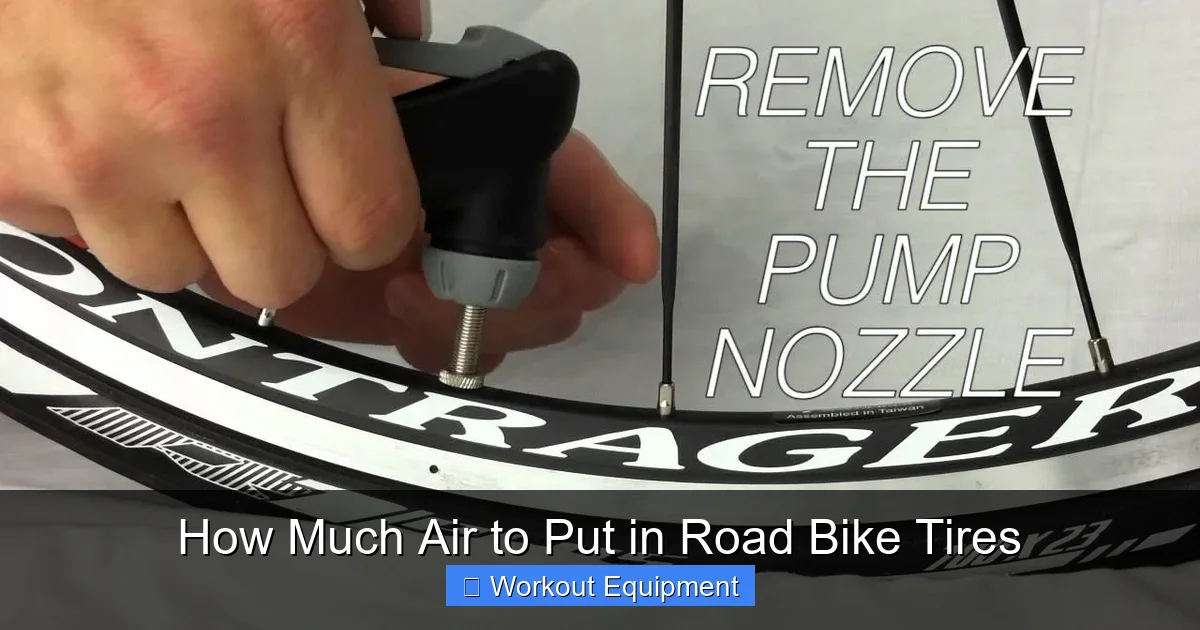
Before we talk numbers, let’s clear up the basics. Tire pressure is measured in pounds per square inch (PSI) or bar (metric). One bar equals about 14.5 PSI. You’ll see both on gauges and pump heads—knowing both helps if you ride internationally or use online calculators.
Visual guide about How Much Air to Put in Road Bike Tires
Image source: i.ytimg.com
What Do PSI and Bar Mean?
PSI is a unit of pressure: pounds of force per square inch of internal surface. Bar is a metric unit roughly equal to atmospheric pressure at sea level. For road bikes, typical pressures range from 80-120 PSI (5.5-8.3 bar) for narrow tires, down to 50-80 PSI (3.4-5.5 bar) for wider ones. But these are just ranges—your ideal number depends on many factors.
How Tire Width Changes the Game
Here’s a key insight: a wider tire has more volume for the same pressure. That means it can hold more air, and its contact patch behaves differently. A 25mm tire at 90 PSI has a larger contact patch than a 23mm tire at the same pressure, but it may roll faster on rough roads because it deforms less. This is why modern road bikes often use 25-28mm tires at lower pressures than old 23mm tires.
The Contact Patch Explained
The contact patch is roughly the area needed to support your weight. For a 150-pound rider, a 23mm tire at 100 PSI might have a patch about 1.5 inches long and 1 inch wide. Lower pressure spreads the load over a larger area, reducing pressure on the road surface and improving grip. But if the patch gets too long (from very low pressure), it increases rolling resistance. The goal is a patch that’s wide enough for grip but short enough for efficiency.
Key Factors That Affect Your Ideal Pressure
Now we get to the heart of the matter. Your perfect pressure isn’t a fixed number—it’s a range that shifts based on several factors. Let’s break them down.
Visual guide about How Much Air to Put in Road Bike Tires
Image source: tiregrades.com
Your Weight and Weight Distribution
Heavier riders need higher pressure to prevent the tire from bottoming out. But it’s not just total weight—it’s how that weight is distributed. On a road bike, roughly 40-45% of your weight is on the front wheel, and 55-60% on the rear. That’s why rear tires usually need 5-10 PSI more than front tires. For example, a 180-pound rider might run 85 PSI front and 95 PSI rear on 25mm tires.
Tire Width and Construction
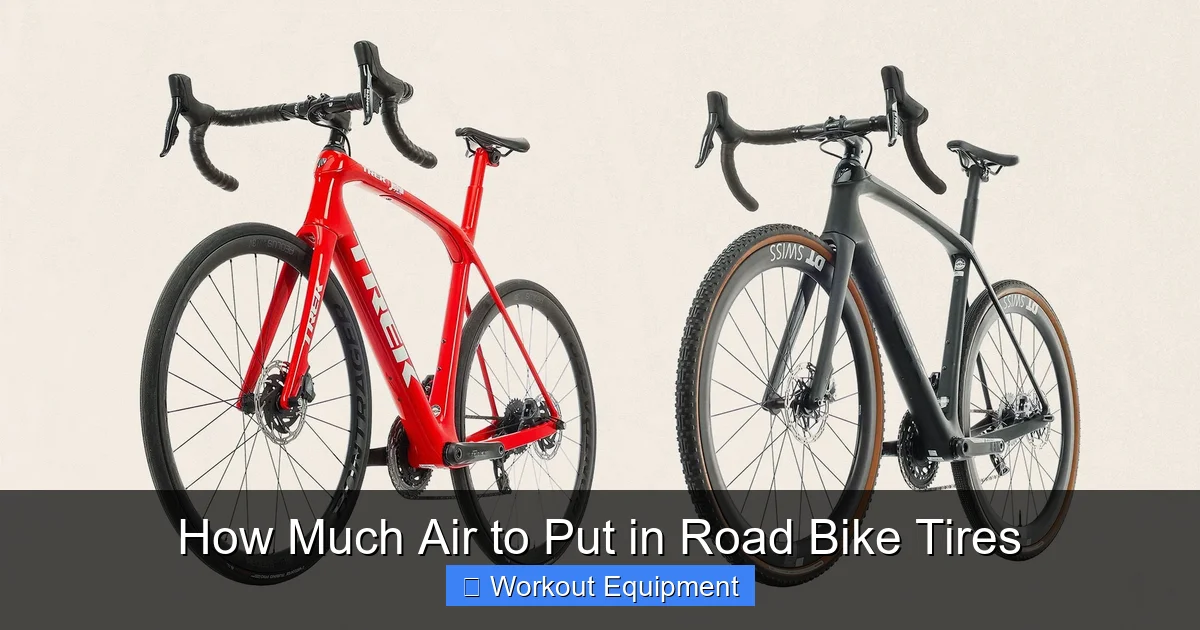
Wider tires can run at lower pressures safely because they have more air volume and are less prone to pinch flats. A 28mm tire might be comfortable at 65 PSI, while a 23mm tire might need 90 PSI for similar support. Also, tire construction matters: supple, high-TPI (threads per inch) tires can run slightly lower without increasing rolling resistance, while tougher, puncture-resistant tires may need a bit more pressure.
Road Surface and Conditions
Smooth asphalt? You can lean toward the higher end of your range for maximum efficiency. Rough roads, cobbles, or chip seal? Drop the pressure by 5-10 PSI to let the tires absorb vibrations and maintain grip. Wet roads? Slightly lower pressure can increase the contact patch, but don’t go so low that hydroplaning becomes a risk.
Temperature and Weather
Air pressure changes with temperature: about 1 PSI for every 10°F (5.5°C) change. Tires lose pressure in cold weather and gain in heat. If you ride from a cool morning into a warm afternoon, your pressure might rise. Check pressures when tires are cold (before riding) and adjust for expected conditions. In very hot weather, start a few PSI lower to account for expansion.
Rim and Tire Compatibility
Not all rims can handle low pressures. Wider rims (internal width 19-21mm) support lower pressures better than narrow ones (15-17mm). Always check your rim manufacturer’s recommended pressure range and tire compatibility. Running too low a pressure on a narrow rim can cause the tire to unseat or damage the rim.
How to Find and Set Your Perfect Pressure
With all these variables, how do you actually determine the right number? Here’s a step-by-step method that works for almost every rider.
Visual guide about How Much Air to Put in Road Bike Tires
Image source: foldingbikerider.com
Start with Manufacturer Guidelines
Look at the sidewall of your tire. It will list a maximum pressure, like “MAX 120 PSI.” That’s a safety limit, not a target. Also, check your rim’s max pressure. Your ideal pressure will be well below these maxes. Start in the middle of the tire’s recommended range (often printed as a range, e.g., “85-120 PSI”) and adjust from there.
The 10% Adjustment Rule
Ride at your starting pressure and pay attention to feel. If the ride feels harsh, buzzing over small bumps, lower pressure by 5 PSI. If you feel sluggish, get pinch flats, or see excessive tire wear on the sides, increase by 5 PSI. Make changes in small increments (5 PSI or about 0.3 bar) and test again. Most riders find their sweet spot within 10-15 PSI of the middle of the range.
Using Calculators and Apps
Several online tools, like the Schwalbe Pressure Calculator or SRAM’s Tire Pressure Guide, ask for your weight, tire width, and rim width to suggest a starting point. These are great for beginners, but treat them as starting points—your personal feel is the final judge.
Quick Reference Table for Common Setups
Here’s a practical table for typical road bike setups. These are starting points only; adjust based on your weight, roads, and feel. Always stay within tire and rim manufacturer limits.
| Tire Width (mm) | Rider Weight (lbs) | Recommended PSI (Front/Rear) | Recommended Bar (Front/Rear) |
|---|---|---|---|
| 23 | 120-150 | 80-90 / 90-100 | 5.5-6.2 / 6.2-6.9 |
| 25 | 120-150 | 70-80 / 80-90 | 4.8-5.5 / 5.5-6.2 |
| 25 | 150-180 | 80-90 / 90-100 | 5.5-6.2 / 6.2-6.9 |
| 28 | 150-180 | 65-75 / 75-85 | 4.5-5.2 / 5.2-5.9 |
| 28 | 180-220 | 75-85 / 85-95 | 5.2-5.9 / 5.9-6.6 |
Note: For tubeless setups, you can typically run 5-10 PSI lower than with tubes due to reduced pinch flat risk.
Checking and Adjusting Pressure Correctly
Even with the right numbers in mind, how you check and adjust matters. A bad gauge or rushed job can throw everything off.
Tools of the Trade: Pumps and Gauges
A good floor pump with a built-in gauge is your best friend. These are usually accurate enough for road bikes. Separate digital gauges can be more precise but require batteries. Cheap, clip-on gauges often read high or low—if in doubt, compare with a known good pump. Remember: trust your gauge, not your thumb. Squeezing a tire tells you almost nothing about actual pressure.
Step-by-Step Adjustment Guide
- Check cold pressure: Measure before riding or at least three hours after riding. Heat from riding increases pressure.
- Release excess air: If overinflated, press the valve core briefly (use a tool for Presta valves) to let out air in small bursts.
- Add air slowly: Pump in short bursts, checking the gauge frequently. It’s easy to overshoot.
- Recheck after settling: After adding air, wait a minute and recheck. Some air may seep into the tire or valve.
- Verify after a short ride: Pressure can drop slightly from initial seating or minor leaks. Recheck after your first 5-10 miles.
When to Check Your Pressure
Check before every ride. Tires lose about 1-2 PSI per week from permeation, and temperature swings can cause daily changes. A quick check takes 30 seconds and prevents problems.
Mistakes Even Experienced Riders Make
- Inflating to the max: The sidewall max is a limit, not a recommendation. Running at max pressure makes for a harsh, slow ride.
- Ignoring temperature: Filling tires in a warm garage and then riding into cold weather can leave you underinflated.
- Using an inaccurate gauge: That old pump gauge might be off by 10 PSI. Verify with a known good gauge.
- Not adjusting for rear tire: The rear tire carries more weight and often needs 5-10 PSI more than the front.
- Overlooking tubeless differences: Tubeless setups can safely run lower pressures; don’t use the same numbers as tube-type tires.
Pressure Myths and Real-World Scenarios
Let’s separate fact from fiction. Many long-held beliefs about tire pressure are outdated or just plain wrong.
Myth 1: Higher Pressure Always Means Faster
This is the most common myth. On perfectly smooth roads, a higher pressure can reduce rolling resistance slightly. But on real-world roads with cracks and roughness, too much pressure causes the bike to bounce, wasting energy. Studies show that for most riders, dropping pressure by 10-15 PSI from the max on typical roads actually increases speed because the tires maintain better contact.
Myth 2: Wider Tires Require Lower Pressure
Wider tires can run at lower pressures because of their larger volume, but they don’t have to. A 28mm tire at 90 PSI is perfectly fine on smooth pavement. The key is to match pressure to load and road conditions, not just width. However, the advantage of wider tires is that they allow you to run lower pressures safely without risking pinch flats, so many riders choose to do so for comfort.
Myth 3: You Can’t Feel the Difference
Some riders claim they can’t tell 5 PSI difference. That’s possible if you’re new to it, but most sensitive riders can detect changes as small as 3-5 PSI, especially in cornering feel and vibration. Give it a try: ride at 90 PSI, then drop to 85 on the same road. You’ll likely notice a smoother ride and maybe even better grip.
Myth 4: Road and Tubeless Tires Need the Same Pressure
Tubeless systems eliminate the tube, so there’s no risk of pinch flats. This means you can safely run 5-10 PSI lower than with a tube-type setup for the same tire, gaining comfort and grip without the flat risk. Many gravel and endurance road riders run tubeless at surprisingly low pressures (e.g., 25mm tires at 50-60 PSI) for huge gains in traction.
Real-World Scenario 1: The Lightweight Rider on Smooth City Streets
You weigh 130 pounds, ride a bike with 25mm tires, and mostly on paved bike paths and smooth city streets. Start with 70 PSI front and 80 PSI rear. If the ride feels plush and you get no flats, you might even drop to 65/75 for extra comfort. On a very smooth group ride, you could bump to 75/85 for a tiny efficiency gain.
Real-World Scenario 2: The Heavier Rider on Rough Country Roads
At 200 pounds, you ride 28mm tires on roads with chip seal and occasional gravel. Start higher: 80 front, 90 rear. If you’re getting rattled, drop to 75/85. If you get pinch flats on potholes, increase by 5 PSI. Consider tubeless to safely run lower, like 70/80, for a much smoother ride.
Real-World Scenario 3: Racing vs. Endurance Riding
For a criterium or time trial on pristine pavement, racers often run near the high end of the range (e.g., 95/105 on 25mm) for minimal rolling resistance. For a 100-mile gran fondo with mixed surfaces, drop 10 PSI (85/95) for comfort, which actually improves endurance speed by reducing fatigue.
Real-World Scenario 4: Changing Conditions Mid-Ride
You start a ride at 60°F with 80 PSI. After two hours, it’s 80°F and your pressure reads 85 PSI. That’s normal—don’t let it out! The increase is from heat buildup and ambient temperature. However, if you descend into a cool valley, pressure drops. Carry a mini pump and check pressures on long rides, especially if temperatures swing more than 20°F.
Conclusion: Your Perfect Pressure Is a Personal Journey
Finding the right air pressure for your road bike tires isn’t about hitting a number on a chart—it’s about listening to your bike and your body. It’s the difference between a ride that leaves you energized and one that leaves you beaten up. Remember, the manufacturer’s max pressure is a limit, not a target. Your perfect pressure lives in the sweet spot where speed, comfort, and grip meet. Start with the guidelines we’ve covered, use a reliable gauge, and don’t be afraid to tweak by a few PSI until it feels just right. Your tires are your only contact with the road; treat them well, and they’ll carry you farther, faster, and with a smile on your face. Now, go inflate those tires and feel the difference!
Frequently Asked Questions
How much air should I put in my road bike tires?
The correct amount of air, measured in PSI (pounds per square inch), is typically found printed on the tire’s sidewall. Always stay within the manufacturer’s recommended minimum and maximum PSI range for safety and performance. A good starting point for most riders is 80-100 PSI, but your exact pressure depends on your weight, road conditions, and tire width.
What’s the difference in PSI for front vs. rear road bike tires?
It’s common to put slightly more air in the rear tire (e.g., 5-10 PSI higher) because it bears more of your body weight. The front tire can often be a few PSI lower for better comfort and steering control. Experimenting within the safe range on the sidewall can help you find your preferred balance of speed and comfort.
Does my rider weight affect how much air I need?
Yes, heavier riders generally need higher pressures within the tire’s recommended range to prevent rim damage and pinch flats. Lighter riders can run slightly lower pressures for a smoother ride and better traction. Use the sidewall PSI range as a guide and adjust based on your total weight (rider + bike).
How do I check if my road bike tires have enough air?
The best way is to use a reliable floor pump with a built-in pressure gauge. You can also do a “squeeze test”—a properly inflated road tire feels very firm, almost like a rock, with no visible sag when you press it. However, a gauge is essential for accuracy, as guessing by feel is unreliable.
Should I inflate my tires to the max PSI on the sidewall?
Not necessarily. The maximum PSI is a safety limit, not a recommendation for everyday use. Inflating to the max can create a harsh, uncomfortable ride and reduce traction on rough surfaces. Most riders find their optimal pressure is slightly below the max, tailored to their weight and the roads they ride on.
How does temperature affect how much air I should put in my tires?
Tire pressure changes with temperature—it increases in warm weather and decreases in cold weather. A 10°F (about 5.5°C) drop can lower pressure by roughly 1-2 PSI. Check and adjust your pressure more frequently during seasonal changes or if you ride from a warm garage into cold conditions.