How Much Air Do You Put in Bike Tires

Getting your bike tire pressure right is non-negotiable for a safe, efficient, and enjoyable ride. The ideal PSI (pounds per square inch) isn’t a one-size-fits-all number; it depends on your bike type, tire width, rider weight, and terrain. This guide cuts through the confusion, providing clear, actionable PSI ranges and the simple science behind them, so you can stop guessing and start riding with confidence.
You stand at your bike, pump in hand, staring at the tiny valve stem. You remember a friend saying something about 80 PSI, but your tire says “MAX 120.” What do you do? You squeeze the tire—it feels… okay? This moment of uncertainty is one of the most common, and most critical, experiences for every cyclist. Figuring out how much air to put in your bike tires isn’t just about avoiding a flat; it’s about unlocking your bike’s true performance, ensuring your safety, and transforming your ride from a jarring ordeal into a smooth, efficient, and joyful experience. Let’s settle this once and for all.
The number on your tire’s sidewall is not the answer. It is merely the ceiling, the absolute maximum pressure the tire casing can safely contain before risking a blowout. The real magic happens somewhere below that number, in a sweet spot tailored specifically to you, your bike, and where you’re riding. This guide will be your definitive map to finding that spot. We’ll demystify PSI, explore the physics of tire contact patches, and provide clear, easy-to-follow charts and rules for every type of bike, from a child’s coaster bike to a pro-level gravel racer.
Why does this matter so much? Imagine wearing shoes that are either two sizes too tight or two sizes too loose. Your efficiency plummets, your comfort vanishes, and you’re constantly at risk of injury. Your bike tires are your only point of contact with the ground. The wrong pressure makes your bike feel sluggish, twitchy, or bone-jarringly harsh. It increases your risk of pinch flats (snake bites), rim damage, and loss of control. The right pressure, however, makes your bike feel like an extension of your body—responsive, grippy, and effortlessly fast. So, take a deep breath, and let’s dive in.
Key Takeaways
- There is no universal “correct” PSI: Your ideal pressure is a personal calculation based on tire width, bike type, rider weight, and terrain conditions.
- The sidewall is your starting point, not your finish line: The maximum PSI printed on your tire is a safety limit, not a recommendation. You should almost always run lower than this.
- Wider tires run at lower pressures: A common misconception. A 2.4″ mountain bike tire may need 25 PSI, while a 23mm road tire needs 90+ PSI. Volume matters more than width alone.
- Your weight is the primary variable: Heavier riders need higher pressures to prevent rim strikes and tire collapse; lighter riders can go significantly lower for more comfort and grip.
- Lower pressure is generally faster and more comfortable off-road: On gravel and dirt, lower PSI increases tire contact patch, improves vibration damping, and enhances traction, often reducing rolling resistance.
- Check pressure before every ride: Tires naturally lose 1-5 PSI per week. A quick squeeze is not enough; use a reliable gauge for accuracy.
- Invest in a good floor pump with a built-in gauge: This is the single most important tool for maintaining proper tire pressure consistently and efficiently.
📑 Table of Contents
The Fundamental Science: Why Pressure Isn’t Just a Number
Before we talk numbers, we need to understand the “why.” Tire pressure affects three core things: rolling resistance, traction, and comfort/safety. These three are in a constant, delicate balance, and your job is to find the optimal point for your conditions.
Rolling Resistance: The Myth of the Rock-Hard Tire
For decades, the cycling lore was simple: higher pressure means less rolling resistance, therefore more speed. This came from the world of smooth asphalt and early, narrow, high-pressure road tires. The logic was that a harder tire deforms less, so less energy is lost to the squirming of the rubber. On a perfectly smooth surface, this holds some truth. But the real world is not a billiard table.
When your tire pressure is too high for the terrain, the tire cannot conform to small imperfections in the road or trail. Instead of the tire absorbing the vibration, your entire bike—and you—get launched into the air with every bump. This is incredibly inefficient. Your body wastes energy suspending and stabilizing itself. Furthermore, a rock-hard tire has a smaller, more concentrated contact patch. This can actually *reduce* grip on loose surfaces like gravel or wet pavement, causing the tire to skate rather than adhere. The modern understanding, proven by rigorous testing (like the famous work by Jan Heine and the Laboratory for Engineering and the Environment), is that on any surface with texture or irregularities, a slightly lower pressure will lower rolling resistance by allowing the tire to “float” over the bumps instead of being bumped by them.
Traction and the Contact Patch
This is where lower pressure truly shines. Your tire’s contact patch is the area of rubber actually touching the ground. Think of it like a footprint. A properly inflated tire has an ideal, slightly oval contact patch. If you over-inflate, that patch becomes smaller and more rounded, concentrating your weight and reducing the amount of rubber gripping the surface. This is bad news in corners, on loose gravel, or in wet conditions.
Lowering the pressure increases the size and shape of the contact patch. More rubber on the ground means more friction and better grip. This is why mountain bikers and gravel riders aggressively run low pressures. That larger patch also conforms to small obstacles, allowing the tire to “wrap” around rocks and roots instead of deflecting off them. The trade-off? Too low, and the tire can squirm under hard cornering or pedaling forces, feeling unstable. It can also lead to rim strikes on sharp impacts or pinch flats if you hit a hard edge. The goal is the lowest pressure that still provides a stable, predictable tire platform without excessive squirm or rim contact.
Comfort, Control, and Safety
This is the most immediate and noticeable effect for most riders. Pressure is your primary suspension system. A tire with 5mm of available vertical travel (from pressure to rim) can absorb a huge amount of vibration that would otherwise be transmitted directly to your hands, arms, and spine. This reduces fatigue dramatically, allowing you to ride longer and harder. It also maintains wheel contact with the ground more consistently, improving control. A tire that is bouncing off every small rock is a tire that is *not* in contact with the ground, and a tire not in contact with the ground provides zero steering or braking traction. The right pressure keeps the tire planted, maximizing control and safety.
How to Find Your Magical PSI: The Core Calculation
So, if the sidewall max is a no-go, where do you start? The process is beautifully simple: Start with the tire width, then adjust for your weight and terrain. We can break it down into a easy-to-follow formula and reference ranges.

Visual guide about How Much Air Do You Put in Bike Tires
Image source: wikihow.com
The Golden Rule: Pounds per Inch of Volume
The most reliable method is to think in terms of “pounds per inch of tire volume.” A wider tire has more volume for the same pressure, meaning it can support more weight at a lower pressure. A narrow tire has less volume, requiring higher pressure to support the same weight without collapsing. This is why a 25mm road tire runs at 90 PSI and a 2.6″ mountain bike tire runs at 20 PSI, yet both can support a 180-pound rider.
A fantastic, universal starting point is: For every inch of tire width (measured at its inflated casing, not the tread), aim for approximately 40-50 PSI for a 150-170 lb rider on mixed pavement. This is a baseline for a typical hybrid/gravel bike. Let’s make it practical.
Practical PSI Charts by Bike Category
These are **starting ranges**. Always begin at the lower end of the range for your weight and adjust based on feel. Remember, your weight includes you, your bike, and any gear (water, tools, etc.).
- Road Bikes (Tire Width: 23c – 32c): These tires are narrow and high-volume for their width. The goal is low rolling resistance and minimal puncturing on smooth pavement.
- 23-25mm tires: 80-100 PSI (for a 150lb rider; add ~2 PSI per 10 lbs over 170)
- 28-32mm tires (modern “endurance” road): 60-80 PSI. These wider tires thrive at lower pressures, offering huge comfort and speed gains on real-world roads.
- Hybrid / City / Commuter Bikes (Tire Width: 35c – 50c): These are all about comfort and versatility on pavement and packed gravel.
- 35-40c tires: 50-70 PSI
- 45-50c tires: 40-60 PSI. You can often run these quite low, even on pavement, for a supremely comfortable ride.
- Gravel / Adventure Bikes (Tire Width: 40c – 50c+): Pressure is highly terrain-dependent. This is where you’ll play with the biggest adjustments.
- Smooth Pavement: 50-65 PSI
- Rough Pavement / Hardpack Gravel: 35-50 PSI
- Loose Gravel / Chunk: 25-40 PSI
- Technical Singletrack (if your bike can handle it): 20-30 PSI (use tubeless setup highly recommended)
- Mountain Bikes (Tire Width: 2.0″ – 2.8″+): Modern wide tires are designed for low pressure. The trend is firmly “wider and lower.”
- Cross-Country (XC) on hardpack: 22-28 PSI (for a 170lb rider)
- Trail / All-Mountain: 18-25 PSI
- Enduro / Aggressive Trail: 15-22 PSI. Often run with inserts for rim protection at the very low end.
- Fat Bikes (Tire Width: 3.8″ – 5.0″+): These are in a league of their own, designed to float on snow and sand.
- Snow: 5-10 PSI (can go as low as 3 PSI on very deep powder)
- Sand: 8-12 PSI
- Pavement / Hardpack: 15-20 PSI (will feel very sluggish)
- Kids’ Bikes (Tire Width: 1.5″ – 2.5″): Often overlooked! Proper pressure is crucial for control and ease of riding.
- Balance Bikes (12-14″): Follow sidewall max, usually 20-30 PSI.
- Kids’ Hybrid/MTL (16-24″): 30-50 PSI depending on width. Lower pressure = more stability and comfort for a lighter rider.
The Critical Variables: Personalizing Your Pressure
Charts are a starting point, not the final answer. Your ideal pressure is a personal equation. Here are the key variables to tweak.
Visual guide about How Much Air Do You Put in Bike Tires
Image source: weeklytools.com
1. Your Weight (The Most Important Factor)
This is simple physics. More mass on the same tire requires more pressure to prevent the tire from bottoming out on bumps (hitting the rim) or excessive squirm. The charts above assume a ~160-170 lb rider. Add 1-2 PSI for every 10 lbs you are over 170 lbs. Subtract 1-2 PSI for every 10 lbs you are under 150 lbs. A 220 lb rider on a gravel bike might run 60 PSI on pavement, while a 110 lb rider on the same bike might be perfectly happy at 35 PSI.
2. Terrain: The Biggest Daily Adjustment
This is your primary control knob. Rougher terrain = lower pressure. If you’re transitioning from smooth pavement to a chip-seal road, drop 5 PSI. From chip-seal to a hardpack gravel path, drop another 5. From hardpack to loose, rocky singletrack, you might drop 10-15 PSI from your pavement setting, if your tires and rims allow. The goal is to let the tire conform to the surface, not fight it.
3. Temperature: The Invisible Pressure Swing
Air expands when hot and contracts when cold. A 10°F (5.5°C) change in temperature can alter your tire pressure by about 1 PSI. This means:
- Morning vs. Afternoon: Tires pumped up in a cool garage will read higher after a sunny ride. Check pressure when tires are “cold” (ridden less than a mile or sat for a few hours) for the most accurate, consistent baseline.
- Seasonal Changes: Your 70 PSI summer road tire might read 60 PSI on a cold winter morning. Adjust accordingly.
- Brake Heat: On long, steep descents, especially on rim brakes, the rim and tire can heat up significantly, increasing pressure. Don’t deflate a hot tire; let it cool first.
4. Tubes vs. Tubeless: The Game-Changer
This technology revolutionized how we think about pressure.
- Tubeless Setup: Allows you to run significantly lower pressures (often 5-10 PSI lower) without the risk of pinch flats (snake bites). The sealant inside also self-seals most small punctures. The lower pressure is the main performance benefit for off-road riding, offering more grip and comfort. It’s now standard for mountain and gravel bikes, and growing in popularity for road bikes.
- Tubed Tires: You are limited by the risk of pinch flats. On rough terrain, you cannot go as low as you could with tubeless. Your minimum pressure is the point where the rim will pinch the tube against the tire casing on a sharp impact. This is usually higher than the pressure where the tire itself would become unstable.
The “How-To”: Checking and Adjusting Like a Pro
Knowing the numbers is useless if you can’t apply them accurately. Let’s talk tools and technique.

Visual guide about How Much Air Do You Put in Bike Tires
Image source: a1tireandbattery.com
The Tool of the Trade: Your Gauge
Forget the “squeeze test.” It is wildly inaccurate, especially for high-pressure road tires. You cannot reliably distinguish between 85 PSI and 95 PSI by feel. You need a gauge.
- Floor Pump with Gauge: The gold standard. A good quality floor pump (e.g., from Lezyne, Topeak, Silca) has an accurate, easy-to-read gauge built-in. This is what you should use for 95% of your adjustments. It’s fast, efficient, and gives you a consistent reference point.
- Pocket/Hand Pump with Gauge: Essential for on-the-go adjustments and emergencies. Buy a good one; cheap ones are notoriously inaccurate. Use it to top off pressure, not for major adjustments from flat.
- Dedicated Pressure Gauge: A standalone gauge (digital or analog) is the most accurate tool for checking pressure. Great for double-checking your pump’s accuracy or for precision work. Digital gauges are easy to read; high-quality analog (like from Park Tool) are durable and don’t need batteries.
The Step-by-Step Adjustment Process
- Start Cold: Check and adjust pressure when the tire is cold, before you ride.
- Know Your Target: Based on your bike, weight, and expected terrain, decide on a starting pressure from the charts above.
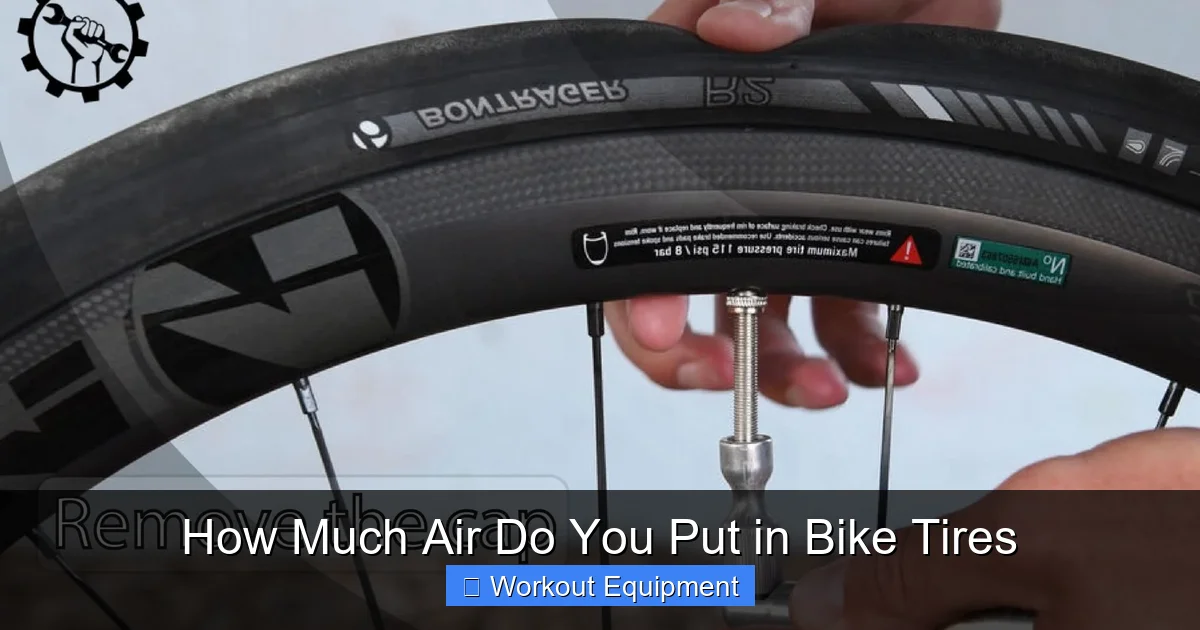
- Attach Pump Securely: For Presta valves (common on road/gravel), unscrew the tiny tip at the top, press the pump head on firmly until you hear no air escaping. For Schrader valves (common on hybrids/kids’ bikes), press the pump head on until it seats.
- Pump and Check: Pump in steady strokes. Glance at the gauge frequently. Don’t overshoot by 10 PSI and then try to let air out; it’s easier to add air than to remove it precisely.
- Detach and Listen: Once you hit your target, detach the pump head. You might hear a quick “pssst” of air—this is normal. Re-check the pressure with your gauge. The act of detaching can sometimes cause a tiny, 0.5-1 PSI loss.
- The Final “Squeeze” (For Context Only): Now, give the tire a firm squeeze. It should feel firm, with a slight give. For a road tire at 90 PSI, it will feel very hard. For a 2.4″ gravel tire at 35 PSI, it will feel noticeably softer, but not “mushy.” This tactile memory helps you do a quick sanity check in the future without a gauge, but always trust the gauge for the final number.
Special Scenarios and Common Pitfalls
Let’s address the specific questions that keep riders up at night.
“What’s the absolute minimum pressure I can run?”
This is the “rim strike” threshold. The minimum pressure is the point where, under hard cornering or on a sharp impact, your tire compresses enough that the rim touches the ground. You’ll feel this as a harsh “clunk” and risk damaging your rim and tire. To find it, on a safe, empty stretch of trail, take a fast, sharp turn and listen/feel. If you hear/feel a clunk, add 2-3 PSI and try again. Your minimum is the pressure just before that happens. For tubeless setups, you can often go lower because there’s no tube to pinch, but the rim strike risk remains.
“I’m going on a long tour with a heavy load. How do I adjust?”
This is a crucial calculation. Add the weight of your panniers, frame bag, and all your gear to your body weight. Recalculate your target pressure using the “pounds per inch” rule. A 170 lb rider with 30 lbs of gear is effectively a 200 lb rider. You may need to increase pressure by 5-10 PSI across all tires to prevent rim strikes and excessive tire wear under the constant load. Check pressure daily on a tour.
“What about altitude?”
Air pressure decreases as you gain elevation. If you pump your tires to 60 PSI at sea level and then ride to a 5,000-foot pass, your pressure will drop by about 3-4 PSI. This means your tires will be slightly softer at the top. For most riding, this minor change is negligible. For very high-altitude trips (e.g., cycling in the Andes or Himalayas), be aware you may need to top off pressures as you climb. The effect is reversible on the descent.
“Can I mix and match pressures on front and rear?”
Absolutely, and you should. The rear tire typically carries more weight (60-65% of rider/bike mass), so it often needs 2-5 PSI more than the front for balance. A common setup for a 160 lb rider on a gravel bike might be: Front: 38 PSI, Rear: 42 PSI. This helps prevent the rear from squirming under power and provides a more balanced feel. For mountain bikes, the difference can be even more pronounced. Experiment!
Conclusion: Your Pressure, Your Ride
Understanding how much air to put in your bike tires moves you from a passive guesser to an active tuner of your machine. It is the single most effective, zero-cost upgrade you can make to your bike’s performance. Start with the baseline charts as your map, but treat them as a conversation starter with your tires, not the final word. Your body is the ultimate feedback device. Ride, feel, adjust. Did that rock garden feel harsh and slow? Try dropping 2 PSI. Are you getting a pinch flat on a city curb? Try raising 3 PSI. Is your bike feeling sluggish and “squirmy” in the corners on the pavement? Try raising 5 PSI.
The perfect pressure is the one that makes you forget about your tires. It’s the pressure that lets you float over bumps, carve corners with confidence, and feel connected to the road or trail without being battered by it. It’s specific to your weight, your bike, your load, and the ground beneath you. So grab your pump with a good gauge, reference your tire’s sidewall for its maximum limit, and start experimenting. The journey to finding your perfect PSI is one of the most rewarding rides you’ll ever take. Now, go enjoy the ride.
Frequently Asked Questions
Can I use the “squeeze test” to check my tire pressure?
No, the squeeze test is highly inaccurate, especially for high-pressure road tires. You cannot reliably distinguish between critical pressure differences like 85 PSI and 95 PSI by feel. Always use a reliable pump with a built-in gauge or a standalone pressure gauge for accuracy and safety.
What happens if I over-inflate my bike tires?
Over-inflating makes for a harsh, uncomfortable ride and reduces traction, as the contact patch becomes too small. It increases your risk of blowouts, especially from impacts or heat buildup. It also accelerates wear in the center of the tire tread and puts extra stress on your rims and spokes.
Is it okay to run my mountain bike tires at road bike pressures?
No, this is a common and detrimental mistake. Mountain bike tires are much wider and have far more volume. Running them at 80+ PSI will make them impossibly harsh, dramatically reduce traction on off-road surfaces, and actually increase the risk of a rim strike or flat because the tire cannot absorb impacts.
How often should I check my bike tire pressure?
Check your tire pressure before every single ride. Tires naturally lose air over time—typically 1-5 PSI per week depending on the tire/tube type and conditions. A quick check with your gauge takes 10 seconds and prevents poor performance, flats, and rim damage.
Do tubeless tires need a different pressure than tubed tires?
Yes, tubeless setups typically allow you to run 5-10 PSI lower than tubed tires on the same terrain. This is because there is no inner tube to pinch flat, which is the primary limiting factor for how low you can safely go with tubes. The lower pressure with tubeless greatly enhances grip and comfort.
My tire says “MAX 120 PSI.” Should I pump it to that?
Almost never. The maximum pressure printed on the tire sidewall is a hard safety limit—the pressure at which the tire casing could fail. It is not a recommended pressure. For a typical 700x25c road tire, you should run between 80-100 PSI for a 160 lb rider. Running at the max 120 PSI would provide a terrible ride, poor grip, and a high risk of blowout.