Absolutely, you can transform your standard bicycle into a fantastic indoor exercise bike. Using specialized equipment like bike trainers, rollers, or smart trainers, you can securely mount your bike for a stable, high-quality workout. This is a highly cost-effective and space-saving solution that lets you use your own bike’s geometry and components, providing a realistic riding feel that many dedicated exercise bikes can’t match. The right setup depends on your budget, fitness goals, and desired tech features.
Key Takeaways
- Yes, it’s very possible and popular: Cyclists have been converting regular bikes for indoor training for decades using trainers and rollers.
- Multiple conversion methods exist: Choose from basic fluid trainers, advanced smart trainers, or balance-focused rollers, each with unique benefits.
- Your bike’s compatibility is key: Most bikes work, but you must check your bike’s axle type (quick release vs. thru-axle) and frame clearance.
- It’s a major cost-saver: A good trainer costs a fraction of a premium dedicated exercise bike, and you use your own familiar bike.
- Setup requires some attention: Proper installation, securing the bike, and creating a safe, ventilated space are crucial for a good experience.
- Technology enhances the experience: Smart trainers unlock immersive apps like Zwift and TrainerRoad, making indoor training engaging and data-rich.
- It’s highly effective for fitness: When set up correctly, it provides a comparable or even superior cardiovascular and leg-strengthening workout to an upright exercise bike.
📑 Table of Contents
- Can I Turn My Bike into an Exercise Bike? The Short Answer is YES!
- The Core Benefits: Why Convert Your Bike?
- Method 1: Bike Trainers (The Most Common Solution)
- Method 2: Rollers (The Classic, Skill-Based Option)
- Method 3: Smart Trainers (The High-Tech, All-in-One Powerhouse)
- Essential Setup: How to Do It Safely and Effectively
- Safety, Noise, and Floor Protection: The Practical Realities
- Cost vs. Value: Is It Really Worth It?
- Conclusion: Your Bike, Your Gym
Can I Turn My Bike into an Exercise Bike? The Short Answer is YES!
So, you’ve got a great bike gathering dust in the garage or apartment while the weather outside is frightful, or you simply want to fit in a quick, efficient workout without leaving the house. The question bubbling in your mind is a very logical one: Can I turn my bike into an exercise bike? The enthusiastic answer is a resounding yes! This isn’t a hacky, rickety solution. It’s a well-established, highly effective practice used by professional cyclists, weekend warriors, and fitness enthusiasts alike to create a powerful home gym staple.
Converting your existing bicycle is one of the smartest moves you can make for your home fitness setup. It leverages the bike you already know, love, and have fitted to your body. You avoid the hefty price tag and massive footprint of a dedicated “stationary bike” or “spin bike.” Instead, you invest in a modular piece of equipment—a trainer or roller—that turns your two-wheeled steed into a rock-solid, sweat-proof workout machine. In this complete guide, we’ll walk through every single method, what you need, how to set it up safely, and help you decide which path is perfect for turning your bike into your new favorite exercise bike.
The Core Benefits: Why Convert Your Bike?
Before we dive into the “how,” let’s talk about the “why.” Converting your bike offers compelling advantages over buying a standalone exercise bike.

Visual guide about Can I Turn My Bike into an Exercise Bike
Image source: exercisebikeacademy.com
Unmatched Cost-Effectiveness
A high-quality upright exercise bike or spin bike can easily cost $500 to over $2,000. In contrast, a fantastic bike trainer that will securely hold your bike starts around $150 for a basic model and goes up to about $1,200 for a top-tier smart trainer. You’re essentially getting the core cardio function for a fraction of the price, all while using your own bike, which may be worth hundreds or thousands itself.
Superior Bike Fit and Realism
That expensive exercise bike in the store has a fixed geometry. Your own bike is custom-fit to *you*. The saddle height, fore/aft position, handlebar reach, and cleat position are all dialed in for your unique body. When you convert it, you retain that perfect, personalized fit. This means better comfort on long sessions and more effective power transfer, reducing the risk of injury. The riding feel—the way you shift your weight, the pedal stroke—is also authentic, which is a huge plus for training specificity.
Space-Saving and Versatile
When you’re done, the trainer can often be folded and stored in a closet or corner. Your bike can be racked on the wall or ceiling. This duo takes up dramatically less permanent floor space than a large, one-piece exercise bike. Furthermore, the conversion is reversible. When the sun is shining, you can quickly unclamp your bike, pop on the front wheel (if you removed it), and head out for a real ride. You own one bike that serves two worlds.
Training Progression and Tech
This is the big one for serious athletes. Basic trainers provide resistance. But “smart trainers” connect via Bluetooth or ANT+ to training apps like Zwift, TrainerRoad, Rouvy, or The Sufferfest. These apps control the resistance automatically to match a virtual course or a structured workout. They provide power, cadence, and heart rate data, turning your converted bike into a powerful training computer. This level of interactive, data-driven training is difficult to find on sub-$1,000 dedicated exercise bikes.
Method 1: Bike Trainers (The Most Common Solution)
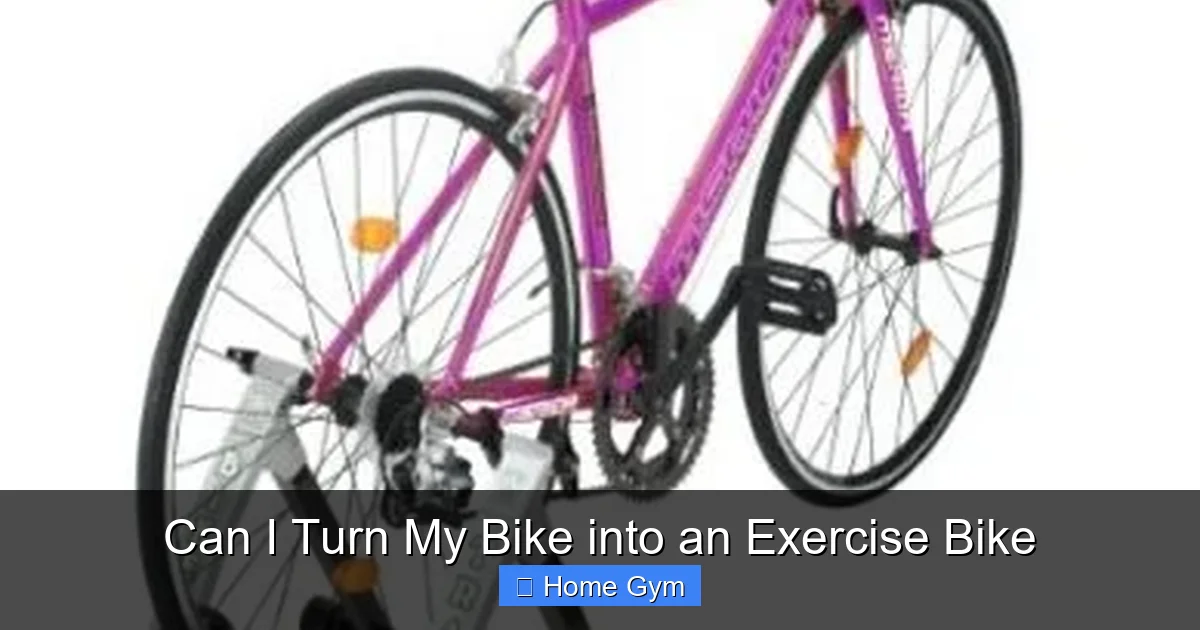
Bike trainers are the workhorse of indoor cycling. They are a frame or stand that you place your bike into, typically lifting the front wheel and providing a resistance unit against the rear wheel. They are stable, relatively quiet, and the easiest for beginners.
Visual guide about Can I Turn My Bike into an Exercise Bike
Image source: athriftymom.com
How They Work
You place your bike’s rear axle into specialized cups or clamps on the trainer. The front wheel is usually lifted by a support block or an adjustable arm to level the bike. A roller (made of metal, fluid, or magnetic material) presses against your bike’s rear tire. As you pedal, the tire spins the roller, creating resistance. The resistance unit is the heart of the trainer.
Types of Resistance
- Wind Trainers: Use a fan to create air resistance. Very affordable, but loud and the resistance curve isn’t progressive (it feels similar at all speeds).
- Magnetic Trainers: Use magnets to create resistance. Quieter than wind, resistance is controlled manually with a lever. Often a budget-friendly mid-range option.
- Fluid Trainers: Use a sealed fluid chamber with an impeller. They are famous for their smooth, road-like feel and progressive resistance (harder you pedal, harder it gets). Quieter than wind, a great all-around choice.
- Electromagnetic/Linear Resistance Trainers: Use powerful electromagnets for very precise, often electronically controlled resistance. Found on higher-end “smart” trainers.
Key Features to Look For
When shopping, consider: Maximum resistance (for strong sprinters), sound level (important for apartments), flywheel weight (heavier feels smoother), and compatibility with your bike’s axle type (quick release vs. thru-axle). Brands like Wahoo (Kickr), Saris (H3), Tacx (Neo), and Kinetic are industry leaders.
Method 2: Rollers (The Classic, Skill-Based Option)
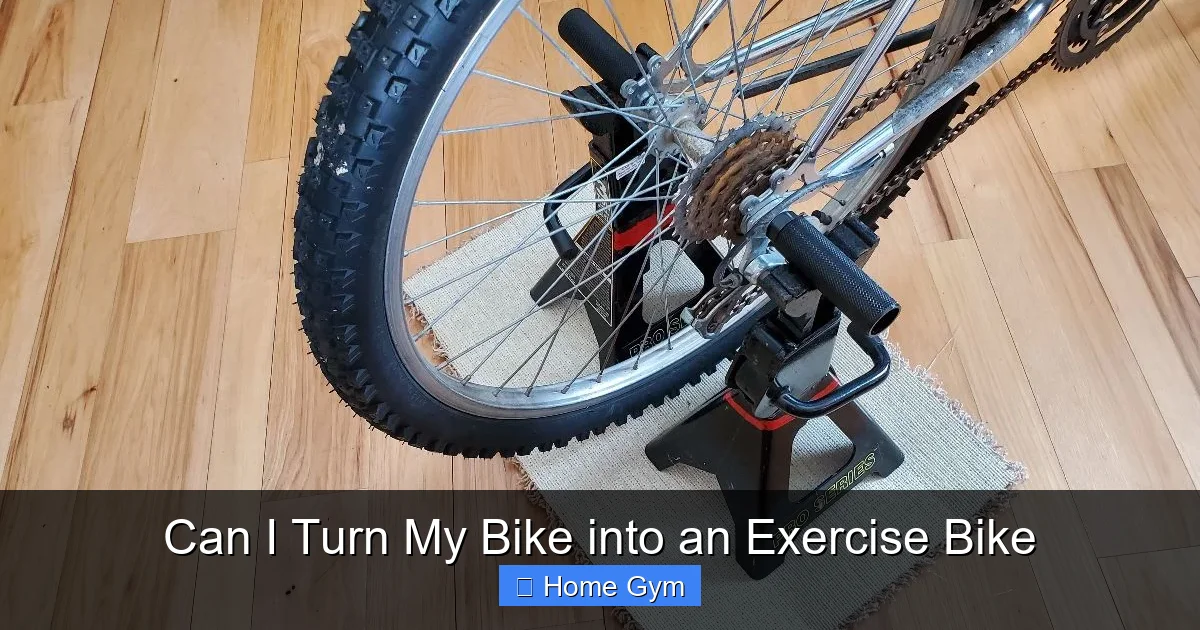
Rollers are a completely different beast. They consist of three cylindrical drums (rollers) on a frame. You place your bike on top, balancing it on the rollers. There is no physical clamp; you must balance and steer to stay on. This makes them excellent for improving your pedal stroke, balance, and core stability.
Visual guide about Can I Turn My Bike into an Exercise Bike
Image source: practicalmechanic.com
How They Work & The Learning Curve
You simply ride your bike on the free-spinning rollers. The rear wheel sits on two rollers, and the front wheel sits on a single, wider roller that helps with steering. The resistance comes from the friction of your tire on the roller and, on some models, an adjustable resistance unit. The first few minutes will be a wobbly adventure! It takes practice to mount, dismount, and ride smoothly without falling off. Once you get it, it’s incredibly rewarding and feels very natural.
Pros and Cons vs. Trainers
Pros: Unmatched realism and handling practice. Very quiet operation. Often more affordable. Excellent for warm-ups and cool-downs. No frame stress on your bike.
Cons: Significant skill barrier. Not ideal for very high-intensity interval training (HIIT) where you need to stand and mash. You cannot use most training apps with standard rollers (unless they have a sensor). Less stable for hard efforts.
Method 3: Smart Trainers (The High-Tech, All-in-One Powerhouse)
Smart trainers are essentially advanced bike trainers (usually fluid or electromagnetic) with built-in electronics. They are the gold standard for serious indoor training and are the primary reason the “bike to exercise bike” conversion is so powerful today.
The “Smart” Difference
A smart trainer measures your power output (watts), cadence (RPM), and speed. Crucially, it can have its resistance controlled wirelessly by a computer, phone, or tablet running a training app. The app can say, “Okay, now increase resistance to 250 watts,” and the trainer instantly complies. This enables:
- Simulated Courses: Ride virtual routes in apps like Zwift; when you go uphill, the trainer gets harder.
- Structured Workouts: Follow precise intervals (e.g., 5 minutes at 200W, 3 minutes at 150W) with automatic resistance changes.
- ERG Mode: The app controls your power output entirely, forcing you to hold a specific wattage regardless of your cadence. This is brutally effective for training.
Direct Drive vs. Wheel-On
Wheel-On Smart Trainers: Your bike’s rear tire presses against a roller (like a standard trainer). They are generally less expensive, but require tire wear and can be slightly less accurate in power measurement due to tire pressure variations. Examples: Wahoo Kickr Snap, Saris H3.
Direct Drive Smart Trainers: You remove your bike’s rear wheel and attach the bike directly to the trainer’s cassette. This eliminates tire slip, wear, and pressure variables, providing the most accurate and consistent power data. They are quieter and often have a larger, heavier flywheel for a supremely realistic feel. Examples: Wahoo Kickr, Tacx Neo 2T, Saris H1. This is the premium option.
Essential Setup: How to Do It Safely and Effectively
You’ve got the equipment. Now, let’s get that bike mounted properly. A secure setup is non-negotiable for safety and a good ride.
Step 1: Check Your Bike’s Compatibility
This is the most important step before you buy anything. You need to know your bike’s axle type and frame clearance.
- Axle Type: Look at your rear wheel. Is it a standard Quick Release (QR) skewer (a lever), or a Thru-Axle (a bolt that goes through the hub)? Modern mountain bikes and many gravel/cyclocross bikes use thru-axles (often 12x142mm, 12x148mm Boost, etc.). Trainers are designed for specific axle standards. You often need an adapter (included or sold separately) for thru-axles.
- Frame Clearance: Look at the space between your rear tire and your bike’s seatstays/chains. Some trainers, especially when the unit is wide for stability, can rub against the frame. Measure or check the trainer manufacturer’s compatibility list.
Step 2: The Mounting Process (General Guide)
1. Prepare Your Bike: For wheel-on trainers, ensure your rear tire is inflated to the trainer manufacturer’s recommended pressure (often higher than your normal road pressure). For direct-drive, you’ll remove the rear wheel and install the trainer’s cassette (you may need a cassette tool).
2. Position the Trainer: Place it on a firm, level floor. A protective mat underneath is highly recommended to catch sweat and protect your floors.
3. Clamp the Rear Axle: Open the trainer’s axle cups/clamps, position your bike’s rear axle into them, and tighten securely. You should not be able to move the axle side-to-side.
4. Level the Bike: Adjust the front wheel support block or the trainer’s front riser until your bike is perfectly level. A bubble level on the saddle can help.
5. Final Checks: Spin the pedals by hand. Ensure the tire is centered on the roller (for wheel-on) and there’s no rubbing on the frame or brake pads. Check that the brakes are not engaged (if you have rim brakes, you may need to release them or use a brake pad spreader).
Step 3: Create Your Indoor Oasis
Safety and comfort are paramount. Ensure you have:
- A fan for airflow—indoor training gets hot!
- A sweat towel and a cover for your bike’s top tube to prevent corrosive sweat damage.
- A sturdy, quiet floor surface (the mat mentioned earlier).
- Proper ventilation. Never train in a stagnant, hot room.
- A bottle of water within easy reach.
- Entertainment! A tablet on a handlebar mount for movies or your training app is essential for long rides.
Safety, Noise, and Floor Protection: The Practical Realities
Turning your bike into an exercise bike changes its environment. Addressing these practicalities upfront prevents frustration and damage.
Is It Safe? Absolutely, With Precautions
The biggest safety risk is the bike falling off the trainer during an aggressive effort or if not clamped properly. Always:
- Double-check axle clamps before every ride.
- Ensure the trainer is on a non-slip surface.
- Start pedaling gently to confirm stability before going hard.
- For rollers, practice mounting/dismounting on a soft surface (carpet) until proficient.
- Keep the area around you clear of obstacles.
Managing Noise and Vibration
Noise is a major concern, especially in apartments. Fluid trainers and direct-drive smart trainers are the quietest. Wheel-on magnetic trainers can produce a humming sound, and wind trainers are loud. Vibration can travel through the floor. The single best investment is a good quality trainer mat. Thick, dense rubber mats absorb vibration and noise remarkably well, protecting your floors and your downstairs neighbors.
Protecting Your Bike and Floors
Sweat is acidic and will corrode your bike’s frame, handlebars, and components if left unchecked. Use a dedicated bike sweat guard (a towel-like cover that straps to the top tube) religiously. For floors, the mat again is key. It will catch tire residue, sweat droplets, and any small debris that falls from your bike. It’s a cheap way to avoid a costly floor repair.
Cost vs. Value: Is It Really Worth It?
Let’s talk numbers. A basic magnetic wheel-on trainer might cost $120. A high-end direct-drive smart trainer like the Wahoo Kickr is $1,299. A comparable dedicated exercise bike with similar resistance and connectivity (like a Peloton Bike+) costs $1,495+ and often requires a subscription for core features. The math is compelling.
The Break-Even Point
If your goal is a solid, reliable cardio workout, a $200-$400 fluid or entry-level smart trainer will provide an excellent experience for years and costs less than many mid-range exercise bikes. The value skyrockets if you already own a decent bike. You are essentially upgrading your existing asset. For the serious cyclist, the value is infinite—there is no substitute for training on your own bike with accurate power data.
When a Dedicated Exercise Bike Might Still Be Better
There are a few scenarios where buying an all-in-one exercise bike makes sense:
- Zero Bike Knowledge: If you’ve never touched a bike, own a rusty old beater, and want a completely turnkey, no-maintenance solution.
- Extreme Space Constraints: If you truly cannot store a full-size bicycle *and* a trainer, a single-piece folding exercise bike might be the only option.
- Specific Non-Cycling Goals: If you want a recumbent bike for back support or a very compact under-desk model for light activity while working, your road bike conversion won’t achieve that.
- Aesthetic Preference: Some simply prefer the sleek, integrated look of a dedicated machine in their living space.
Conclusion: Your Bike, Your Gym
So, can you turn your bike into an exercise bike? Not only can you, but for the vast majority of people seeking a serious, engaging, and cost-effective cardio solution, you absolutely should. The pathway is clear: assess your bike’s compatibility, choose the trainer type that fits your budget and goals (from a simple fluid trainer to a feature-packed smart trainer), and invest in a few key accessories like a mat and sweat cover.
This approach gives you a versatile home gym that serves dual purposes. You get the authentic geometry and feel of your own bike, the potential for incredibly advanced training with smart technology, and all without sacrificing precious living space or breaking the bank. It’s a return to the fundamentals of fitness—using what you have wisely—supercharged with modern technology. Unlock your bike’s second life. Set it up, fire up your favorite app or playlist, and turn those pedals. Your garage, basement, or living room is now your personal cycling studio.
Frequently Asked Questions
Is it safe to put my expensive road bike on a trainer?
Yes, it is perfectly safe when done correctly. The trainer supports the bike at the rear axle and front wheel, taking all the weight and stress. The key is ensuring a secure, tight clamp on the axle and that the trainer is on a stable, level surface. Always double-check the clamp before riding.
Will using a trainer damage my bike’s tire or drivetrain?
There will be normal wear. A wheel-on trainer wears out your rear tire faster than outdoor riding because it’s constantly in contact with a roller. You can buy a dedicated “trainer tire” that’s more durable. The drivetrain (chain, cassette) experiences similar wear to outdoor riding but without dirt and grime. Regular cleaning and lubrication are still important. Direct-drive trainers eliminate tire wear entirely.
How noisy are bike trainers?
Noise varies dramatically by type. Wind trainers are the loudest. Magnetic trainers produce a moderate hum. Fluid and direct-drive smart trainers are the quietest, often described as a smooth whirring sound. Using a thick rubber trainer mat under the unit significantly reduces vibration and noise transmission to your floor.
What type of bike is best for converting to an exercise bike?
Almost any bike works! Road bikes, mountain bikes, gravel bikes, and hybrids are all commonly used. The main considerations are axle compatibility (quick release vs. thru-axle) and frame clearance. Bikes with very wide tires (like plus-sized MTB tires) may not fit on some wheel-on trainers. Always check the trainer manufacturer’s compatibility list for your specific bike model.
Is a $200 trainer as good as a $1,000 smart trainer?
For basic, non-connected resistance, a good $200-$300 fluid trainer provides a smooth, realistic ride and is excellent for general fitness. However, a $1,000+ smart trainer offers critical advantages: electronic resistance control for apps, built-in power meter accuracy, often a more realistic road feel with a heavy flywheel, and quieter operation. The value depends on whether you want interactive training and precise data.
How does a converted bike compare to a Peloton or NordicTrack bike?
Functionally, they achieve the same goal: a stationary cycling workout. The converted bike wins on fit (your own bike’s geometry) and often on value (you provide the bike). Dedicated bikes like Peloton win on convenience (all-in-one, no setup), integrated screen, and brand ecosystem. A smart trainer + your bike + your own tablet can replicate the interactive class experience at a similar or lower total cost, but requires more initial setup.