How to Use a Peloton Bike at the Gym

Using a Peloton bike at the gym is a fantastic way to enjoy premium cycling classes without the home equipment cost. However, it’s different from your living room setup. You’ll need to adapt to shared equipment, navigate the touchscreen with a guest login, and follow gym-specific etiquette. This guide walks you through finding the bike, adjusting it correctly, selecting the right class, and maximizing your workout in a public space, ensuring you ride confidently and respectfully.
Key Takeaways
- Gym Peloton bikes are guest-access systems: You typically use a temporary “Guest” login, not your personal account credentials, and your ride metrics won’t save to your personal history.
- Thorough pre-ride inspection is non-negotiable: Always check the bike’s stability, wipe down all contact points, and test the resistance knob and pedals before starting your class.
- Proper bike fit is your responsibility: The gym won’t have a live fitting. You must adjust the seat height, fore/aft position, and handlebars yourself using the guidelines provided.
- Class selection differs from home: Filter for “Gym” or “No Equipment” classes, and consider shorter, high-energy sessions (20-30 mins) that fit a gym schedule.
- Gym etiquette is paramount: Respect time limits, use headphones if audio isn’t private, wipe the bike thoroughly after use, and never monopolize the bike during peak hours.
- Your metrics are for you, not the leaderboard: While you’ll see output and cadence, your name won’t appear on the leaderboard. Use the numbers for self-improvement, not competition.
- Bring your own accessories: Consider your own headphones, a towel, and a water bottle to ensure comfort and hygiene, as gym provisions may be limited.
📑 Table of Contents
- Welcome to the Shared Studio: Your Peloton Journey Begins at the Gym
- Finding Your Bike and The First Contact: Inspection & Setup
- Navigating the Digital Kingdom: Logging In and Selecting Your Class
- Ride Time: Execution, Metrics, and Mindset
- Gym Etiquette: The Unwritten Rules of Shared Peloton Use
- Troubleshooting: From Connectivity to Comfort Issues
- Maximizing Your Gym Peloton Experience: Beyond the Basic Ride
- Conclusion: Your Invitation to Ride
Welcome to the Shared Studio: Your Peloton Journey Begins at the Gym
You walk into your local gym, eyes scanning the cardio floor, and there it is: the sleek, magnetic-resistance bike with the large, glowing touchscreen. It’s a Peloton. Your heart does a little flutter. You’ve seen the ads, your friends rave about it, but committing to a $1,500 bike plus a monthly subscription at home feels like a big leap. Seeing one at the gym is like a free trial—a chance to experience the hype without the financial stretch. But then doubt creeps in. Is it the same? How do I even turn it on? What if I break it? What about all those people around me?
First, take a deep breath. Using a Peloton bike at the gym is an incredible opportunity. It gives you access to world-class instructors, immersive classes, and precise performance metrics. However, it operates under a different set of rules than your own personal bike in your living room. This isn’t just about hopping on and pedaling; it’s about understanding the guest ecosystem, respecting shared space, and adapting your approach. Think of this guide as your friendly, no-judgment zone manual. We’ll walk through every single step, from the moment you spot the bike to the moment you wipe it down and walk away, feeling accomplished and informed. By the end, you won’t just be using a gym Peloton; you’ll be mastering it.
Finding Your Bike and The First Contact: Inspection & Setup
Before you even think about clipping in, your first mission is to locate and assess your steed. Not all gyms are the same. Some have a dedicated, quiet “Peloton room” with one or two bikes. Others have a single bike tucked between ellipticals on the main floor, subject to the gym’s ambient noise and foot traffic. Wherever it is, your process starts the same way: with a respectful and thorough check.
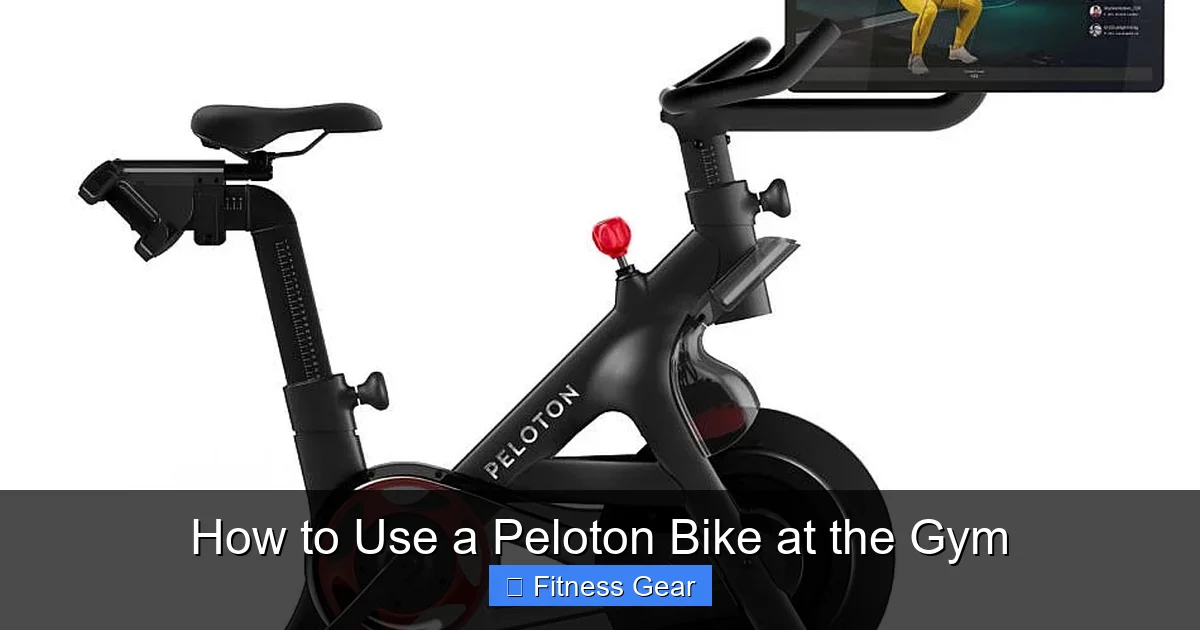
Visual guide about How to Use a Peloton Bike at the Gym
Image source: chatelaine.com
The Hunt and The Pre-Ride Checklist
Locating the bike is step one. Ask at the front desk: “Do you have a Peloton bike available for member use?” Some gyms require you to book it in advance via an app; others are first-come, first-served. Once you find it, approach it like a responsible car renter doing a walk-around. This is your pre-ride checklist:
- Visual Scan: Look for any obvious damage. Is the frame stable? Does the touchscreen have cracks or excessive smudges? Are the cables (if visible) frayed?
- Wipe It Down: This is critical. Use the gym’s disinfectant wipes or your own. Clean the handlebars, the seat, the resistance knob, and the pedal surfaces. You don’t know who was on it last. Don’t be shy; this is standard gym hygiene.
- Test the Basics: Gently rock the bike side-to-side. It should feel solid, not wobbly. Turn the resistance knob left and right. You should hear and feel the magnetic mechanism engage. Press the power button (often on the back or base) to ensure the screen lights up.
- Pedal Check: Look at the pedals. Most gym Pelotons use standard Look Delta or SPD-compatible pedals, but some might have toe cages. Check for excessive wear or debris. Give them a spin.
This quick 60-second ritual protects you from faulty equipment and shows respect for the next rider. If something seems genuinely broken (a wobbly seat that won’t tighten, a dead screen), report it to staff immediately and find another cardio option.
Adjusting the Bike for YOUR Body: A Step-by-Step Guide
This is the most important technical skill you’ll learn. A poorly fit bike leads to knee pain, backache, and a terrible workout. There is no live instructor to help you here. You must become your own fit expert. The good news? Peloton bikes have very intuitive adjustment levers.
- 1. Seat Height: Stand next to the bike. The top of the seat should be roughly level with your hip bone (the greater trochanter). A foolproof method: sit on the bike, place your heel on the pedal at the bottom of the stroke (6 o’clock position). Your leg should be completely straight. Now, switch to the ball of your foot on the pedal; you should have a very slight bend (about 25-30 degrees) at the knee at the bottom of the stroke. Use the red lever under the front of the seat to slide it up or down. Always make adjustments with the bike *stopped*.
- 2. Seat Fore/Aft (Forward/Back): Sit on the bike with the pedals at 3 and 9 o’clock (horizontal). Your front knee should be directly over the pedal spindle (the center of the pedal). Use the red lever *under the seat* to slide it forward or back. This alignment prevents knee strain.
- 3> Handlebar Height: For beginners, a higher handlebar is often more comfortable. Use the black adjustment lever (usually on the stem) to raise or lower them. A good starting point is level with the seat or slightly higher. As you gain flexibility and core strength, you can lower them for a more aggressive, aerodynamic position. Ensure all levers click back into the locked position before you ride!
Pro Tip: Wear the shoes you plan to ride in for this adjustment process. The thickness of your sole affects the final fit. If you feel any pinching in your knees or hips, stop and readjust. A minute of fiddling now prevents weeks of pain.
Navigating the Digital Kingdom: Logging In and Selecting Your Class
The screen is your window to the Peloton universe. But when you’re at the gym, you’re a visitor. You won’t log in with your personal username and password. That’s reserved for your home bike. Instead, you’ll use a guest or shared login provided by the gym.
Visual guide about How to Use a Peloton Bike at the Gym
Image source: i0.wp.com
The Guest Login Process: What to Expect
On the main screen, you’ll typically see options like “Guest,” “Gym,” or a specific gym-branded login. Select this. You may be prompted to enter a PIN or a simple username/password combo that the gym management provides (sometimes on a sign or sticker near the bike). This guest profile has limited functionality. You cannot:
- Save your ride to your personal history.
- Follow your usual program or stack.
- Appear on the leaderboard with your real name or photo.
- Use any subscription-linked features like personalized metrics trends.
What you CAN do is access the entire Peloton class library and see your real-time metrics (cadence, resistance, output, heart rate if paired). Think of it as a “demo mode.” Your performance data exists only for that session on that screen. Once you log off, it’s gone. This is the biggest difference from home use. Embrace it as a low-pressure, no-commitment ride. Your goal is the workout, not the digital trophy.
Finding the Perfect Class for the Gym Environment
With the library at your fingertips, the sheer volume can be overwhelming. The key is to filter strategically for the gym context.
- Filter by Duration: At the gym, you’re likely fitting this into a broader workout. Look for 20, 30, or 45-minute classes. A 60-minute epic might be too long unless you’ve specifically carved out the time.
- Filter by “Gym” or “No Equipment”: Peloton has a specific category called “Gym” or sometimes “No Equipment.” These classes are designed for people using bikes in public spaces. Instructors often give cues that don’t rely on specific home-bike setups (like “if you have a heart rate monitor…”). They also tend to be more general in their instruction.
- Music & Energy Level: Since you’re in a public space, consider the energy. A loud, aggressive metal class might be fun for you but disruptive to others doing yoga nearby. A classic rock or pop ride is usually a safe bet. Look at the class description and the instructor’s typical vibe. Cody Rigsby and Emma Lovewell are known for high-energy, fun rides, while Christine D’Ercole offers more technical, form-focused sessions.
- Beginner vs. Advanced: Be honest with yourself. If it’s your first time on a Peloton, choose a “Beginner” or “Low Impact” ride. The instructor will spend more time on form and offer more resistance options. An advanced climb class will leave you frustrated and potentially injured if you’re not ready.
Pro Tip: Before you commit to a class, use the “Preview” feature. Watch the first 30 seconds. Get a feel for the instructor’s voice, the music volume, and the class structure. Does it match what you want right now?
Ride Time: Execution, Metrics, and Mindset
You’re clipped in, the class is starting, and the instructor’s face fills the screen. Now what? The experience is similar to home, but with a few mental and practical shifts.

Visual guide about How to Use a Peloton Bike at the Gym
Image source: sageliving.us
Understanding Your Screen in Guest Mode
Your screen will show your real-time metrics: Cadence (pedaling speed in RPM), Resistance (the knob number), Output (current and total in watts), and sometimes Heart Rate. On the right, you’ll see the “Leaderboard.” But remember, in guest mode, you’ll appear as something generic like “Gym User 1” or “Guest.” You won’t be on the main leaderboard with your friends. This is actually liberating! It removes the pressure of competition. Your only competition is the person you were yesterday. Focus on your own numbers. Use the resistance knob as instructed—the instructor will call out “Add 10 points” or “Take it down to 30.” Your output will fluctuate based on your cadence and resistance. Don’t obsess; use it as a general gauge of effort.
Form is Everything: Cues to Remember
Even without personalized instruction, the on-screen cues are excellent. Pay attention to:
- Core Engagement: Instructors constantly say “engage your core!” This means gently bracing your abdominal muscles, not sucking in your stomach. It stabilizes your pelvis and protects your lower back.
- Hand Position: You have three basic positions: hands on the inner part of the bars (for warm-ups/cool-downs), on the outer “hooks” (for most of the ride), and on the top of the bars (for standing climbs). Switching positions relieves pressure and works different muscles.
- Pedal Stroke: Think of a full circle, not just pushing down. Imagine scraping mud off your shoe at the bottom of the stroke. This engages your hamstrings and glutes, making you more efficient and powerful.
- Upper Body: Keep your shoulders relaxed and down, away from your ears. Elbows soft. Avoid hunching.
If you feel sharp pain (not muscle burn) in your knee, hip, or back, stop. Check your seat height and fore/aft position. A minor adjustment can make all the difference.
Gym Etiquette: The Unwritten Rules of Shared Peloton Use
This is where many well-intentioned gym-goers stumble. The Peloton bike is a high-demand, expensive piece of equipment in a shared space. Your behavior directly impacts everyone else’s experience.
The Golden Rules: Time, Space, and Cleanliness
- Time Limits Are Real: Many gyms enforce a 30-minute limit per session, especially during peak hours (after work, early morning). Set a timer on your phone. When it goes off, finish your cool-down and get off promptly. Do not “rest” on the bike while scrolling your phone. Others are waiting.
- The Post-Ride Wipe-Down is Mandatory: This is not optional. Use the provided disinfectant spray and paper towel. Wipe the handlebars, seat, resistance knob, and *especially the pedal surfaces and your shoe cleats if you used them*. Sweat is corrosive and unhygienic. Leave the bike cleaner than you found it.
- Volume Control: If the gym provides headphones, use them. If not, keep the volume at a level where you can hear the instructor clearly but someone standing next to you cannot. Be mindful of the gym’s ambient noise. A headphone jack is usually available on the bike’s console.
- No “Reserving” with Your Towel: Placing your towel on the bike while you go do another exercise is poor form. If you’re not actively riding, you’re not using the bike. Let someone else have it.
- Report Issues, Don’t Ignore Them: Found a loose bolt? The resistance feels sticky? Tell the gym staff immediately. Don’t just ride it and leave a problem for the next person.
Mind Your Surroundings
Remember you are in a public gym. Your energy and volume matter. If you’re taking a high-energy, shout-along class, be aware of the space. Are you next to a quiet stretching area? Tone it down a notch. Respect the fitness journey of everyone around you, whether they’re lifting weights or meditating. The Peloton community at home is loud and proud; in the gym, it’s a respectful guest.
Troubleshooting: From Connectivity to Comfort Issues
Even with the best preparation, small hiccups can happen. Here’s how to handle them without panic.
“It Won’t Log In!” or “The Screen is Frozen”
First, don’t shake or bang the screen. Simply hold the power button for 10-15 seconds to force a hard shutdown. Wait 30 seconds, then press it again to restart. This solves 90% of temporary glitches. If the guest login credentials are rejected, double-check you typed them correctly (case-sensitive?). If it still fails, the gym may have changed the password. Alert staff. Do not try to log in with your personal credentials; it will likely fail and could trigger a security flag.
Resistance Feels “Off” or Sticky
Magnetic resistance should be smooth and consistent as you turn the knob. If it feels gritty, has dead spots, or doesn’t change, the bike likely needs servicing. Report it. Do not attempt to force it or “fix” it yourself. Riding with faulty resistance can throw off your metrics and is a safety risk if the knob slips.
Pedals Won’t Clip In/Out or Feel Slippery
For Look Delta cleats, ensure the cleat is properly aligned with the front of the pedal and press down firmly until you hear a click. To release, you twist your heel outward. If it’s stuck, check for dirt or debris in the mechanism. Wipe it clean. If it’s a toe-cage pedal, make sure the strap is snug but not overly tight. Slippage usually means your shoe is worn or the pedal surface is wet with sweat—wipe it.
Discomfort in the Wrong Places
If your inner thighs are chafing, the seat may be too high or too far forward. A slight adjustment back or down can help. If your hands are going numb, your handlebars are too low or you’re gripping too tightly. Raise the bars slightly and consciously relax your grip. Stand up and pedal out of the saddle for a few minutes to relieve pressure. Always listen to your body; pain is a signal to stop and adjust.
Maximizing Your Gym Peloton Experience: Beyond the Basic Ride
You’ve completed a ride. You’re sweaty and satisfied. But you can extract even more value from this unique gym offering.
Using Metrics for Personal Bests (Even If They Don’t Save)
Since your data vanishes after the ride, your goal becomes internal. During your ride, note your average output for a 30-minute class. Next time you ride, try to beat that number by 5-10 watts. Focus on maintaining a higher cadence (RPM) with slightly lower resistance, or holding a challenging resistance at a steady pace. These short-term, session-based goals are powerful motivators. Use the final cool-down to review your metrics on the screen. What was your max output? Your average cadence? This is your personal snapshot.
Integrating with Your Overall Gym Routine
The Peloton bike is a potent tool, but it shouldn’t be your only tool. Use it strategically:
- As a Warm-Up/Cool-Down: A 10-minute low-impact ride is perfect before strength training to get blood flowing.
- For Active Recovery: On rest days from heavy lifting, a 20-minute easy ride promotes circulation without impact.
- As a HIIT Substitute: The high-intensity interval training (HIIT) and Tabata rides are brutally efficient for calorie burn and cardiovascular improvement in minimal time.
- To Break Monotony: If you usually run on the treadmill, swapping in a Peloton ride once a week reduces repetitive stress on joints and works different muscles.
Building a Habit Without the Commitment
The beauty of the gym Peloton is the low barrier to entry. There’s no subscription guilt, no equipment taking up space in your home. Treat it as a premium amenity. Schedule it. “I will do a Peloton ride every Tuesday and Thursday after my strength session.” By creating a routine around it, you’ll get more consistent benefits. And who knows? After months of regular use, you might find the value proposition for a home bike has shifted. You’ll know exactly what you want, what you love, and whether it’s worth the investment for you. The gym becomes your test lab.
Conclusion: Your Invitation to Ride
Using a Peloton bike at the gym is more than just a workout; it’s a small act of adaptation and savvy. It’s about taking a premium, personalized experience and making it work within a communal, shared environment. You’ve learned to be an inspector, a mechanic, a navigator, and a respectful citizen of the fitness floor. You’ve discovered that the magic isn’t solely in the saved history or the leaderboard ranking—it’s in the burn of a perfectly executed climb, the rush of a favorite song during a sprint, and the quiet focus of a solo ride with only your metrics as company.
So next time you see that sleek bike sitting idle, don’t walk by with curiosity. Walk up with confidence. Wipe it down, adjust it to your body, log in as a guest, and hit play. The instructor on the screen will guide you through the work, and you’ll guide yourself through the logistics. You are now equipped to turn that shared piece of equipment into your personal sanctuary of effort and achievement, one guest ride at a time. Now, go clip in and discover what all the buzz is about. The saddle awaits.
Frequently Asked Questions
Do I need my own Peloton account and subscription to use a gym bike?
No. Gym Peloton bikes use a shared “Guest” or “Gym” login provided by your facility. You do not need your personal account credentials, and your ride will not be saved to your personal history or appear on the leaderboard with your name.
How do I adjust the resistance? Is it the same as the home bike?
Yes, the adjustment is identical. Turn the large red knob clockwise to increase resistance (making it harder) and counter-clockwise to decrease it. The numerical value appears on your screen. Listen for the instructor’s cues on when to adjust.
Can I use my own heart rate monitor or headphones with the gym bike?
Almost certainly yes. The bike has Bluetooth connectivity. You can pair your own chest-strap or optical heart rate monitor for more accurate metrics. You can also connect your own Bluetooth headphones for a better audio experience, which is highly recommended in a public gym setting.
What should I do if the bike feels unstable or the resistance knob isn’t working properly?
Do not ride the bike. Immediately report the issue to gym staff. A wobbly bike or faulty resistance mechanism is a safety hazard and will provide inaccurate metrics. Use a different cardio machine until it is serviced.
Are there specific classes I should look for as a first-time gym Peloton user?
Yes. Filter for classes labeled “Beginner,” “Intro to Peloton,” or “Low Impact.” These are 20-30 minutes and focus heavily on form, proper resistance usage, and building confidence without overwhelming you. Avoid advanced climbs or HIIT rides for your first few sessions.
What is the single most important etiquette rule to remember?
Thoroughly wipe down the entire bike—handlebars, seat, resistance knob, and pedals—with disinfectant after your ride. This is non-negotiable for hygiene and respect for the next user. Combine this with adhering to any posted time limits, and you’ll be a model gym Peloton citizen.