Smithfield Ham Cooking Instructions for Beginners Today
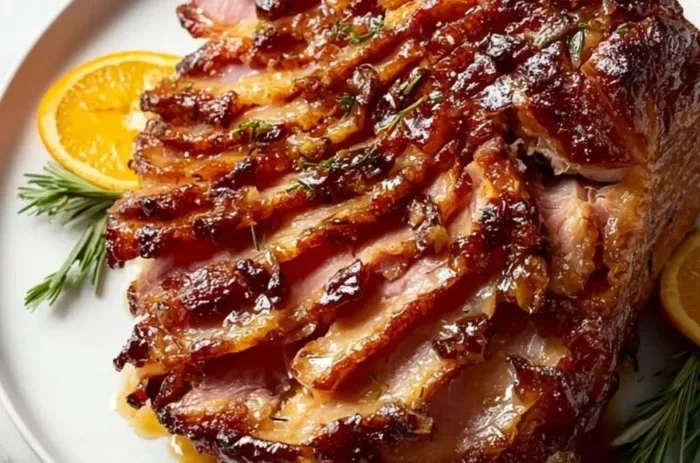
Smithfield ham cooking instructions are simpler than most people think. Whether you are baking a whole ham or a half ham, the right method makes all the difference. This guide walks you through every step from preparation to serving. You will learn how to create a beautiful glazed finish and avoid common pitfalls. By the end, you will feel confident cooking a delicious Smithfield ham like a pro.
Key Takeaways
- Soaking is essential: Always soak your Smithfield ham in water for 4 to 12 hours to remove excess salt and cure.
- Low and slow wins: Cook your ham at 325°F for even heating and a moist, tender result every time.
- Glaze at the right time: Apply your glaze during the last 20 to 30 minutes of cooking to prevent burning.
- Use a meat thermometer: The internal temperature should reach 145°F for safe and perfectly cooked ham.
- Rest before slicing: Let the ham rest for 15 to 20 minutes after cooking to lock in the juices.
- Avoid these common mistakes: Overcooking, skipping the soak, and adding glaze too early are the top errors beginners make.
📑 Table of Contents
- What Is Smithfield Ham and Why Is It So Popular?
- How to Prepare Smithfield Ham for Cooking
- Smithfield Ham Cooking Instructions: Step-by-Step Guide
- Different Methods for Cooking Smithfield Ham
- Common Mistakes to Avoid When Cooking Smithfield Ham
- Expert Tips for the Perfect Smithfield Ham
- Serving Suggestions and Pairing Ideas
- Final Thoughts on Smithfield Ham Cooking Instructions
What Is Smithfield Ham and Why Is It So Popular?
Smithfield ham has a rich history that goes back generations. It originates from Smithfield, Virginia, a small town known for its exceptional pork products. The curing process gives this ham its deep, smoky flavor and firm texture. People across the country love it for holiday dinners and special occasions.
The curing process involves salt, sugar, and sometimes smoke. This combination preserves the meat and develops its signature taste. Unlike a regular baked ham you find at the grocery store, a true Smithfield ham has a more intense and complex flavor profile. Many people call it the gold standard of cured hams.
There are two main types you will encounter. The first is the whole Smithfield ham, which is perfect for large gatherings. The second is the half ham, which works well for smaller families. Both types follow the same basic cooking principles, so the method stays consistent no matter which one you choose.
Understanding what makes Smithfield ham special helps you cook it better. The curing process means it already has a lot of flavor built in. You do not need to add a lot of extra seasoning. In fact, less is often more when it comes to this type of ham.
How to Prepare Smithfield Ham for Cooking
The Soaking Step You Cannot Skip
Before you even think about turning on the oven, you need to soak your ham. This is the most important prep step in all smithfield ham cooking instructions. The soaking process removes excess salt from the curing process. Without it, your ham could end up way too salty to enjoy.
Here is how to do it properly. Place your ham in a large pot or container filled with cold water. Cover it and put it in the refrigerator. Let it soak for at least 4 hours, but ideally overnight. Some cooks soak for up to 12 hours for a very salty cure.
Change the water every 3 to 4 hours if you have time. Fresh water pulls out more salt. This simple step makes a huge difference in the final taste. Skipping the soak is the number one mistake beginners make.
Trimming and Scoring the Ham
After soaking, take the ham out and rinse it under cold water. Pat it dry with paper towels. Now you need to trim off any excess fat. Leave about a quarter-inch of fat on the surface. This fat layer keeps the ham moist during cooking.
Next, score the fat in a diamond pattern. Use a sharp knife and cut shallow slits about a quarter-inch deep. Scoring helps the glaze seep into the meat. It also gives the ham a beautiful presentation when it comes out of the oven.
Some people like to stud the scores with whole cloves. This adds a subtle aromatic flavor. It is completely optional, but it does look impressive on the table. Place a clove at the center of each diamond.
Bringing the Ham to Room Temperature
Take the ham out of the refrigerator about 30 minutes before cooking. Letting it sit at room temperature helps it cook more evenly. A cold ham going straight into a hot oven cooks unevenly. The outside can overcook while the inside stays cold.
This small step takes almost no effort. But it pays off in a much better final product. Your ham will have a consistent texture from edge to center. This is a tip that even experienced cooks swear by.
Smithfield Ham Cooking Instructions: Step-by-Step Guide
Oven Temperature and Timing
Preheat your oven to 325°F. This low and steady temperature is the sweet spot for cooking ham. It heats the meat gently and keeps it moist. Higher temperatures tend to dry out the outer edges before the center is done.
Place the ham flat side down on a rack inside a roasting pan. Add about one inch of water to the bottom of the pan. This creates steam that keeps the oven environment moist. It also prevents drippings from burning on the pan bottom.
The general rule is about 15 to 20 minutes per pound. So a 10-pound whole ham takes roughly 2.5 to 3.5 hours. Use a meat thermometer to check the internal temperature. The ham is done when it reaches 145°F in the thickest part.
Making the Perfect Glaze
A good glaze takes your Smithfield ham from great to outstanding. You can use many different glaze recipes. The classic brown sugar and pineapple glaze is a favorite for a reason. It is simple, sweet, and pairs perfectly with the smoky ham flavor.
Here is a basic glaze recipe to try. Mix one cup of brown sugar with half a cup of pineapple juice. Add two tablespoons of mustard and a teaspoon of cinnamon. Stir everything together until smooth. This makes enough glaze for a whole ham.
Brush the glaze on during the last 20 to 30 minutes of cooking. If you add it too early, the sugar will burn and turn bitter. Apply it in thin layers for the best caramelized finish. You can also add a splash of apple cider vinegar for a tangy kick.
Basting for Moisture and Flavor
Basting is a step that separates good ham from great ham. Every 30 minutes, open the oven and spoon the pan juices over the ham. This keeps the surface moist and builds layers of flavor. The glaze also starts to caramelize with each baste.
Do not skip this step if you want the best results. It only takes a few minutes each time. The aroma filling your kitchen while you baste is absolutely worth it. Your family will know something special is in the oven.
Different Methods for Cooking Smithfield Ham
Oven Baking: The Traditional Method
Oven baking is the most popular way to cook Smithfield ham. It gives you full control over temperature and timing. The even heat distribution ensures the ham cooks consistently throughout. Most recipes and smithfield ham cooking instructions are built around this method.
The biggest advantage is the glazed finish you can achieve. The dry heat of the oven caramelizes the sugar in the glaze beautifully. You also get a nice bark on the outside while the inside stays tender and juicy.
Slow Cooker Method
A slow cooker is a great alternative if you want a hands-off approach. Place the soaked ham in the cooker with a cup of water or apple juice. Cook on low for 6 to 8 hours. This method keeps the ham incredibly moist.
The downside is you will not get the same caramelized glaze. You can brush the glaze on during the last hour of cooking. The result is still delicious, but the texture is slightly different from oven-baked ham.
Boiling Before Baking
Some traditional cooks boil the ham first, then finish it in the oven. This method removes even more salt from the cure. It also pre-cooks the ham, so the oven time is shorter. The final product is very tender and mild in flavor.
To do this, simmer the ham in water for about 2 hours. Then transfer it to the oven with your glaze. This method takes more time but produces a very different texture. It is worth trying at least once to see if you prefer it.
Comparison Table: Cooking Methods at a Glance
| Method | Time per Pound | Moisture Level | Glaze Quality | Difficulty |
|---|---|---|---|---|
| Oven Baking | 15-20 minutes | High | Excellent | Easy |
| Slow Cooker | 6-8 hours total | Very High | Good | Very Easy |
| Boil Then Bake | 2 hours boil + 1 hour bake | Very High | Very Good | Medium |
Common Mistakes to Avoid When Cooking Smithfield Ham
Skipping the Soak Entirely
This is the most common mistake by far. If you do not soak your ham, the salt content will be overwhelming. The ham will taste too salty and overpowering. Always plan ahead and give your ham enough time in the water.
Overcooking the Ham
Overcooking dries out the meat and ruins the texture. Many people leave the ham in the oven too long because they are worried about food safety. Use a meat thermometer and pull the ham at 145°F. The carryover heat will bring it up a few more degrees as it rests.
Adding the Glaze Too Early
Sugar burns easily at high temperatures. If you add your glaze at the start of cooking, it will turn black and bitter. Always wait until the last 20 to 30 minutes. This gives the glaze time to caramelize without burning.
Not Letting the Ham Rest
Cutting into the ham right after cooking releases all the juices. The meat becomes dry and less flavorful. Let it rest for at least 15 to 20 minutes before slicing. This simple step keeps the ham juicy and makes it easier to carve.
Expert Tips for the Perfect Smithfield Ham
Choose the Right Size for Your Gathering
Plan for about one-quarter to one-third of a pound per person. A whole ham usually weighs between 10 and 15 pounds. A half ham works great for 4 to 6 people. Buying too small means running out, and buying too big means lots of leftovers.
Experiment with Different Glaze Flavors
Do not be afraid to get creative with your glaze. A maple mustard glaze adds a warm, earthy flavor. A honey and bourbon glaze gives a rich, slightly boozy sweetness. Even a simple honey and clove glaze works wonders. Try different combinations to find your family favorite.
Save the Ham Bone
After you finish cooking, do not throw away the ham bone. It makes an incredible base for soups and beans. Simmer the bone in water with vegetables for a few hours. The resulting broth is rich with smoky ham flavor. This is a great way to get even more value from your purchase.
Store Leftovers Properly
Cooked ham keeps in the refrigerator for up to 5 days. Store it in an airtight container or wrap it tightly in foil. You can also freeze cooked ham for up to 3 months. Slice it before freezing so you can thaw only what you need.
Serving Suggestions and Pairing Ideas
Smithfield ham pairs beautifully with many classic side dishes. Roasted sweet potatoes and green beans are a traditional Southern combination. A fresh pineapple salsa on top adds a bright, tropical contrast. Collard greens and cornbread complete the picture perfectly.
For drinks, a crisp white wine or a light ale complements the rich flavor. Sweet tea is a classic Southern pairing that never disappoints. The smoky, salty notes of the ham work well with both sweet and tangy beverages.
Slice the ham thin against the grain for the best texture. This makes each slice tender and easy to chew. Serve it on a platter with the glaze drizzled on top. Your guests will love the presentation and the flavor.
Final Thoughts on Smithfield Ham Cooking Instructions
Cooking a Smithfield ham is easier than most people expect. With the right preparation and a little patience, you can create a show-stopping centerpiece for any meal. The key steps are simple. Soak the ham to remove excess salt. Cook it low and slow at 325°F. Add your glaze in the final minutes. Let it rest before slicing.
Follow these smithfield ham cooking instructions and you will nail it every time. Do not be intimidated by the process. Even as a complete beginner, you can achieve outstanding results. The aroma alone will make your whole house smell amazing.
Start with a smaller half ham if you are nervous about your first attempt. Once you master the basics, you can move on to a whole ham for bigger occasions. The skills you learn will serve you for years to come. Your family and friends will look forward to your Smithfield ham at every holiday gathering.
Remember that cooking is about enjoying the process. Do not stress over perfection. Every ham you cook teaches you something new. Soon enough, you will be the one sharing your tips with other beginners. Happy cooking!
Frequently Asked Questions
How long should I soak a Smithfield ham before cooking?
You should soak your Smithfield ham for at least 4 hours, but overnight soaking for 8 to 12 hours works best. Changing the water every few hours helps remove even more salt. This step is essential for reducing the cured saltiness before cooking.
What internal temperature should Smithfield ham reach?
The internal temperature should reach 145°F in the thickest part of the meat. Use a reliable meat thermometer to check. After removing it from the oven, the temperature will rise a few degrees during resting.
Can I cook a Smithfield ham without a glaze?
Yes, you can cook Smithfield ham without a glaze. The ham already has a rich, cured flavor on its own. A glaze simply adds sweetness and a beautiful caramelized finish. If you skip it, the ham will still taste wonderful.
How do I store leftover cooked Smithfield ham?
Store leftover ham in an airtight container in the refrigerator for up to 5 days. You can also freeze it for up to 3 months. Wrap it tightly in plastic wrap or foil to prevent drying out.
Is a Smithfield ham the same as a spiral ham?
No, they are not the same. A Smithfield ham is cured using a traditional process from Virginia. A spiral ham is pre-sliced by the manufacturer for easy serving. You can cook both using similar methods, but the preparation differs slightly.
What is the best glaze for Smithfield ham?
The best glaze depends on your personal taste. A classic brown sugar and pineapple glaze is the most popular choice. Honey and mustard glaze works great for those who prefer a tangy flavor. Maple syrup glaze is another excellent option for a rich, warm taste.