How High Should My Stationary Bike Seat Be
Setting your stationary bike seat at the right height is one of the most important steps for a comfortable and effective workout. A seat that is too low or too high can cause knee pain, poor posture, and reduced power output. In this guide, we walk you through simple methods to find your ideal seat height every time you ride.
Key Takeaways
- Correct seat height prevents injury: A properly adjusted seat reduces strain on your knees, hips, and lower back during every ride.
- Heel method is the easiest starting point: Place your heel on the pedal at the lowest point and your leg should be fully straight.
- Knee angle matters: Your knee should have a slight bend when the pedal is at its lowest position.
- Seat height affects your workout quality: The right position helps you generate more power and ride longer without fatigue.
- Adjust for different types of riding: Standing climbs and seated sprints may need slight seat position changes.
- Re-check your seat regularly: Seat height can shift over time, so make it a habit to check your setup.
📑 Table of Contents
- How High Should My Stationary Bike Seat Be
- Why Seat Height Matters So Much
- How to Check Your Knee Angle
- Common Seat Height Mistakes to Avoid
- How to Adjust Your Stationary Bike Seat Step by Step
- How Seat Height Affects Your Workout Performance
- Expert Tips for Perfect Seat Height Every Time
- Quick Tips for the Perfect Seat Height
- Conclusion
How High Should My Stationary Bike Seat Be
If you have ever felt sore after a stationary bike seat height session, the problem might be your seat. Many people overlook this simple adjustment, and it can make or break your entire workout. A bike seat that sits at the wrong height puts extra stress on your joints. It also makes your legs work harder than they need to. The good news is that finding the right position is easy once you know what to look for.
Whether you are a complete beginner or a regular rider, getting your seat height right is essential. Your exercise bike seat adjustment affects how your body moves during every pedal stroke. It changes your comfort level, your power output, and even how long you can last on the bike. In this article, we break down everything you need to know about setting your seat at the perfect height. You will learn simple methods, common mistakes, and expert tips that make a huge difference.
Think of your bike seat like the foundation of a house. If the foundation is off, everything else suffers. Your knees, hips, and back all depend on proper seat alignment. Taking a few minutes to get this right will save you from pain and help you enjoy every ride more. Let us dive into the details.
Why Seat Height Matters So Much
The height of your stationary bike seat is not just about comfort. It directly affects how your body performs during a workout. When your seat is set incorrectly, your muscles cannot work efficiently. This means you burn fewer calories and get less out of your time on the bike. More importantly, wrong seat height leads to injuries over time.
Here are the main reasons why getting your seat height right matters:
- Joint protection: A seat at the wrong height puts extra pressure on your knees and hips.
- Better power output: When your seat is correct, your legs can push and pull with full force.
- Longer rides: Comfort lets you stay on the bike longer without feeling sore.
- Proper posture: The right seat height helps you maintain a healthy riding position.
- Injury prevention: Avoid strains, sprains, and chronic pain from poor bike setup.
Many people make the mistake of jumping on the bike and just starting to ride. They never think about adjusting the seat. This is like wearing shoes that do not fit and wondering why your feet hurt. Take the time to set up your bike properly before every session. Your body will thank you.
The Heel Method: The Easiest Way to Start
The heel method is the most popular way to find your proper bike seat position. It is simple and works for almost everyone. Here is how you do it:
- Sit on your stationary bike and place your heel on the pedal.
- Move the pedal to the lowest point, which is the 6 o’clock position.
- Your leg should be completely straight with your heel on the pedal.
- If your knee is bent, raise the seat. If your hip rocks, lower the seat.
- Once your leg is straight, release the pedal and place the ball of your foot on the pedal.
This method gives you a great starting point. From here, you can make small adjustments based on how your body feels. The heel method works because it uses your natural leg length to set the seat. You do not need any tools or special knowledge. Just sit on the bike and follow these steps.
Keep in mind that the heel method is a starting point. Everyone’s body is slightly different. Your indoor cycling posture might need fine-tuning after you try this method. The goal is to feel comfortable and powerful with every pedal stroke.
How to Check Your Knee Angle
Once you have set your seat using the heel method, the next step is to check your knee angle. This is where the real magic happens. A stationary bike knee angle that is correct makes all the difference in how your body handles a workout.
When the pedal is at the lowest point (6 o’clock position), your knee should have a slight bend. It should not be completely locked out. At the same time, it should not be bent too much. The ideal angle is between 25 and 35 degrees of bend. This range allows your muscles to work through a full range of motion without straining.
Here is a quick way to check your knee angle:
- Look at your knee from the side while pedaling.
- At the bottom of the pedal stroke, your knee should not be fully straight.
- There should be a visible slight bend.
- If your knee is locked, your seat is too high.
- If your knee bends deeply, your seat is too low.
Getting this angle right is one of the most important parts of proper cycling form. It keeps your joints safe and helps you pedal more efficiently. Many experienced riders check this angle every few weeks because seat height can shift over time.
Common Seat Height Mistakes to Avoid
Even with the best intentions, many people make mistakes when setting their bike seat. These errors can lead to pain, poor performance, and even long-term injury. Here are the most common mistakes you should watch out for.
Setting the Seat Too Low
A seat that is too low is one of the most common problems riders face. When your seat is too low, your knees bend too much at the bottom of the pedal stroke. This puts extra pressure on your knee joints. It also makes your legs work harder because your muscles cannot fully extend. You might feel a burning sensation in the front of your knees after a ride.
Signs your seat is too low include:
- Knee pain, especially at the front of the knee
- Your hips rocking side to side while pedaling
- Feeling like you cannot push through the full pedal stroke
- Quick fatigue in your legs
Setting the Seat Too High
On the other side, a seat that is too high causes different problems. When your seat is too high, you have to stretch to reach the pedals. This strains your hamstrings and hips. You might also feel like you are sliding forward on the seat or leaning too far forward. Over time, this can cause lower back pain and hip discomfort.
Signs your seat is too high include:
- Pain at the back of your knee
- Your hips rocking or tilting while pedaling
- Difficulty reaching the pedals comfortably
- A feeling of instability in your riding position
Ignoring Seat Fore-Aft Position
Height is not the only thing that matters. The forward and backward position of your seat also plays a role. This is called the fore-aft position. If your seat is too far forward or too far back, it affects how your knees track during pedaling. Many people adjust only the height and forget about this important detail.
To check your fore-aft position, sit on the bike and look down at your front knee. When the pedal is at the 3 o’clock position, your front knee should be directly over the ball of your foot. This alignment ensures that your legs push through the pedals with maximum efficiency and minimal strain.
How to Adjust Your Stationary Bike Seat Step by Step
Now that you understand why seat height matters and what mistakes to avoid, let us walk through the actual adjustment process. Follow these steps to get your seat dialed in perfectly.
Step 1: Prepare Your Bike
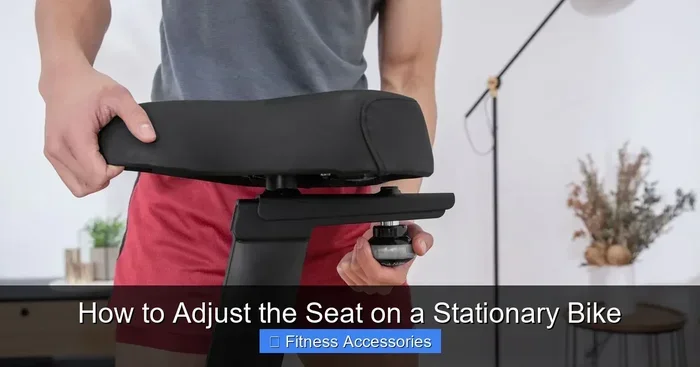
Before you start, make sure your stationary bike is set up on a flat surface. Check that the seat post clamp is loose enough to move but tight enough to hold position. If you are using a spin bike seat more comfortable setup, make sure the seat rail is clean and free of debris.
Step 2: Sit and Find Your Heel Position
Sit on the bike and place your heel on the pedal at the 6 o’clock position. Your leg should be straight. Use a mirror or ask a friend to check your position from the side. This gives you a clear view of whether your leg is fully extended.
Step 3: Lock the Seat in Place
Once you have found the right height, tighten the seat clamp firmly. Do not over-tighten, as this can damage the seat post. Make sure the seat does not move when you push down on it with your hand.
Step 4: Test Ride and Fine-Tune
Take the bike for a short test ride of about five minutes. Pay attention to how your knees feel and how comfortable the seat is. Make small adjustments of a quarter inch at a time until you find the sweet spot. The perfect height feels natural and powerful.
If you are new to indoor cycling, you might want to check out our guide on how long a beginner should ride a stationary bike to build up your endurance gradually. Also, for tips on keeping your seat comfortable during longer rides, see our article on making your exercise bike seat more comfortable.
How Seat Height Affects Your Workout Performance
Did you know that your seat height can actually change how many calories you burn and how strong your legs get? The right stationary bike seat height unlocks better performance in several ways.
When your seat is at the correct height, your legs can push through the full range of motion. This means more muscle engagement and more power per pedal stroke. You will notice that you can ride longer and push harder without feeling as tired. Your indoor cycling posture also improves, which means better breathing and more oxygen flowing to your muscles.
On the flip side, a poorly adjusted seat can hold you back. You might feel like you are working hard but not getting anywhere. Your legs might feel heavy and sore even after a short ride. These are all signs that your seat height needs attention.
For riders who want to track their progress, consider using a heart rate monitor or a fitness app. When your seat is set correctly, you will see steady improvements in your endurance and power output. If you are tracking your rides on a device, check out how to add your stationary bike to Fitbit with our guide on adding a stationary bike to Fitbit.
Expert Tips for Perfect Seat Height Every Time
Experienced riders and trainers have shared their best tips for finding and maintaining the perfect seat height. Here are some insights that can help you get the most from every ride.
Re-Check Your Seat Every Few Weeks
Your seat height can shift over time. The clamp can loosen, or you might bump the seat accidentally. Make it a habit to check your seat before each ride. A quick check takes only a few seconds and can save you from a lot of discomfort.
Consider Your Riding Shoes
If you ride with cycling shoes that clip into the pedals, your seat height might be different than when you ride in regular shoes. Cycling shoes change the way your foot connects to the pedal, which can affect your ideal seat position. Always re-check when you switch between shoe types.
Listen to Your Body
No guide can replace how your body actually feels. If something hurts, your seat might be off. Pay attention to signals like knee pain, hip discomfort, or lower back soreness. These are your body’s way of telling you that something needs adjusting.
Use a Reference Point
Mark your seat post with a piece of tape at your ideal height. This makes it easy to return to the right position after someone else uses your bike or if the seat gets bumped.
Get a Professional Bike Fit
If you ride regularly and want to take your setup to the next level, consider getting a professional bike fit. A specialist will analyze your body, your riding style, and your goals to create a custom setup. This is especially helpful for people who have had injuries or chronic pain.
Quick Tips for the Perfect Seat Height
Here is a quick summary of tips to keep in mind every time you ride:
- Use the heel method as your starting point.
- Aim for a slight knee bend at the bottom of the pedal stroke.
- Check your fore-aft position for proper knee alignment.
- Re-check your seat height every few weeks.
- Listen to your body and adjust when something feels off.
- Make small adjustments, no more than a quarter inch at a time.
- Keep your seat clean and well-maintained for smooth adjustments.
For more tips on getting the most out of your indoor cycling sessions, our article on how long you should be on a stationary bike covers ideal ride durations for different fitness levels.
Conclusion
Getting your stationary bike seat height right is one of the simplest and most impactful things you can do for your workouts. It protects your joints, boosts your power, and makes every ride more enjoyable. You do not need expensive tools or advanced knowledge. Just follow the heel method, check your knee angle, and listen to your body.
Remember that your seat height is not set in stone. It can change based on your riding style, your shoes, and even how your body feels on a given day. The key is to stay mindful and make adjustments whenever needed. A few minutes of setup can lead to hours of comfortable, effective riding.
Now that you know how to set your seat correctly, it is time to hop on your bike and put this knowledge to work. Your knees, your hips, and your workout results will all thank you. Happy riding!
Frequently Asked Questions
How do I know if my stationary bike seat is too low?
If your seat is too low, you will likely feel pain at the front of your knees. You might also notice your hips rocking side to side while pedaling. Another sign is that your legs feel like they cannot fully extend during the pedal stroke. Try raising your seat slightly and see if these symptoms go away.
What happens if my stationary bike seat is too high?
A seat that is too high causes pain at the back of your knees and strains your hips. You may feel unstable or like you are sliding forward on the seat. Your pedaling power also decreases because your muscles cannot work through their full range of motion. Lower the seat in small increments until the discomfort goes away.
Can I use the heel method if I have knee problems?
The heel method is generally safe and gentle on the joints. However, if you have existing knee problems, it is a good idea to consult a doctor or physical therapist before making changes to your bike setup. They can help you find the safest seat height for your specific condition.
Should I adjust my seat for different types of workouts?
For most riders, the seat height stays the same whether you are doing a steady ride, intervals, or hill climbs. However, some riders prefer to lower the seat slightly for standing climbs. This gives them more control and power when they are out of the saddle. Make any changes in small amounts and pay attention to how your body responds.
How often should I re-check my stationary bike seat height?
You should check your seat height at least once a month. If you ride frequently or share your bike with others, check it before each session. Seat height can shift gradually over time, so regular checks help you maintain the best riding position and avoid discomfort.
Is there a difference between a spin bike seat and a regular stationary bike seat?
The principles for setting seat height are the same for both types of bikes. Spin bikes and regular stationary bikes both use a seat post that can be adjusted up or down. The main differences are in the seat design and overall bike frame. Focus on finding the right height regardless of the bike type you are using.
=== META TITLE ===
How High Should My Stationary Bike Seat Be | Guide & Tips
=== URL SLUG ===
/how-high-should-my-stationary-bike-seat-be/