Is a Recumbent Bike Good for Lower Back Pain

Yes, a recumbent bike is generally an excellent choice for individuals with lower back pain. Its reclined seating position and built-in lumbar support dramatically reduce spinal compression and shear forces compared to upright exercises. This design promotes proper spinal alignment while providing a low-impact cardiovascular workout that strengthens supporting muscles without jarring the joints. For many, it offers a sustainable path to improved fitness and pain management, but proper setup and medical guidance are crucial.
Key Takeaways
- Ergonomic Design is Key: The reclined position distributes weight over a larger seat area and backrest, removing the forward-leaning posture that strains the lumbar spine during traditional cycling.
- Minimal Spinal Compression: Recumbent biking generates very little axial loading (downward pressure) on the spinal discs, making it a safe option for conditions like disc degeneration or post-surgery recovery (with doctor approval).
- Active Core Engagement: While supported, the core muscles (abdominals and lower back) engage isometrically to stabilize the pelvis and spine during the pedal stroke, promoting gentle strengthening.
- Low-Impact, High-Result Cardio: It provides an effective cardiovascular workout without the high-impact shock of running or the aggressive forward flexion of an upright bike, protecting vulnerable joints and tissues.
- Customizable Support: Most recumbents have adjustable seats, backrests, and pedal positions, allowing you to fine-tune the machine to your specific pain points and body mechanics.
- Improves Hip and Glute Mobility: The larger pedal arc encourages a full range of motion at the hip, which can alleviate tightness in the hip flexors and glutes—a common contributor to lower back pain.
- Not a Cure-All: It’s a therapeutic tool, not a universal solution. Proper form, appropriate resistance, and consultation with a healthcare professional are essential to ensure it benefits your specific condition.
📑 Table of Contents
- Understanding the Beast: What Causes Lower Back Pain During Exercise?
- The Recumbent Bike Anatomy: A Biomechanical Breakdown
- Direct Benefits for the Aching Lower Back
- How It Compares: Recumbent vs. Upright Bike vs. Other Cardio
- Choosing the Right Recumbent Bike for Your Back
- Safe and Effective Usage: Your Action Plan
- Potential Limitations and Who Should Be Cautious
- The Verdict: A Resounding “Yes, With Conditions”
Understanding the Beast: What Causes Lower Back Pain During Exercise?
Before we can crown the recumbent bike a hero, we need to understand the villain: lower back pain. It’s a complex, often multi-faceted issue. For many, pain stems from mechanical stress—poor posture, weak core muscles, tight hip flexors, or degenerated discs that don’t like being compressed or twisted. Think of your spine as a carefully stacked column of building blocks (vertebrae) with soft cushions (discs) in between. Activities that cause you to hunch forward, like leaning over bicycle handlebars, increase pressure on the front of these discs and force the supporting muscles to work overtime in a shortened, strained position. High-impact activities like running send shockwaves up this column. The goal of any exercise for back pain is to move the body without aggravating these sensitive structures. This is where the recumbent bike’s unique design enters the conversation, not as a magic bullet, but as a biomechanically intelligent alternative.
The Culprits in Traditional Cardio
Let’s quickly identify why common cardio options can be problematic:
- Upright Stationary Bike: Requires you to bend forward at the hips to reach the handlebars. This posterior pelvic tilt (tucking your tailbone) rounds the lower back, shortening the hip flexors and psoas muscles that attach to the lumbar spine. Over time, this position can create a constant pull on the lower back.
- Treadmill/Running: Each heel strike transmits force up the kinetic chain. While running itself isn’t inherently bad, for someone with existing disc issues or facet joint irritation, this repetitive compression and minor rotational forces can be a direct irritant.
- Elliptical: Often involves a slight forward lean and a forced, sometimes unnatural, stride pattern that can still engage the lower back if core stability is lacking.
The common theme? Poor spinal alignment under load. The recumbent bike aims to eliminate that from the start.
The Recumbent Bike Anatomy: A Biomechanical Breakdown
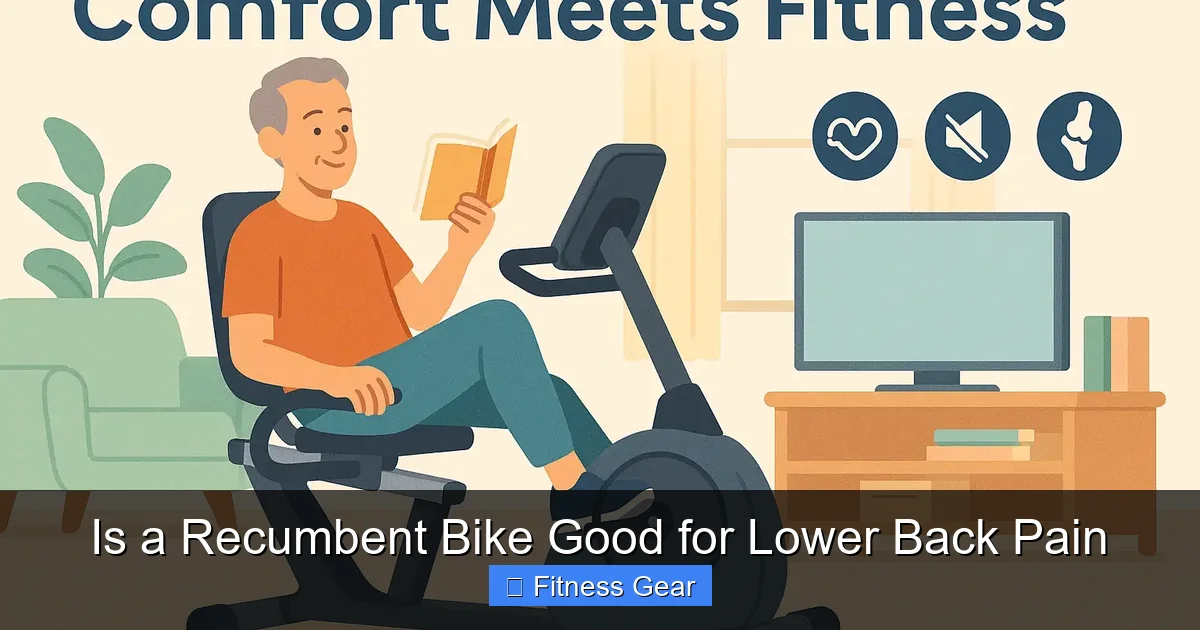
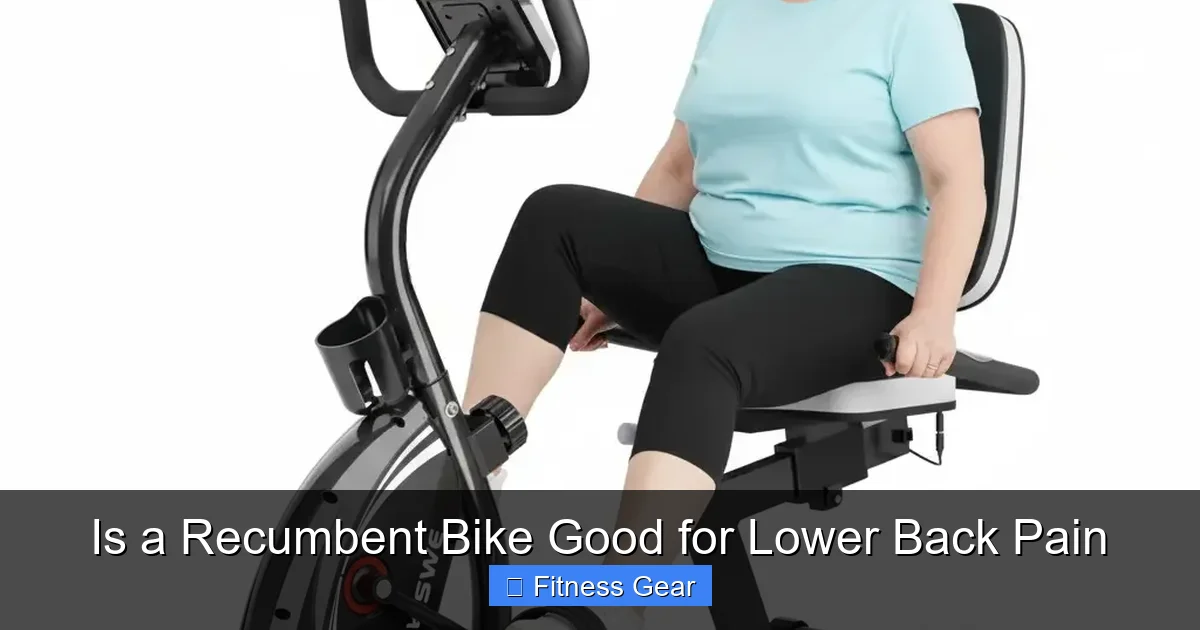
To appreciate why it’s back-friendly, we must dissect its design. A recumbent bike places you in a chair-like seat with a significant backrest, and the pedals are out in front of you, not below. This isn’t just for comfort; it’s a fundamental shift in physics.
Visual guide about Is a Recumbent Bike Good for Lower Back Pain
Image source: vanswefitness.com
The Reclined Position: Your Spine’s New Best Friend
Sitting at a 100-110 degree angle (more on that later) means your torso is supported. The weight of your upper body is transferred into the backrest, not hanging from your lower back muscles. This does two critical things:
- Eliminates the “Hunch”: Your spine can maintain its natural, gentle “S-curve,” especially in the lumbar region. The lumbar spine has an inward curve (lordosis). When you hunch, you flatten or reverse this curve, straining ligaments and discs. The backrest supports this natural curve.
- Deactivates Overworked Muscles: The erector spinae muscles (the ones that run vertically alongside your spine) don’t have to work isometrically to keep you from collapsing forward. They can relax, or at most, engage minimally for stabilization.
The Seat and Lumbar Support: More Than Just Padding
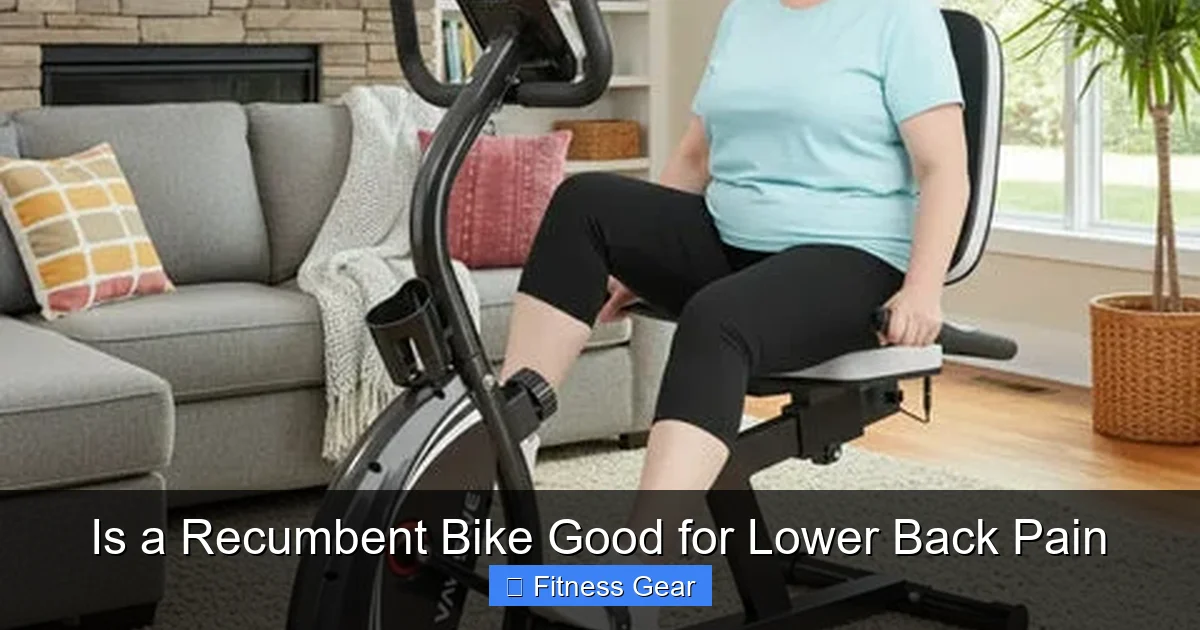
A good recumbent bike seat is wide and distributes pressure over the sit bones (ischial tuberosities), not the tailbone. Many come with an adjustable lumbar pillow or contour. This isn’t a gimmick; it actively props up the natural inward curve of your lower back, filling the space between your back and the seat back. This prevents your lower back from rounding against a flat surface, which would strain it. You should be able to sit all the way back into the seat with your lower back resting comfortably against this support.
Pedal Placement and Leg Angle
With pedals in front, your knees never extend far above your hip level. This keeps the hip angle in a more open, less flexed position. Why does this matter? A deeply flexed hip (like in a tucked position on an upright bike) puts the hip flexors in a shortened state. Since the iliopsoas—a major hip flexor—attaches directly to the lumbar spine, a shortened psoas tugs on the lumbar vertebrae, contributing to pain and anterior pelvic tilt. The recumbent’s leg position keeps this muscle at a more neutral length.
Direct Benefits for the Aching Lower Back
Now, let’s connect the biomechanics to tangible benefits for someone suffering from lower back pain.
Visual guide about Is a Recumbent Bike Good for Lower Back Pain
Image source: cdn.shopify.com
1. Drastic Reduction in Spinal Compression and Shear
Studies using MRI and pressure sensors have shown that recumbent cycling produces some of the lowest intradiscal pressures (pressure inside your spinal discs) of any common exercise. The supported position means gravity and your body weight aren’t compressing your spine vertically. There’s also minimal rotational shear force because your torso is stable. For someone with a bulging or herniated disc, this is a game-changer. You get movement and blood flow—which is vital for disc health—without the damaging forces that might occur during walking or an upright bike workout.
2. Promotion of Proper Alignment and Posture
The bike essentially forces a neutral spine if set up correctly. You can’t slump forward because the backrest is there. This proprioceptive feedback helps re-educate your body on what a neutral, pain-free posture feels like. Over time, this can translate to better posture off the bike as your neuromuscular system starts to recognize and favor that alignment.
3. Gentle Core and Glute Activation
Don’t mistake “supported” for “no work.” To pedal efficiently, you must stabilize your pelvis. This activates your deep core stabilizers (transverse abdominis, multifidus) and gluteus maximus in a low-load, endurance-building way. Strengthening these muscles is paramount for long-term back health. They form a natural “corset” and “pillow” for your spine. The recumbent bike allows you to train these muscles without the high compressive loads that might aggravate an acute injury.
4. Improved Hip Mobility and Blood Flow
The full range of motion at the hip joint—flexing and extending the leg through a large arc—helps combat the creeping tightness in the hip flexors and adductors that so many of us develop from sitting all day. Tight hips pull the pelvis out of alignment, straining the lower back. Cycling gently stretches the hip flexors on the upstroke and strengthens the glutes on the downstroke. Furthermore, the rhythmic motion increases blood circulation to the muscles, ligaments, and even the discs of the lumbar spine, delivering nutrients and flushing out inflammatory byproducts.
How It Compares: Recumbent vs. Upright Bike vs. Other Cardio
Let’s do a head-to-head for the back pain sufferer.
Visual guide about Is a Recumbent Bike Good for Lower Back Pain
Image source: vanswefitness.com
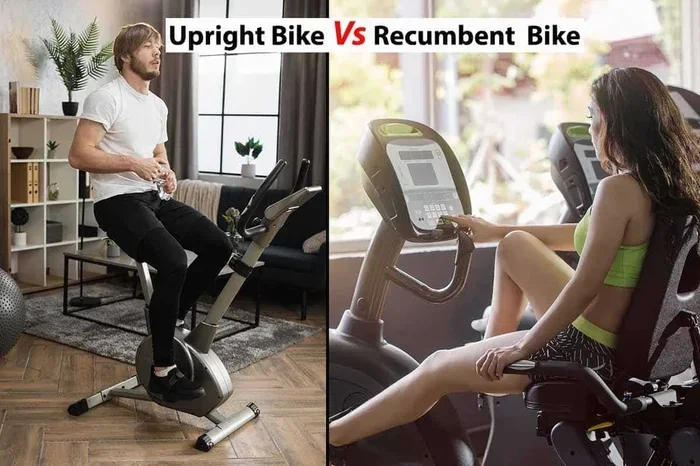
Recumbent vs. Upright Stationary Bike
The upright bike is the direct comparison. The recumbent wins on spinal support, hands down. The upright bike requires core engagement to stabilize a flexed spine, which can be good for core training once you’re pain-free, but it’s often a source of aggravation during recovery. The recumbent is the clear therapeutic choice for initial rehabilitation and consistent management. The upright bike might be a progression goal later.
Recumbent vs. Elliptical
Ellipticals can be good, but they are less forgiving in terms of setup. A slight misstep in stride or an unconscious lean can re-introduce shear forces. The recumbent’s fixed, supported position is more inherently stable and predictable for a sensitive back.
Recumbent vs. Walking
Walking is fantastic and natural. However, for some with severe spinal stenosis (narrowing of the spinal canal) or acute flare-ups, the slight extension and impact of walking can be painful. The recumbent’s fully supported flexion can be more comfortable for these specific conditions. Ideally, both can be part of a routine, but the bike offers a controlled, intensity-controllable environment.
Recumbent vs. Swimming
Swimming is often the gold standard for back pain due to full buoyancy. However, access to a pool, time, and technique can be barriers. A recumbent bike at home or the gym is vastly more accessible. It’s a fantastic complementary activity to swimming.
Choosing the Right Recumbent Bike for Your Back
Not all recumbent bikes are created equal. Here’s what to look for to maximize back benefits.
Seat Adjustability is Non-Negotiable
You must be able to slide the seat forward and backward on a rail. This adjustment is critical for achieving the correct hip angle. When the pedal is at the 3 o’clock position (forwardmost), your knee should have a very slight bend (<25 degrees) and not feel like you’re over-extending. Your hip angle should feel open, not sharply bent. If you can’t adjust the seat, you’re forcing your body into a potentially harmful position.
Backrest Design and Lumbar Support
Look for a backrest that is contoured and, ideally, has an adjustable lumbar pillow (that can move up/down and in/out). You want to be able to fill the natural curve of your lower back perfectly. A flat, hard backrest will likely cause more pain. Some high-end models have seats that recline independently, which can be even more comfortable for severe pain.
Step-Through Design
A step-through frame (no top tube to step over) is easier and safer for anyone with limited mobility or balance issues, which often accompany back pain. It reduces the need to lift the leg high, which can strain the back.
Resistance Type
Magnetic or fan resistance is smoother and quieter than friction brake systems. Smooth transitions between resistance levels are important to avoid sudden jolts that could strain a sensitive back.
Console and Programs
Simple is better. You want clear speed, time, distance, and heart rate monitoring. Pre-set programs that include warm-up and cool-down periods are excellent for ensuring you don’t jump into or out of a workout too aggressively.
Safe and Effective Usage: Your Action Plan
Buying the bike is step one. Using it correctly is everything.
The Golden Rule: Consult a Professional First
This cannot be overstated. Before starting any new exercise regimen with existing back pain, get clearance from your doctor or a physical therapist. They can diagnose the root cause of your pain (e.g., disc issue, facet joint arthritis, muscle strain, stenosis) and tell you if a recumbent bike is appropriate and what specific adjustments you might need.
Setup Checklist for Pain-Free Pedaling
Follow this ritual every time:
- Sit All the Way Back: Your entire back, including your sacrum (tailbone area), should be flush against the backrest.
- Adjust the Lumbar Support: Place it so it gently fills the space in your lower back. You should feel a light, supportive pressure, not a push that forces your spine into an exaggerated arch.
- Set the Seat Position: With pedals level (12 and 6 o’clock), your knee should have a very slight bend on the forward pedal. Your hip should not be sharply flexed. You should be able to comfortably reach the pedals without rocking your hips.
- Handlebar/Grip Reach: Your elbows should be slightly bent, shoulders relaxed down and back. You should not have to reach or strain forward.
Workout Guidelines: Start Smart, Progress Slowly
- Frequency: Begin with 3-4 short sessions per week, 10-15 minutes each. Consistency is more important than duration initially.
- Intensity: Start with zero to very light resistance. Focus on smooth, controlled pedal strokes. The goal is movement and blood flow, not a sweat-drenched cardio blast. Your heart rate should be in a very low, comfortable zone.
- Cadence (RPM): Aim for a moderate, sustainable cadence (70-90 RPM). Don’t mash the pedals with heavy resistance at a slow speed; that strains muscles and joints.
- Mind Your Form: Keep your core gently braced (as if preparing for a light punch), your back flat against the seat, and your pelvis stable—no rocking. Focus on pushing through the heel on the downstroke.
- Warm-Up & Cool-Down: Always start with 3-5 minutes of pedaling with no resistance. End with the same. This gradually increases and then decreases blood flow, preventing stiffness.
- Listen to Your Body: Discomfort from using a new muscle is one thing. Sharp, shooting, or increasing pain in your back is a STOP sign. Adjust your position, reduce resistance, or stop entirely. Pain is a signal, not a challenge.
Potential Limitations and Who Should Be Cautious
While excellent for many, the recumbent bike isn’t for every single back condition.
When It Might Not Be Ideal
- Acute, Severe Flare-Ups: During the first 48-72 hours of a severe muscle spasm or acute injury, rest and gentle mobility (as advised by a professional) are key. Exercise may be contraindicated.
- Certain Spinal Stenosis Cases: Some individuals with lumbar spinal stenosis (narrowing that pinches nerves) find extension (leaning back) painful and flexion (bending forward) relieving. The recumbent’s supported, slightly flexed position can be perfect for them. However, others may have different pain triggers. A doctor’s assessment is vital.
- Severe Osteoporosis: While low-impact is good, any exercise must be extremely gentle to avoid fracture risk. Medical guidance is essential.
The Importance of a Holistic Approach
Relying solely on the bike is a partial solution. True back health requires a comprehensive strategy:
- Combine with Targeted Stretching: Daily gentle stretches for the hip flexors, piriformis, and hamstrings are crucial to complement the bike’s work.
- Incorporate Core & Glute Strength Training: Once pain is managed, add exercises like bridges, bird-dogs, and planks (modified as needed) to build the supportive musculature the bike gently activates.
- Address Daily Posture: The bike won’t fix 8 hours of slouching at a desk. Use ergonomic chairs, take frequent standing breaks, and practice neutral spine alignment throughout the day.
The recumbent bike is a powerful tool in your toolbox, not the entire toolbox itself.
The Verdict: A Resounding “Yes, With Conditions”
So, is a recumbent bike good for lower back pain? For the overwhelming majority of people dealing with chronic mechanical lower back pain, degenerative disc disease, post-surgical recovery (where approved), or general stiffness, the answer is a qualified yes. Its biomechanical design directly addresses the primary mechanisms that aggravate back pain during traditional cardio: forward flexion, spinal compression, and poor support.
It provides a controlled, low-stress environment to rebuild cardiovascular endurance, improve circulation, and gently strengthen the core and gluteal muscles that form the foundation of a healthy spine. It allows you to break the cycle of “pain -> inactivity -> weakness -> more pain” by offering a safe, sustainable form of movement.
The “conditions” are important: proper setup, starting conservatively, listening to your body, and professional guidance. It is not an instant cure, but a therapeutic modality. When used wisely as part of a broader back-health strategy that includes stretching, strength training, and postural awareness, a recumbent bike can be one of the best investments you make for your long-term mobility and comfort. It turns the daunting task of “getting cardio” into a genuinely restorative and back-friendly experience.
Frequently Asked Questions
Can I use a recumbent bike if I have a herniated disc?
Often, yes. The recumbent position minimizes spinal compression and shear forces, which is beneficial for disc issues. However, you must get clearance from your doctor or physical therapist first, as the specific location and severity of the herniation determine safe movements. Start with no resistance and very short durations, stopping immediately if pain radiates.
How often should I use a recumbent bike for back pain relief?
For therapeutic benefits, aim for consistency over intensity. Start with 3-4 sessions per week, lasting 10-20 minutes each. The goal is gentle movement and blood flow. As your tolerance improves, you can gradually increase duration to 30 minutes. Daily short walks or gentle stretching can be added on other days.
Is recumbent biking better than walking for lower back pain?
It depends on the individual and the cause of pain. Walking is a natural, weight-bearing activity that’s excellent for many. However, for those with severe spinal stenosis, disc issues aggravated by impact, or poor balance, the recumbent bike’s fully supported, non-impact motion can be superior. Often, a combination of both is ideal.
What resistance level should I use on a recumbent bike for back pain?
Start with the lowest or no resistance. The primary goal is pain-free movement and circulation, not building leg muscle. A light resistance that allows you to pedal smoothly at a moderate cadence (70-90 RPM) without straining your back or breath is perfect. Increase resistance only when you can do so with absolutely no increase in back pain.
Can a recumbent bike replace physical therapy for my back?
No. A recumbent bike is a tool that can be used *within* a physical therapy or rehabilitation program prescribed by a professional. Physical therapy addresses the root causes of your pain through manual therapy, targeted exercises, and education. The bike is an excellent cardiovascular and gentle strengthening complement to that specialized care, not a replacement for it.
Why does my lower back still hurt after using the recumbent bike?
This is a critical warning sign. Possible reasons include: incorrect seat/backrest setup (not providing proper support), using too much resistance, pedaling with poor form (rocking hips, slouching), or simply that your specific condition is not suited to this activity. Stop the activity and consult your healthcare provider to reassess both your diagnosis and your exercise prescription.