Setting up your spin bike correctly is the single most important thing you can do for a safe, effective, and enjoyable workout. An improper fit leads to discomfort, wasted energy, and a high risk of injury. This guide provides a step-by-step, foolproof method to adjust your seat height, fore/aft position, handlebar reach, and cleat alignment. By following these principles, you’ll unlock more power, improve your endurance, and ensure every pedal stroke counts, transforming your spin class experience from a potential struggle into a powerful, rewarding session.
You’ve signed up for your first spin class, or maybe you’re a regular who’s always felt a little “off” on the bike. The music is pumping, the instructor is calling out climbs and sprints, and you’re perched on a machine that feels utterly foreign. The difference between a transformative, endorphin-filled hour and a painful, frustrating slog hinges on one crucial thing: your spin bike setup. It’s not just about hopping on and pedaling. It’s about creating a seamless connection between your body and the machine. This guide will walk you through every single adjustment, turning guesswork into a precise science. We’ll break it down into simple, repeatable steps so you can walk into any studio, confidently dial in your fit, and ride with power, comfort, and safety.
Think of your spin bike as an extension of your own skeleton. If the angles are wrong, you’re fighting your own anatomy, straining ligaments and wasting energy. The correct setup aligns your bones and joints to leverage the bike’s mechanics, allowing your powerful leg muscles—your glutes, quads, and hamstrings—to do the work they’re designed for. Whether you’re using a Keiser, Schwinn, Stages, or any other commercial studio bike, the fundamental principles of fit remain universal. Let’s get you set up for success.
Key Takeaways
- Seat Height is Foundational: Your leg should have a slight 25-35 degree bend at the bottom of the pedal stroke. Too high causes hip rocking; too low strains knees.
- Fore/Aft Position Aligns Your Knee: The front of your knee should be directly over the pedal axle when the crank is horizontal. This prevents knee strain.
- Handlebar Height is a Personal Choice: Beginners should start with handlebars higher than the seat for comfort. Lower them as you gain flexibility and core strength for a more aggressive, powerful ride.
- Cleat Alignment is Critical for Power: Your foot should point straight ahead, with the ball of the foot centered on the pedal axle. Misalignment causes knee pain and inefficient power transfer.
- Resistance and Cadence Work Together: Proper setup allows you to maintain a safe, sustainable cadence (80-100 RPM) against resistance. Don’t sacrifice form for heavy resistance.
- Always Perform a Pre-Ride Safety Check: Ensure all adjustment levers are securely locked and the bike is stable before mounting. A quick shake test can prevent a dangerous slip.
- Listen to Your Body: Discomfort is a signal. Sharp pain means stop and readjust. Muscle fatigue is normal; joint pain is a warning sign of a poor fit.
📑 Table of Contents
- Why Your Spin Bike Setup is Non-Negotiable for Performance and Safety
- Step 1: Mastering Your Seat Height – The Foundation of Your Fit
- Step 2: Fine-Tuning Seat Fore/Aft Position – The Secret to Happy Knees
- Step 3: Handlebar Height and Reach – Supporting Your Upper Body
- Step 4: Cleat and Shoe Alignment – Maximizing Power Transfer
- Step 5: Resistance, RPM, and Finding Your “Sweet Spot”
- The Pre-Ride Safety Checklist: Never Skip This
- Common Setup Mistakes (And How to Fix Them)
- The Conclusion: Your Setup, Your Superpower
Why Your Spin Bike Setup is Non-Negotiable for Performance and Safety
Before we touch a single lever, let’s understand the “why.” A proper bike fit isn’t just a comfort luxury; it’s the bedrock of an effective and safe workout. When your bike is misaligned, a cascade of problems begins. A seat that’s too high forces your hips to rock side-to-side with each pedal stroke. This inefficient motion steals power from your legs and can lead to lower back pain and chafing. A seat that’s too low crushes the space in your knee joint, placing immense stress on the patella tendon and inviting acute knee pain, especially during those high-resistance climbs the instructor loves.
The Kinetic Chain: From Foot to Hip
Your body operates as a linked chain during a pedal stroke—the kinetic chain. It starts at the foot, travels up through the ankle, knee, and hip. A disruption at any single point compromises the entire chain. For example, if your cleats are misaligned, your foot will want to point inward or outward. Your knee, trying to compensate, will track improperly, rubbing against the thigh bone and causing that nagging “runner’s knee” pain. The goal of the setup process is to create a straight, neutral line from your hip, through your knee, and down to the ball of your foot. When this line is maintained throughout the 360-degree pedal stroke, you generate maximum power with minimal joint stress.
Comfort Equals Consistency Equals Results
Let’s be honest: if it hurts, you won’t do it. Discomfort in the saddle, wrists, or knees will make you shorten your rides, skip classes, or worst of all, push through pain and get injured. A well-fitted bike feels like a natural, almost intuitive extension of your body. You can focus on the workout—the rhythm, the resistance, your breathing—not on the nagging ache in your left knee. This mental focus allows you to push harder, ride longer, and actually enjoy the process. Consistency is the golden key to fitness results, and comfort is the key to consistency.
Step 1: Mastering Your Seat Height – The Foundation of Your Fit
Seat height is the most critical adjustment. Get this wrong, and everything else feels compromised. The goal is to find a height that allows for a full, smooth pedal stroke without locking your knee or rocking your hips.
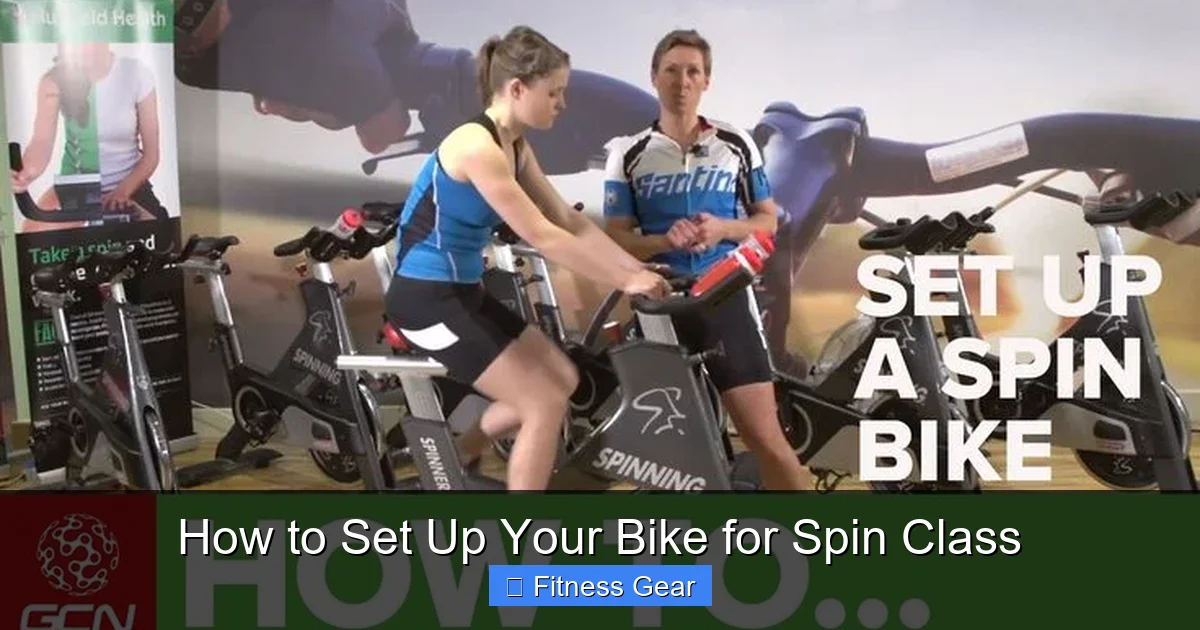
Visual guide about How to Set Up Your Bike for Spin Class
Image source: i.pinimg.com
The 25-35 Degree Rule (The Gold Standard)
The most reliable method is to measure your knee angle at the bottom of the stroke. Here’s how to do it:
- Get on the bike. Place your heels on the pedals (not the balls of your feet).
- Pedal backwards slowly. Use one foot to push the pedal all the way down to the 6 o’clock position.
- Check your hip. At the very bottom of the stroke, your hip on that side should feel stable and not have to rock or shift to reach the pedal. If you have to lift your hip to make the pedal reach, the seat is too high.
- Check your knee. Now, place the ball of your foot correctly on the pedal. At the bottom of the stroke (6 o’clock), there should be a very slight, soft bend in your knee—approximately 25 to 35 degrees. It should never be completely straight (hyperextended) or tightly bent (less than 25 degrees).
Pro Tip: A completely straight knee at the bottom of the stroke is a classic sign of a seat that’s too high. This hyperextension locks the joint and transfers all the impact up into your hip and lower back.
The Quick-and-Dirty Heel Method (For When You’re in a Rush)
If you’re late for class and need a fast estimate, use the heel method. With the pedal at the 6 o’clock position, your leg should be fully extended with your heel on the pedal (foot flat). When you then move to the correct ball-of-the-foot position, you’ll have that crucial slight knee bend. This is a great starting point, but always fine-tune with the full knee angle check when you have a moment.
Step 2: Fine-Tuning Seat Fore/Aft Position – The Secret to Happy Knees
Once your height is locked in, it’s time to slide the seat forward and backward. This adjustment determines where your knee sits in relation to the pedal axle, which is paramount for knee health and efficient power transfer.

Visual guide about How to Set Up Your Bike for Spin Class
Image source: i.ytimg.com
The KOPS Method (Knee Over Pedal Spindle)
The industry standard is the KOPS method. It’s simple and effective:
- Position the cranks. Rotate the pedals so they are horizontal, at 3 and 9 o’clock.
- Find the bony bump. Locate the bony prominence on the front of your knee (the patella).
- Drop a plumb line. From the front of that bony bump, imagine a vertical line dropping straight down.
- Check the axle. That vertical line should pass directly over the center of the pedal axle (the spindle) at the 3 o’clock position. If it’s significantly in front of or behind the axle, you need to slide the seat.
Why this matters: If your knee is too far behind the axle (seat too far back), you’ll be pulling up on the upstroke inefficiently and stressing your hamstrings and knee. If your knee is too far in front (seat too far forward), you’ll be pushing your knee forward into the handlebar on the downstroke, straining the patella tendon and quadriceps.
The “Sit Bones” Check for Comfort
While KOPS is for biomechanics, you also need to consider saddle comfort. Your sit bones (ischial tuberosities) should be centered on the widest part of the saddle. If the seat is too far forward, you’ll be perched on the nose of the saddle, leading to numbness and perineal pressure. If it’s too far back, you’ll be sliding backward, putting pressure on your tailbone. After adjusting for KOPS, sit on the bike and gently rock your hips side-to-side. You should feel equal, stable pressure on both sit bones. Make micro-adjustments (±1-2 cm) until you find the sweet spot where your knee is aligned and your sit bones are supported.
Step 3: Handlebar Height and Reach – Supporting Your Upper Body
With your lower body aligned, we move to the upper body. Handlebar setup affects your back, neck, shoulders, and arms. It’s highly personal and depends on your goals and flexibility.

Visual guide about How to Set Up Your Bike for Spin Class
Image source: i.pinimg.com
Height: The Comfort vs. Performance Spectrum
Handlebar height on most spin bikes is adjustable via a vertical post. Here’s the general rule of thumb:
- For Beginners & Those with Back/Neck Issues: Start with the handlebars level with or 1-2 inches above your seat height. This puts you in a more upright, “endurance” position, reducing strain on your lower back and neck. It’s the most comfortable position for longer rides.
- For Intermediate/Advanced Riders: Lower the handlebars incrementally. A drop of 2-4 inches below the seat height creates a more aggressive, “aero” position. This engages your core more, shifts weight forward for better pedal leverage on climbs, and mimics the riding position of a road bike. Only lower if you have the core strength and hamstring flexibility to maintain a flat back without rounding.
Warning: Dropping the bars too low, too fast is a prime cause of lower back rounding and neck strain. Progress slowly.
Reach: The Distance to the Controls
Reach is adjusted by sliding the saddle forward or backward (which we already did) and sometimes by adjusting the stem angle on the handlebar post. The correct reach allows you to:
- Grip the handlebars lightly with a soft bend in your elbows (about 20-30 degrees).
- Keep your shoulders relaxed and down, not hunched up by your ears.
- Maintain a neutral spine. Your torso should form a stable, strong platform. If you feel like you’re stretching to reach the bars (arms locked straight), your reach is too long. If you feel cramped and your knees hit the handlebars, your reach is too short.
If your bike has a fore/aft handlebar adjustment, use it to fine-tune this after setting your seat position. Your elbows should never be locked, and your shoulders should never be forced forward.
Step 4: Cleat and Shoe Alignment – Maximizing Power Transfer
If you’re using dedicated spin shoes ( SPD or Look-style), cleat setup is your final, crucial frontier. A misaligned cleat is a one-way ticket to hot spots, foot numbness, and knee pain. The goal is to have your foot point straight ahead and transfer force through the ball of the foot.
Finding Your Natural Foot Angle
Don’t just guess. Have a friend watch you walk or stand naturally. Which direction do your feet point? For most people, it’s slightly outward (10-15 degrees of external rotation). Your cleat should be set to match this natural angle. Forcing your feet to point perfectly straight ahead if that’s not your natural alignment will twist your knee joint with every pedal stroke.
The Ball-of-the-Foot Rule
The cleat must be positioned so that the ball of your foot (the bony pad just behind your toes) sits directly over the center of the pedal axle. This is the strongest, most stable part of your foot. If the cleat is too far forward, you’ll be on your toes, leading to foot cramping and Achilles strain. If it’s too far back, you’ll be pushing with your heel, which is inefficient and puts pressure on your forefoot. Most cleats have a fore/aft adjustment slot. Use it to get this alignment perfect. Your shoe should feel stable and balanced on the pedal, not like it’s tipping forward or backward.
Float: Your Safety Net
Float is the degree to which your foot can rotate (medially and laterally) while still clipped in. Road cleats (Look, SPD-SL) often have 0-6 degrees of float. Mountain bike-style SPD cleats typically have 6-10+ degrees. More float is forgiving and better for beginners or anyone with knee tracking issues. Less float is more efficient for advanced riders who have perfect form and want every watt of power transferred directly. If you’re new to clips, start with more float. It allows your knee to find its natural path during the pedal stroke.
Step 5: Resistance, RPM, and Finding Your “Sweet Spot”
Your bike setup is complete, but how you use it matters just as much. The interplay between gear (resistance) and cadence (RPM) is where the magic—or the injury—happens.
The 80-100 RPM Cadence Rule
A safe, sustainable, and effective cadence for most riders on a spin bike is between 80 and 100 revolutions per minute (RPM). This is a pace where your leg speed is high enough to keep the pedal stroke smooth and circular, reducing the “mashing” force on your knees. If your cadence drops below 60 RPM under heavy load, you’re grinding. This places massive, sudden impact forces on your knee joints with every downstroke. Your properly set-up bike should allow you to maintain this cadence across a range of resistances.
How to Add Resistance Properly
Resistance is controlled by a knob or lever, usually on the frame between your legs. Turn it clockwise (usually) to increase difficulty. The key is to add resistance before you slow down. If you’re sprinting at 100 RPM and want to simulate a hill, add a quarter-turn of resistance and try to hold your cadence. Your speed will drop, but your RPM should stay in the safe zone. If adding resistance makes your cadence plummet into the 40s, you added too much, too fast. Your muscles need time to adapt to the new load while maintaining a fast, controlled stroke.
The “Sweet Spot” Sensation
When your setup is perfect and your resistance/cadence is dialed in, you’ll know it. You’ll feel a smooth, powerful pull on the upstroke and a strong, controlled push on the downstroke. Your hips will stay level, your core will be engaged, and your breathing will be rhythmic. There’s no jarring, no excessive swaying, no sharp pains. It feels like you and the bike are one machine. This is the “sweet spot.” Use the first 5-10 minutes of every class to find it. Start with light resistance, focus on your form, and make tiny micro-adjustments to your seat or handlebars if something feels “off.”
The Pre-Ride Safety Checklist: Never Skip This
Before you clip in and start, perform this 60-second ritual. It could save you from a serious fall or injury.
- 1. Check All Levers: Firmly tug on the seat height adjustment lever and the handlebar post lever. They should be completely locked and immovable. Give them an extra push to be sure.
- 2. The Shake Test: With your hands on the handlebars, put your full body weight on one pedal at the bottom of the stroke. Then the other. The bike should not shift, creak, or wobble. If it does, alert the instructor immediately—the bike is not safe to ride.
- 3> Pedal Clearance: Spin the pedals with your hands. Ensure they clear the front of the bike frame and your own shoes/ankles. A misaligned crank arm can cause a crash.
- 4. Cleat Engagement: Clip one shoe in and out a few times. Ensure it releases easily with the standard twist (usually ankle outward). A stuck cleat is dangerous if you need to bail quickly.
- 5. Water Bottle & Towel: Have them within easy reach. Leaning or stretching for water while riding is a major cause of loss of control.
Common Setup Mistakes (And How to Fix Them)
Even with the best intentions, a few classic errors creep in. Here’s how to diagnose and solve them.
“My knees hurt!”
Likely Cause: Seat is too low or too far forward. Fix: Revisit Steps 1 and 2. Raise the seat to achieve that slight knee bend. Move the seat slightly back to align your knee over the pedal axle. Also, check cleat float and foot angle.
“My lower back is killing me!”
Likely Cause: Handlebar is too low for your current flexibility, or you’re rounding your back. Seat may be too far back, forcing you to reach. Fix: Raise the handlebars by 1-2 inches. Focus on engaging your core to support your spine. Ensure your seat fore/aft position allows you to comfortably rest your hands on the bars without hunching.
“I have numbness in my… you know… area.”
Likely Cause: Seat is too far forward, putting pressure on the perineum. Or, the seat is tilted downward. Fix: Slide the seat backward a centimeter or two. Ensure the seat is perfectly level (use a small spirit level if you’re unsure). Consider a padded shorts or a different saddle style if the problem persists.
“I feel wobbly and can’t control the bike.”
Likely Cause: Handlebar height is too high, creating a “top-heavy” feel. Seat is too high, causing hip rocking. Fix: Lower the handlebars slightly to bring your weight more centered over the bike. Double-check your seat height—hip rocking is a major cause of instability.
The Conclusion: Your Setup, Your Superpower
Setting up your spin bike isn’t a one-time chore; it’s an ongoing conversation with your body. Your ideal fit might shift slightly as you gain flexibility, strength, or as you recover from an injury. The empowerment comes from knowing how to have that conversation. You are no longer a passive passenger on the bike; you are its engineer, tuning it to your unique specifications. The next time you walk into the studio, take those extra two minutes. Adjust with intention. Test with purpose. That investment of time pays dividends in every single pedal stroke: more power, more endurance, more joy, and zero pain. You’ve earned that great ride. Now go set up your bike and claim it.
Frequently Asked Questions
What’s the fastest way to check if my seat height is correct?
Place your heel on the pedal at the bottom of the stroke. Your leg should be fully straight. When you move to the ball of your foot, you’ll have the correct slight knee bend. This is a quick initial check before fine-tuning.
Can I use regular athletic shoes instead of spin shoes?
Yes, most studio bikes have standard toe cages. Regular sneakers work fine. However, dedicated spin shoes with a stiff sole and proper pedal system (SPD or Look) provide significantly better power transfer, foot stability, and prevent the “slipping” sensation, making them a worthwhile investment for regular riders.
My hamstrings are tight. Should I raise or lower my handlebars?
Raise them. Higher handlebars reduce the forward bend at your hips, which lessens the stretch on your hamstrings and lower back. Start with them level with or above your saddle. As your flexibility improves, you can experiment with lowering them slightly.
Does more resistance always mean a better workout?
No. Excessive resistance that forces your cadence below 60 RPM is inefficient and dangerous for your knees. A better workout comes from maintaining a cadence of 80-100 RPM against a challenging but sustainable resistance. This builds muscular endurance and cardiovascular fitness safely.
Can I adjust my bike during a class?
It’s best to make all major adjustments before class starts. Small tweaks (like adding a half-turn of resistance) are fine. However, getting off mid-class to adjust your seat height or fore/aft position is disruptive and can be dangerous in a crowded, dark room. Use the first song to assess and adjust if needed.
Do all spin bikes adjust the same way?
The principles (seat height, fore/aft, handlebar height) are universal, but the mechanisms differ. Some use quick-release levers; others use twist knobs or pin-and-hole systems. Always ask the instructor for a brief tutorial on that specific bike’s levers and locks before your first ride. The adjustment ranges might also vary slightly between brands.