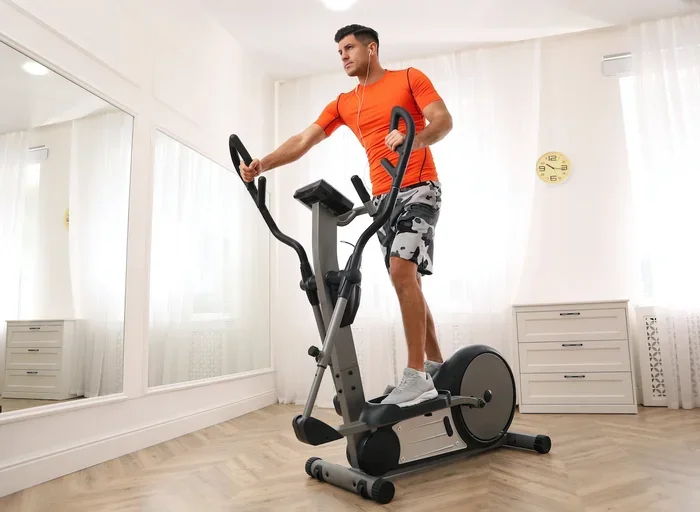
How to Set Seat Height on Exercise Bike

Setting your exercise bike seat height is the single most important adjustment you can make for comfort, power, and injury prevention. A seat that is too high or too low can cause knee pain, poor pedaling efficiency, and an uncomfortable ride. This guide walks you through the exact steps to find your perfect seat height on an exercise bike in minutes.
You just unboxed your new exercise bike. You hop on, start pedaling, and within minutes your knees start aching. Your back feels off. Something is just not right.
Here is the thing most people miss. The problem is almost always the seat height. Setting your stationary bike seat adjustment correctly is the foundation of every great indoor cycling session. It affects your comfort, your power output, and even how many calories you burn.
In this guide, we will walk you through exactly how to set seat height on exercise bike the right way. Whether you own an upright bike, a recumbent model, or a spin bike, this guide covers it all. No guesswork. No fancy tools needed. Just simple steps you can follow right now.
Key Takeaways
- Correct seat height prevents knee pain and ensures your legs extend properly during each pedal stroke.
- Use the heel-to-pedal method for the fastest and most reliable way to set your seat height.
- Handlebar position matters too and works hand-in-hand with seat height for overall comfort.
- Recumbent and upright bikes differ in how you should approach seat adjustments.
- Small tweaks make a big difference so always fine-tune after your initial setup.
- A properly fitted bike seat boosts your workout efficiency and helps you burn more calories.
📑 Table of Contents
- Why Seat Height on Your Exercise Bike Matters So Much
- The Heel-to-Pedal Method: The Easiest Way to Set Your Seat Height
- How to Set Seat Height on Exercise Bike: Upright vs. Recumbent
- Common Mistakes People Make When Setting Their Bike Seat
- How to Make Your Exercise Bike Seat More Comfortable After Setting the Height
- Expert Tips for Perfecting Your Exercise Bike Setup
- How to Know If Your Seat Height Is Correct: Quick Self-Check
- How Seat Height Affects Your Calorie Burn and Workout Results
- Key Takeaways
- Conclusion
Why Seat Height on Your Exercise Bike Matters So Much
Think of your bike seat as the control center of your workout. When it is set correctly, everything feels smooth and natural. When it is off, even by a small amount, your body starts to compensate in ways that cause problems.
Proper bike seat height ensures your legs achieve the right amount of extension at the bottom of each pedal stroke. This reduces strain on your knees and joints. It also allows your muscles to work efficiently, which means more power with less effort.
Here are the main reasons why getting this right matters:
- Knee protection: A seat that is too low puts excessive pressure on your kneecaps. A seat that is too high causes your hips to rock side to side. Both lead to pain over time.
- Better pedaling efficiency: When your seat is at the right height, your legs can push through the full circle of the pedal stroke without wasting energy.
- Comfort during long rides: If you want to exercise on your exercise bike for 30 minutes or more, comfort is non-negotiable. A proper seat height makes longer sessions enjoyable.
- Injury prevention: Poor bike fitting is one of the leading causes of repetitive strain injuries in indoor cyclists.
- Improved calorie burn: When your body is aligned correctly, you can pedal harder and longer, which directly increases your calorie expenditure.
Setting your seat height is not a luxury. It is a necessity. And the good news is that it takes less than five minutes once you know the method.
The Heel-to-Pedal Method: The Easiest Way to Set Your Seat Height
The heel-to-pedal method is the gold standard for setting exercise bike seat position. It is simple, fast, and surprisingly accurate. You do not need any special tools or measuring tapes.
Step-by-Step Instructions
- Sit on the bike seat and place your heel on the center of the pedal axle.
- Extend your leg fully so that your foot is at the lowest point of the pedal stroke.
- Your leg should be completely straight with no bend in the knee. If your knee is bent, the seat is too low. If your hip is rocking, the seat is too high.
- Tighten the seat clamp once you find the correct position.
- Clip your feet in or place the balls of your feet on the pedals and do a few test pedals. You should feel a very slight bend in your knee at the bottom of the stroke.
This method works because when you pedal with your heels, you naturally find the height where your legs can fully extend. When you switch back to the balls of your feet, that slight bend is exactly what your body needs for optimal power and comfort.
Quick tip: Always make this adjustment before your first ride of the day. Your body warms up during exercise, and your muscles can shift slightly. Setting the seat cold gives you a more accurate starting point.
How to Set Seat Height on Exercise Bike: Upright vs. Recumbent
Not all exercise bikes are the same, and the type of bike you own affects how you should approach the stationary bike seat adjustment. Let us break it down by bike type.
Upright Exercise Bikes
Upright bikes mimic the feel of a traditional bicycle. Your body sits vertically, and your legs hang straight down to the pedals. For upright bikes, the heel-to-pedal method works perfectly.
When you set the seat on an upright bike, also pay attention to the handlebar position. Your arms should reach the handlebars comfortably without forcing your shoulders up or leaning too far forward. If you find yourself hunching, you may need to lower or move the handlebars closer.
Proper handlebar and seat alignment is key to a comfortable upright ride. Check out our guide for more details.
Recumbent Exercise Bikes
Recumbent bikes have a reclined seat with a backrest. Your legs extend forward to reach the pedals rather than hanging straight down. The seat height adjustment on recumbent bikes is different.
On a recumbent bike, you are adjusting the seat slide forward or backward along the rail, not necessarily the vertical height. The goal is to achieve a slight bend in your knee when your foot is at the farthest point of the pedal stroke.
Here is how to do it:
- Sit in the seat and place your foot on the pedal at its farthest forward position.
- Your knee should have a soft bend of about 25 to 30 degrees.
- If your knee is fully straight, the seat is too far back. Slide it forward.
- If your knee bends too much, the seat is too far forward. Slide it back.
Getting the recumbent seat right can transform your workout. Many people underestimate how much difference a small adjustment makes. Once you dial it in, you will notice better comfort and more power with every pedal.
Common Mistakes People Make When Setting Their Bike Seat
Even with the best intentions, people make mistakes when adjusting their exercise bike seat height. Here are the most common ones and how to avoid them.
Mistake 1: Setting the Seat Too Low
A seat that is too low is the most common error. It causes your knees to bend excessively, which puts pressure on the patella and surrounding tendons. Over time, this leads to anterior knee pain. If you feel pain at the front of your knee during a ride, the seat is almost certainly too low.
Mistake 2: Setting the Seat Too High
A seat that is too high forces your hips to rock from side to side as you pedal. This wastes energy and can cause lower back pain. You may also feel a stretching sensation in the hamstrings at the bottom of the pedal stroke. If this sounds familiar, lower the seat slightly.
Mistake 3: Ignoring the Handlebars
Seat height does not exist in a vacuum. The handlebar position works together with the seat to determine your overall riding posture. A great seat height paired with the wrong handlebar position will still leave you uncomfortable.
For a more complete setup guide, check out our article on how to set up a stationary bike for your height. It covers the full picture from seat to handlebars to pedal position.
Mistake 4: Never Reassessing Your Setup
Your body changes over time. You may lose or gain weight. Your flexibility may improve or decline. The seat height that felt perfect six months ago may not be right anymore. Make it a habit to reassess your setup every few weeks.
How to Make Your Exercise Bike Seat More Comfortable After Setting the Height
Once you have your seat height dialed in, you can take comfort a step further. A proper exercise bike seat height reduces strain, but you can also make the seat itself more comfortable with a few simple tricks.
If you want to go the extra mile, we have a detailed guide on how to make your exercise bike seat more comfortable with DIY solutions. Here are some quick ideas to get you started:
- Add a gel seat cover: A padded cover distributes pressure more evenly across the seat surface.
- Wear padded cycling shorts: They make a noticeable difference during longer rides.
- Shift your weight slightly: On upright bikes, try leaning forward just a little to take pressure off your sit bones.
- Take breaks: Stand up and pedal for 30 seconds every 10 minutes to relieve pressure points.
These small changes combined with a properly set seat height will make your workouts far more enjoyable.
Expert Tips for Perfecting Your Exercise Bike Setup
We asked experienced cycling instructors and fitness professionals for their top tips on setting up an exercise bike correctly. Here is what they recommend.
Tip 1: Use a Mirror or Record Yourself
Set up your bike and then film yourself from the side while pedaling. Look for a smooth, circular pedal motion. If your hips are bouncing or your knees are tracking inward, something is off. Adjust the seat and recheck.
Tip 2: The Ball of Your Foot Should Align with the Pedal Axle
When your foot is clipped in or placed on the pedal, the ball of your foot should sit directly over the pedal axle. This alignment ensures maximum power transfer and reduces strain on your ankles.
Tip 3: Check Your Knee Tracking
As you pedal, your knee should track straight up and down. If it caves inward or pushes outward, your seat height or cleat position may need adjustment. Proper knee alignment during cycling is one of the best ways to prevent joint pain.
Tip 4: Fine-Tune After Warming Up
Your muscles and joints behave differently when warm. After a 5-minute warm-up at a light pace, recheck your seat height. You may find you need a tiny adjustment. This is completely normal and shows you are paying attention to your body.
For more guidance on maximizing your indoor cycling results, check out our article on how to burn more calories on a stationary bike. Proper seat height is just one piece of the puzzle.
How to Know If Your Seat Height Is Correct: Quick Self-Check
After you have adjusted your seat, how do you know if it is right? Here is a simple self-check you can do every time you ride.
| Check | What to Look For | What It Means |
| Knee at bottom of stroke | Slight bend (25-30 degrees) | Seat height is correct |
| Knee at bottom of stroke | Fully straight or very little bend | Seat is too high |
| Knee at bottom of stroke | Significant bend | Seat is too low |
| Hip movement while pedaling | Smooth and stable | Seat height is correct |
| Hip movement while pedaling | Rocking side to side | Seat is too high |
| Knee pain during ride | No pain | Seat height is correct |
| Knee pain during ride | Pain at front or back of knee | Adjust seat height and reassess |
Use this table as a quick reference after each adjustment. It takes the guesswork out of the process and gives you clear, actionable feedback.
How Seat Height Affects Your Calorie Burn and Workout Results
You might be wondering why seat height matters so much for calorie burn. The answer is simple: efficiency. When your body is properly aligned, you can push harder and longer without fatigue or pain.
Think about it this way. If your seat is too low, your knees are bent too much. This means your leg muscles cannot fully extend and contract through the pedal stroke. You are essentially leaving power on the table. You burn fewer calories because you cannot sustain the same level of effort.
On the flip side, a correctly positioned seat allows your muscles to work through their full range of motion. You generate more force per pedal stroke. You can maintain a higher intensity for longer periods. And that directly translates to a better workout and more calories burned.
If you are tracking your exercise bike calorie burn, seat height is one of the variables you can control to get better results. Combine a proper seat height with consistent effort, and you will see real progress.
For specific calorie targets, check out our guide on how long to ride an exercise bike to burn 500 calories. A properly set seat makes those sessions more effective.
Key Takeaways
- Correct seat height prevents knee pain and ensures your legs extend properly during each pedal stroke.
- Use the heel-to-pedal method for the fastest and most reliable way to set your seat height.
- Upright and recumbent bikes require different approaches to seat adjustment. Know which one applies to your bike.
- Handlebar position works together with seat height for overall riding comfort and posture.
- Avoid common mistakes like setting the seat too low, too high, or ignoring handlebar alignment.
- Reassess your setup regularly as your body changes over time.
- A properly fitted exercise bike seat boosts your workout efficiency and helps you burn more calories with less effort.
Conclusion
Setting the seat height on your exercise bike is one of the simplest and most impactful things you can do for your workouts. It takes just a few minutes, requires no special equipment, and makes an immediate difference in how your body feels during every ride.
Use the heel-to-pedal method as your starting point. Fine-tune based on how your knees, hips, and back feel during your first few minutes of pedaling. Make adjustments as needed. And remember, the goal is a setup that feels natural and allows you to pedal with full power and zero pain.
Take the time to get this right now. Your knees, your back, and your workout results will thank you. Happy riding!
Frequently Asked Questions
How do I know if my exercise bike seat is too low?
If your knees bend too much at the bottom of the pedal stroke or you feel pain at the front of your knees, your seat is likely too low. Try raising it slightly and test again. The heel-to-pedal method is the best way to find the right starting point.
Can I set my exercise bike seat height without tools?
Yes. Most exercise bikes have a quick-release lever or knob that lets you adjust the seat height by hand. You do not need any special tools. Just follow the heel-to-pedal method and tighten the clamp once you find the right position.
Should I adjust my seat height based on my height?
Your height is a good starting point, but the heel-to-pedal method is more accurate because it accounts for your individual leg length and flexibility. Two people of the same height may need different seat heights based on their body proportions.
How often should I recheck my exercise bike seat height?
You should reassess your seat height every few weeks or whenever you notice discomfort during your rides. Your body changes over time, and what felt perfect before may need a small tweak. A quick check before each workout session is a great habit.
Is seat height more important than handlebar position?
Seat height is the most critical adjustment because it directly affects your knee alignment and pedaling efficiency. However, handlebar position matters too for overall comfort and posture. Ideally, you should get both dialed in for the best results.
What if I still feel discomfort after adjusting my seat height?
If you still feel pain or discomfort after adjusting your seat, check your handlebar position and foot placement. You may also want to consider a seat cushion or padded cycling shorts. If discomfort persists, consult a fitness professional for a full bike fitting assessment.