How to Replace Walking Belt on Proform Treadmill
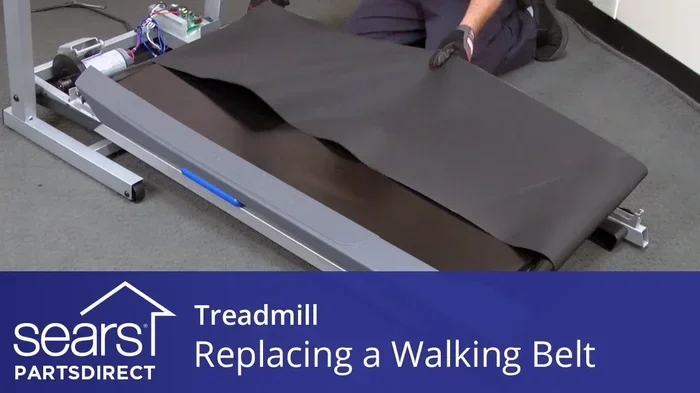
Replacing the walking belt on your Proform treadmill is easier than you think. With the right tools, a little patience, and our detailed walkthrough, you can swap out a worn belt in under an hour. This guide covers everything from choosing the correct belt size to final tension adjustments.
Your Proform treadmill has been a reliable partner in your fitness journey. But over time, the walking belt starts to show signs of wear. Fraying edges, slipping, or strange noises all point to one thing — it is time for a replacement.
Replacing the walking belt on a Proform treadmill might sound intimidating, but it is a task most homeowners can handle in about an hour. You do not need advanced mechanical skills. You just need the right guidance, a few basic tools, and a little confidence.
In this guide, we walk you through every single step. From identifying the correct belt size to fine-tuning the tension after installation, we have you covered. By the end, you will feel empowered to tackle this repair yourself and save money on professional service calls.
Key Takeaways
- Know your model: Finding your Proform treadmill model number ensures you buy the correct replacement belt.
- Gather tools first: Having all the necessary tools ready saves time and frustration during the replacement process.
- Align the belt properly: Correct alignment prevents uneven wear and extends the life of your new walking belt.
- Tension matters: Too loose or too tight a belt causes slipping, noise, and premature failure.
- Lubricate after installation: Applying treadmill belt lubricant reduces friction and protects both the belt and deck.
- Test before your workout: Always run a test cycle at low speed to verify everything works before you exercise.
📑 Table of Contents
- Why Your Proform Walking Belt Needs Replacement
- Choosing the Right Replacement Belt for Your Proform
- Tools and Supplies You Will Need
- Step-by-Step Guide to Replacing the Walking Belt
- Common Mistakes to Avoid During Belt Replacement
- How to Maintain Your New Walking Belt
- When to Call a Professional
- Conclusion
Why Your Proform Walking Belt Needs Replacement
Every treadmill belt has a lifespan. Understanding the signs of wear helps you act before the belt fails completely during a workout. Catching the problem early also protects the treadmill deck and rollers from additional damage.
Common Signs of a Worn Walking Belt
Look out for these telltale indicators that your belt needs replacing:
- Slipping during use: The belt slides under your feet even when you are walking at a steady pace.
- Visible fraying or cracking: The edges of the belt look worn, dry, or cracked to the touch.
- Loud squeaking or grinding noises: Unusual sounds during operation signal friction between the belt and deck.
- Belt shifting to one side: The walking belt drifts left or right instead of staying centered.
- Reduced cushioning: Your joints feel more impact than usual because the belt has lost its shock absorption.
If you notice any of these issues, do not ignore them. Continuing to use a damaged belt can harm the treadmill deck and motor. For quick fixes on minor slipping issues, you might want to check how to fix a slipping belt on a treadmill first. But if the damage is severe, a full replacement is the best path forward.
Choosing the Right Replacement Belt for Your Proform
Not all treadmill belts are created equal. Buying the wrong size or type can lead to frustration and wasted money. Here is how to make sure you get the perfect match for your Proform model.
Find Your Treadmill Model Number
Before ordering anything, locate your Proform treadmill model number. You can usually find this on a sticker near the power plug, on the underside of the frame, or in the user manual. Some models also display the version number on the console screen.
If you are having trouble locating it, visit where to find the version number on a Proform treadmill for helpful tips. Once you have the model number, you can search for the exact compatible belt.
Measure the Belt Correctly
Use a soft measuring tape to determine both the length and width of your current belt. Measure from edge to edge while the belt is still on the treadmill. Most Proform walking belts range from 50 to 60 inches in length and 18 to 22 inches in width.
- Length: Measure the full seam-to-seam length.
- Width: Measure across the top surface of the belt.
- Thickness: Note the belt thickness as well, since this affects tension and cushioning.
Write down all three measurements. When you shop for a replacement, match these dimensions exactly. A belt that is even slightly too large or small will not sit properly on the deck.
Consider Belt Material and Type
Proform treadmills typically use multi-ply polyester or rubber composite belts. Higher-end models may feature cushioned belts designed to reduce joint impact. When choosing a replacement, match the material type to your original belt for the best performance.
Tools and Supplies You Will Need
Before you start disassembling your treadmill, gather everything you need. Having all tools ready prevents mid-project trips to the hardware store and keeps your momentum going.
Essential Tools
- Phillips head screwdriver: You will need this for most bolt and screw removal.
- Adjustable wrench: Helps loosen and tighten nuts on the belt rollers.
- Allen wrench set: Many Proform models use hex bolts for the deck housing.
- Flathead screwdriver: Useful for prying off side covers gently.
- Treadmill belt lubricant: You will need this for the final step after installation.
Helpful Extras
- Clean cloth: For wiping dust and debris off the deck before installing the new belt.
- Flashlight: Helps you see into tight spaces under the deck housing.
- Knee pad or mat: Working on the floor for extended periods can be hard on your knees.
Pro tip: Lay out all your tools on a towel before you begin. This keeps small parts organized and prevents them from rolling under furniture. If you are also curious about how to adjust the belt on a treadmill, this is the perfect time to refresh your understanding of tension principles.
Step-by-Step Guide to Replacing the Walking Belt
Now comes the hands-on part. Follow these steps carefully, and your Proform treadmill will feel brand new again.
Step 1: Unplug the Treadmill
Safety always comes first. Unplug the treadmill from the wall outlet and wait at least five minutes. This allows any residual electrical charge to dissipate. Never work on a treadmill while it is plugged in, even if it is turned off.
Step 2: Remove the Side Covers
Most Proform treadmills have two side covers held in place by screws or clips. Use your Phillips head screwdriver to remove the screws. Set them aside in a safe spot — a small bowl works great for this. Gently pull the covers off and set them aside.
Step 3: Loosen the Walking Belt
Locate the tension bolts at the rear of the treadmill. These bolts control how tight the belt sits on the deck. Use your adjustable wrench to turn each bolt counterclockwise. Loosen them about one to two full turns. The belt should now be loose enough to lift in the center.
If you are unsure about proper tension settings, check out how do you tighten the belt on a treadmill for additional guidance on tension fundamentals.
Step 4: Remove the Old Belt
Lift the belt in the center and pull it forward toward the front roller. Work slowly and gently. The belt will slide off the rear roller and come free from the deck. Once loose, fold the old belt in half and slide it out from under the treadmill.
Take a moment to inspect the deck surface. If you see deep scratches, debris, or worn spots, clean the area thoroughly with a damp cloth. A clean deck ensures the new belt sits evenly and lasts longer.
Step 5: Position the New Belt
Unroll the new walking belt and lay it flat across the deck. Make sure the belt is centered side to side. The seam should run lengthwise along the center of the deck.
Start by placing the belt over the rear roller first. Then, pull the front end of the belt up and over the front roller. Work slowly, making sure the belt does not twist or fold over on itself. A twisted belt will cause uneven wear and noise.
Step 6: Adjust the Belt Tension
Once the new belt is in place, it is time to adjust the tension. Turn each rear tension bolt clockwise, about one to two turns. The belt should feel snug but not overly tight.
Here is a quick test: lift the center of the belt with your hand. You should be able to raise it about two to three inches off the deck. If it lifts more than that, the belt is too loose. If you cannot lift it at all, tighten the bolts slightly more.
For more details on achieving the perfect tension, refer to how to tighten the belt on a Proform treadmill. That article covers Proform-specific tension settings in greater detail.
Step 7: Lubricate the New Belt
Apply a thin, even layer of treadmill belt lubricant across the entire underside of the belt. Use the lubricant recommended by Proform or a compatible silicone-based lubricant. Avoid using household products like WD-40, as they can damage the belt material over time.
Lubrication reduces friction between the belt and the deck. This protects both components and ensures a smooth, quiet walking experience. Spread the lubricant evenly with a clean cloth for best results.
Step 8: Reassemble and Test
Replace the side covers and secure them with screws. Plug the treadmill back in and turn it on. Set the speed to the lowest setting and let the belt run for two to three minutes. Watch for any slipping, noise, or misalignment.
If the belt looks and sounds good, gradually increase the speed to your normal walking pace. Walk on the belt for a few minutes to confirm everything feels right. If you notice any issues, stop immediately and recheck the tension and alignment.
Common Mistakes to Avoid During Belt Replacement
Even with the best instructions, it is easy to make mistakes. Here are the most common errors people make when replacing a treadmill belt — and how to avoid them.
- Skipping lubrication: A dry belt creates excess friction. This wears out both the belt and the deck faster. Always lubricate after installation.
- Over-tightening the belt: Too much tension puts strain on the motor and rollers. It also makes the treadmill louder and harder to operate.
- Not centering the belt: An off-center belt will drift to one side during use. This causes uneven wear and can damage the frame over time.
- Using the wrong belt size: Even a half-inch difference in length can cause the belt to slip or bunch up. Always double-check your measurements.
- Forgetting to inspect the deck: A dirty or damaged deck affects how the new belt performs. Clean the deck surface thoroughly before installing the replacement.
If you experience persistent belt slipping after replacement, you may want to explore what to do if your treadmill belt is slipping for troubleshooting tips.
How to Maintain Your New Walking Belt
Replacing the belt is only half the battle. Proper maintenance keeps your new walking belt in great shape for years to come. A little regular care goes a long way.
Regular Cleaning
Dust and debris build up on the deck and belt over time. Wipe down the belt surface with a damp cloth once a week. Use a vacuum to clean dust from the deck area every two weeks. This simple habit prevents grit from grinding against the belt underside.
Lubrication Schedule
Most Proform treadmills need lubrication every three to six months. If you use your treadmill daily, aim for every three months. If you walk lightly a few times a week, every six months should suffice. Always use a lubricant designed specifically for treadmills.
Check Tension Monthly
Over time, belts naturally stretch and lose tension. Once a month, check that the belt still lifts about two to three inches at the center. If it feels loose, adjust the rear tension bolts slightly. This small habit prevents many common belt problems.
Inspect for Wear and Tear
Every few months, look over the entire belt for signs of wear. Check the edges for fraying, the surface for cracks, and the underside for excessive wear patterns. Catching small issues early saves you from a full replacement sooner than necessary.
When to Call a Professional
Most belt replacements go smoothly with a little patience. But sometimes, the problem runs deeper than just the belt. If you notice any of the following, it may be time to call a professional technician:
- The treadmill motor makes grinding noises even after a new belt is installed.
- The belt continues to slip despite correct tension and lubrication.
- The deck surface is visibly warped or damaged underneath the belt.
- You feel uncomfortable working with electrical equipment or heavy machinery.
A qualified technician can diagnose underlying issues and ensure your treadmill operates safely. Many Proform service centers also offer belt installation for a reasonable fee. Do not hesitate to reach out if the repair feels beyond your comfort zone.
Conclusion
Replacing the walking belt on your Proform treadmill is a rewarding DIY project. It saves you money, builds your confidence, and keeps your treadmill running like new. With the right belt size, proper tools, and a steady hand, you can complete the entire process in about an hour.
Remember to choose the correct belt for your model, follow each step carefully, and always lubricate the new belt after installation. Regular maintenance after the replacement will extend the life of your belt and protect your investment.
Now that you know how to handle this repair yourself, you are ready to get back to your workouts without interruption. Your Proform treadmill is counting on you — and your next walk is just a belt replacement away.
Frequently Asked Questions
How long does it take to replace a walking belt on a Proform treadmill?
Most people complete the replacement in 45 minutes to one hour. If you are a first-timer, give yourself an extra 15 to 20 minutes to read through the instructions and gather your tools beforehand.
Can I use any treadmill belt for my Proform treadmill?
No. You must match the belt to your specific Proform model. Check your model number and measure the current belt’s length, width, and thickness before purchasing a replacement. Using the wrong size will cause performance issues.
How often should I replace the walking belt on my Proform treadmill?
Most walking belts last between 3 to 5 years with regular use. Heavy daily use may shorten that lifespan. Regular cleaning and lubrication help extend the belt life significantly.
Do I need to lubricate the belt after every replacement?
Yes. Lubrication is essential after installing a new belt. It reduces friction between the belt and the deck, prevents premature wear, and ensures a smooth, quiet walking experience.
What happens if I overtighten the walking belt?
An overtightened belt puts extra strain on the motor and rollers. It can cause the motor to overheat, increase noise levels, and actually shorten the belt’s lifespan. Always check tension by lifting the center of the belt — it should raise about two to three inches.
Is it safe to replace the belt myself, or should I hire a professional?
For most people, replacing a Proform treadmill belt is a safe and straightforward DIY task. Just make sure to unplug the treadmill before starting. If you feel uncomfortable with any part of the process, a professional technician can handle the job for you.