How to Record Stationary Bike on Apple Watch
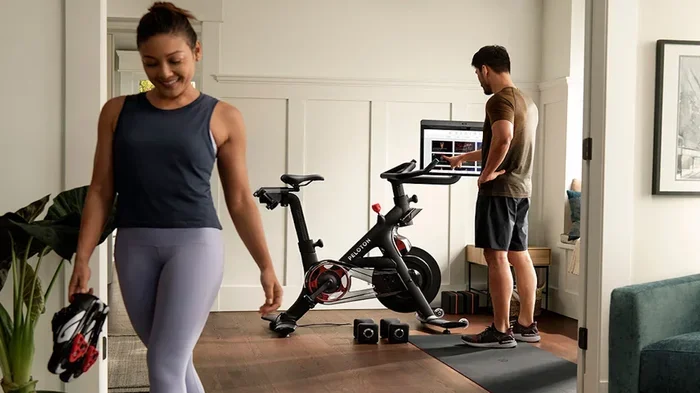
Recording your stationary bike workout on Apple Watch is simple and rewarding. You can track calories burned, heart rate, distance, and workout duration directly from your wrist. This guide covers every method, from the built-in Workout app to third-party apps, so you can choose what works best for your fitness routine.
Riding a stationary bike is one of the best low-impact workouts you can do at home. And when you pair it with your Apple Watch, you unlock a powerful way to monitor every pedal stroke. Whether you are a beginner or a seasoned cyclist, knowing how to record stationary bike on Apple Watch helps you get the most out of each session.
Your Apple Watch does more than just tell time. It tracks your heart rate, counts calories, measures distance, and logs your entire workout history. But setting it up correctly for a stationary bike ride takes a few simple steps. This guide walks you through everything you need to know, from opening the Workout app to exploring advanced third-party options.
By the end of this article, you will know exactly how to start recording, what metrics to watch, and how to make your data work harder for you. Let us get into it.
Key Takeaways
- Use the Apple Watch Workout app: The native app makes recording stationary bike sessions quick and effortless with just a few taps.
- Track key metrics: Apple Watch monitors heart rate, calories, time, and distance to give you a complete picture of your ride.
- Third-party apps add features: Apps like Zwift and Kinomap offer advanced tracking and virtual ride experiences.
- Set up your Apple Watch correctly: Proper calibration and settings ensure accurate data every time you hop on the bike.
- Sync with your iPhone: All your workout data automatically syncs to your iPhone for long-term tracking and analysis.
- Compare with other workouts: You can log and compare your stationary bike sessions with other exercises like logging kettlebell workouts on Apple Watch for a full fitness picture.
- Stay consistent: Regular recording helps you spot trends and stay motivated toward your fitness goals.
📑 Table of Contents
- Why Recording Your Stationary Bike Workout Matters
- How to Record Stationary Bike on Apple Watch Using the Workout App
- Understanding the Metrics Apple Watch Tracks During Cycling
- Using Third-Party Apps for Advanced Stationary Bike Tracking
- Tips for Accurate Stationary Bike Tracking on Apple Watch
- Common Mistakes to Avoid When Recording Stationary Bike Workouts
- Comparing Stationary Bike Recording With Other Fitness Activities on Apple Watch
- How to Review and Analyze Your Stationary Bike Data
- Final Thoughts
Why Recording Your Stationary Bike Workout Matters
Tracking your rides gives you real insight into your progress. Without data, it is hard to know if you are actually improving. When you record stationary bike on Apple Watch, you build a clear picture of your fitness journey over time.
Here is why recording matters so much:
- Accountability: Seeing your workout logged keeps you motivated to show up every day.
- Progress tracking: You can compare today’s ride with last week’s and see real improvements.
- Health insights: Heart rate data helps you understand how hard your body is working during each session.
- Goal setting: Recorded data makes it easy to set realistic fitness goals based on actual numbers.
- Injury prevention: Tracking effort levels helps you avoid overtraining and burnout.
Think of your Apple Watch as a personal fitness coach on your wrist. It does not just count minutes. It gives you meaningful data that helps you train smarter, not harder.
How to Record Stationary Bike on Apple Watch Using the Workout App
The Apple Watch Workout app is the easiest way to start recording your rides. It comes pre-installed on every Apple Watch, and it works great for stationary biking. Here is exactly how to do it.
Step-by-Step Guide
- Press the Digital Crown on your Apple Watch to open the app list.
- Tap the Workout app. It has a green icon with a running figure.
- Scroll down and select “Other” or “Cycle” from the list of workout types.
- Set your goal. You can choose to track by time, distance, or calories.
- Tap Start. Your Apple Watch begins recording immediately.
- Ride your stationary bike at a comfortable pace.
- Tap End when you finish your session.
- Save the workout to your history for future reference.
That is all it takes. The entire process takes less than 30 seconds before you start pedaling. Once saved, your workout appears in the Fitness app on your iPhone, where you can review detailed charts and trends.
Customizing Your Workout Metrics
Apple Watch lets you choose which metrics appear on your screen during a ride. To customize, open the Workout app, select your workout type, and swipe right on the metric you want to change. You can display heart rate zones, elapsed time, calories burned, and more.
For stationary biking, most people find heart rate and calories to be the most useful metrics. Distance tracking can be less accurate on a stationary bike since the watch relies on arm movement. However, Apple Watch compensates by using your heart rate data to estimate calorie burn very accurately.
Understanding the Metrics Apple Watch Tracks During Cycling
When you record stationary bike on Apple Watch, the watch captures several key data points. Understanding what each metric means helps you use your workouts more effectively.
Heart Rate and Heart Rate Zones
Your Apple Watch uses optical sensors to measure your heart rate continuously during a ride. It breaks your heart rate into five zones:
- Zone 1 (Warm-up): 50-60% of max heart rate. Light effort, great for recovery.
- Zone 2 (Fat Burn): 60-70% of max heart rate. Moderate effort, ideal for steady rides.
- Zone 3 (Cardio): 70-80% of max heart rate. Challenging effort that improves endurance.
- Zone 4 (Peak): 80-90% of max heart rate. High intensity, builds speed and power.
- Zone 5 (Max): 90-100% of max heart rate. All-out effort, used for short bursts.
Monitoring which zones you spend the most time in helps you tailor your rides to your specific fitness goals. If you want to burn fat, spending more time in Zone 2 is key. If you want to build cardiovascular endurance, Zone 3 and Zone 4 intervals work best.
Calories Burned
Apple Watch estimates calories burned using a combination of your heart rate, personal details (age, weight, height), and activity level. For stationary biking, this estimate is quite reliable. A typical 30-minute moderate ride burns between 200 and 400 calories depending on your weight and intensity.
Exercise Minutes and Rings
Every recorded workout contributes to closing your Apple Watch exercise rings. The Move ring tracks active calories, the Exercise ring tracks minutes of brisk movement, and the Stand ring tracks hours where you stood at least once. Completing your rings daily creates a satisfying routine that keeps you moving.
If you also enjoy other forms of exercise, you might want to learn how to track kettlebell workouts on Apple Watch to keep all your fitness activities in one place.
Using Third-Party Apps for Advanced Stationary Bike Tracking
While the native Workout app works great for most people, third-party apps offer deeper features for cycling enthusiasts. These apps connect to your Apple Watch and provide richer data, virtual routes, and training plans.
Popular Apple Watch Cycling Apps
Here are some top apps that pair well with Apple Watch for stationary biking:
- Zwift: A virtual cycling platform that lets you ride digital worlds while your Apple Watch tracks your heart rate and power output.
- Kinomap: Offers real-world video routes you can follow on your stationary bike while tracking performance metrics.
- Strava: A social fitness app where you can log rides, join challenges, and compare your performance with friends.
- MapMyRide: Great for planning routes and tracking your indoor cycling sessions with detailed analytics.
Setting Up a Third-Party App
Most third-party apps follow a similar setup process. Download the app from the App Store on your iPhone. Open the Apple Watch app on your iPhone, go to the My Watch tab, and find the app. Toggle on “Show App on Apple Watch.” Once installed, open the app on your watch, select your workout type, and start riding.
Keep in mind that some apps require a subscription for full features. But even free versions offer significant improvements over the default Workout app for serious cyclists.
Tips for Accurate Stationary Bike Tracking on Apple Watch
Getting the most accurate data from your Apple Watch during a stationary bike session comes down to a few simple habits. Follow these tips to ensure your recordings are as precise as possible.
Wear Your Watch Correctly
Your Apple Watch should sit snugly on the top of your wrist, about one finger width above the bone. If it is too loose, the heart rate sensor may not read accurately. During intense rides, sweat can also affect readings, so keep the watch clean and dry before each session.
Calibrate Your Watch Before Riding
Before starting a new recording session, take a moment to calibrate. Open the Workout app, scroll to your chosen workout type, and make sure the correct activity is selected. This small step ensures the metrics displayed match your actual effort.
Use the Correct Workout Type
Apple Watch offers several workout types that relate to cycling. “Cycle” works well for outdoor rides and general indoor cycling. “Other” is a good fallback option if you do not see a cycling-specific category. Choosing the right type ensures your watch uses the appropriate algorithms for tracking.
Let Your Watch Rest Between Rides
If you do back-to-back sessions, give your Apple Watch a minute to reset between rides. This prevents data from overlapping and keeps your workout history clean and organized.
Sync Regularly with Your iPhone
Make sure your Apple Watch syncs with your iPhone after each workout. Open the Fitness app on your iPhone to verify that your ride data has been saved correctly. If a workout is missing, try opening the app and pulling down to refresh.
For users who also use other fitness equipment, connecting your Apple Watch to devices like a treadmill or other gym machines can help create a seamless fitness tracking experience. You can learn more about connecting Apple Watch to gym equipment through resources like connecting Apple Watch to Life Fitness treadmill.
Common Mistakes to Avoid When Recording Stationary Bike Workouts
Even with the best tools, small mistakes can skew your data or make the recording process frustrating. Here are the most common errors and how to avoid them.
- Starting the wrong workout type: This leads to inaccurate metrics. Always double-check that you have selected the right activity before pressing Start.
- Forgetting to wear the watch during the warm-up: Your heart rate data starts from when you hit Start, not from when you begin pedaling. Put the watch on before you start warming up.
- Not saving the workout: Always confirm that your workout is saved before ending the session. Unsaved data gets lost.
- Ignoring heart rate sensor issues: If your watch struggles to read your heart rate, tighten the band or clean the sensor. Dirty sensors lead to gaps in your data.
- Skipping post-ride review: The real value of recording comes from reviewing your data. Take 30 seconds after each ride to glance at your results in the Fitness app.
Avoiding these simple mistakes keeps your data clean and your motivation high. Over time, consistent recording builds a powerful dataset that shows exactly how your fitness is improving.
Comparing Stationary Bike Recording With Other Fitness Activities on Apple Watch
One of the best things about Apple Watch is that it tracks almost every type of exercise. This makes it easy to compare your stationary bike sessions with other workouts. Here is a quick look at how different activities stack up in terms of tracking accuracy and data richness.
| Activity | Heart Rate Tracking | Calorie Estimate | Distance Accuracy | Apple Watch Accuracy |
|---|---|---|---|---|
| Stationary Bike | Excellent | Very Good | Moderate | High |
| Running | Excellent | Very Good | High (with GPS) | Very High |
| Cycling (Outdoor) | Excellent | Very Good | High (with GPS) | Very High |
| Kettlebell Workouts | Good | Good | N/A | Moderate |
| Rowing | Good | Good | N/A | Moderate |
| Elliptical | Good | Good | Moderate | Moderate |
As you can see, stationary bike tracking on Apple Watch is very reliable for heart rate and calories. Distance estimates may vary slightly since the watch relies on arm movement rather than GPS for indoor rides. But for overall fitness tracking and progress monitoring, it performs excellently across all activity types.
If you are curious about how other activities compare, you can explore how to log kettlebell workouts on Apple Watch or check out how long you should ride a stationary bike to reach specific fitness goals.
How to Review and Analyze Your Stationary Bike Data
Recording is only half the battle. The real value comes from reviewing and analyzing your data over time. Apple Watch makes this easy through the Fitness app on your iPhone.
Open the Fitness app and tap on the “Workouts” tab. You will see a list of all your recorded sessions, including date, duration, calories burned, and heart rate averages. Tap on any workout to see a detailed breakdown with charts and graphs.
You can also view your weekly and monthly summaries in the “Summary” tab. This gives you a big-picture view of your progress. Look for trends like increasing average heart rate (a sign of improving fitness) or rising calorie burn (a sign of longer or more intense rides).
Sharing your data with friends or a coach adds another layer of accountability. You can share specific workouts or your overall activity trends directly from the Fitness app.
Final Thoughts
Learning how to record stationary bike on Apple Watch opens up a world of fitness insights right from your wrist. Whether you use the built-in Workout app or explore third-party options, the key is to stay consistent and review your data regularly. Every ride you record brings you closer to understanding your body and reaching your fitness goals.
Start simple. Use the Workout app for your first few rides. Then, as you grow more comfortable, explore heart rate zones, third-party apps, and advanced metrics. The beauty of Apple Watch is that it grows with you. What starts as a simple ride tracker becomes a powerful tool for lifelong fitness.
So put on your watch, hop on the bike, and start pedaling. Your next recorded workout is just a tap away.
Frequently Asked Questions
Can Apple Watch automatically detect a stationary bike workout?
Yes, Apple Watch has an auto-detection feature that recognizes when you start a workout. However, it works best for activities like walking, running, and outdoor cycling. For stationary biking, you may need to start the workout manually to ensure accurate tracking. The auto-detect feature can sometimes miss indoor bike sessions because the movement patterns differ from outdoor cycling.
Does Apple Watch track distance accurately on a stationary bike?
Apple Watch estimates distance on a stationary bike using arm movement and heart rate data rather than GPS. This means distance readings may not be perfectly accurate for indoor rides. However, calories burned and heart rate tracking remain very reliable. If precise distance tracking matters to you, consider using a third-party app that lets you manually enter distance data.
What is the best Apple Watch workout type for stationary biking?
The “Cycle” workout type is the best option for most stationary bike sessions. It uses cycling-specific algorithms for heart rate zones and calorie estimation. If you do a more unconventional indoor cycling workout, the “Other” option works as a solid alternative. Always make sure to select your workout type before pressing Start for the most accurate results.
Can I use Apple Watch with Peloton or other smart bikes?
Yes, Apple Watch pairs well with Peloton and most other smart bikes. The watch connects via Bluetooth to track your heart rate and workout data independently. Some smart bikes also sync directly with Apple Watch for a seamless experience. Check your bike manufacturer’s app for specific Apple Watch integration options.
How do I save a stationary bike workout on Apple Watch?
After you finish your ride, swipe right on the workout screen and tap End. Then scroll down and tap Save. You can add a note about your ride if you want. The workout will automatically sync to the Fitness app on your iPhone, where you can review detailed stats and trends over time.
Is Apple Watch accurate for heart rate monitoring during intense stationary bike intervals?
Apple Watch uses optical heart rate sensors that work well during most exercise intensities. During high-intensity interval training on a stationary bike, readings may occasionally lag or drop. Keeping the watch snug on your wrist and ensuring the sensor stays clean helps maintain accuracy. For the most precise readings, consider using a Bluetooth chest strap heart rate monitor paired with your Apple Watch.