How to Put Air in Bike Tire Without Pump
Facing a flat tire far from home? You can still get rolling without a traditional pump. This guide covers proven emergency methods like using CO2 cartridges, foot pumps, or even creative DIY hacks with common items. Each technique has critical safety steps and pressure limits to prevent damage. Remember, these are temporary fixes—always check your tire and tube for damage and reinflate properly with a real pump as soon as possible to ensure your safety on the road or trail.
Key Takeaways
- CO2 cartridges are the fastest emergency solution: They provide instant inflation but require careful handling to avoid over-inflation and can leave you stranded if misused.
- A foot pump is a reliable manual backup: It requires physical effort but offers precise control and doesn’t rely on consumables, making it a smart item to carry.
- Creative DIY methods exist but are risky: Using a balloon or public air compressor (like at a gas station) can work in a pinch but often leads to inaccurate pressure and potential damage.
- Always check for the cause of the flat: Inflating a tire without removing the puncture object is dangerous and will lead to another immediate flat.
- Pressure matters more than just getting air in: Over-inflating with a cartridge or under-inflating with a weak method compromises handling, increases wear, and risks a blowout.
- Prevention is the best strategy: Carry a combination of a mini-pump and a CO2 inflator, know how to use them beforehand, and regularly inspect your tires.
- These are temporary fixes only: The goal is to get you to a safe location or a proper repair shop, not to create a long-term solution.
📑 Table of Contents
- Why You Might Need to Inflate a Tire Without a Pump
- Method 1: The CO2 Cartridge System – Speed in a Can
- Method 2: The Foot Pump – Old School, Reliable, No Frills
- Method 3: Creative DIY & Public Resource Hacks
- Method 4: Improvising with Common Items (The “MacGyver” Section)
- Safety First: The Non-Negotiable Steps Before and After Inflation
- Building Your Ultimate Flat-Repair Kit: Prevention and Preparation
- Conclusion: Knowledge is Your Best Tool
Why You Might Need to Inflate a Tire Without a Pump
You’re cruising down a quiet country road or navigating a city bike path when you feel it—that unmistakable wobble, the “thump-thump-thump” of a tire going soft. You stop, and your heart sinks. The rear tire is flat. You check your pack: no pump. You’re miles from home, and your phone is dead. This nightmare scenario is a rite of passage for many cyclists. The good news? Knowing how to put air in a bike tire without a pump isn’t just a party trick; it’s an essential survival skill that can turn a major inconvenience into a minor detour.
The need arises from simple forgetfulness (you left the pump at home), equipment failure (your mini-pump broke), or being caught completely unprepared on a long ride. It can also happen if you’re helping a friend with a flat and they don’t have a pump either. Whatever the reason, being resourceful is key. This article is your comprehensive field manual. We’ll move beyond the basic “use a CO2 cartridge” advice to explore every practical, semi-practical, and last-ditch method, complete with the crucial “how-to” and, more importantly, the “how-not-to.” Our goal is to get you safely back on the road, not to create a new problem.
Method 1: The CO2 Cartridge System – Speed in a Can
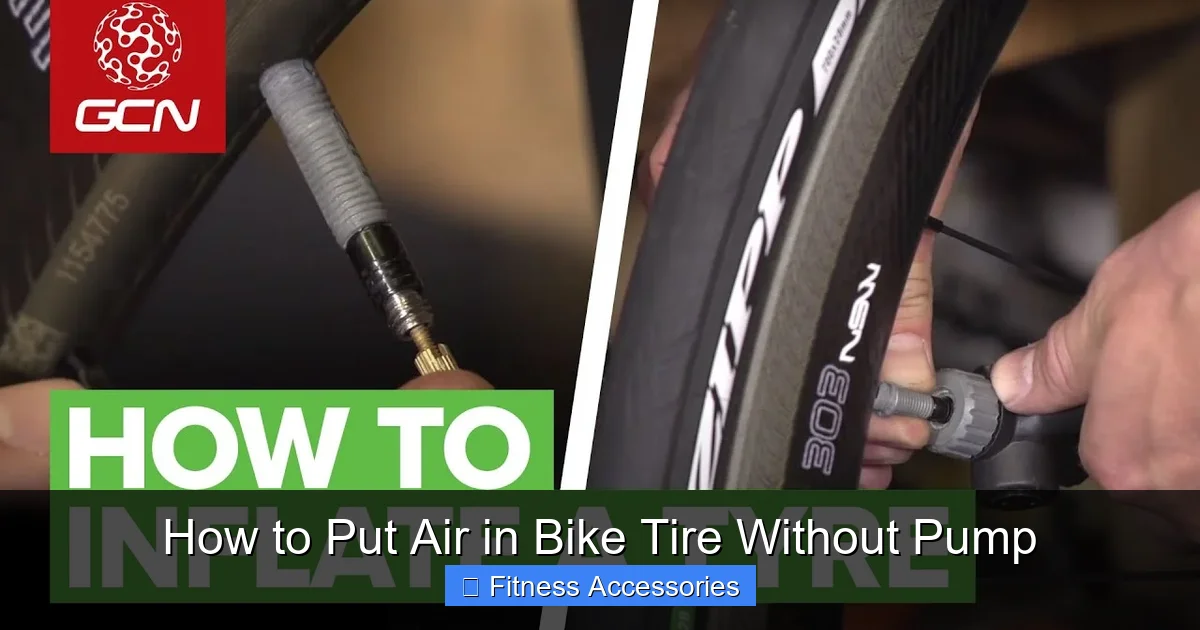
This is the gold standard for emergency inflation among serious cyclists. A CO2 inflator system consists of small, threaded metal cartridges filled with compressed carbon dioxide and a small, simple valve head that attaches to your Presta or Schrader valve. It’s the fastest way to get air in a tire, often taking less than 10 seconds.
Visual guide about How to Put Air in Bike Tire Without Pump
Image source: i.ytimg.com
How It Works & What You Need
CO2 cartridges come in various sizes (16g, 20g, 25g are common for bikes). The smaller 16g cartridges are typically enough for a standard road or hybrid bike tire (700c x 25-32mm). You’ll also need an inflator head. There are two main types: a simple push-on head with a built-in valve mechanism, or a more precise threaded head that screws onto the cartridge. The threaded type is generally preferred as it gives you more control and reduces the chance of a “shot” of CO2 that empties the cartridge in one go.
Step-by-Step Guide to Using a CO2 Cartridge
- Prepare the Tire: First, ensure the flat is repaired. Remove the cause of the puncture (nail, glass, etc.). If you’re just topping up a slow leak, proceed with caution. Install a new or patched tube and get the tire bead seated correctly on the rim.
- Attach the Inflator: Screw the inflator head onto your tire’s valve. For Presta valves, unscrew the small tip at the top first, then press the head on firmly. For Schrader, just press on.
- Screw on the Cartridge: With the inflator head pointed away from you and anyone else, carefully screw the CO2 cartridge into the inflator. Do this slowly at first. You’ll hear a slight hiss as the seal is made.
- Dispense the Gas: Once the cartridge is snug, press the button or lever on the inflator head. Do not hold it down continuously. Press in short bursts (1-2 seconds), checking the tire firmness with your thumb after each burst. A road tire should become very firm, almost rock-hard. A mountain bike tire should bulge slightly when pressed.
- Disconnect & Remove Cartridge: Once inflated, unscrew the cartridge from the inflator head (point it away from your face). Then, remove the inflator head from the valve. You’ll hear a loud hiss of escaping CO2—this is normal as the remaining gas in the inflator head and valve is released.
- Check Pressure & Secure Cartridge: Give the tire a firm squeeze. It should be firm. Important: CO2 is much more soluble in butyl rubber tubes than air. This means your tire may feel firm initially but could lose pressure significantly within 24-48 hours as the CO2 permeates through the tube. You must ride to a location with a real pump and top up with air as soon as possible. Store the empty cartridge separately so you don’t accidentally try to use it again.
Critical Pros and Cons
- Pros: Incredibly fast, compact, lightweight, works in any orientation. Perfect for race situations or when you need to minimize stop time.
- Cons: Consumable (you use a cartridge each time), can be expensive per use, risk of over-inflation and blowing the tire off the rim if you’re not careful, pressure dissipates over time, leaves you with an empty cartridge to dispose of.
Pro Tip: Practice with a new cartridge and an old tire at home before you ever need it on the road. Get a feel for how many bursts your specific tire needs. A 700x25c road tire usually takes about 1/3 to 1/2 of a 16g cartridge.
Method 2: The Foot Pump – Old School, Reliable, No Frills
Before the days of sleek mini-pumps and CO2, cyclists used their own two feet. A simple, collapsible foot pump (sometimes called a “floor pump” but much smaller) is an unsung hero of bike repair kits. It’s entirely manual, requires no cartridges, and gives you absolute control over the inflation process.
How It Works & What You Need
A foot pump is a small, usually aluminum or plastic cylinder with a flexible hose and a valve head at the end. You place the base on the ground, step on it to compress the chamber, and pull up to draw air in. Pushing down forces air into the tire. They are extremely durable and often come with a mounting bracket to attach to your frame.
Step-by-Step Guide to Using a Foot Pump
- Position the Pump: Place the pump’s base flat on the ground. Some models have a small non-slip pad—use it.
- Attach to Valve: Connect the pump head to your tire valve. For Presta, unscrew the tip and lock the head on (many have a lever lock). For Schrader, just press on. Ensure it’s seated tightly to prevent air leaks.
- The Pumping Motion: Place your foot flat on the pump’s platform. Use your body weight to press down firmly and quickly. The upstroke is passive—just lift your foot, and the chamber refills with air. The motion should be a steady, rhythmic press-down and lift-up.
- Monitor Progress: After 10-15 strokes, check the tire’s firmness. Road tires will get very hard. Mountain bike tires will visibly round off and resist thumb pressure. You can’t over-inflate with a foot pump unless you’re really trying, as it’s slow and gives constant feedback.
- Disconnect: Once at the desired pressure (refer to the PSI range printed on your tire sidewall), unlock the lever if present and pull the head off. You might hear a small hiss—that’s the air from the hose escaping, not your tire.
Critical Pros and Cons
- Pros: No consumables, unlimited air supply, excellent pressure control, very reliable, often cheaper than CO2 systems. The act of pumping can also warm you up on a cold day!
- Cons: Requires physical effort (can be tiring for high-volume road tires), slower than CO2, bulkier than a CO2 cartridge, can be awkward to use in tight spaces.
Pro Tip: For high-pressure road tires, a small, high-quality foot pump with a narrow barrel is more effective than a wide, low-pressure one. Look for pumps with a pressure gauge attached for precision.
Method 3: Creative DIY & Public Resource Hacks
When you have absolutely nothing designed for the task, you must get creative. These methods are less reliable and carry higher risks of tire or rim damage, but in a true survival situation, knowledge is power. We’ll explore two common “hacks”: using a balloon and using a public air compressor.
Hack A: The Balloon Method
This is a classic trick that leverages the fact that a standard latex or mylar balloon can hold air at a pressure high enough to inflate a bike tire.
What You Need:
A standard rubber or mylar balloon (think party balloon, not a weather balloon). A balloon that is too large will be difficult to manage.
Step-by-Step:
- Inflate the balloon fully with your mouth and tie it off.
- Carefully make a small slit in the knot of the balloon or near the tied end. You want a tiny hole, not a tear.
- Quickly but carefully stretch the balloon opening over your tire’s valve stem (Presta or Schrader). You may need to hold it tightly to create a seal.
- Squeeze the balloon gently to force air into the tire. You’ll need to do this repeatedly as the balloon deflates around the valve.
- This method is slow, messy, and imprecise. You will likely under-inflate. It’s best for getting just enough air to limp a very short distance to a better solution.
Why It’s Risky:
Controlling the flow is nearly impossible. You can’t gauge pressure. The balloon can slip off, wasting the air. It’s also a one-shot deal per balloon. Do not attempt this with a mylar (foil) balloon—the material is not elastic and will not squeeze effectively.
Hack B: The Gas Station Compressor
If you’re near a gas station or car wash, you might see a coin-operated air compressor meant for car tires. Can you use it for your bike?
What You Need:
A gas station air compressor with a standard Schrader valve fitting (the same as a car tire). You will also likely need an adapter.
The Challenge & The Adapter:
Bike tires use two valve types: Presta (narrow, with a small locknut) and Schrader (wide, identical to car tires). Gas station compressors have a Schrader chuck. If you have a Schrader valve, you can sometimes attach it directly, but the chuck is often too large and heavy for a bike rim, risking damage to the valve stem if it’s pulled sideways. The absolute must-have adapter for this hack is a “Schrader-to-Presta” adapter. This is a small, inexpensive brass or plastic fitting that screws onto your Presta valve, converting it to a Schrader thread, allowing the gas station chuck to fit.
Step-by-Step:
- If you have a Presta valve, screw on the Presta-to-Schrader adapter first.
- Approach the compressor. Place the bike rim on the ground or have a friend hold it steady. Never hold the heavy compressor hose yourself while it’s pressurizing.
- Press the compressor chuck onto your valve/adapter. It should click or seal.
- Insert your coins and start the compressor. Watch your tire like a hawk. Car compressors are set for high pressure (30-40 PSI+). A bike tire, especially a road tire, can easily pop if over-inflated. Stand ready to pull the chuck off the moment the tire feels firm.
- After a second or two, pull the chuck off. Check pressure by squeezing. It’s better to under-inflate slightly and add more than to over-inflate.
Why It’s Risky:
Extreme risk of over-inflation and a catastrophic blowout, where the tire rips off the rim, potentially injuring you and destroying the tire and tube. The force is also hard on a delicate bike valve. This method should only be used as an absolute last resort if you have a Presta-to-Schrader adapter and you are watching the tire constantly. It is not recommended for beginners.
Method 4: Improvising with Common Items (The “MacGyver” Section)
True desperation means looking around at everyday objects. While most won’t work, a few theoretical hacks exist. We list them with heavy caveats.
The “Blow-Up” from Another Source
Can you get air from a friend’s bike pump, a football, or a basketball? Theoretically, yes, but there are major hurdles. Football and basketball needles are incompatible with bike valves. You would need an adapter (like a Presta-to-Schrader, then a Schrader-to-basketball). This adds complexity and leak points. A friend’s pump is the best-case scenario here—just use it properly. The key takeaway: if another person has a working pump, use it. Don’t overcomplicate things.
The “Suck and Blow” Myth
A persistent urban legend claims you can inflate a bike tire by sucking air out of it (creating a vacuum) and then blowing in. This is physically impossible to achieve meaningful pressure. Your lungs cannot generate the sustained pressure needed (a good bike pump creates ~60-100 PSI; a human blow is ~1-2 PSI). Do not waste time or risk contamination by attempting this.
Using a Vacuum Cleaner (In Reverse)
Some modern shop vacuums have a “blow” function. In theory, you could attach a bike valve to the hose and use it to inflate. In practice, the airflow is usually too weak and uncontrolled. The exhaust port is also often dirty. This is not a recommended or reliable method.
Safety First: The Non-Negotiable Steps Before and After Inflation
No matter which method you choose, the steps surrounding the inflation are more critical than the inflation itself. Skipping these can turn a flat tire into a serious accident or a ruined wheel.
The Pre-Inflation Checklist: Find the Problem
Never, ever inflate a tire without first inspecting the inside. If you just rode on a flat, the tube is likely shredded. If you found the flat tire already deflated, you must remove the wheel and tire to find the cause.
- Remove the Wheel: For rear wheels, shift the chain to the smallest cog first. Release the brake if necessary (or open the quick-release on V-brakes). Open the quick-release or unbolt the axle.
- Remove the Tire: Use tire levers to pry the tire bead over the rim. Work around the wheel. Once one side is off, pull out the inner tube.
- Inspect the Tire: Run your fingers along the inside of the tire casing. Feel for any embedded glass shards, thorns, nails, or cuts. A piece of debris left inside will immediately puncture your new or repaired tube. Also, check the tire tread and sidewall for cuts or damage that could compromise its integrity.
- Inspect the Rim: Check the rim tape (the strip covering the spoke holes). It must be intact and centered. A loose or torn rim tape is a common cause of repeated flats. Check the rim itself for sharp edges or burrs.
- Repair or Replace: If the tube has a simple puncture, patch it properly or install a new tube. If the tube is torn, or the tire is damaged, you need new parts. A compromised tire or tube is unsafe to ride on, even if inflated.
The Post-Inflation Reality Check
After you’ve inflated using your chosen emergency method:
- Check for Seating: Ensure the tire bead is sitting evenly all the way around the rim. Look for any section where the tire looks off-center or the rim tape is showing.
- Do a “Spin Check”: Spin the wheel slowly. Watch for any wobble or bulge in the tire. A bead that isn’t fully seated can cause a dangerous blowout when you ride.
- Feel for Pressure: Squeeze the tire firmly. It should be firm to the touch. A road tire should feel almost solid; a mountain bike tire should give a little but be clearly round and firm.
- Ride Cautiously to a Real Pump: Your immediate goal is to get to a safe location (bike shop, friend’s house, your garage) with a proper floor pump. Re-inflate the tire to the exact PSI range listed on its sidewall. A floor pump with a gauge is the only way to be sure.
- Listen and Feel: On your cautious ride, listen for any hissing (a slow leak) and feel for any vibration or instability. If the tire feels soft again quickly, you have another leak or a poor seal from your emergency fix.
The CO2 Permeation Warning (Again)
We must stress this point: CO2 molecules are smaller than nitrogen (the main component of air) and permeate through butyl rubber tubes much faster. A tire filled with CO2 can lose 50% or more of its pressure in 24 hours. It is not a “set and forget” solution. You must replace the CO2 with atmospheric air at the earliest convenience. Riding on a severely under-inflated tire can damage the rim and is extremely unsafe.
Building Your Ultimate Flat-Repair Kit: Prevention and Preparation
The best way to solve the problem of not having a pump is to always have one. But a smart kit accounts for pump failure. Here’s how to build a robust, redundant system that ensures you’re never stranded.
The Core: A Reliable Mini-Pump
Invest in a good quality mini-pump from a reputable brand (e.g., Lezyne, Topeak, Blackburn). Look for:
- Material: Aluminum is lighter and stronger than plastic.
- Valve Compatibility: It should work with both Presta and Schrader valves, often with a reversible head or an adapter included.
- Pressure Output: For road bikes, ensure it’s rated for high pressure (120+ PSI). For mountain bikes, volume (how much air per stroke) is more important than max pressure.
- Mounting System: A secure frame mount is essential so the pump doesn’t bounce around and get damaged or lost.
The Backup: A CO2 Inflator System
Pair your mini-pump with a small CO2 kit. A typical kit includes:
- 2-3 x 16g CO2 cartridges
- An inflator head (preferably the threaded type)
- A small pouch to hold it all
This combo covers you for 99% of situations. The pump is your primary, unlimited tool. The CO2 is your rapid-deployment option for when you’re in a hurry, injured, or the pump is broken.
The Essentials: Tools and Tubes
No inflation method works without a repaired or new tube. Your kit must include:
- Tire Levers: Plastic ones are fine, but carry at least two, preferably three.
- Spare Tube(s):strong> Carry at least one tube that matches your tire size and valve type (Presta or Schrader). Consider carrying two on long rides.
- Patch Kit: A small adhesive patch kit is a good backup if you have multiple flats and run out of tubes.
- Multi-Tool: With the appropriate hex wrenches for your wheel bolts/quick-release and any other bolts on your bike.
- Rim Tape: A small piece of your correct-width rim tape can save you if yours is damaged.
The Practice Imperative
Having the tools is useless if you don’t know how to use them. Before you ever need them on the road, practice the entire flat repair process at home:
- Remove the wheel.
- Use tire levers to get the tire off.
- Remove the tube, find the puncture (use soapy water if needed), and patch it or install the new tube.
- Re-seat the tire bead carefully, checking it’s not pinching the tube.
- Inflate with your mini-pump to the correct pressure.
- Re-install the wheel.
Do this until the process is muscle memory. Time yourself. The goal is to be able to do it in under 10 minutes in good conditions. In the rain or cold, it will take longer.
Conclusion: Knowledge is Your Best Tool
Being stranded with a flat and no pump is a test of your resourcefulness and preparedness. We’ve explored the spectrum of solutions, from the highly effective (CO2 cartridges, foot pumps) to the risky and improvised (gas station compressors, balloons). The clear winner for most cyclists is a dual approach: carry a reliable mini-pump and a small CO2 kit. This gives you both the precision and unlimited supply of a manual pump and the blinding speed of CO2 for when every second counts.
Remember, the act of getting air into the tire is only one small part of the equation. The mandatory pre-inflation inspection for the puncture cause and the mandatory post-inflation ride to a real pump for a proper pressure check are what separate a safe, temporary fix from a dangerous gamble. Your bike’s tires are the only point of contact between you and the earth. Treating them with respect—ensuring they are correctly inflated and undamaged—is the single most important thing you can do for your safety on two wheels. So, build your kit, practice the repair, and ride with confidence, knowing that a flat tire is no longer a crisis, but merely a brief pause in your journey.
Frequently Asked Questions
Is it safe to use a CO2 cartridge on a mountain bike tire?
Yes, it is safe, but you must use the correct cartridge size and monitor inflation closely. Mountain bike tires operate at lower pressures (20-40 PSI) and have higher volume. A single 16g CO2 cartridge can easily over-inflate a wide mountain tire if you discharge it all at once. Use short bursts and check firmness frequently. The same CO2 permeation issue applies—you must add air from a regular pump within a day or two.
Can I use a balloon to inflate my bike tire?
Technically yes, but it’s an extremely poor and unreliable method. A standard party balloon can hold enough pressure, but controlling the airflow is nearly impossible. You will likely under-inflate the tire, and the process is slow and messy. It should only be considered if you have absolutely no other option and only need a tiny amount of air to roll a very short distance to a better solution.
What is the best portable tool to carry for putting air in a tire without a pump?
The best combination is a high-quality mini-pump paired with a small CO2 cartridge inflator kit. The mini-pump (like a Lezyne or Topeak model) is your primary, unlimited, and precise tool. The CO2 kit is your backup for speed or if the pump fails. This two-pronged approach covers all emergency scenarios and is the standard recommendation for serious recreational and competitive cyclists.
Will using a gas station air compressor damage my bike tire or tube?
It very well could. Gas station compressors are designed for car tires and deliver a high, uncontrolled volume of air at high pressure. The most common risk is catastrophic over-inflation, where the tire bead blows off the rim, destroying the tire and tube and potentially causing injury. You must watch the tire constantly and pull the hose off the moment it feels firm. Using a Presta-to-Schrader adapter is also mandatory for most bikes. This method is high-risk and not recommended for inexperienced riders.
How long will a tire stay inflated after using a CO2 cartridge?
Not long enough to ignore. CO2 permeates through the butyl rubber of a bike tube significantly faster than air. A tire filled with pure CO2 can lose a dangerous amount of pressure (down to ride-unsafe levels) within 24-48 hours. You should plan to ride directly to a location with a regular air pump and top up the tire with atmospheric air as soon as possible after using a CO2 cartridge.
If I get a flat, do I have to remove the tire to find the cause before re-inflating?
Absolutely, yes. Inflating a tire without first removing and inspecting the tube and tire is one of the most dangerous mistakes you can make. If the object (nail, thorn, glass) that caused the flat is still embedded in the tire, your new or repaired tube will be punctured the moment you inflate it and ride a few feet. You must remove the wheel, take the tire off, feel inside the tire casing thoroughly for debris, and check the rim tape before installing a new tube and inflating.