Putting air in a Specialized bike tire is a fundamental skill every rider must master. It involves identifying your valve type, using the correct pump, and inflating to the manufacturer’s recommended PSI for your specific model and riding conditions. Proper inflation is critical for performance, safety, and tire longevity, preventing flats and ensuring a comfortable ride. This guide breaks down the entire process, from tools to troubleshooting, making it simple for any cyclist.
Key Takeaways
- Identify Your Valve: Specialized bikes commonly use Presta or Schrader valves. Using the wrong pump head is the most common mistake.
- Check the Sidewall: The recommended pressure range (PSI) is always printed on your Specialized tire’s sidewall. Never guess.
- Use a Quality Pump: A floor pump with a pressure gauge is the most efficient and accurate tool for the job.
- Inflate Gradually: Add air in short bursts, checking pressure frequently to avoid overinflation.
- Secure the Bead: For tubeless setups, ensure the tire bead is seated correctly on the rim before and during inflation.
- Regular Checks: Tire pressure should be checked before every ride, as tires naturally lose air over time.
- Listen & Feel: A “pop” or “seating” sound when inflating a new tubeless tire means the bead has snapped into place.
[FEATURED_IMAGE_PLACEHOLDER]
📑 Table of Contents
Why Proper Inflation Matters for Your Specialized Bike
Let’s be honest: “pumping up tires” sounds about as exciting as watching paint dry. But for a Specialized bike owner, it’s one of the most important maintenance tasks you’ll ever perform. Think of your tire pressure as the foundation of your entire riding experience. It’s the direct link between your bike and the ground. Too little air, and you risk a “snake bite” pinch flat, poor handling, excessive rim wear, and a sluggish, uncomfortable ride. Too much air, and you lose traction, suffer a harsh, jarring experience, and increase your risk of a blowout. Getting it just right, as the engineers at Specialized intended, unlocks your bike’s designed performance, whether you’re carving corners on a Tarmac, bombing descents on a Stumpjumper, or commuting on a Sirrus.
Specialized designs tires for specific models and disciplines. A high-pressure, slick road tire on a Roubaix has a completely different optimal pressure range than a wide, knobby, low-pressure tire on a Turbo Levo. That number on the sidewall isn’t a suggestion; it’s a carefully calculated window for safety, efficiency, and grip. Regularly putting air in your Specialized bike tire correctly ensures you’re respecting that engineering. It’s a five-minute task that pays dividends in speed, safety, and fun every single time you ride. This guide will walk you through every single step, so you’ll never have to guess again.
Getting Started: Tools of the Trade
Before you touch your Specialized bike, you need the right tools. Using improper equipment is the fastest way to damage a valve or get a wildly inaccurate reading. You don’t need a garage full of gear, but a few key items make all the difference.
Visual guide about How to Put Air in a Specialized Bike Tire
Image source: wikihow.com
The Essential Pump: Your Best Friend
The gold standard is a floor pump. Its long lever provides excellent mechanical advantage, meaning you can reach high road pressures (100+ PSI) with less effort than a hand pump. Crucially, most quality floor pumps come with an integrated, easy-to-read pressure gauge. This is non-negotiable for accuracy. Look for pumps with a dual-head design that automatically adapts to both Presta and Schrader valves—a lifesaver if you have multiple bikes.
For on-the-go emergencies, a mini-pump or CO2 inflator is a must-have in your saddlebag. Mini-pumps are reliable but require more effort. CO2 cartridges are incredibly fast and effortless but are single-use, can be wasteful, and often lead to overinflation if you’re not practiced. They’re best for fixing a flat trailside, not for your regular at-home top-ups. Never use a gas station air hose on a high-pressure road tire; they are notoriously inaccurate and can explode a tire instantly.
Understanding Valve Types: Presta vs. Schrader
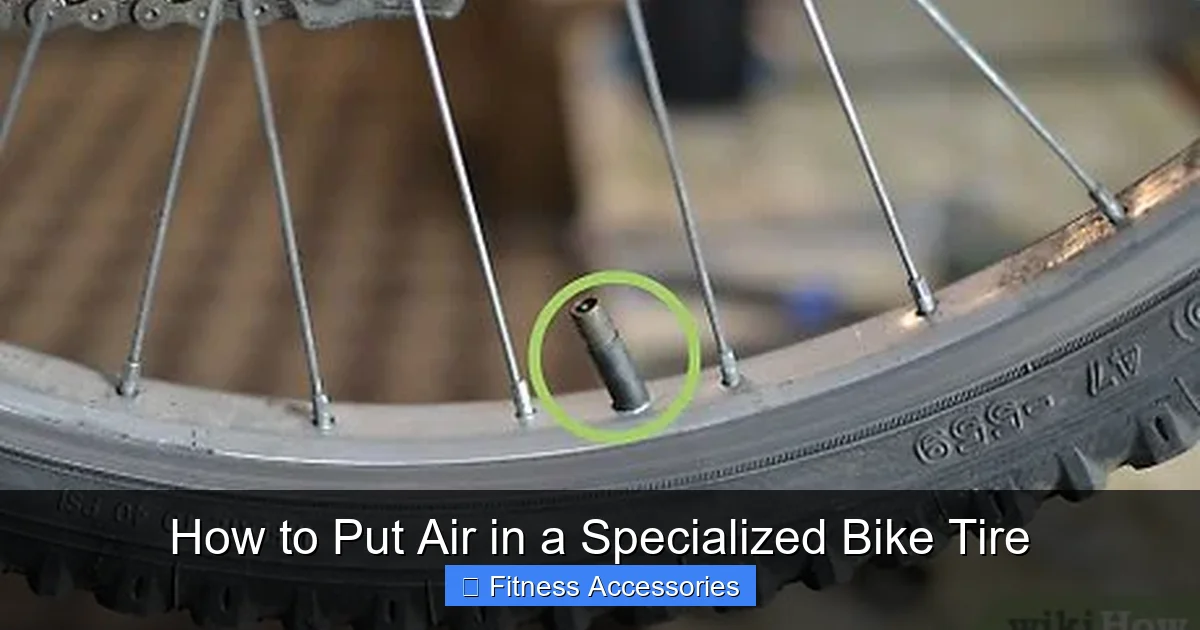
This is the first hurdle. Look at the valve stem on your Specialized wheel. You’ll see one of two types:
- Presta Valve (French Valve): This is the narrow, metal valve with a small, knurled tip at the top. You loosen the tiny lock nut at the tip by turning it counter-clockwise (usually a quarter-turn) to open it for inflation. It’s lighter, seals better at high pressure, and is the standard on most road and high-performance mountain bikes. It requires a pump head with a Presta-specific opening or a universal head that clamps onto the valve.
- Schrader Valve (American Valve): This is the wider, familiar valve you see on car tires. It has a spring-loaded pin in the center that you depress with a small tool (or your fingernail) to release air. It’s common on entry-level mountain bikes, hybrids, and e-bikes. It’s robust and works with any standard pump or air compressor.
Pro Tip: If your Specialized bike has Presta valves and you’re using a pump with a Schrader-only head, you need a cheap Presta-to-Schrader adapter. It screws onto the Presta valve, converting it to fit the Schrader pump head.
The Step-by-Step: How to Put Air in a Specialized Bike Tire
Now for the main event. Follow these steps exactly, and you’ll become a pro at inflating your Specialized bike tire.
Step 1: Find the Magic Number (Recommended PSI)
Flip your Specialized bike over or look at the tire’s sidewall. You’ll see something like: “MAX 120 PSI” or a range like “65-95 PSI”. This is your target. The range accounts for rider weight and terrain. A lighter rider on smooth roads can use the higher end; a heavier rider or one on rough roads should stay in the middle or lower end. For mountain bikes, pressure is often given in BAR (1 BAR ≈ 14.5 PSI). A good starting point for a typical trail bike is 22-26 PSI (1.5-1.8 BAR), but always check your specific tire’s marking. Write this number down if it helps.
Step 2: Prep the Valve
Remove the plastic dust cap from the valve stem. For a Presta valve, loosen the small lock nut at the top by turning it counter-clockwise a few times. You should hear a faint hiss of air—this means it’s open. For a Schrader valve, you don’t need to loosen anything; just depress the central pin briefly with a tool to ensure it’s not stuck.
Step 3: Attach the Pump Head Correctly
This is where most people struggle. Place the pump head onto the valve stem squarely and push down firmly. For a universal pump head (the kind that has a lever), you’ll feel it engage. You may need to hold it on with one hand initially. For a screw-on head, thread it onto the valve clockwise until snug. Do not cross-thread it. A poor seal is the cause of 90% of “pumping frustration.” You’ll know it’s sealed when you stop hearing air leaking around the base of the pump head.
Step 4: Inflate in Bursts, Check Constantly
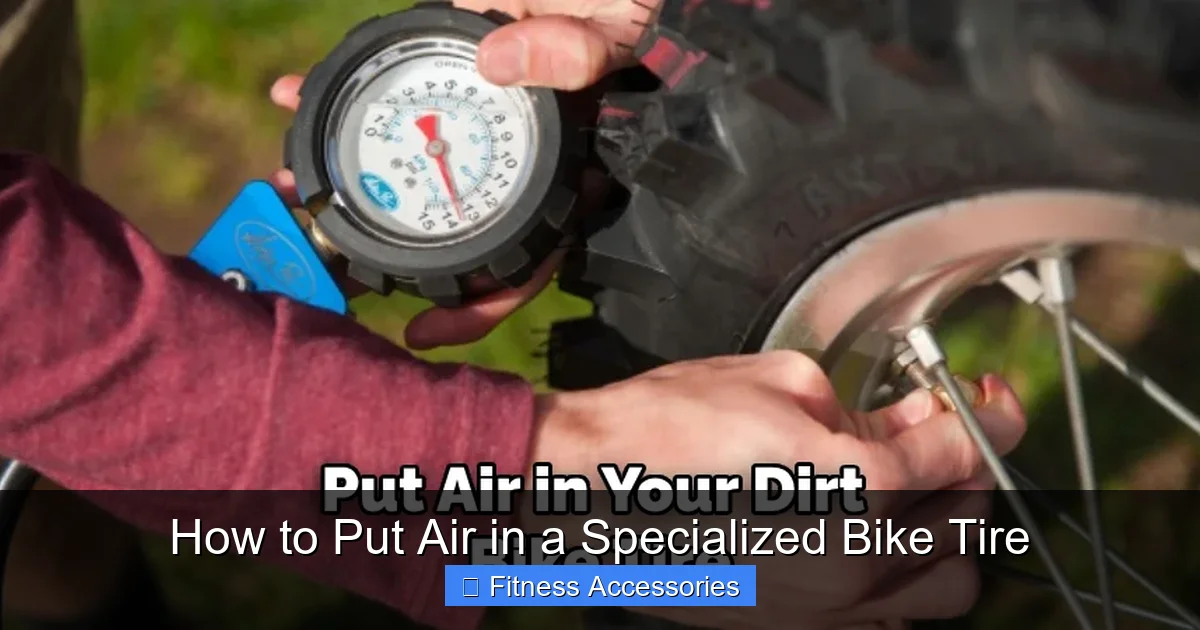
Start pumping with steady, full strokes on your floor pump. Every 10-15 pumps, lift the pump head slightly to check the gauge reading. Do not rely on the pump’s stroke count. Pressure can vary wildly based on tire volume. A 700x25c road tire fills much faster than a 29×2.6” mountain tire. Your goal is to reach your target PSI from Step 1. If you overshoot slightly, you can release air by gently pressing the valve pin (Schrader) or the lock nut (Presta).
Step 5: The Final Seal
Once you’re at your target pressure, carefully remove the pump head. For Presta valves, you might hear a quick “pfft” of air—this is normal. Immediately tighten the small lock nut clockwise until snug. This prevents dirt and moisture from entering and stops slow leaks. Screw the plastic dust cap back on finger-tight. That’s it! Your Specialized bike tire is now at the correct pressure.
Special Case: Inflating a Tubeless Specialized Tire
Tubeless setups (common on modern Specialized mountain bikes) require a bit more technique. The tire bead must seal against the rim. First, ensure the bead is seated all around. Apply a generous amount of tubeless sealant through the valve (you may need a valve core remover). Then, using a high-volume pump or a CO2 cartridge, deliver a massive, rapid burst of air. You should hear a distinct “POP” or “SNAP” as the bead locks into place. This can take several tries. Once seated, shake the wheel to distribute sealant and top up to your final pressure. It’s messier but worth it for the puncture resistance and lower pressure capability.
Troubleshooting: Why Won’t My Tire Hold Air?
Sometimes, the process goes wrong. Here’s how to diagnose common problems.
Visual guide about How to Put Air in a Specialized Bike Tire
Image source: dirtbikefixes.com
The Pump Head Won’t Stay On / Air Leaks Around It
This almost always means a poor seal. For Presta valves, ensure the lock nut is fully loosened. Clean any dirt from the valve stem. Try re-attaching the pump head more squarely. If using a universal head, press the lever down HARDER to clamp it. If it’s a screw-on head, ensure it’s threaded correctly and snug. The pump head itself may be worn out; inspect the rubber gasket inside for cracks or deformation.
The Tire Loses Pressure Quickly (Within Hours/Days)
All tires lose a little air (1-3 PSI per week is normal due to permeation). Faster loss indicates a problem. First, submerge the wheel in water and look for bubbles. If bubbles come from the valve stem, the valve core may be loose (tighten it slightly with a valve tool) or faulty (replace the core—they’re cheap). If bubbles come from the tire itself, you have a puncture or a damaged rim strip/tubeless seal. For tubeless, a slow leak might just need more sealant or a better bead seal.
The Tire Won’t Pop/Bead Seat (Tubeless)
Ensure you have enough sealant (usually 2-4 oz). Clean the rim bed and tire bead of any old sealant or debris. Try using a CO2 cartridge for its instant, high-volume blast. Lay the wheel on its side and bounce it vertically while pumping to help the bead settle into the rim channel. Sometimes, a new tire needs a few miles of riding for the sealant to fully plug the microscopic gaps.
The Pump Gauge Shows High Pressure, But Tire Feels Soft
Your gauge is likely inaccurate, especially if it’s on a cheap mini-pump. Always trust a known-good, calibrated floor pump gauge. Alternatively, your tire may have a significant cut or damage, allowing air to escape faster than you can pump it. Inspect the tire thoroughly for embedded glass, thorns, or casing cuts.
Maintenance and Best Practices for Longevity
Inflation isn’t a “set it and forget it” task. Integrating these habits into your routine will extend the life of your Specialized tires and rims.
Check Pressure Before Every Ride
Make it part of your pre-ride checklist. Tire pressure changes with temperature (roughly 1 PSI for every 10°F change) and naturally leaks over time. A quick squeeze is a decent habit, but a gauge is the only way to be sure. Riding on under-inflated tires is the #1 cause of premature tire wear and rim damage.
Store Your Bike Properly
If storing your Specialized bike for a season, inflate the tires to the maximum recommended pressure on the sidewall. This prevents the tire beads from “setting” in a deformed position and reduces stress on the rim tape and valves.
Know When to Replace
No matter how well you inflate, tires wear out. Check for:
- Tread Wear: Smoothing of knobs or a worn center strip.
- Casing Damage: Cuts, fraying, or bulges in the sidewall (a “hernia”). Do not ride on a bulging tire.
- Dry Rot: Cracks in the rubber, especially on the sidewall or near the bead.
- Repeated Flats: If you’re getting multiple flats in the same spot despite correct pressure, the tire or tube is likely compromised.
Valve Care
Occasionally, remove the valve core (for Presta) and clean it. Replace it if it leaks or feels stiff. Keep dust caps on to keep dirt and moisture out of the valve mechanism.
Conclusion: Mastery is Simple
Putting air in a Specialized bike tire doesn’t require a mechanic’s license. It requires attention to detail and the right tools. By consistently checking your sidewall for the correct PSI, using a quality pump with a good gauge, and mastering the simple seal of the pump head, you take full control of your bike’s performance and safety. You’ll feel the difference in every pedal stroke: smoother, faster, and more confident. This small, routine act of care is what separates a casual rider from an informed cyclist who truly understands their machine. Now, go check your pressure—your Specialized bike is waiting.
Frequently Asked Questions
Can I use a car tire inflator at a gas station on my Specialized road bike?
We strongly advise against it. Gas station compressors are designed for car tires and deliver air in uncontrolled, high-volume bursts. They can easily overinflate and blow a high-pressure Specialized road tire (often rated to 100+ PSI) in seconds. Always use a manual pump with a gauge for control and safety.
What happens if I overinflate my Specialized tire?
Overinflation makes your ride harsh and uncomfortable, reduces traction, and increases your risk of a sudden blowout, especially when hitting a pothole or curb. It also causes the center of the tread to wear prematurely. Always stay within the PSI range printed on your Specialized tire’s sidewall.
Why does my Specialized bike tire feel hard even though the gauge shows the correct pressure?
This is usually a perception issue. A properly inflated tire should feel firm but not rock-hard when you pinch the sidewall. If the gauge is accurate and the pressure is correct, the “hard” feel is normal, especially on high-pressure road tires. If the tire is truly underinflated, it will feel soft and have excessive sidewall flex when you push on it.
Is it normal for a new Specialized tubeless setup to lose a lot of air the first few days?
Yes, this is normal. The sealant needs time to coat the entire internal surface and seal any microscopic porosity in the tire casing and rim tape. Check and top up the pressure daily for the first week. After the sealant fully cures (usually a few days), the pressure loss should slow to a normal rate of 1-3 PSI per week.
My Presta valve keeps leaking air after I remove the pump. What’s wrong?
You likely forgot to tighten the small lock nut at the top of the valve stem after inflating. After removing the pump, always turn that lock nut clockwise until it’s snug to seal the valve. If it’s already tight and still leaking, the valve core itself may be faulty or dirty. You can try tightening it slightly with a valve core tool or replace the core entirely (they are inexpensive and screw in).
Should I inflate my Specialized bike tires to the maximum PSI listed?
Not necessarily. The maximum PSI is the tire’s absolute safety limit, not the recommended pressure. Your optimal pressure depends on your body weight, the terrain, and your desired ride feel. A heavier rider or someone on smooth pavement might use the higher end of the range. A lighter rider or someone on rough trails should use a lower pressure for better grip and comfort. Start in the middle of the range and adjust from there based on feel.