Putting air in a Bontrager bike tire is a simple but critical skill for any cyclist. It directly impacts your safety, comfort, and the bike’s performance. The process involves identifying your valve type (Presta or Schrader), using a compatible pump with a gauge, and inflating to the specific PSI range printed on your tire’s sidewall. Regular checks and proper inflation prevent flats, reduce rolling resistance, and ensure a smoother ride. Mastering this basic maintenance task empowers you to ride with confidence and get the most out of your Bontrager tires.
Key Takeaways
- Always Check the Sidewall: The tire, not the rim, has the definitive recommended pressure range (PSI or bar) printed directly on it.
- Know Your Valve: Bontrager tires primarily use Presta (skinny) or Schrader (car-type) valves. Your pump head must match to create an airtight seal.
- Use a Floor Pump with a Gauge: A dedicated bike floor pump with an accurate built-in gauge is the most efficient and precise tool for the job.
- Inflate Gradually: Add air in short bursts, checking the gauge frequently to avoid over-inflation, which can cause blowouts.
- Check Pressure Regularly: Tires naturally lose 1-5 PSI per week. Check before every few rides for optimal performance and safety.
- Don’t Trust the Pump Gauge Blindly: For critical accuracy, use a separate, high-quality tire pressure gauge, especially for high-pressure road tires.
- Secure the Valve Cap: Always screw the valve cap back on tightly after inflating to protect the valve stem from dirt and moisture.
📑 Table of Contents
- Why Proper Tire Inflation is Non-Negotiable
- Understanding Your Equipment: The Valve and The Pump
- The Step-by-Step: How to Inflate Your Bontrager Tire
- Troubleshooting: Why Won’t My Tire Hold Air?
- Maintenance and Best Practices for Longevity
- Beyond the Basics: Special Considerations for Bontrager Tires
- Conclusion: Your Ride Starts with the Right Squeeze
Why Proper Tire Inflation is Non-Negotiable
Let’s be honest: “pumping up tires” doesn’t sound like the most thrilling part of cycling. It’s easy to forget about until you get a flat or feel like you’re pedaling through quicksand. But understanding how to put air in a Bontrager bike tire correctly is one of the most fundamental—and impactful—skills you can master. It’s the direct link between you and the road or trail, affecting everything from how fast you go to how much fun you have.
Bontrager, as a leading brand under the Trek umbrella, designs tires for specific purposes—smooth-rolling road rubber, grippy mountain bike treads, or versatile hybrid patterns. Each of these designs has an optimal pressure window. Inflating your Bontrager tire to the correct PSI (pounds per square inch) or bar is not a suggestion; it’s a requirement for the tire to perform as engineered. Too little air, and you risk “snakebite” flats from rim pinches, excessive rolling resistance, and a sluggish, unstable ride. Too much air, and you sacrifice precious traction and comfort, increasing the risk of a blowout and making every bump feel like a jolt to your bones.
This guide will walk you through every single step, from identifying your valve to achieving that perfect, confident squeeze. We’ll demystify the tools, explain the “why” behind the numbers, and troubleshoot common hiccups. By the end, you won’t just know *how* to put air in your Bontrager tire—you’ll understand *why* it matters and how to do it like a pro.
Understanding Your Equipment: The Valve and The Pump
Before you can even think about adding air, you need to understand the two key components in this equation: the valve on your Bontrager tire and the pump you’ll use. They must speak the same language. A mismatch here is the most common reason for frustration.

Visual guide about How to Put Air in a Bontrager Bike Tire
Image source: sefiles.net
The Two Main Valve Types: Presta vs. Schrader
Bontrager tires, especially on performance-oriented bikes like Trek road and mountain models, overwhelmingly feature the Presta valve (sometimes called a “French valve”). It’s the skinnier of the two, with a small, knurled nut at the top. You unscrew this nut (it doesn’t come off) to let air in or out, then tighten it back down to seal. Its narrow diameter allows for stronger, lighter rims, which is why you see it on most higher-end bikes.
However, some Bontrager tires on more casual, hybrid, or children’s bikes may use the Schrader valve (the “American valve”). This is the same short, thick valve found on car tires. It has a small pin in the center that you depress with a tool or your fingernail to release air. It’s simpler and more common on lower-pressure tires.
How to Identify Yours: It’s visually obvious. Presta is slender and has a lock nut. Schrader is stout and has a spring-loaded pin. If you’re unsure, look at the tire’s sidewall. Bontrager often prints the recommended valve type alongside the pressure range.
Choosing Your Weapon: The Right Pump
Using the wrong pump is like trying to plug a USB-C cable into an old 30-pin iPhone port. It just won’t work. You need a pump with a head that fits your valve.
- Dual-Head Pumps: Most quality floor pumps (the big, sturdy ones you stand on) come with a reversible or dual-chamber head. One side is for Presta, the other for Schrader. You simply flip or rotate the head to the correct side. These are the gold standard for home use.
- Presta-Only Pumps: Common on high-end pumps. They have a dedicated hole that fits the narrow Presta stem perfectly.
- Schrader-Only Pumps: Often seen on cheap, department-store pumps or portable models.
- Pump Adapters: If you have a pump with the wrong head, tiny plastic adapters exist to convert a Schrader pump head to fit a Presta valve. They’re inexpensive and useful to have in your repair kit.
The Gauge is Your Best Friend: Never buy a pump without a reliable, easy-to-read pressure gauge attached. Some pumps have them on the base, others on the handle. For the most precise readings, especially for high-pressure road tires (80+ PSI), consider a separate, high-quality standalone gauge. Pump-mounted gauges can be less accurate at the extremes.
The Step-by-Step: How to Inflate Your Bontrager Tire
Now, the main event. We’ll assume you have the correct pump for your valve type. This process is universal for any bike tire, Bontrager or otherwise.

Visual guide about How to Put Air in a Bontrager Bike Tire
Image source: sefiles.net
Step 1: Find Your Optimal Pressure
This is the most important step and the one most people skip. Do not guess. Look at the sidewall of your Bontrager tire. You’ll see something like: “INFLATE TO 65-95 PSI” or “4.5-6.5 BAR.” This is the manufacturer’s tested, safe range for that specific tire model. Factors like your weight, terrain, and desired comfort will determine where in that range you land.
- Road Tires (High Pressure): Typically 80-120 PSI. Lighter riders or rough roads may run the lower end; heavier riders or smooth pavement may run higher.
- Mountain Bike Tires (Low Pressure): Typically 20-35 PSI for tubeless setups, 30-50 PSI for tubed. Lower pressure increases grip and comfort on rough trails.
- Hybrid/Commuter Tires: Typically 50-70 PSI. A good middle ground for efficiency and comfort on pavement and light gravel.
Pro Tip: If you’re new, start in the middle of the range. You can adjust up or down by 5 PSI on your next fill based on how the ride feels.
Step 2: Prepare the Valve and Pump
Remove the dust cap from the valve stem and set it aside. For a Presta valve, loosen the small knurled nut at the top by turning it counter-clockwise a few turns. You should hear a tiny hiss of air—this is normal and confirms it’s open. For a Schrader valve, you may need to depress the center pin briefly with a tool to ensure it’s not stuck. Now, select the correct head on your pump. For Presta, you’ll often need to press the head down firmly onto the valve stem to engage the seal. Some pump heads have a locking lever—engage it once seated.
Step 3: Attach, Pump, and Check
Press the pump head onto the valve stem with firm, even pressure. You should feel it seat snugly and the air flow begin. If you hear a constant loud hissing around the connection, it’s not sealed—re-seat it. Begin pumping. Do not trust the pump gauge for your final number until the tire is firm. Pump in steady, full strokes. After every 10-15 pumps, pause and glance at your gauge. The needle will move slowly at first, then faster as pressure builds.
As you approach your target pressure (e.g., if you’re aiming for 70 PSI and the gauge reads 65), pump more slowly and in shorter bursts—1-3 pumps at a time—then check again. It’s easy to overshoot by 10+ PSI in a single vigorous pump. Patience here prevents a costly blowout.
Step 4: The Final Check and Seal
Once you hit your target pressure, carefully remove the pump head. For Presta valves, you might hear a small puff of air—this is fine. Immediately tighten the knurled nut at the top of the Presta valve finger-tight. This locks the valve closed. Screw the dust cap back on firmly. Give the tire a quick squeeze. It should feel very hard, with no give. For a more accurate check, use your thumb to press firmly on the tread; it should barely deflect. If it feels soft, add a few more PSI.
Final Safety Check: Spin the wheel and watch the tire profile. It should form a nice, round, firm shape. There should be no visible bulges or deformities. If you see a lump, stop riding—the tire may be damaged or the rim tape may be misaligned.
Troubleshooting: Why Won’t My Tire Hold Air?
You’ve followed the steps, but the gauge drops like a stone, or you can’t get a seal. Don’t panic. These are common issues with simple fixes.
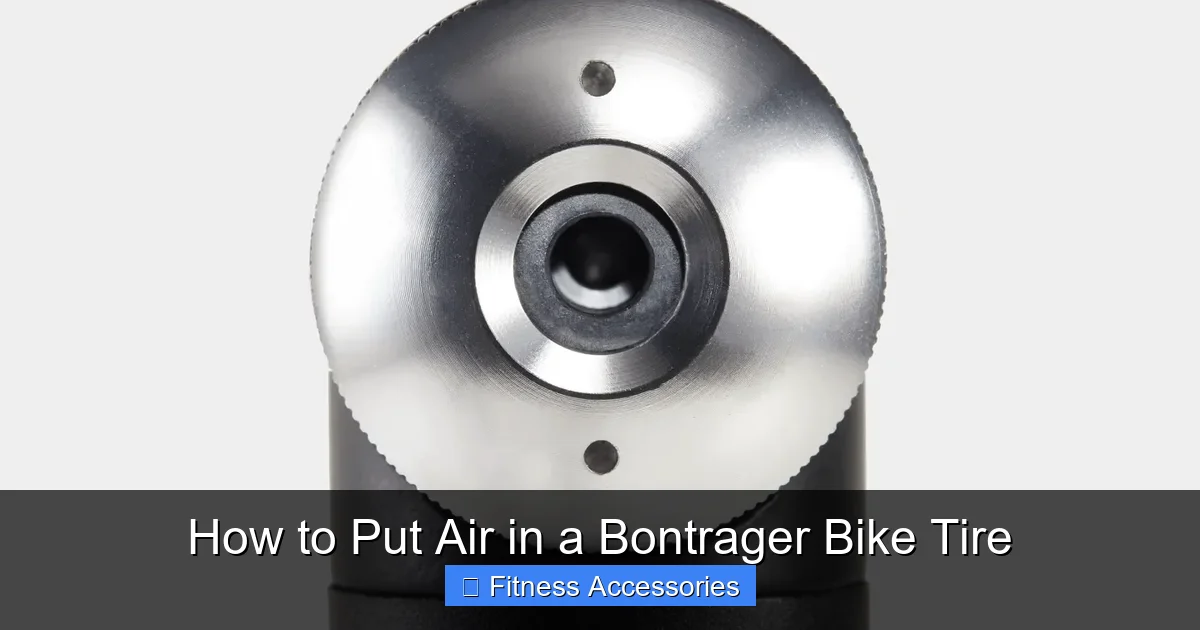
Visual guide about How to Put Air in a Bontrager Bike Tire
Image source: images.tcdn.com.br
Problem: Air Escapes Around the Pump Head
Symptom: A loud, constant hissing sound while pumping, and the gauge doesn’t rise.
Solution: This is almost always a poor seal between the pump head and the valve.
- For Presta: Ensure the lock nut on the valve stem is fully loosened. Press the pump head down straight and very firmly. If your pump has a locking lever, make sure it’s fully engaged after pressing down.
- For Schrader: Make sure the pump head’s rubber seal is clean and not cracked. Press down until you feel it bottom out on the valve stem.
- Try a different pump or head. Sometimes the pump head is worn out.
Problem: The Tire Loses Pressure Very Quickly
Symptom: Pressure drops significantly (more than 5-10 PSI) within minutes of inflating.
Solution: This indicates a leak in the system. Diagnose it systematically:
- Check the Valve Core: The tiny piece inside the valve stem can become loose or faulty. For Presta, tighten the lock nut extra snug. For Schrader, you can use a valve core tool (a small, inexpensive wrench) to tighten the core itself. Listen for hissing at the valve tip.
- Inspect the Tire: Visually scan the entire tread and sidewall for embedded debris (glass, thorns), cuts, or punctures. Feel the inside of the tire (if you can remove it) for sharp objects.
- Check the Rim/Tape: If you have a puncture, the object may have penetrated the tire and is now stuck in the rim tape or hole. When you remove the tire, inspect the rim bed carefully. The rim tape must cover all spoke holes perfectly.
- Valve Stem Damage: A bent or cracked valve stem will leak. This requires replacing the inner tube (the valve is part of the tube).
Problem: I Can’t Get the Pressure High Enough
Symptom: The pump gets very hard to use and the gauge stalls well below the tire’s max rating.
Solution:
- Your pump is inadequate. Small, portable “frame” pumps are often terrible for high-pressure road tires (80+ PSI). They may physically not be able to generate that pressure. You need a quality floor pump.
- Leakage. Re-check for the hissing sounds described above. A major leak will make it impossible to build pressure.
- Tire/Rim Limitation. Very old or damaged rims can have flaws that prevent holding high pressure. This is rare but possible.
Maintenance and Best Practices for Longevity
Inflating your tire isn’t a “set it and forget it” task. It’s part of a regular maintenance rhythm that keeps your Bontrager tires—and your entire bike—performing optimally for years.
Establish a Checking Routine
Tires are not airtight containers. They slowly leak air through the rubber and valve. A good rule of thumb: check your tire pressure every 1-2 weeks if you ride regularly, and before every long ride or race. Make it part of your pre-ride checklist. A quick squeeze with your thumb can tell you a lot, but a gauge is the only way to be sure. Invest in a small, portable pressure gauge to keep in your saddlebag for mid-ride top-offs.
Mind the Temperature
Air pressure is directly affected by temperature. For every 10°F (about 5.5°C) change in temperature, your tire pressure will change by approximately 1 PSI. This means:
- Cold mornings: Your tires will be under-inflated compared to the reading you got in a warm garage. Add a few PSI if you filled them indoors the day before.
- Riding generates heat: Friction from the road and flexing of the tire increases pressure. Your pressure might read 5-10 PSI higher after a hard, long ride than when you started. Don’t let this scare you into letting air out cold.
- Seasonal changes: Adjust your baseline pressure slightly in summer vs. winter for the same ride quality.
Storage and Valve Care
When storing your bike for the off-season, it’s actually beneficial to let out some air (reduce pressure to about 20-30 PSI) to prevent flat spots from developing on the tires under the bike’s weight. However, keep some air in them to maintain the bead seal on the rim.
Always keep valve caps screwed on. They are not just for show; they keep dirt and moisture out of the valve mechanism, which can cause leaks or make the valve sticky. For Presta valves, after inflating and tightening the lock nut, give it a final gentle tug to ensure it’s snug and won’t unscrew itself while riding.
Beyond the Basics: Special Considerations for Bontrager Tires
While the inflation process is universal, Bontrager offers some specific technologies and tire types that have slight nuances.
Tubeless Ready (TLR) Systems
Many modern Bontrager mountain and gravel tires are “Tubeless Ready.” These use a special airtight rim and a sealant-filled tire, eliminating the inner tube. Inflating a tubeless setup is different.
- Initial Setup: Requires a shot of sealant (latex-based liquid) inside the tire and often a high-volume burst of air to “seat” the bead (the edge of the tire locking into the rim). This usually needs a special air compressor or a high-volume floor pump with a “burst” chamber.
- Pressure: Tubeless tires can run much lower pressures without fear of pinch flats, typically 20-30% lower than a tubed setup for the same conditions. Follow Bontrager’s guidelines for your specific TLR model.
- Maintenance: Sealant dries out every 2-6 months. You’ll need to periodically add more sealant through the valve (using a syringe) or re-install the tire. Pressure still needs regular checking, as tubeless systems can be slightly more porous.
Integrated vs. Removable Valve Cores
Most Bontrager inner tubes have removable valve cores. This is a tiny, threaded piece inside the valve stem (both Presta and Schrader) that you can unscrew with a special tool. Why does this matter?
- Adding Sealant: For tubeless conversions or adding sealant to a puncture-resistant tube, you inject it directly through the valve core after removing it.
- Cleaning/Replacing: If a valve core gets clogged with sealant or dirt, you can remove it, clean it, or replace it for pennies.
- Valve Extenders: If you have deep-section rims and a standard valve stem is too short, you can install a valve extender onto a removable core. Non-removable cores cannot use extenders.
Always assume your valve core is removable unless you have definitive proof otherwise. It’s a great feature to have.
Conclusion: Your Ride Starts with the Right Squeeze
Learning how to properly put air in your Bontrager bike tire transforms you from a passive rider into an active mechanic. It’s the first line of defense against poor performance, discomfort, and mechanical failure. The ritual is simple: find the magic number on the tire sidewall, match your pump to the valve, add air gradually, and seal it up tight. This small act of attention pays massive dividends in every pedal stroke.
Your Bontrager tires are engineered for performance, whether you’re carving canyon roads, bombing downhill singletrack, or commuting across town. They can only deliver on that promise when they’re at the correct pressure. Make checking and adjusting your tire pressure as habitual as putting on your helmet. In the world of cycling, where efficiency and safety are paramount, there is no cheaper, faster, or more impactful upgrade than the correct amount of air in your tires. Now, go enjoy the ride.
Frequently Asked Questions
Can I use a gas station air pump on my Bontrager bike tire?
You can, but it’s risky. Gas station pumps are designed for car Schrader valves and often deliver air in very high, uncontrolled bursts. They lack precise gauges, making over-inflation and a potential blowout very likely. They also may not fit a Presta valve without an adapter. A dedicated bike pump is always the safer, better choice.
What happens if I over-inflate my Bontrager tire?
Over-inflation makes the ride harsh and uncomfortable, reduces traction (as the tire can’t conform to the ground), and significantly increases the risk of a catastrophic blowout, especially from hitting a pothole or curb. It also accelerates wear in the center of the tread. Always stay within the PSI range on the tire sidewall.
Why does my Bontrager tire feel flat even when the gauge reads the correct pressure?
This is usually due to under-inflation. If the pressure is correct but the tire feels soft, you may have a slow leak, a damaged rim tape, or a severely worn tire carcass that can no longer hold its shape. Re-check the pressure after 15 minutes to see if it’s dropping. If it holds but feels soft, you may simply need to run slightly higher pressure for your weight.
Do I need to remove the valve core to add air?
No, you do not remove the valve core to add air under normal circumstances. You simply attach your pump directly to the valve stem. You only remove the core for specific tasks like injecting tubeless sealant, cleaning a clogged valve, or installing a valve extender on deep rims.
My Bontrager tire has a maximum pressure of 120 PSI. Should I always pump it to that?
No. The maximum pressure is the absolute upper safety limit, not the recommended pressure. Your optimal pressure depends on your body weight, the terrain, and your preference for comfort vs. speed. A lighter rider on smooth roads might run 90 PSI, while a heavier rider might need 110 PSI for the same tire to prevent rim strikes. Start in the middle of the range and adjust.
How often should I really check my tire pressure?
Check your tire pressure before every ride if you want to be perfect. At a minimum, check it every 1-2 weeks. Tires naturally lose 1-5 PSI per week through osmosis. Temperature changes also affect pressure. A quick squeeze and gauge check takes 30 seconds and can prevent a flat, a sluggish ride, or a blowout.