How to Make My Spin Bike Seat More Comfortable
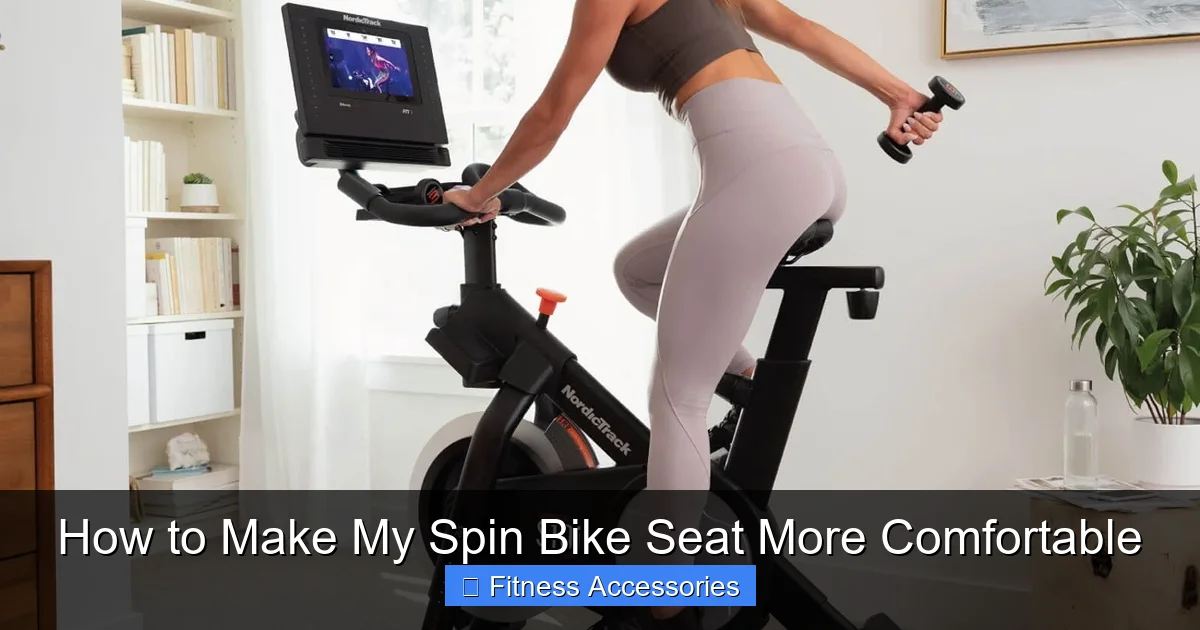
Don’t suffer in silence! A painful spin bike seat is the #1 reason people quit indoor cycling. The good news is that almost every discomfort is fixable. It starts with a proper bike fit—specifically, correct saddle height, fore/aft position, and angle. From there, investing in a quality padded cycling short or a seat cover can transform your ride. Remember, some initial discomfort is normal as your body adapts, but sharp pain is a sign something is wrong. By combining smart adjustments, the right accessories, and building your endurance, you can turn a painful chore into your favorite workout.
Let’s be honest: the first time you plopped down on a spin bike, that saddle probably felt like a medieval torture device. The unyielding plastic or minimal padding, the strange shape—it’s designed for performance, not plush comfort. And yet, here we are, committing to hour-long rides in the name of fitness. The burning question on every new cyclist’s mind is simple: how to make my spin bike seat more comfortable?
The frustration is real. You’re motivated, you’ve got the playlist ready, but the moment you sit down, your focus shifts from crushing the climb to just getting through the next minute without pain. You might even be tempted to call it quits, thinking, “Maybe this sport just isn’t for me.” Before you hang up your SPD shoes, take a breath. The truth is, 99% of spin bike seat discomfort is completely solvable. It’s not about finding a magic cloud to sit on; it’s about understanding the science of saddle fit, using the right tools, and training your body correctly. This guide will walk you through every step, from the easiest 30-second tweak to long-term strategies, transforming your relationship with your saddle from adversarial to harmonious.
Key Takeaways
- Proper Adjustment is 80% of the Solution: Correct saddle height, fore/aft position, and tilt are non-negotiable for comfort. Use the “three-finger rule” and hip alignment check.
- Invest in Your Interface: A good pair of padded cycling shorts (with a proper chamois) or a high-quality gel/foam seat cover is the single most effective upgrade after a fit.
- Your Clothing Matters: Never ride in regular gym shorts. Seamless, moisture-wicking fabric and a dedicated chamois pad are essential to prevent chafing and pressure points.
- It’s a Training Issue, Not Just a Seat Issue: Your core and glutes must do the work. Building endurance in these muscles and practicing active pedaling reduces saddle pressure significantly.
- Break-Ins Are Real (For You & The Seat): Your body needs 3-5 rides to adapt to a new saddle or position. A new seat cover may also feel stiff initially.
- Professional Fits Are Worth It: If adjustments feel overwhelming, a 30-minute session with a certified bike fitter can solve years of pain and is often free at your local studio.
- Listen to Your Body: Discomfort that fades is okay. Sharp, localized pain, numbness, or tingling means STOP and re-adjust immediately.
📑 Table of Contents
- The Root of All Discomfort: Understanding Why Spin Bike Seats Hurt
- H2: The Holy Trinity of Saddle Adjustment: Your First 10 Minutes
- H2: The Accessory Arsenal: Upgrading Your Saddle Interface
- H2: The Clothing Code: Dressing for Saddle Success
- H2: The Fit Factor: When Your Bike Itself is the Problem
- H2: Training Your Tolerance: Building a “Saddle-Ready” Body
- H2: Troubleshooting: Specific Pains and Their Fixes
- Strong Conclusion
The Root of All Discomfort: Understanding Why Spin Bike Seats Hurt
Before we dive into solutions, we need to diagnose the problem. Why does a narrow, firm saddle designed for efficiency feel so awful? The discomfort typically stems from one or more of these core issues:
Pressure Points vs. Shear Forces
Your body has two primary contact points with the saddle: your ischial tuberosities (the scientific name for your “sit bones”) and your soft tissue. A well-fitted saddle supports your sit bones, distributing your weight over a stable bony structure. Pain occurs when the saddle is too narrow (pressing into soft tissue) or too wide (causing inner thigh chafing). Meanwhile, shear force is the sliding or rubbing motion that happens with each pedal stroke, especially if you’re not stable. This is the primary cause of chafing and raw skin. The goal is to maximize stable pressure on the sit bones and minimize shear on everything else.
The “New vs. Old” Seat Phenomenon
That beat-up, stained saddle at your local studio that everyone uses? It’s likely molded to the shape of hundreds of riders over years. It may feel “broken in” and comfortable, but it’s actually a custom-fit disaster waiting to happen. A new, firm saddle will feel harsh initially because it’s not yet conforming to your unique anatomy. This leads many to incorrectly blame the saddle design, when in reality, their body just needs 3-5 rides to adapt to a *correct* position.
Your Bike Fit is the Foundation
No amount of padding will fix a fundamental fit error. If your saddle is too high, you’ll rock side-to-side at the bottom of the pedal stroke, creating massive shear. If it’s too low, you’ll put excessive pressure on your knees and sit bones. If it’s too far forward or back, you’ll shift your weight onto the wrong parts of the saddle. All comfort solutions must start with a correct bike fit.
H2: The Holy Trinity of Saddle Adjustment: Your First 10 Minutes
Before you spend a dime on accessories, master these three critical adjustments. You can do them on any spin bike in under two minutes. Get this right, and you’ll solve 80% of your comfort issues.

Visual guide about How to Make My Spin Bike Seat More Comfortable
Image source: solefundamentals.com
1. Saddle Height: The Three-Finger Rule
This is the most important adjustment. A correct height allows a slight bend in your knee at the bottom of the pedal stroke (with the ball of your foot on the pedal). Here’s the foolproof method:
- Place the crankarm at the 6 o’clock position (pointing straight down).
- Sit on the saddle and place the ball of your foot on the pedal.
- Your leg should have a 25-30 degree bend at the knee. A visual trick: you should be able to fit about three fingers stacked vertically between the top of your knee and the saddle.
- If you have to rock your hips to reach the pedal, the saddle is too high. If your leg is locked straight or nearly straight, it’s too low.
Pro Tip: A saddle that’s too high causes you to over-extend, pulling on your hamstrings and causing your hips to sway side-to-side. This sway grinds your soft tissue against the saddle with every rotation—a major source of pain and numbness.
2. Saddle Fore/Aft Position: The Plumb Line Method
This determines whether you’re sitting over or behind the pedals, affecting knee strain and weight distribution.
- Position the crankarms so they are parallel to the floor (3 and 9 o’clock).
- Place a plumb line (a string with a weight) from the front of your kneecap.
- The line should fall directly over the axle of the pedal (the center of the pedal spindle).
- If it falls in front, the saddle is too far forward. If it falls behind, it’s too far back.
Why it matters: Too far forward shifts weight to your hands and shoulders and strains the knees. Too far back puts excessive pressure on your sit bones and makes it hard to engage your core.
3. Saddle Tilt: The Level Check
This is simple but often overlooked. Use a small carpenter’s level on the saddle. For most riders, a completely level saddle (0 degrees) is ideal.
- Nose Up: Causes you to slide forward, putting pressure on your perineum (the area between your sit bones). This is the #1 cause of numbness and tingling—a serious red flag.
- Nose Down: Causes you to slide back, putting all your weight on your sit bones and making you grip the handlebars tightly to stay in place.
Exception: Some riders with specific anatomical needs or those who ride very aggressively in an aero position may need a 1-2 degree nose-down tilt, but this should be determined by a professional fitter.
H2: The Accessory Arsenal: Upgrading Your Saddle Interface
Once your bike is dialed in, you can enhance comfort with targeted accessories. Think of these as the suspension system for your seat.

Visual guide about How to Make My Spin Bike Seat More Comfortable
Image source: i.ytimg.com
Padded Cycling Shorts: The Gold Standard
This is not an optional piece of equipment; it’s essential. A proper cycling short is a technical garment with a chamois (pronounced “shammy”)—a padded, seamless pad designed specifically for the cycling motion.
- Why it works: The chamois provides strategic padding exactly where you need it (sit bones and soft tissue), wicks sweat, reduces friction, and has antimicrobial properties to prevent saddle sores. It moves *with* your body, unlike a loose seat pad that slides around.
- What to look for: Fit is everything. The chamois should be snug against your body with no wrinkles. A loose short will cause chafing. For spin bike use (shorter, high-intensity rides), a shorter inseam (3-5 inch) is often more comfortable than full-length bibs. Look for brands like Pearl Izumi, Castelli, or Assos for quality. Don’t wear underwear underneath—it creates seams and friction.
- The “Break-In” Myth: A good chamois should be comfortable on the first ride. If it’s not, it’s likely the wrong size or style for your anatomy.
Seat Covers & Pads: A Quick Fix with Caveats
If you can’t or don’t want to wear padded shorts (for a lunchtime class, for example), a seat cover is your next best bet.
- Gel Covers: These are soft, squishy pads that strap over your existing saddle. They provide immediate cushioning but can shift if not secured tightly. They’re great for absolute beginners on very long, easy rides. Downside: They can increase heat retention and sometimes make you “sink” too much, affecting pedaling efficiency.
- Foam/Cushion Covers: Like the popular “Sheepskin” or “Comfort” covers. They add a layer of firm padding. Often more stable than gel.
- The Critical Rule: A cover can only do so much. If your saddle is the wrong shape or your bike fit is terrible, a cover will just make a bad situation feel “squishy-bad” instead of “hard-bad.” It’s a band-aid, not a cure.
Specialized Saddles: The Nuclear Option
If you’ve tried everything and still have pain, your saddle itself might be wrong for your anatomy. Spin bikes often come with a generic, narrow performance saddle. Consider a replacement:
- Wider Saddles: For riders with wider sit bones. Measure your sit bone width (many shops have a “sit bone mapper” or you can use a simple cardboard imprint) to find your ideal width.
- Cutaway/Tunnel Saddles: These have a recessed channel down the center to relieve pressure on perineal tissue. Excellent for preventing numbness.
- “Women’s Specific” Saddles: These are typically wider and have a shorter nose to accommodate generally wider pelvises and different soft tissue placement. But anatomy varies wildly—the best saddle is the one that fits *your* bones, not your gender.
- Important: Check if your spin bike’s saddle rails are compatible (usually 7x7mm or 7x9mm oval) before purchasing a new saddle.
H2: The Clothing Code: Dressing for Saddle Success
What you wear is part of your saddle system. The wrong fabric can undo all your careful adjustments.

Visual guide about How to Make My Spin Bike Seat More Comfortable
Image source: solefundamentals.com
The Non-Negotiable: Seamless & Moisture-Wicking
Regular cotton gym shorts are the enemy. Cotton absorbs sweat, becomes heavy, and has seams in all the wrong places. These seams become friction points that cause raw, painful chafing (saddle sores).
- Always wear technical fabric. Polyester, nylon, and spandex blends are designed to wick moisture away from the skin, keeping the area dry and reducing friction.
- Seamless construction in the inner thigh and seat area is crucial. Flatlock stitching is also a must to minimize raised seams.
The Chamois: Your Best Friend
As mentioned, the chamois is the heart of the cycling short. It’s not just a maxi-pad; it’s a engineered piece of foam or gel with varying density zones. High-end chamois have multi-density padding: firmer under the sit bones for support, and softer in the perineal area for pressure relief. They are also treated with antimicrobial finishes to fight bacteria growth from sweat.
Layering for the Studio
For a hot indoor cycling class, you might just wear your padded short and a lightweight, fitted top. For cooler environments or outdoor rides, you can layer your padded short under regular cycling tights or even regular pants (as long as there are no inner seams). Never wear two padded shorts—it will bunch and cause more problems.
H2: The Fit Factor: When Your Bike Itself is the Problem
Sometimes the saddle isn’t the issue; the entire bike geometry is wrong for your body. This is especially common on shared studio bikes.
Handlebar Height: The Unsung Hero of Comfort
If your handlebars are too low, you’re forced into an aggressive, forward-leaning position. This shifts your weight forward, off your sit bones and onto your hands and soft tissue. Raising the handlebars (by adding spacers or flipping the stem on some bikes) allows you to sit more upright, centering your weight over the saddle.
- Test: If you feel constant pressure in your hands, wrists, or perineum, try raising the bars by a small increment (10-20mm) and see if saddle pressure decreases.
Cleat Position (For SPD Users)
If you use clipless pedals, your foot position on the pedal dramatically affects knee tracking and hip rotation, which in turn affects how you sit.
- Fore/Aft: The ball of your foot should be over the pedal axle. Too far forward stresses the knee; too far back engages the calf unnaturally.
- Float: Your cleats should allow a few degrees of natural rotation (usually 6-9 degrees). Restricting this forces your knee to twist, which can torque your hip and pelvis, pulling on the saddle.
The Case for a Professional Bike Fit
If you’ve made all the adjustments in this guide and are still in pain, a professional bike fit is the ultimate investment. A certified fitter will:
- Measure your sit bone width.
- Analyze your pedaling stroke on a trainer.
- Check your flexibility and leg length discrepancies.
- Make micro-adjustments to saddle type, tilt, height, and handlebar position.
- Many studios offer a free or discounted fit for members. It’s worth asking.
H2: Training Your Tolerance: Building a “Saddle-Ready” Body
Your body is an adaptable machine. The discomfort you feel is often your soft tissue complaining because your core and glutes aren’t doing their job.
Engage Your Core & Glutes: The Active Pedal Stroke
Many beginners “plop” on the saddle and let their legs dangle. This isolates the saddle as the only support. Instead, think of creating a solid platform:
- Core Braced: Gently pull your belly button toward your spine. This stabilizes your pelvis, preventing it from rocking side-to-side (which creates shear).
- Glutes Activated: Think about pushing through your heel and squeezing your glute at the top of the pedal stroke. This transfers power and takes load off your sit bones.
Drill: On a long, steady ride, spend 5 minutes consciously focusing on this active engagement. You should feel less vibration and pressure transmitted to the saddle.
The Art of the “Out of the Saddle” (OOS) Interval
Standing up on the pedals is not just for sprints. It’s a vital tool for saddle relief.
- How: During a flat, easy section, lift your body off the saddle, supporting your weight on your hands and feet. Your legs should still be bent, not locked. Pedal smoothly.
- When: Every 10-15 minutes on a long ride, spend 30 seconds to 1 minute OOS. This completely eliminates saddle pressure, increases blood flow, and gives your skin a break from friction.
- Caution: Don’t bounce. Maintain control. Use OOS on flats and gentle climbs, not on intense, shaky sprints.
Building Endurance Gradually
Your sit bones and skin need time to adapt. If you go from 0 to 60-minute rides, you’re asking for pain. Follow the “10% rule”—increase your ride time by no more than 10% per week. This allows your body to build the necessary calluses and muscular endurance to sit comfortably for longer periods.
H2: Troubleshooting: Specific Pains and Their Fixes
Let’s decode your specific discomfort.
“My inner thighs are chafing raw.”
Cause: Saddle is too wide, or you’re sliding side-to-side due to incorrect height or lack of core stability. Also, seams in clothing.
Fix: 1) Ensure saddle is level and at correct height. 2) Consider a narrower saddle. 3) Wear seamless, tight-fitting shorts. 4) Apply anti-chafe balm (like Body Glide) to inner thighs before riding.
“I have numbness/tingling in my sensitive area.”
Cause: CRITICAL. This indicates pressure on nerves and blood vessels. Usually from a saddle nose that’s too high, too far forward, or a saddle that’s too narrow.
Fix: 1) Immediately tilt the saddle nose down by 1-2 degrees. 2) Move the saddle back slightly. 3) Ensure you are sitting on the *wide* part of the saddle, not the nose. 4) Consider a cutaway or relief-channel saddle. Do not ignore this symptom.
“My sit bones are sore for days after.”
Cause: Pressure is concentrated on a small area. Saddle may be too hard, too narrow, or tilted down.
Fix: 1) Check saddle tilt—ensure it’s level or 1 degree nose-up. 2) A slightly wider saddle or a gel/foam cover can distribute pressure. 3) Your body may just need more time to adapt if the saddle is correctly positioned.
“I feel like I’m sliding forward constantly.”
Cause: Saddle nose is tilted down, or handlebars are too far forward/low, pulling you out of position.
Fix: 1) Level the saddle. 2) Raise the handlebars. 3) Move the saddle back slightly. 4) Engage your core to hold your position.
Strong Conclusion
Making your spin bike seat comfortable is not a matter of luck or enduring pain as a badge of honor. It’s a precise blend of science and personalization. Start with the non-negotiable foundation: the Holy Trinity of adjustments—height, fore/aft, and tilt. Get this right, and you’ve won half the battle. From there, strategically deploy your accessories: a fitted padded short is your most powerful tool, followed by a suitable seat cover if needed. Dress the part with technical, seamless clothing. Understand that your body is part of the equation—engage your core, use OOS intervals, and build your tolerance progressively. Finally, know when to call in the experts. A professional bike fit is the ultimate solution for persistent pain and will pay dividends in every ride you ever take. Remember, the goal is to forget the saddle is even there, freeing your mind to focus on the music, the climb, and the sheer joy of moving. That’s not a fantasy; it’s what happens when you apply these principles. Your most comfortable ride is waiting—go adjust, upgrade, and ride on.
Frequently Asked Questions
How long does it take to break in a new spin bike saddle?
Your body typically needs 3-5 rides of 30-60 minutes to adapt to a new saddle or position. The saddle itself may feel firmer initially but will not significantly change shape. If pain is severe or includes numbness after this period, your fit is likely incorrect.
Can a saddle that’s too high cause seat pain?
Yes, absolutely. A saddle that’s too high forces your hips to rock side-to-side at the bottom of each pedal stroke. This creates intense shear force, grinding your soft tissue against the saddle and causing chafing, hot spots, and pain. Always ensure a slight knee bend at the bottom of the stroke.
Are chamois pads in cycling shorts necessary for spin bike comfort?
For regular indoor cycling, they are highly recommended. The chamois provides targeted padding, reduces friction, and wicks moisture. While a high-quality seat cover can help, a well-fitted padded short moves with your body and is far more effective at preventing chafing and pressure points during the repetitive motion of pedaling.
Is riding out of the saddle bad for my knees or back?
No, when done correctly. Standing up periodically (every 10-15 minutes for 30-60 seconds) is crucial for saddle relief and blood flow. The key is to maintain control, avoid bouncing, and keep a slight bend in your knees. It should be a smooth transition, not a violent stand-up sprint.
If my spin bike seat hurts, does that mean it’s just not for me?
Almost never. Pain is a signal from your body that something is misaligned—saddle position, bike fit, clothing, or riding technique. It is almost always fixable with the adjustments and strategies outlined here. Persistent, sharp pain or numbness should be addressed by stopping and re-evaluating your setup.
What’s better for comfort: a gel seat cover or a wider saddle?
It depends on the cause. If your sit bones are simply too narrow for the existing saddle, a wider saddle is the correct solution because it provides a new platform for your anatomy. A gel cover merely adds cushioning to the existing shape and width. If the saddle is the wrong *width*, a cover won’t fix the underlying pressure distribution issue. First, confirm your saddle is the correct width via a professional fit or sit bone measurement.