How to Make My Bike into a Stationary Bike
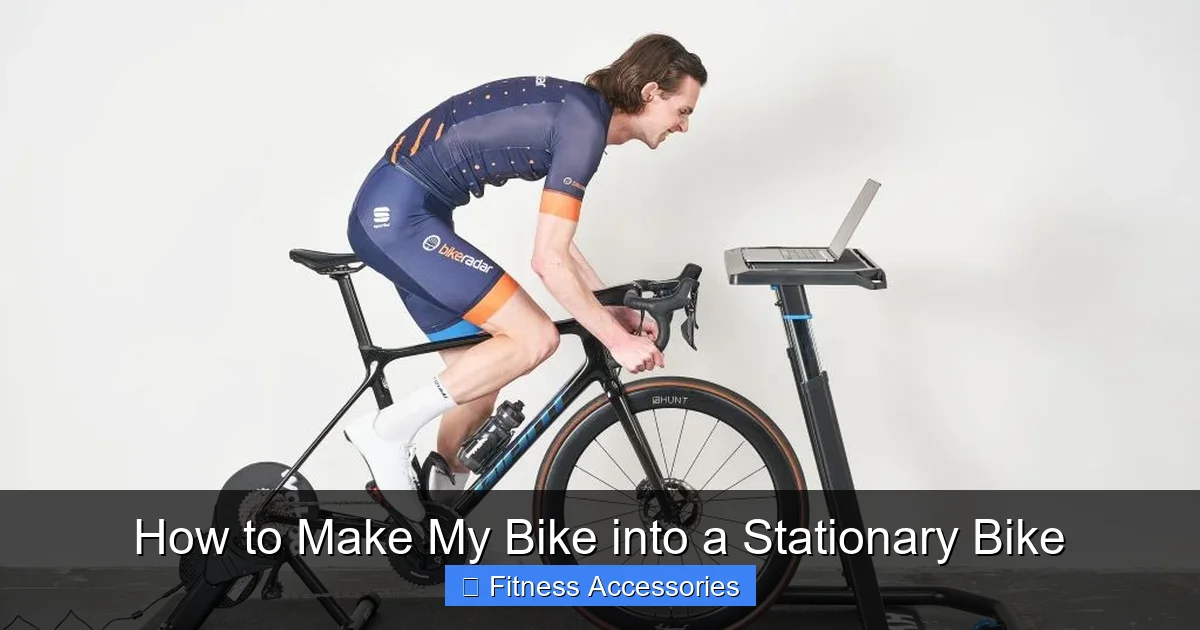
Converting your bike to a stationary setup is a cost-effective way to enjoy indoor cycling year-round. This guide explores three primary methods: using a dedicated bike trainer, mounting your bike on rollers, or building a custom stand. Each option has distinct benefits regarding stability, realism, and budget. We’ll walk you through the setup process, essential safety checks, and maintenance tips to ensure a smooth, effective workout experience without damaging your bicycle.
Key Takeaways
- Method Choice is Crucial: Select between a bike trainer (stable, resistant), rollers (skill-based, realistic), or a DIY stand (budget) based on your fitness goals and skill level.
- Compatibility is Key: Ensure your bike’s wheel size and axle type (quick release vs. thru-axle) match the trainer or stand you choose to avoid damage and ensure safety.
- Resistance Control Varies: Trainers offer manual, wind, or magnetic resistance; rollers rely solely on your effort. Consider if you need programmed workouts or a simple feel.
- Stability vs. Realism Trade-off: Trainers are very stable but fix the bike; rollers require balance but mimic road riding more closely and improve core stability.
- Safety First: Always use a front wheel riser block on trainers to level the bike and prevent handlebar diving. Secure your bike properly before every ride.
- Tire & Drivetrain Wear: Expect increased wear on your rear tire and chain/cassette. Use a dedicated trainer tire and keep your drivetrain clean and lubricated.
- Noise & Space Considerations: Trainers, especially magnetic ones, can be noisy. Rollers are quieter but take up more floor space. Consider your living environment.
📑 Table of Contents
- Unlock Year-Round Cycling: Why Convert Your Bike?
- Understanding Your Options: Trainers vs. Rollers vs. Stands
- Method 1: Setting Up a Wheel-On Bike Trainer
- Method 2: Mastering the Art of Rollers
- Method 3: The DIY Stand (For the Handy & Budget-Conscious)
- Beyond Setup: Safety, Maintenance, and Maximizing Your Ride
- Choosing the Right Path for You: A Decision Guide
- Conclusion: Your Indoor Journey Starts Now
Unlock Year-Round Cycling: Why Convert Your Bike?
Have you ever stared out at pouring rain or a blanket of snow, sighed, and put your cycling shorts away? You’re not alone. For many cyclists, the end of fair-weather riding doesn’t mean the end of training. The secret? Turning your trusty two-wheeled companion into a powerful stationary bike. This isn’t about buying a bulky, expensive piece of gym equipment. It’s about leveraging what you already own to maintain fitness, build strength, and even improve your technique from the comfort of your living room, garage, or basement.
The beauty of this approach is its simplicity and economy. You already know your bike’s geometry, gearing, and comfort. By adding a relatively small accessory, you transform it into a dedicated training machine. This guide will walk you through every step, from understanding the different systems available to the final bolt-tightening and first pedal stroke. We’ll cover commercial solutions and even a few clever DIY ideas, ensuring you have all the knowledge to make the perfect choice for your budget, space, and cycling goals.
Understanding Your Options: Trainers vs. Rollers vs. Stands
Before you spend a dime, it’s vital to understand the three main pathways to stationary cycling. They offer vastly different experiences. Think of it like choosing between a treadmill (trainer), a balance beam (rollers), or a simple bike mount (stand). Your choice will dictate the skill required, the feel of your ride, and the ultimate cost.
Visual guide about How to Make My Bike into a Stationary Bike
Image source: joyfultriathlete.com
The Classic Choice: Bike Trainers
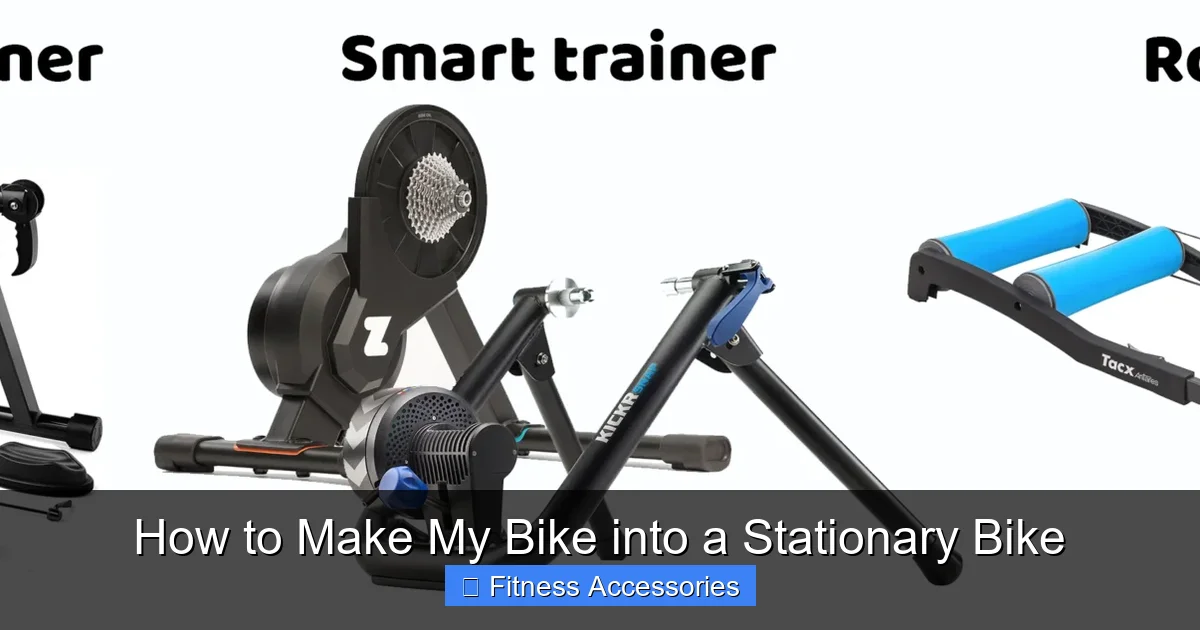
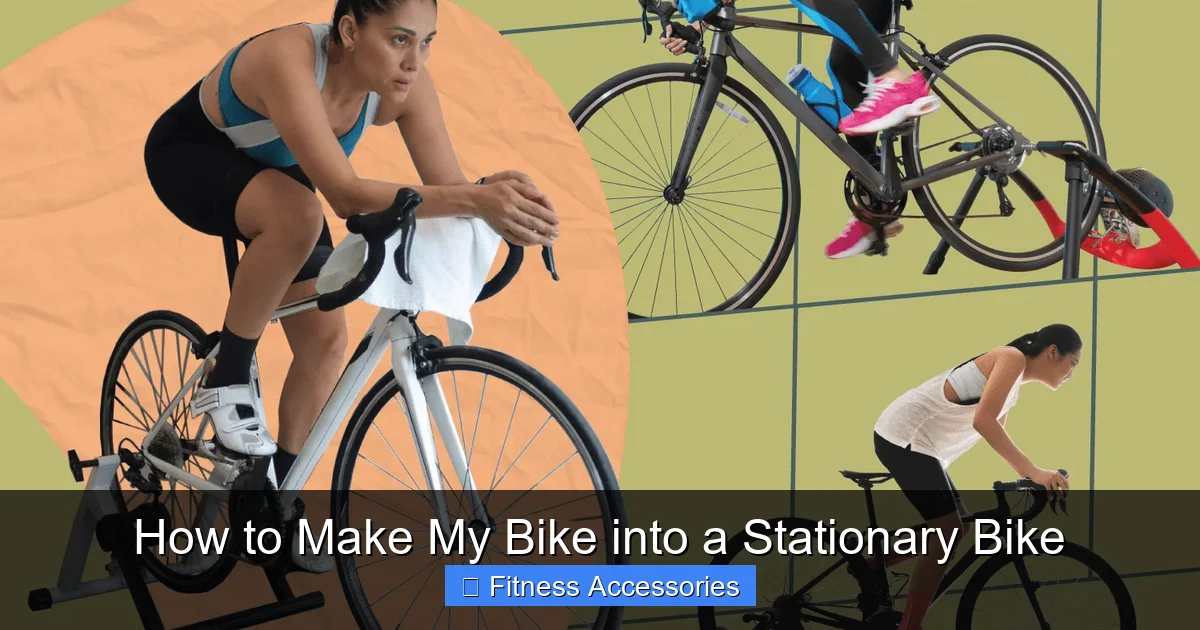
A bike trainer is a triangular or A-frame stand that clamps onto your bike’s rear axle, lifting the rear wheel off the ground. The wheel spins against a resistance unit—usually a fan, magnet, or fluid-filled cylinder. This is the most popular method for serious indoor training because it’s incredibly stable. You can stand up and hammer on the pedals, do high-intensity intervals, or read a book without worrying about falling over. Modern “smart trainers” can even connect to apps like Zwift or TrainerRoad to control resistance automatically, simulating hills and virtual courses. They are the workhorse of indoor cycling.
The Skill-Based Choice: Rollers
Bike rollers are a set of three cylindrical drums (usually one for each wheel and one for the front) mounted on a frame. Your bike rides *on* the rollers, not *in* a clamp. This means you must balance the bike to stay upright. It’s a full-body workout that demands constant core engagement and smooth pedal strokes, closely mimicking the balance and handling required on the road. Rollers are famously used by professionals for high-cadence work and improving pedal efficiency. They are quieter than many trainers but have a steeper learning curve. Falling off is a real (though usually harmless) possibility when starting.
The Budget DIY Choice: Custom Stands
This method involves creating a simple structure to hold your bike’s rear axle or frame off the ground, allowing the rear wheel to spin freely. Often, this uses wood, sturdy PVC pipe, or old metal parts. The resistance comes from the drivetrain itself—you simply pedal against the gears. You can add a friction device, like a block of wood pressing against the tire, for basic resistance. This is the most affordable entry point but also the most basic. It lacks calibrated resistance, can be noisy, and requires careful construction to be safe and stable. It’s best for very casual use or as a temporary solution.
Method 1: Setting Up a Wheel-On Bike Trainer
This is the most straightforward and common conversion. Here’s a step-by-step breakdown to get you rolling safely.
Visual guide about How to Make My Bike into a Stationary Bike
Image source: biketoworkday.us
Step 1: Compatibility Check
This is the most important step. You must match your bike to the trainer. First, check your rear wheel size. Most trainers accommodate 26”, 27.5”, 29”, and 700c (28”) wheels via adjustable cups or dropouts. Second, identify your axle type. Most older or entry-level bikes use a quick-release (QR) skewer. Modern mountain and gravel bikes often use a thru-axle. You need a trainer that is compatible with your specific axle, or you may need to purchase an adapter kit. Using the wrong skewer or forcing a thru-axle into a QR-only trainer is dangerous and can damage your bike or the trainer.
Step 2: Assemble the Trainer (if required)
Most trainers come partially assembled. Follow the manufacturer’s instructions to attach the resistance unit (fan, magnet, or fluid cartridge) to the main frame and secure the legs. Ensure all bolts are tightened to the specified torque. A wobbly trainer is unsafe.
Step 3: Mount Your Bike
- Remove the quick-release skewer from your bike’s rear wheel. If your bike has a thru-axle, remove that.
- Insert the trainer’s specific skewer (it’s usually longer and has a conical end) through the rear wheel hub. Hand-tighten the nut on the non-drive side.
- Position the bike over the trainer’s resistance unit. The rear axle should drop directly into the trainer’s clamping mechanism.
- Clamp and secure: Engage the trainer’s quick-release lever or tightening knob. Apply firm pressure. The wheel should be centered and straight against the resistance roller. Give the wheel a firm tug to ensure it won’t slip out.
- Use a front wheel riser block: Almost all trainers lift the rear wheel, causing the bike’s front end to point downward. This puts uncomfortable pressure on your hands and shifts your weight forward. Place a sturdy riser block (often included) under the front wheel to level the bike. This is critical for comfort and proper riding position.
Step 4: Final Safety & Setup Checks
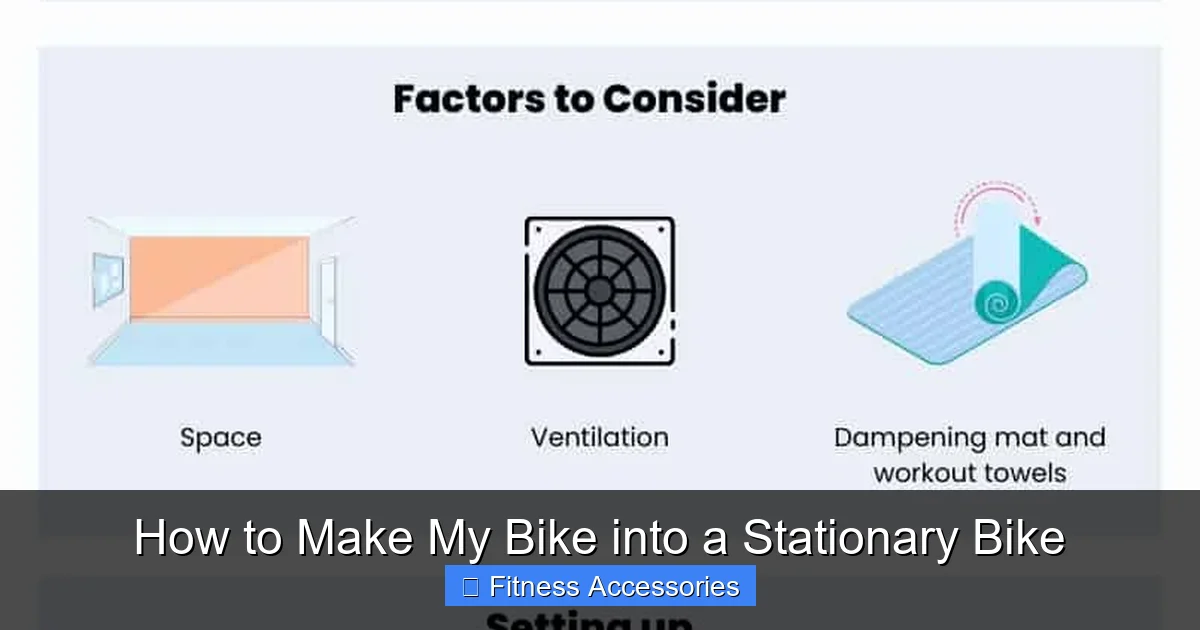
Before your first pedal stroke, spin the rear wheel by hand. It should rotate smoothly against the resistance unit without rubbing or catching. Check that the bike is perfectly level. Ensure the trainer’s legs are on a flat, non-slippery surface. If your floor is slick, place a yoga mat or piece of carpet underneath for grip. Finally, have a bottle of water and a towel within easy reach—indoor training gets hot!
Method 2: Mastering the Art of Rollers
Rollers offer a uniquely engaging ride but require a different setup and mindset. Patience is your first accessory.
Visual guide about How to Make My Bike into a Stationary Bike
Image source: verywellfit.com
Roller Anatomy and Setup
A standard roller set has a frame holding three drums. The rear drum is usually connected to the front drum via a belt or band, so when you pedal, both wheels turn in sync. The front drum is free-spinning for balance. Setup is simple: unfold the frame, place it on a flat surface, and ensure all drums are parallel and spin freely. No tools are typically needed.
Getting On and Off: The Critical Skill
This is the hardest part. The standard technique is the “side mount.”
- Position the rollers next to a wall or in a doorway for initial support. Wear flat-soled shoes for better feel.
- Hold the handlebars and straddle the rollers with one foot on each side, bike pointed straight.
- Give yourself a gentle push off the wall/ doorway and simultaneously lift both feet onto the pedals. The goal is to get both feet on the pedals and applying power within 1-2 seconds. Your first attempts will be wobbly; this is normal.
- To dismount: Simply slow down, straighten the bike, and put one foot down. It’s easier to stop than to start.
Pro Tip: Start in a very easy gear. High cadence (90+ RPM) in a low gear is much easier to balance than grinding in a high gear. Focus on looking ahead, not down at your front wheel. Smooth, circular pedal strokes are key.
Adding Resistance to Rollers
Basic rollers offer no added resistance—the difficulty is entirely up to you. To add resistance, you can:
- Use a resistance unit that mounts between the rear drum and frame (like a fan or magnetic unit).
- Place a heavy object (like a sandbag) on the frame behind the rear drum to create friction as the drum presses into it (a crude but functional method).
- Simply shift into harder gears. The increased drivetrain friction will make it harder to turn the wheels.
Method 3: The DIY Stand (For the Handy & Budget-Conscious)
If you’re on a shoestring budget or just want a project, a simple stand can work. Warning: This requires careful building. An unstable stand is dangerous.
Design Concept: The “Spoon” or “A-Frame” Stand
The goal is to create a stable base that supports the bike’s rear triangle or axle, allowing the rear wheel to spin freely. A common design uses two sturdy vertical posts (e.g., 2×4 lumber) connected at the top by a horizontal crosspiece. A slot is cut in the crosspiece to cradle the bike’s rear axle or a section of the seat stays.
Materials and Construction
- Materials: Pressure-treated 2×4 lumber, lag bolts, wood screws, a wide wood block for the axle cradle, and optionally, a section of old bicycle inner tube for grip.
- Build: Create a wide, stable base (at least 24-30 inches wide). The taller the uprights (24-30 inches), the more stable it will be. The crosspiece must be perfectly level and securely fastened. The cradle slot should be slightly wider than your axle and lined with rubber or inner tube to prevent metal-on-metal contact and slippage.
- Resistance: For any meaningful resistance, you must create friction on the tire. The simplest method is a friction block: a wooden block with a high-friction surface (like a piece of cut-up yoga mat or sandpaper) that you can tighten against the rear tire using a bolt or clamp. This is crude and will wear your tire quickly.
Safety Imperatives for DIY
This method is not recommended for high-intensity training, standing sprints, or anyone not confident in their building skills. The stand must not tip forward, backward, or side-to-side. Test it vigorously with the bike mounted but without riding it first. Have someone nearby when you test-ride for the first time. Always wear a helmet. A failed DIY stand can cause a serious crash.
Beyond Setup: Safety, Maintenance, and Maximizing Your Ride
You’re clamped in, the front wheel is level, and you’re ready to go. But a great indoor session depends on more than just the hardware.
Essential Safety Protocols
- Always secure the bike: Double-check the trainer clamp or roller position before every ride. Give the rear wheel a firm tug.
- Use a front riser block on trainers: Never skip this. It’s not just for comfort; it prevents you from pitching forward over the handlebars during hard efforts.
- Mind your surroundings: Ensure you have clear space to the sides and front. A fan for cooling is great, but keep cords and pets away from spinning wheels.
- Hydrate and ventilate: You’ll sweat more indoors. Have water readily available and work in a room with airflow to prevent overheating.
- Listen to your bike: Strange noises, slipping, or excessive vibration mean stop immediately and check your setup.
Tire and Drivetrain Care
Indoor training is brutal on specific parts. The rear tire experiences constant friction and heat without the cooling effect of wind. Invest in a dedicated trainer tire—they are made of harder, more heat-resistant rubber and last significantly longer. You will also wear your chain and cassette faster due to the constant load and lack of lubrication from road grit. Implement a strict cleaning and lubing schedule after every few rides. Consider having a second, inexpensive rear wheel and cassette you use only on the trainer to save your best components for outside.
Making It Enjoyable: The Mental Game
Staring at a wall is a quick path to boredom. Mitigate this:
- Use entertainment: Mount a tablet or phone on your handlebars to watch shows, movies, or follow along with virtual rides.
- Try training apps: Apps like Zwift, Rouvy, or TrainerRoad (which require a smart trainer) gamify the experience, providing virtual worlds, structured workouts, and competition.
- Set goals and structure: Don’t just “go for a ride.” Do interval sessions, hill repeats, or a tempo ride. A timer and a plan make time fly by.
- Get the right accessories: A good trainer mat protects your floor, reduces noise, and catches sweat. A handlebar-mounted fan is a game-changer for comfort. A sweat cover protects your bike’s stem and headset from corrosive salt.
Choosing the Right Path for You: A Decision Guide
With all this information, how do you decide? Here’s a quick-reference guide based on common user profiles.
- For the Serious Athlete / Structured Trainer: A smart direct-drive trainer (which replaces your rear wheel) is the gold standard. If that’s out of budget, a high-quality wheel-on magnetic or fluid trainer is excellent. You want stability, accurate power measurement (if possible), and app connectivity.
- For the Casual Rider / Fitness Maintainer: A basic wheel-on magnetic or wind trainer is perfect. It’s affordable, stable, and gets the job done for 3-4 rides a week. Pair it with a good entertainment setup.
- For the Roadie Focused on Cadence & Technique: Rollers are your best friend. They improve pedal stroke efficiency, balance, and core strength in a way a trainer never can. Start with a basic set and master them.
- For the Extreme Budget / Occasional User: A carefully built, very sturdy DIY stand with a friction block can work for light, short sessions. Understand the limitations and risks. Alternatively, look for a used basic trainer on local marketplaces.
- For the Apartment Dweller / Noise-Sensitive: Rollers are generally quieter than fan trainers. A high-end magnetic or direct-drive silent trainer is also a good choice. Avoid basic wind trainers, which can sound like a vacuum cleaner.
Conclusion: Your Indoor Journey Starts Now
Converting your bike into a stationary machine is one of the smartest investments a cyclist can make. It bridges the gap between seasons, ensures you never miss a training day due to weather, and can actually make you a stronger, more efficient rider when done right. The core principle is simple: secure the rear wheel, provide resistance, and level the bike. From there, your choice of method tailors the experience to your needs.
Whether you opt for the plug-and-play stability of a wheel-on trainer, the skill-honing challenge of rollers, or the frugal ingenuity of a DIY stand, you are taking control of your fitness. Remember to prioritize safety with proper setup, maintain your equipment diligently, and find ways to make the time enjoyable. The first pedal stroke on your new stationary setup marks the beginning of a more consistent, resilient, and year-round cycling life. Now, go tighten that skewer, level that front wheel, and ride.
Frequently Asked Questions
Can I use any bike on a trainer or rollers?
Almost any standard bike can be used, but you must check axle compatibility (quick-release vs. thru-axle) and wheel size. Some modern thru-axle systems require specific adapters. Always verify with the trainer/roller manufacturer’s compatibility list before purchasing.
Is it damaging to my bike to use it on a trainer?
Not if set up correctly, but it does increase wear on specific parts. The rear tire experiences significant friction and heat, so using a dedicated trainer tire is highly recommended. The drivetrain (chain, cassette) also wears faster due to constant load. Regular cleaning and lubrication are essential. There is no extra stress on the frame when properly mounted.
Do I need a special front wheel block for my trainer?
Yes, absolutely. A front wheel riser block is critical for comfort and safety. Without it, your bike’s front end will be pointed down, placing excessive pressure on your hands, shoulders, and neck. It also shifts your weight awkwardly and can make you feel like you’re going to pitch forward during hard efforts. Most trainers include one, but if not, they are inexpensive and essential.
What’s the difference between magnetic, fluid, and wind resistance?
Wind trainers use a fan that creates resistance by moving air. They are loud but provide a progressive, road-like feel. Magnetic trainers use magnets that create drag; they are quieter and often have a dial for manual resistance adjustment. Fluid trainers use a sealed fluid chamber; they are very quiet, offer smooth and progressive resistance, and are a popular mid-range choice. Smart trainers use electromagnetic or motorized systems for app-controlled resistance.
Are rollers harder to use than a trainer?
Yes, significantly. Rollers require balance, coordination, and constant core engagement to stay upright. There is a learning curve where you will likely fall off a few times (usually gently). Trainers are completely stable, allowing you to focus solely on power and effort. Rollers are better for improving pedal technique and stability, while trainers are better for high-power, structured workouts.
How can I reduce noise from my trainer setup?
Noise comes from the resistance unit and vibration transmission. Use a thick trainer mat to dampen vibrations and protect your floor. For wind trainers, noise is inherent. For magnetic trainers, ensure the unit is clean and properly aligned. Direct-drive trainers are generally the quietest. Placing a rug or piece of carpet under the mat can further reduce sound transmission to rooms below.