How to Build a Treadmill for a Dog
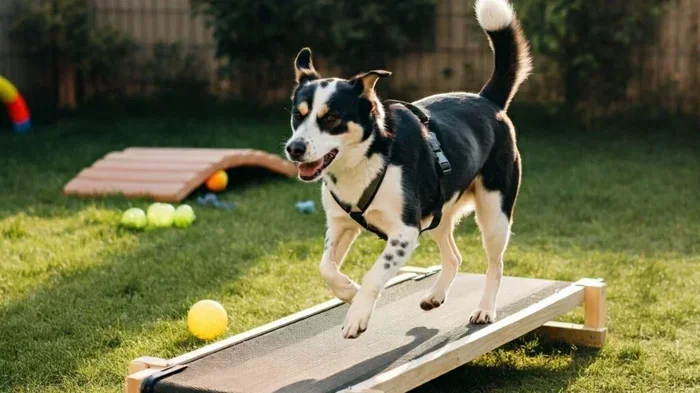
Building a treadmill for your dog is easier than you think. This guide walks you through the entire process, from choosing the right materials to ensuring your pup stays safe during every workout. You will learn how to create a homemade dog treadmill that fits your pet’s size, needs, and fitness goals.
Key Takeaways
- DIY dog treadmills are a cost-effective way to keep your pet active and healthy at home.
- You need basic materials like a motor, belt, frame, and safety features to build one properly.
- Safety should always come first when designing and using a homemade dog treadmill.
- Training your dog gradually is essential for a positive experience on the dog walking machine.
- Regular maintenance keeps your DIY pet exercise equipment running smoothly and safely.
📑 Table of Contents
- Why Build a Treadmill for Your Dog?
- What You Need Before You Start Building
- Step-by-Step Guide to Building Your Dog’s Treadmill
- Safety Tips for Using a Homemade Dog Treadmill
- Training Your Dog to Use the Treadmill
- Maintenance and Care for Your Dog’s Treadmill
- Benefits of a Dog Treadmill for Your Pet’s Health
- Common Mistakes to Avoid When Building a Dog Treadmill
- When to Consider a Commercial Dog Treadmill Instead
- Final Thoughts on Building a Treadmill for Your Dog
Why Build a Treadmill for Your Dog?
Dogs need exercise every single day. Some breeds require a lot of movement to stay happy and healthy. But sometimes, weather, schedules, or limited space make outdoor walks tough. That is where a homemade dog treadmill comes in handy.
Building a dog treadmill DIY project lets you customize the equipment to fit your pet perfectly. You control the size, speed, and safety features. It also saves money compared to buying a commercial dog treadmill, which can cost hundreds of dollars.
Beyond convenience, a canine treadmill build gives your dog a consistent workout. Whether you have a high-energy Border Collie or a recovering pup needing low-impact movement, a homemade solution adapts to the situation. Let us walk through everything you need to know.
What You Need Before You Start Building
Before you grab any tools, take a moment to plan. A successful build dog treadmill project starts with the right preparation. Here is what you need to think about.
Understanding Your Dog’s Exercise Needs
Every dog is different. A young Labrador needs much more exercise than a senior Bulldog. Think about your dog’s age, breed, weight, and health condition. Dogs that are overweight or recovering from surgery may need gentle, slow movement first.
For general canine fitness, most dogs benefit from 20 to 40 minutes of moderate activity per session. A dog treadmill plan should match this energy level. Start slow and build up over time.
Gathering Materials and Tools
Here is a basic list of what you will need for your DIY dog exercise equipment:
- A sturdy frame made from wood or metal
- A smooth, durable belt or walking surface
- A motor with adjustable speed control
- Safety rails or side barriers
- A non-slip base to prevent sliding
- Screws, bolts, and basic tools (screwdriver, drill, wrench)
You do not need professional-grade equipment. Many people build effective dog walking machines using materials from a local hardware store. Keep it simple and focus on stability.
Step-by-Step Guide to Building Your Dog’s Treadmill
Now for the fun part. Let us break down the build a treadmill for a dog process into manageable steps.
Step 1: Design the Frame
Start by building a rectangular frame. The length should be a few inches longer than your dog when they are standing with their legs stretched out. The width should be wide enough for your dog to walk comfortably without feeling cramped.
Use thick plywood or sturdy metal tubing for the base. The frame must be solid. Any wobble or flex can scare your dog and cause injury. Think of it as the foundation of a house. If the base is weak, everything else falls apart.
Step 2: Install the Belt and Motor
Attach a smooth conveyor belt or rubber mat to the frame. This becomes the walking surface. Connect the motor underneath and make sure the belt moves evenly without jerking.
An adjustable speed motor is key. You want to start at a slow walk and increase gradually. Most dogs begin at speeds between 1 and 3 miles per hour. The dog treadmill motor should be quiet enough that it does not startle your pet.
Step 3: Add Safety Features
Safety is the most important part of any homemade dog treadmill. Install side rails on both edges. These prevent your dog from stepping off the belt. Add a non-slip surface to the walking area so paws do not slide.
Consider adding a safety kill switch. If your dog jumps off suddenly, the belt should stop immediately. This protects your pet from injury and builds trust in the equipment.
Step 4: Test and Adjust
Before letting your dog on, test the treadmill yourself. Check for smooth movement, stable frame, and safe speed settings. Make any adjustments needed. A well-tested DIY pet exercise machine gives you peace of mind.
Safety Tips for Using a Homemade Dog Treadmill
Safety cannot be overstated. A dog treadmill safety plan protects your pet and makes the experience positive. Here are the most important rules to follow.
- Always supervise your dog during treadmill sessions. Never leave them unattended.
- Start with the belt off and let your dog walk on it while it is stationary. Get them comfortable first.
- Use treats and praise to create a positive association with the machine.
- Check the belt temperature before each use. A fast-moving belt can generate heat.
- Keep the area clear of toys, cords, and other objects that could cause tripping.
Just like humans, dogs need a proper warm-up. Start the treadmill at a very slow pace and let your dog ease into it. This reduces the risk of muscle strain and helps them understand how the machine works.
Training Your Dog to Use the Treadmill
Training is the step many people skip. But it makes all the difference. A dog that trusts the treadmill will enjoy their workouts instead of fearing them.
Begin by placing treats on the stationary belt. Let your dog walk across to get them. Repeat this for several sessions. Once your dog is comfortable stepping onto the belt, turn the motor on at the lowest speed.
Keep sessions short at first. Five to ten minutes is plenty for a beginner. Gradually increase the time and speed as your dog builds confidence. For more structured guidance, you can also explore how to train a dog to walk on a treadmill using proven techniques.
Be patient. Some dogs take to the treadmill in just a few sessions. Others need a week or more. Every dog learns at their own pace. The key is to never force it.
Maintenance and Care for Your Dog’s Treadmill
A homemade dog treadmill needs regular care to stay safe and functional. Here is a simple maintenance routine:
- Clean the belt after every use. Wipe away dust, fur, and dirt.
- Check bolts and screws weekly. Vibration from use can loosen them over time.
- Inspect the motor monthly. Listen for unusual sounds or smells.
- Lubricate moving parts as needed to keep everything running smoothly.
- Replace the belt when it shows signs of wear or thinning.
Proper maintenance also extends the life of your equipment. A well-cared-for DIY dog exercise equipment setup can last for years. It is worth the small effort to keep everything in top shape.
Benefits of a Dog Treadmill for Your Pet’s Health
A canine treadmill build offers many health benefits for your furry friend. Regular exercise helps maintain a healthy weight, which reduces the risk of joint problems, diabetes, and heart disease. It also provides mental stimulation, which can reduce destructive behaviors at home.
For dogs that struggle with outdoor walks due to injury or old age, a treadmill offers a gentle alternative. The controlled environment lets you manage speed and distance precisely. This is especially helpful during recovery training when your vet recommends low-impact exercise.
Many dog owners also notice improved behavior after adding regular treadmill sessions. A tired dog is a well-behaved dog. The physical outlet helps burn off excess energy that might otherwise go into chewing, barking, or restlessness.
Common Mistakes to Avoid When Building a Dog Treadmill
Even with the best intentions, mistakes happen. Here are common pitfalls to watch out for:
- Skipping the safety rails. Without barriers, dogs can fall off the belt and get injured.
- Using a motor that is too powerful. Start with a low-speed motor. You can always adjust up, but a motor that is too fast from day one is dangerous.
- Ignoring the belt surface. A slippery belt can cause your dog’s paws to slide. Choose a textured, non-slip surface.
- Rushing the training process. Putting your dog on a moving treadmill too quickly creates fear and resistance.
- Neglecting regular maintenance. Loose bolts or a worn belt can lead to accidents.
Avoiding these mistakes keeps your dog walking machine safe and effective. Take your time with each step, and do not skip the training phase.
When to Consider a Commercial Dog Treadmill Instead
While a DIY pet exercise project is rewarding, sometimes a commercial option makes more sense. If your dog is very large, has complex health needs, or if you lack the time or tools for a build, a store-bought treadmill may be the better choice.
Before purchasing one, it helps to know what to look for. Check out our guide on what to look for in a good treadmill for tips on choosing the right equipment for your pet.
Commercial dog treadmills often come with built-in safety features, warranties, and customer support. Weigh the cost against the convenience. Both options can provide excellent workouts for your dog when used correctly.
For those interested in maximizing your dog’s workout efficiency, learning about how many steps on a treadmill to lose weight can also help you set the right pace and duration for your pet’s fitness routine.
Final Thoughts on Building a Treadmill for Your Dog
Building a treadmill for your dog is a rewarding project that benefits both you and your pet. It gives your dog a reliable way to stay active, no matter the weather or your schedule. With the right materials, a solid plan, and patience during training, your homemade dog treadmill can become a favorite part of your dog’s daily routine.
Start small, prioritize safety, and always listen to your dog’s cues. If they seem uncomfortable or scared, slow down and give them more time. The goal is to make exercise fun and stress-free.
Remember that every dog deserves a healthy, active life. Whether you build one from scratch or choose a commercial option, the most important thing is that your dog gets the movement they need. A well-built canine treadmill build is a gift that keeps giving for years to come.
Frequently Asked Questions
Can any dog use a homemade treadmill?
Most dogs can use a treadmill, but it depends on their size, health, and temperament. Small dogs need a narrower belt, while large breeds need a longer and sturdier frame. Always consult your vet before starting any new exercise routine, especially if your dog has existing health conditions or is very young or old.
How long should a dog exercise on a treadmill?
Start with 5 to 10 minute sessions and gradually increase to 20 to 40 minutes. The duration depends on your dog’s breed, age, and fitness level. Watch for signs of fatigue like excessive panting or slowing down, and stop immediately if your dog seems uncomfortable.
Is it safe to leave a dog alone on a treadmill?
No, you should never leave your dog unattended on a treadmill, whether it is homemade or store-bought. Dogs can lose balance, jump off unexpectedly, or become frightened by the moving belt. Always supervise treadmill sessions to ensure your pet stays safe.
What speed is safe for a dog on a treadmill?
Most dogs start comfortably at 1 to 3 miles per hour, which is a slow walking pace. You can increase speed gradually based on your dog’s comfort and fitness level. Never start at a high speed, and always let your dog set the pace they feel confident with.
How do I train my dog to accept the treadmill?
Begin with the treadmill turned off and place treats on the belt to encourage your dog to step on. Reward calm behavior and repeat over several days. Once your dog is comfortable, turn the motor on at the lowest speed and continue using treats and praise to build a positive association.
What materials work best for a DIY dog treadmill?
Plywood or metal tubing makes a strong frame, while a rubber conveyor belt or textured mat works well as the walking surface. Choose a quiet, adjustable-speed motor and always include safety rails. Non-slip materials are essential to keep your dog’s paws secure during every workout.