How to Adjust the Belt on a Nordictrack Treadmill

Adjusting the belt on your Nordictrack treadmill is a straightforward maintenance task you can do yourself. It typically involves using the included hex key to turn the rear roller adjustment bolts, which corrects alignment or tension. Always unplug the treadmill first and check the owner’s manual for your specific model’s instructions. Proper adjustment prevents belt wear, ensures safety, and extends your machine’s life.
Key Takeaways
- Safety First: Always unplug the treadmill completely before performing any adjustment or inspection.
- Two Adjustments, Two Problems: Belt alignment (centering) fixes side-to-side drift. Belt tension (tightness) fixes slipping or stopping.
- Use the Right Tool: Nordictrack treadmills use a specific hex key (Allen wrench), usually included in the front roller assembly or hardware packet.
- Small Turns, Big Difference: Make adjustments in very small increments (1/4 to 1/2 turns) and test frequently.
- Know the Signs: A slipping belt feels loose underfoot; a misaligned belt rubs the side shrouds or drifts to one side.
- Regular Checks are Key: Inspect belt alignment and tension monthly as part of routine treadmill maintenance.
- Don’t Force It: If the belt is severely damaged, worn, or adjustment doesn’t solve the problem, replacement may be necessary.
📑 Table of Contents
- Why Adjusting Your Treadmill Belt is Crucial
- Understanding Belt Alignment vs. Belt Tension
- Essential Tools and Safety Precautions
- Step-by-Step: How to Adjust Belt Alignment (Centering)
- Step-by-Step: How to Adjust Belt Tension (Tightness)
- Advanced Troubleshooting: When Adjustments Don’t Work
- Pro Maintenance Tips to Prevent Future Adjustments
- Conclusion: Your Treadmill, Your Control
Why Adjusting Your Treadmill Belt is Crucial
You’ve laced up your shoes, pressed start, and the belt feels… off. Maybe it’s sliding under your feet with every step, or you hear a concerning squeak as it rubs against the side. These aren’t just annoyances; they’re your Nordictrack treadmill sending you a clear maintenance signal. The running belt is the heart of your machine’s workout surface. When it’s not properly aligned or tensioned, it leads to a cascade of problems: premature wear on the belt itself, increased strain on the motor and roller bearings, and a potentially unsafe workout environment. Learning how to adjust the belt is one of the most important, and empowering, pieces of knowledge a treadmill owner can have. It saves you from costly service calls and keeps your fitness journey running smoothly. This guide will walk you through everything, from understanding the “why” to the precise “how,” for any Nordictrack residential treadmill model.
Understanding Belt Alignment vs. Belt Tension
Before we touch a tool, we must understand the two distinct issues people refer to as “adjusting the belt.” They require different fixes, and diagnosing correctly is step one.

Visual guide about How to Adjust the Belt on a Nordictrack Treadmill
Image source: nordictrack.info
Belt Alignment (Centering)
This addresses a belt that has drifted to the left or right side of the deck. You’ll often see scuff marks on the side plastic shrouds, or the belt might actually slip off the roller if it’s extreme. The cause is usually an uneven surface, an off-center installation, or normal wear that shifts the belt over time. The fix involves adjusting the rear roller bolts to nudge the belt back to the center.
Belt Tension (Tightness)
This is about how taut the belt is across the deck. A belt that’s too loose will slip, feel “bouncy,” or stop when you step on it. A belt that’s too tight creates excessive drag, strains the motor, causes premature bearing wear, and makes the belt feel hard to move. The fix also involves the rear roller bolts, but by turning them both equally to increase or decrease overall tension.
Pro Tip: A properly tensioned belt should have about 1-2 inches of vertical “lift” when you pull it up in the center of the deck. It should feel firm, not tight as a drumhead.
Essential Tools and Safety Precautions
This job requires minimal tools, but the right ones are non-negotiable for safety and effectiveness.
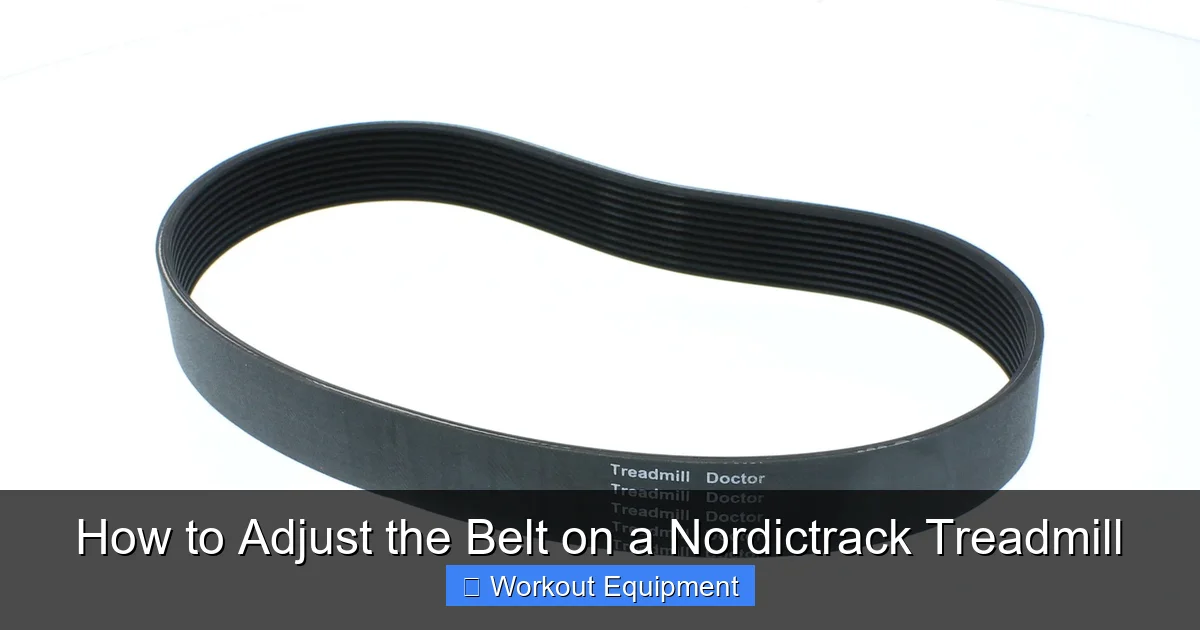
Visual guide about How to Adjust the Belt on a Nordictrack Treadmill
Image source: cdn.treadmilldoctor.com
The All-Important Hex Key (Allen Wrench)
Nordictrack treadmills use a metric hex key, most commonly a 5mm or 6mm. This tool is almost always included with your treadmill. It’s typically taped to the front roller assembly or found in the small hardware packet that came with the machine. Do not use a socket or adjustable wrench; you need the precise fit of a hex key to avoid stripping the bolt heads. If you’ve lost it, you can purchase a set of metric hex keys from any hardware store for a few dollars.
Non-Negotiable Safety Steps
1. UNPLUG THE TREADMILL. This is the golden rule. The belt can move unexpectedly if the machine receives any power, and that can cause severe injury. Pull the plug from the wall outlet.
2. Clear the Area: Remove any items from the deck and the floor around the treadmill.
3. Locate Your Model’s Manual: While this guide is universal, your specific model’s manual (available online as a PDF from Nordictrack’s support site) may have unique torque specs or instructions. Have it open on your phone or tablet.
4. Inspect First: Before adjusting, look at the belt and deck. Is there excessive wear, fraying, or deep scratches? Are the deck rollers clean and free of debris? Sometimes cleaning is the real solution.
Step-by-Step: How to Adjust Belt Alignment (Centering)
Use this process if your belt is rubbing one side or drifting during use.

Visual guide about How to Adjust the Belt on a Nordictrack Treadmill
Image source: treadmillreviews.net
- Identify the Drift Direction: Run the treadmill at a slow speed (2.0-3.0 mph) with no one on it. Observe which side the belt moves toward. If it drifts to the right, you will adjust the rear roller’s right bolt. If it drifts to the left, adjust the left bolt.
- Access the Rear Roller: At the back of the treadmill deck, you’ll see the large cylindrical rear roller. On each end of this roller, protruding through the frame, are two hexagonal bolt heads. These are your adjustment points.
- Make the Adjustment: Insert your hex key into the bolt on the side the belt is drifting toward. For example, if the belt drifts right, insert the key into the right bolt.
- To pull the belt FROM the left side TO the right (correct a left drift): Turn the right bolt clockwise. This shortens the right side of the roller, pulling that side of the belt toward the center.
- To pull the belt FROM the right side TO the left (correct a right drift): Turn the left bolt clockwise.
Note: “Clockwise” means turning the bolt to the right as you face it. A mnemonic: “Right drift, left bolt tight.”
- The 1/4 Turn Rule: Turn the selected bolt only 1/4 to 1/2 of a full turn at a time. This is a critical point. Over-turning is the most common mistake.
- Test and Repeat: Plug the treadmill back in, set it to a slow walk, and observe. The belt should move toward the center. It may take 2-4 small adjustment cycles to perfect it. Once centered, let it run for a minute to ensure it stays put.
Step-by-Step: How to Adjust Belt Tension (Tightness)
Use this process if the belt slips under your feet, feels loose, or stops when you step on it.
- Check Current Tension: With the treadmill unplugged, go to the center of the deck. Try to lift the belt vertically. You should feel firm resistance. If you can lift it more than 2-3 inches easily, it’s too loose.
- Access the Rear Roller Bolts: As with alignment, you’ll use both bolts on the rear roller.
- Turn Both Bolts Equally: This is the key difference from alignment. To increase tension (tighten the belt), turn both rear roller bolts clockwise the same amount (e.g., 1/4 turn each). To decrease tension (loosen the belt), turn both bolts counter-clockwise the same amount.
- Incremental Adjustments: Again, small turns are vital. Tighten in 1/4 turn increments.
- Test Thoroughly: After each adjustment, plug in and run the treadmill at a moderate speed (3.5-4.0 mph) with no one on it. Listen for any squealing (a sign of too much tension) and watch for any slipping. Then, carefully step onto the belt. It should feel solid and move smoothly with your weight without hesitation.
Advanced Troubleshooting: When Adjustments Don’t Work
Sometimes, the belt won’t stay centered or tensioned no matter how you turn the bolts. This indicates a deeper issue.
The Deck Itself May Be Unlevel
If your floor is uneven or the treadmill leveling feet are not properly adjusted, the entire deck can sit at a slight angle. This constant gravitational pull will make the belt drift to one side, undoing your roller adjustments. Solution: Use a bubble level on the side rails and deck. Adjust the four leveling feet (usually large knobs at the base corners) until the treadmill is perfectly level. Re-check belt alignment after leveling.
Worn or Damaged Components
- Worn Deck: A deck with deep grooves or excessive slickness (often from lack of wax/lubricant on older models) can’t hold belt traction properly.
- Worn Rollers: The front and rear rollers have a rubber coating. If this coating is shiny, glazed, cracked, or worn down, it won’t grip the belt. You might need roller replacement.
- Stretched Belt: Over years of use, the belt itself can permanently stretch. No amount of roller adjustment will restore proper tension. A new belt is needed.
Debris in the Roller Area
Lint, hair, carpet fibers, and dust can pack into the space between the roller and the deck frame. This acts as a wedge, pushing the belt. Solution: With the treadmill unplugged, use a vacuum cleaner with a crevice tool to thoroughly clean out the rear roller cavities on both sides. Also clean under the front roller.
Pro Maintenance Tips to Prevent Future Adjustments
An ounce of prevention is worth a pound of cure. Incorporate these habits to minimize belt issues.
Clean Regularly and Thoroughly
After every few workouts, wipe down the belt and deck with a slightly damp cloth. Once a month, perform a deep clean: vacuum the entire deck, roller areas, and motor compartment (if accessible). This prevents abrasive debris from acting as sandpaper between the belt and deck.
Lubricate According to Your Model’s Schedule
This is critical. Many Nordictrack models (especially older ones and some current value lines) require periodic silicone-based lubricant applied between the belt and deck. Others have “lube-free” decks with a special coating. You must follow your specific model’s instructions. Over-lubricating a lube-free deck is as bad as under-lubricating a standard one. Check your manual. Proper lubrication reduces friction, heat, and belt stretch.
Check Belt Alignment Monthly
Make it a habit. Once a month, run the treadmill empty for a minute and just watch the belt. Does it stay centered? Catching a minor drift early is a 30-second fix. Letting it go leads to a shredded belt and damaged shrouds.
Inspect for Wear
Look at the underside of the belt. Are the edges frayed or rough? Is the belt surface slick and shiny? Is the deck surface smooth or deeply scored? These are signs of impending failure. Address the root cause (alignment, tension, lubrication) before it leads to a complete breakdown.
Conclusion: Your Treadmill, Your Control
Adjusting the belt on your Nordictrack treadmill isn’t a mysterious art reserved for technicians. It’s a fundamental skill that puts you in control of your equipment’s health and your workout safety. By understanding the difference between alignment and tension, using the correct hex key with tiny, patient turns, and embracing a routine of cleaning and inspection, you can solve the most common belt issues in under ten minutes. Remember the mantra: unplug, diagnose, adjust in 1/4 turns, test. This simple process extends the life of a multi-hundred-dollar component, protects your motor, and ensures every run is smooth, quiet, and safe. You’ve invested in your health with this machine; a little bit of knowledgeable maintenance is the best way to protect that investment for years to come.
Frequently Asked Questions
How often should I check my treadmill belt alignment?
You should visually check the belt alignment every time you use the treadmill by quickly observing it as it starts. For a more thorough check, run it empty once a week and watch it for a full minute. A formal monthly inspection as part of your cleaning routine is ideal.
What if I don’t have the original hex key that came with my Nordictrack?
You need a metric hex key, most commonly 5mm or 6mm. You can buy an inexpensive set of metric Allen wrenches from any hardware store, auto parts store, or online. Using the wrong size or type of tool (like a socket) will likely strip the bolt head, creating a much bigger problem.
My belt is still slipping after I tightened both rear roller bolts. What now?
If proper tension adjustment doesn’t stop slipping, the cause is likely not tension. Check for a severely worn or glazed belt, a deck that needs lubrication (if your model requires it), or worn-out roller surfaces that can’t grip the belt. Also, ensure the belt is clean and dry; moisture or silicone spray on the walking surface can cause slipping.
Can I over-tighten the treadmill belt?
Yes, absolutely. Over-tightening creates excessive drag on the motor, causing it to overheat, shorten its lifespan, and potentially fail. It also puts immense pressure on roller bearings, causing them to wear out prematurely. You’ll know it’s too tight if the motor struggles to start, makes a high-pitched whine, or the belt feels rigid and difficult to move by hand.
Is it normal for a new treadmill belt to need frequent adjustments at first?
Yes, a brand-new belt can stretch slightly during the first 10-20 hours of use. It’s normal to need a minor tension adjustment after the initial break-in period. After this, adjustments should be infrequent if the treadmill is properly maintained and kept on a level surface.
When should I call a professional instead of adjusting it myself?
Call a professional if: you are uncomfortable performing any step; the belt is ripped, frayed, or has a permanent crease; the deck is severely warped or gouged; the roller bearings are grinding or wobbling; you’ve adjusted correctly but the problem persists immediately; or your treadmill is still under warranty and self-service could void it.