Getting your dirt bike tire pressure right is non-negotiable for performance and safety. The perfect PSI isn’t a single number; it’s a dynamic range that changes with terrain, rider weight, and bike setup. Ignoring this critical setup step leads to poor handling, crashes, and premature tire wear. This guide breaks down exactly how much air to put in dirt bike tires for any condition, ensuring you ride with confidence and control.
Let’s be real: when you’re itching to ride, messing with tire pressure can feel like a tedious chore. You just want to twist the throttle and feel the rush. But here’s the hard truth—the single most impactful, and often overlooked, setup change you can make to your dirt bike has nothing to do with your suspension clickers or jetting. It’s the air inside your tires. Knowing exactly how much air to put in dirt bike tires is the secret sauce that separates confident riders from hesitant ones, and it’s the difference between a bike that feels like an extension of your body and one that feels like a wild, unpredictable animal. This guide will strip away the guesswork and give you the clear, actionable knowledge to master your tire pressure for any trail, track, or desert.
We’re going to demystify PSI (Pounds per Square Inch), explain why your friend’s perfect setting is wrong for you, and give you terrain-by-terrain charts you can actually use. No more pumping by feel or copying what you see at the track. It’s time to take control.
Key Takeaways
- There is no universal PSI: The correct air pressure depends entirely on terrain, rider weight, and tire construction. What works for motocross will fail in the desert.
- Manufacturer recommendations are your starting point: Always begin with the PSI range printed on your bike’s swingarm or owner’s manual. This is the safe baseline for your specific machine.
- Terrain is the primary variable: Soft, loamy soil requires lower pressure for a larger contact patch, while hard-packed or rocky trails demand higher pressure to prevent flats and rim damage.
- Your weight matters: Heavier riders need slightly higher PSI to prevent the tire from bottoming out on impacts; lighter riders can often run a bit lower for more grip.
- Check pressure when tires are cold: Always set your PSI before riding. Riding heats the air and tire, giving a falsely high reading that leads to under-inflation when cooled.
- Invest in a quality gauge: Cheap, inaccurate gauges are worse than no gauge. A reliable digital or high-quality analog gauge is essential equipment.
- Consistency is key: Once you find your ideal pressure for a given condition, write it down. Use the same gauge and check every ride for predictable performance.
📑 Table of Contents
- The Critical Role of Tire Pressure: Why This Isn’t Just About Flats
- Your Starting Point: Manufacturer Recommendations & Bike Specifics
- Terrain-Specific Pressure Guides: The Practical Charts
- The Step-by-Step: How to Check and Adjust Your Pressure Correctly
- Common Mistakes & Advanced Troubleshooting
- Long-Term Care: Pressure, Tires, and Longevity
- Conclusion: Make Pressure a Conscious Habit
The Critical Role of Tire Pressure: Why This Isn’t Just About Flats
Before we dive into numbers, we need to understand why tire pressure is so fundamental. It’s not merely a barrier against pinch flats. Correct pressure dictates your bike’s entire personality. It controls the tire’s shape, which in turn controls its contact patch—the actual area of rubber touching the ground. This patch is your only connection to the earth, and its size, shape, and stiffness determine everything: acceleration, braking, cornering grip, traction on climbs, and how the bike absorbs bumps and impacts.
The Contact Patch: Your Window to Grip
Imagine pressing a soft, under-inflated balloon against the floor. It squishes and creates a wide, flat area. Now, take a fully-inflated basketball and press it down. The contact area is small and round. Your dirt bike tire behaves the same way. Lower pressure allows the tire carcass to deform more, creating a larger, squarer contact patch. This is gold in soft terrain like sand or deep loam, as it lets the tire “float” on top instead of digging in and bogging down. However, that same soft tire on hard-packed dirt or rocks will feel squirmy, unpredictable in corners, and is highly susceptible to rim damage from impacts because there’s not enough air volume to absorb the shock.
Conversely, higher pressure creates a smaller, rounder contact patch. This is essential for rocky, root-filled, or hard-pack terrain. The stiffer sidewall and tread resist folding over, providing precise, predictable handling and a strong defense against pinch flats. The trade-off? In soft conditions, a high-pressure tire will act like a snowplow, digging trenches and killing momentum.
Beyond the Patch: Sidewall Flex and Heat
Pressure also governs sidewall flex. Too low, and the sidewall will over-flex, generating excessive heat. This heat degrades the tire’s rubber compounds and can lead to a blowout—a catastrophic failure you do not want at speed. Too high, and the tire becomes a rigid, uncomfortable hoop that transmits every rock and root directly to your hands, feet, and spine, while also reducing the tire’s ability to “bite” into small irregularities for traction. Finding the sweet spot maximizes grip while minimizing heat buildup and rider fatigue.
Your Starting Point: Manufacturer Recommendations & Bike Specifics
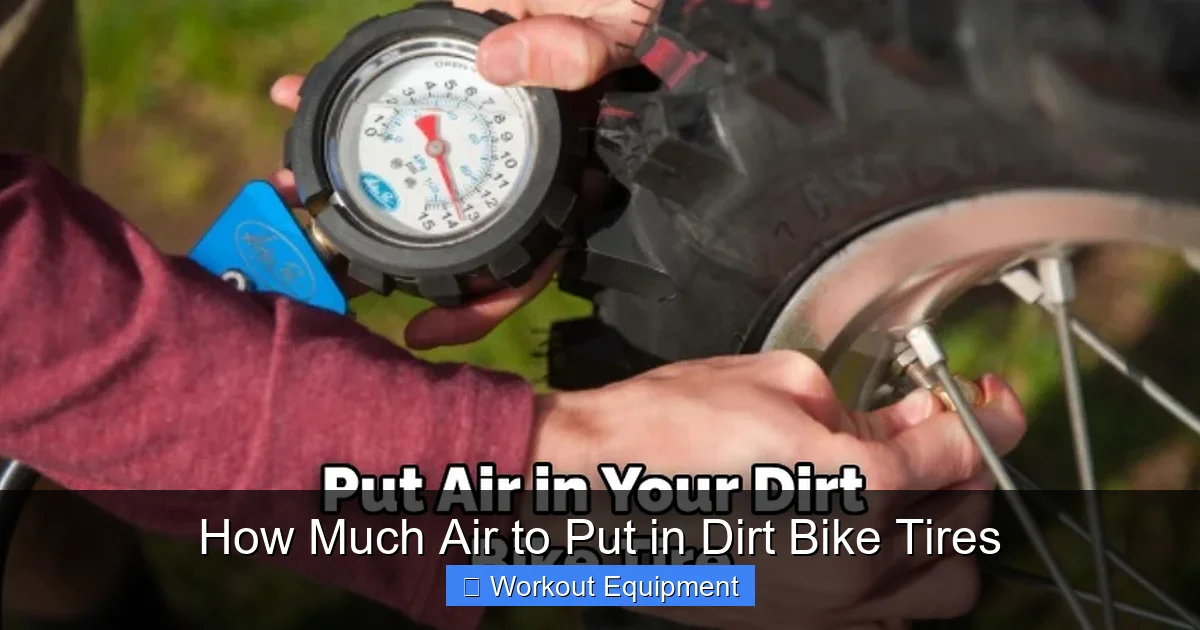
Before you ever look at terrain, you must know your bike’s baseline. Every dirt bike manufacturer engineers their frame, swingarm, and suspension with a specific tire size and a recommended pressure range in mind. This range is your absolute minimum safe starting point for the bike’s intended use.
Visual guide about How Much Air to Put in Dirt Bike Tires
Image source: dirtbikefixes.com
Where to Find the Magic Numbers
Look for a sticker on your bike’s swingarm, near the rear shock mount, or on the frame triangle. It will typically list something like “FRONT: 12-14 PSI / REAR: 13-15 PSI” for a motocross bike, or a wider range for an adventure bike. Your owner’s manual is the ultimate source. Never go below this minimum recommended pressure. These numbers account for the structural loads placed on the rim and tire at speed and during hard landings. Running below the min PSI risks the tire bead unseating from the rim (a “burp” or complete loss of air) and can overload the sidewall beyond its design limits.
Example: A 2023 Yamaha YZ250FX might list 12.0 PSI front / 13.0 PSI rear as its minimum for standard conditions. A KTM 300 XC-W, with a different wheel and tire setup, might list 13.1 / 14.5 PSI. Your bike is unique. Start there.
The Tube vs. Tubeless Factor
This is a huge variable. Tube-type tires (common on most motocross bikes) are more forgiving of lower pressures because a tube can “float” inside the tire and is less likely to be pinched against the rim in a hard impact. However, a severe pinch can still flat the tube. They also tend to run slightly softer overall.
Tubeless setups (common on modern enduro, trail, and adventure bikes, and increasingly on motocross) require more careful pressure management. The tire bead must be firmly seated on the rim to hold air. Running too low increases the risk of a “bead unseating” event, where the tire literally comes off the rim. Tubeless tires also often have stiffer sidewalls (like in DOT or “dual-sport” tires) and may require 1-2 PSI more than a comparable tube-type tire to achieve the same feel and prevent rim damage. Always consult your bike or tire manufacturer’s specific guidance for tubeless systems.
Terrain-Specific Pressure Guides: The Practical Charts
This is the meat of the matter. With your bike’s minimum PSI in mind, here’s how to adjust for the real world. Remember, these are general guidelines. Your personal “sweet spot” will be a narrow band within these ranges, discovered through experimentation. Always make changes in ½ PSI increments and note the results.
Visual guide about How Much Air to Put in Dirt Bike Tires
Image source: tiregrades.com
1. Hard-Packed, Rocky, Rooty Terrain (Motocross Tracks, Technical Trails)
Here, you need a firm, predictable tire that won’t fold over in corners and will stand up to sharp impacts. The goal is a crisp, responsive feel and flat protection.
- Front: Start at your bike’s recommended max (e.g., 14-16 PSI). Heavier riders or those hitting big jumps may need 16-18 PSI. Lighter riders on smooth tracks might drop to 13-14.
- Rear: Start at your bike’s recommended max (e.g., 15-17 PSI). For extremely rocky “baby-head” sections or aggressive riders, 17-19 PSI is common. If you’re getting a lot of pinch flats, add 1 PSI.
- Why: Higher pressure minimizes sidewall roll and pinch flats. The tire stays more round, offering precise cornering feedback on firm ground.
2. Loamy, Bumpy, “G-outty” Soil (Typical Forest Trails, Some MX Tracks)
This is the most common terrain for trail riders. You want a balance of grip and bump absorption. The tire needs to conform to small bumps for traction but not so much that it feels unstable.
- Front: Your bike’s recommended range is usually perfect here (e.g., 12-14 PSI). Experiment within that window. If the front feels vague or washes out in corners, add ½ PSI. If it feels harsh and bounces over small bumps, drop ½ PSI.
- Rear: Slightly lower than the hard-pack setting. Start 1-1.5 PSI below your max (e.g., 13.5-15.5 PSI). The goal is a tire that “ breathes” over whoops and small roots without folding.
- Why: A moderate pressure allows the tire to act as additional suspension, smoothing out the ride and maintaining contact on uneven surfaces.
3. Sand (Deep, Soft, or Packed Beach Sand)
Sand is all about floatation. You want the tire to plow through the top layer and sit on the firmer substrate below. This demands the lowest pressures you’ll run.
- Front & Rear: Drop 3-5 PSI below your typical loamy setting. For a bike that runs 14/15 normally, you might go as low as 10/11 PSI. For deep, dry sugar sand, even 9/10 might be needed.
- Critical Note: When running very low pressure in sand, avoid sharp rocks or hard shells hidden beneath the surface. The risk of rim damage and bead unseating is high. Keep speed steady and avoid sudden impacts.
- Why: The massive contact patch distributes your weight over a larger area, preventing the bike from sinking. The tire acts like a paddle.
4. Mud (Sticky, Sucking Mud)
Mud is a cousin to sand but with more resistance. You need floatation to avoid getting stuck, but also a tread pattern that can clean itself. Pressure is similar to sand.
- Front & Rear: Same as sand advice: 3-5 PSI lower than your normal loamy setting. However, if the mud has a hard, slick bottom layer (common in dried riverbeds), you might need a touch more pressure (only 2-3 PSI low) to cut through the top layer and get to the firmer base.
- Why: Low pressure maximizes the tire’s footprint, reducing ground pressure and helping the bike “float” on top of the suction.
5. High-Speed Desert / Open Terrain
This is a hybrid challenge. You have long, whooped-out runs at speed (wanting stability and bump absorption) combined with sudden, sharp hits on rocky whoops (wanting rim protection).
- Front: Often run a bit higher than the rear for stability at speed. Start at your normal loamy setting (12-14 PSI). If the front feels “twitchy” in long whoops, add 1 PSI.
- Rear: The most critical. You need it soft enough to absorb the constant G-forces in whoops but hard enough to not fold or pinch on the rocks at the bottom. Start at your normal loamy setting (13-15 PSI). If you’re getting a lot of rear flats on rocky whoops, add ½ to 1 PSI. If the rear feels like it’s “skipping” over the whoops instead of tracking, drop ½ PSI.
- Why: The rear tire takes the brunt of the punishment in desert whoops. Finding this balance is key to maintaining speed and comfort.
The Step-by-Step: How to Check and Adjust Your Pressure Correctly
Knowing the numbers is useless if you don’t implement them properly. Here is the foolproof method.
Visual guide about How Much Air to Put in Dirt Bike Tires
Image source: e7yp5tq4unz.exactdn.com
Step 1: The Cold Tire Rule
This is the #1 rule of accurate pressure setting. Always set your tire pressure when the tires are completely cold. This means the bike hasn’t been ridden for at least 3 hours, or first thing in the morning. Riding heats the air inside the tire (and the rubber itself), which increases the PSI reading by 1-3 PSI. If you set pressure on hot tires, by the time they cool down after your ride or overnight, they will be dangerously under-inflated.
Step 2: Invest in a Quality Gauge
Your $2 gas station gauge is garbage. It’s often off by several PSI. You need a reliable tool. Digital gauges are generally more accurate and easy to read. High-quality analog (dial) gauges from brands like Motion Pro, Talon, or SVR are also excellent and don’t require batteries. Buy one, keep it in your pack, and use only that gauge. Consistency is part of the science.
Step 3: The Adjustment Process
- Remove the valve cap. Press the gauge onto the valve stem firmly to get a seal. Read the pressure.
- If adding air, use a quality pump with a built-in gauge (like a Topeak or Lezyne) or a floor pump with a separate gauge. Add air in short bursts, re-checking frequently.
- If letting air out, use a small tool (or the back of your gauge) to gently press the valve core. Release air in small increments, re-checking.
- Always re-check the final pressure with your primary gauge after any adjustment. Pump gauges can be inaccurate.
- Replace the valve cap securely. It keeps dirt and moisture out of the valve, which can cause slow leaks.
Step 4: The Post-Ride Check
After a ride, especially a hard one, check your pressures again (while still hot). This gives you a data point. Did you lose 2 PSI? That might indicate a very slow leak or a bead that’s not perfectly seated (common with new tires). Did the pressure rise 4 PSI from cold to hot? That’s a normal heat buildup. Tracking these changes helps you understand your tire’s behavior.
Common Mistakes & Advanced Troubleshooting
Even with the right numbers, things can go wrong. Let’s troubleshoot.
“My tires feel great in the pits, but on the track, the front washes out.”
This is a classic sign of front tire pressure being too low for the conditions. The soft tire folds over under braking or cornering loads, losing its edge. Solution: Increase front PSI by ½ to 1 PSI. Also, check your front fork oil level and compression—a fork that’s too soft can exacerbate the problem.
“I’m getting constant pinch flats (snake bites) on the rear.”
This means your pressure is too low, and you’re hitting impacts (landing jumps, hitting rocks) that are compressing the tire to the point where the rim pinches the tube/tire against the obstacle. Solution: Increase rear PSI in ½ PSI increments until flats stop. Consider if your suspension is too soft, causing you to bottom out and overload the tire.
“The bike feels harsh and bounces over small bumps.”
Your pressure is likely too high. The tire is too stiff to conform to minor surface irregularities, so it skips and hammers. Solution: Drop pressure by ½ PSI. If it persists, your suspension may be too stiff, but pressure is the first, easiest check.
“I’m running the same pressure as my pro rider hero!”
Stop it. Your weight, riding style, and bike setup are different. A 150 lb pro rider on a factory-tuned bike will run significantly lower pressure than a 200 lb amateur on a stock bike. Use their settings as a vague reference, not a gospel. Your ideal pressure is yours alone to discover.
Long-Term Care: Pressure, Tires, and Longevity
Proper pressure management isn’t just for today’s ride; it extends the life of your expensive tires and wheels.
How Pressure Affects Tire Wear
Under-inflated tires wear prematurely and unevenly. The center of the tread can overheat and wear faster, while the sidewalls suffer excessive flex fatigue. Over-inflated tires wear the center of the tread down quickly because only that small, round patch is contacting the ground. Correct pressure promotes even wear across the tread face, maximizing your tire’s lifespan and saving you money.
Protecting Your Rims
Your aluminum or magnesium rims are vulnerable. impacts at low pressure are transferred directly to the rim, causing bends, cracks, and “dimples.” This compromises wheel strength and safety. Proper pressure creates a cushion of air that absorbs shock. It’s cheaper to buy a new tire than a new wheel.
The Seasonal/Temperature Adjustment
Air pressure changes with temperature. For every 10°F (5.5°C) drop in temperature, pressure drops about 1 PSI. If you set your tires at 70°F in the morning and ride into a 40°F afternoon, your pressure has dropped 3 PSI. Conversely, a hot day or long, aggressive ride can increase pressure by 2-3 PSI. Be mindful of this, especially in spring/fall or during long desert rides. You might need to add a little air mid-day in cold weather.
Conclusion: Make Pressure a Conscious Habit
Mastering your dirt bike tire pressure is a continuous loop of observation, adjustment, and learning. It’s the one setup parameter you can change in 30 seconds with a $20 gauge, and it will transform your bike’s handling more than any other tweak. Start with your manufacturer’s recommendations. Then, use the terrain guides above as your template. Ride, feel, and adjust in tiny increments. Write down what works for your local trails in your riding journal or on your phone. Soon, you won’t be guessing—you’ll be selecting your pressure with the same confidence you have when choosing a gear. You’ll feel more connected to the terrain, ride more smoothly, crash less, and get more life from your tires. That’s the power of knowing exactly how much air to put in your dirt bike tires. Now go check your gauges.
Frequently Asked Questions
Should I check my dirt bike tire pressure when the tires are hot or cold?
Always set and check your pressure when the tires are cold. Riding heats the air inside, giving a falsely high reading. Setting pressure on hot tires means they will be dangerously under-inflated when they cool down. Check before every ride or after the bike has been sitting for several hours.
What’s the single biggest mistake riders make with tire pressure?
The most common error is running pressure that’s too low for the terrain, especially on hard-packed or rocky trails. This is done in the mistaken belief it will create more grip. Instead, it causes the tire to fold over unpredictably in corners, leads to frequent pinch flats, and risks rim damage. Always start with your manufacturer’s minimum and increase for hard, rocky ground.
Do I need different pressures for my front and rear tires?
Absolutely. The front and rear tires have completely different jobs and loads. The rear tire handles most of the power delivery, acceleration, and the brunt of impacts from jumps and whoops, so it often runs 1-2 PSI higher than the front. The front tire is for steering and braking, and its pressure is tuned for cornering feel. Never set them to the same PSI unless specifically advised for a very specific, unusual setup.
How often should I check my dirt bike tire pressure?
Check it before every single ride. Tires can lose 1 PSI per week from normal permeability through the rubber. A slow leak from a minor puncture or a bad valve can drain pressure much faster. Making a pressure check part of your pre-ride ritual is non-negotiable for safety and performance.
Can I use the same pressure for motocross and trail riding?
No. Motocross tracks are typically maintained hard-pack, so pressures are higher (e.g., 14-16F / 15-17R). Trail riding often involves softer, more varied terrain, so you’ll run lower pressures (e.g., 12-14F / 13-15R). Always adjust based on the specific conditions you’re about to ride, not the type of riding you did last time.
Is a digital tire gauge worth the money?
Yes, a quality digital gauge is one of the best investments you can make. Cheap analog gauges are notoriously inaccurate and can be off by 2-4 PSI. An inaccurate gauge makes all your adjustments meaningless. A reliable $25-$40 digital gauge from a reputable brand (like AccuGage, Topeak, or SVR) ensures you’re actually setting the pressure you think you are, which is the foundation of consistent performance.