How Hard Is It to Assemble a Treadmill
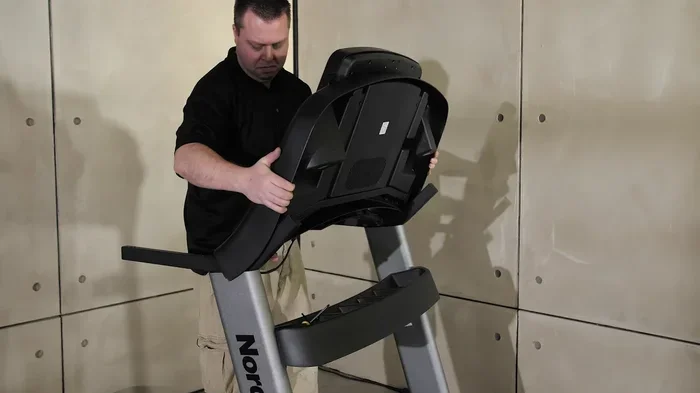
Assembling a treadmill is a manageable DIY project that most people can complete in 2 to 4 hours. With the right tools, a clear plan, and a helper or two, you can have your treadmill assembly done without hiring a professional. This guide walks you through every stage so you feel confident from start to finish.
So you just bought a new treadmill and now you are staring at a box full of parts, bolts, and a thick instruction manual. The question on your mind is simple: how hard is it to assemble a treadmill? The honest answer is that it is not as scary as it looks. Most people can knock it out in a single afternoon with basic tools and a bit of patience.
Setting up your fitness gear at home is one of the best decisions you can make for your health. A home gym setup saves you gym memberships and gives you the freedom to work out anytime. But the assembly step can feel intimidating, especially when you see dozens of small bags of screws and metal bars. This guide breaks it all down so you know exactly what to expect.
Whether you are assembling a folding treadmill or a heavy-duty commercial-style model, the core process is similar. You will attach the frame, mount the motor, lay down the belt, and set up the console. Each step builds on the last, and none of them require advanced technical skills. Let us dive into the details.
Key Takeaways
- Most treadmills take 2 to 4 hours to assemble: The process is straightforward if you follow the manual and prepare your workspace.
- Basic tools are all you need: An Allen wrench, screwdriver, and adjustable wrench typically cover the job.
- Having a partner makes it much easier: Heavy parts like the frame and motor housing are safer and faster with a second person.
- Read the manual first: Skipping this step causes the most common assembly mistakes and delays.
- Level your floor before starting: An uneven surface can cause wobbling and affect your workout later.
- Don’t rush the belt alignment: Proper centering prevents early wear and keeps your runs smooth.
- Check warranty terms before DIY assembly: Some brands require professional installation to keep your warranty valid.
📑 Table of Contents
Understanding What You Are Getting Into
Before you open that box, it helps to understand what treadmill assembly actually involves. Most models come in three main sections: the base frame, the upright console tower, and the running belt with the motor underneath. Each section has its own set of bolts, washers, and brackets.
The total weight of a treadmill can range from 200 to 300 pounds for a standard home model. Some commercial-grade units go even heavier. This is why having a second person is not just a nice-to-have but practically essential for certain steps. Trying to hold a heavy frame upright while threading bolts is a recipe for frustration and potential injury.
What Tools Do You Need?
You do not need a professional toolbox to put together a treadmill. The standard toolkit includes:
- Allen wrench (usually included in the box)
- Phillips-head screwdriver
- Adjustable wrench
- Rubber mallet (helpful for tapping parts into place)
- Power drill (optional but speeds things up)
That is it. No specialized equipment needed. The Allen wrench that comes with the treadmill handles most of the bolt work. A power drill can help with loosening and tightening, but use it carefully so you do not strip any screws.
Step-by-Step Treadmill Assembly
Now let us walk through the actual process. Every brand has slight variations, but the general flow remains the same. Follow these steps and you will have a fully assembled treadmill ready for your first workout.
Step 1: Unbox and Organize
Start by laying out a clean, open space on your floor. A garage or spare room works great. Remove all parts from the box and lay them out on a clean surface. Check each bag of hardware against the parts list in the manual. This is the time to catch any missing pieces, not when you are halfway through assembly.
Sort the screws, bolts, and brackets by type. Small zip-lock bags or a muffin tin work wonders for keeping everything organized. Trust me, this small step saves a lot of headaches later.
Step 2: Attach the Base Frame
The base frame is the foundation of your entire machine. Start by connecting the side rails to the front and rear rollers. Most frames use a pin-and-bolt system that clicks into place with a firm push and a quarter turn with the Allen wrench.
Make sure the frame sits flat on the ground. If your floor is uneven, consider using a level or placing the treadmill on a mat. A stable base prevents wobbling during workouts and reduces wear on the motor over time.
Step 3: Mount the Motor and Belt
This is the most technical part of the process. The motor housing slides onto the base and attaches with a few bolts. Once the motor is secured, you will lay the running belt over the deck. Center the belt carefully before tightening any rollers.
Improper belt alignment is one of the most common mistakes during treadmill setup. If the belt is off-center, it will drag on one side and wear out quickly. Take your time with this step. Gently adjust the belt by loosening the rear roller bolts, centering the belt, and then re-tightening.
Step 4: Attach the Console Tower
The console tower houses the display, controls, and safety key. It typically bolts onto the upright frame using a few large bolts. You will want to plug in the console cable at this point and make sure the connection is secure.
Some models also include the safety key magnet and the heart rate sensors on the console or the handlebars. Attach these according to the manual. This is also a good time to test the power-on sequence before you are fully finished.
Step 5: Final Adjustments and Testing
Once everything is bolted together, go through a final checklist. Tighten any bolts that feel loose. Check that the belt moves freely by walking it by hand. Adjust the incline mechanism if your model has one. Plug in the treadmill and power it on for a brief test run at a slow speed.
Listen for any unusual sounds. A slight hum from the motor is normal. Grinding, squealing, or clicking noises mean something needs adjustment. Most issues at this stage are simple fixes like a misaligned belt or a loose roller.
How Long Does Assembly Actually Take?
Let us talk about the real-world time commitment. For a first-time assembler, expect treadmill assembly to take anywhere from 2 to 4 hours. If you have assembled furniture before or have a handy friend, you can often finish in under 2 hours.
Here is a rough breakdown:
- Unboxing and organizing: 15 to 20 minutes
- Base frame assembly: 20 to 30 minutes
- Motor and belt installation: 30 to 45 minutes
- Console tower attachment: 15 to 20 minutes
- Final adjustments and testing: 15 to 30 minutes
The belt alignment and console wiring are where most people slow down. Do not rush these steps. A few extra minutes of care here saves you from calling customer support later.
Common Mistakes to Avoid
Even with a clear manual, it is easy to make mistakes during exercise equipment assembly. Here are the most common ones and how to avoid them.
Skipping the manual. This is the number one mistake. The manual contains model-specific diagrams and torque specifications. Guessing where a part goes can lead to assembling something backward, which means undoing half your work.
Not having enough space. Treadmill parts are large and awkward. You need room to lay out all components and maneuver around the frame. Trying to assemble a treadmill in a tight closet is a bad idea.
Over-tightening bolts. More force does not mean a better connection. Over-tightening can strip threads or crack plastic housing. Hand-tighten first, then give it a quarter turn with the wrench.
Ignoring the level. An unlevel treadmill causes uneven belt wear and can feel unstable during running. Use a simple bubble level on the frame before you start your first workout.
Forgetting to check the warranty. Some brands require professional installation to keep the warranty intact. Before you dive in, check your warranty terms. If professional assembly is required, it may be worth the cost.
Should You Hire a Professional?
Not everyone feels comfortable tackling treadmill assembly on their own. That is completely fine. Hiring a professional is a smart choice if you are short on time, not handy, or dealing with a particularly heavy or complex model.
Professional assembly typically costs between $100 and $250 depending on your location and the treadmill model. Some retailers offer assembly services when you purchase the treadmill. If you buy from a big-box store, ask about this option before you leave the parking lot.
On the other hand, if you enjoy DIY projects and want to save money, assembly is very doable. The satisfaction of finishing it yourself and hopping on your treadmill for the first time is hard to beat.
Once your treadmill is up and running, you might also want to think about where to place it in your home. A well-placed treadmill keeps your space organized and your workouts consistent. Check out our guide on how to hide a treadmill in your living room for creative storage ideas that keep your home looking tidy.
Tips for a Smooth Assembly Experience
A few extra tips can make your treadmill setup go even more smoothly:
- Watch a video tutorial first. Search for your specific model on YouTube. Seeing the parts come together in real time helps you understand the manual much better.
- Work with a buddy. Even if you are strong, a second pair of hands makes a huge difference for the heavy lifting steps.
- Keep the manual handy. Refer back to it at every step. Do not trust your memory.
- Take photos as you go. If something looks off later, you can compare your work to the photos.
- Do not fully tighten everything until the end. Leave bolts finger-tight until all parts are in position, then go back and secure them.
After your treadmill is assembled, you will want to make sure it stays in great shape. Regular maintenance keeps your machine running smoothly for years. If you ever run into issues down the road, understanding repair costs can help you decide between fixing it yourself or calling a pro. Learn more about treadmill repair costs to budget for long-term ownership.
Final Thoughts on Treadmill Assembly
So, how hard is it to assemble a treadmill? The answer is that it is a manageable weekend project for most people. You do not need to be a mechanic or a tech wizard. With the right tools, a clear manual, and a little patience, you can have your treadmill ready to roll in just a few hours.
The biggest factors that determine how easy or hard the process feels are your preparation, your workspace, and whether you have a helper. Take your time, follow the steps in order, and do not skip the manual. You will be surprised how satisfying it is to finish and hear that motor hum to life for the first time.
Once your treadmill is set up, you are one step closer to crushing your fitness goals from the comfort of home. If you are also looking to maximize your workouts, check out whether a treadmill is a good way to lose weight for tips on getting the most out of your new machine.
Remember, the hardest part is already behind you. The rest is just stepping on and going. Happy running.
Frequently Asked Questions
Do I need any special tools to assemble a treadmill?
No special tools are required. Most treadmills come with an Allen wrench, and a basic screwdriver and adjustable wrench will cover everything else. A rubber mallet and power drill are helpful extras but not necessary.
Can one person assemble a treadmill alone?
Yes, one person can do it, but having a partner makes the process significantly easier and safer. Heavy parts like the frame and motor housing are awkward to manage solo, especially during the middle steps of the assembly.
How long does treadmill assembly usually take?
Most people complete the assembly in 2 to 4 hours. First-timers should expect closer to 4 hours, while experienced DIYers can finish in under 2 hours. The belt alignment step tends to take the most time.
What should I do if a part is missing from the box?
Contact the manufacturer or retailer immediately. Do not attempt to substitute parts or skip steps. Most companies will ship missing components quickly, especially if you are still within the return or support window.
Does assembling a treadmill yourself void the warranty?
It depends on the brand. Some manufacturers require professional installation to keep the warranty valid. Always check the warranty terms in the manual or on the product page before starting assembly.
Can I assemble a treadmill on carpet?
Yes, you can assemble a treadmill on carpet, but a hard, level surface is ideal for the process. Carpet can make it harder to slide the base and level the machine. Once assembled, check out our guide on whether it is okay to have a treadmill on carpet for tips on placement and protection.