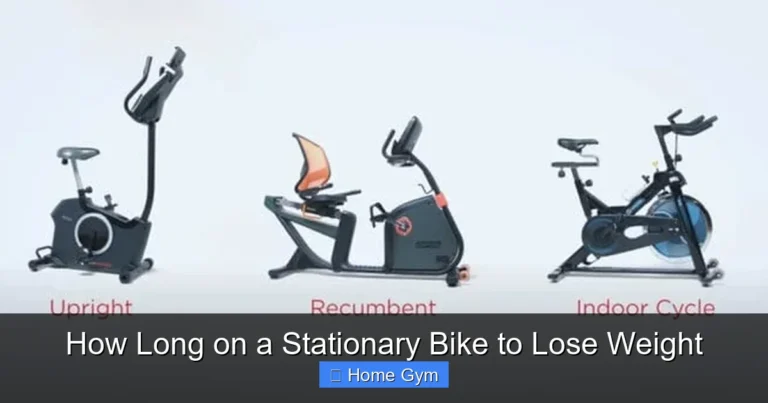
Can I Turn My Bike into a Stationary Bike

Absolutely, you can transform your regular bicycle into a highly effective stationary bike for home workouts. This is a popular and cost-efficient way to build a home gym without buying a dedicated exercise bike. The primary methods involve using a bike trainer (a stand that provides resistance) or a stationary bike stand/roller system. While simple and affordable, success depends on choosing the right equipment for your bike type and fitness goals, ensuring a stable and safe setup. It’s an excellent solution for cycling training, cardio, and low-impact exercise in a small space.
Key Takeaways
- Yes, it’s very possible: You can convert almost any standard bicycle (road, mountain, hybrid) into a stationary bike using specialized equipment.
- Two main methods exist: Bike trainers (most common) provide resistance, while stands/rollers offer a more free-balancing experience.
- Cost-effective solution: This approach is significantly cheaper than purchasing a new smart bike or high-end stationary cycle.
- Space-saving design: The converted setup is compact and can often be stored vertically or folded when not in use.
- Bike compatibility is key: Ensure your bike’s wheel size and axle type (quick release vs. thru-axle) match the trainer or stand you choose.
- Stability and safety first: Properly securing your bike and using a front wheel riser block are critical for a safe, wobble-free workout.
- Not all damage is permanent: Correct use with proper equipment will not harm your bike; however, prolonged use may cause normal wear on the trainer’s contact point.
[FEATURED_IMAGE_PLACEHOLDER]
📑 Table of Contents
- Can I Turn My Bike into a Stationary Bike? The Short Answer is YES!
- Understanding the Two Main Conversion Methods
- Step-by-Step: How to Set Up Your Bike on a Trainer
- Choosing the Right Trainer or Stand for Your Bike and Goals
- Maximizing Your Stationary Bike Workout: Tips and Tricks
- Addressing Common Concerns: Safety, Wear & Tear, and Value
- The Verdict: Is It Worth It?
Can I Turn My Bike into a Stationary Bike? The Short Answer is YES!
So, you’re looking to build a home gym, and the idea of a dedicated exercise bike feels like a luxury you don’t need—or space you don’t have. But what about that trusty two-wheeler gathering dust in the garage or leaning against the wall? Can you turn your bike into a stationary bike? The exciting news is that you absolutely can! Converting your existing bicycle into a stationary training machine is one of the smartest, most budget-friendly hacks for home fitness. It taps into equipment you already own and transforms it into a powerful tool for cardiovascular health, leg strength, and endurance training.
This isn’t some complicated mechanical project requiring a engineering degree. It’s about pairing your bike with the right aftermarket accessory. Think of it like putting your bike on a specialized treadmill just for its wheels. The core principle is simple: you stabilize the rear wheel so it can’t move forward or backward, and you introduce a resistance mechanism that makes pedaling challenging, simulating the feel of riding outdoors or on a gradient. The result is a smooth, quiet, and incredibly effective workout that feels remarkably like the real thing.
Whether you’re a serious cyclist looking for off-season training or a casual rider wanting a convenient cardio option, this conversion opens up a world of possibilities. Let’s dive deep into exactly how you can make this happen, what you need, and how to do it safely and effectively.
Understanding the Two Main Conversion Methods
When we talk about turning a bike into a stationary bike, we’re generally referring to two distinct categories of equipment. Each has its own feel, benefits, and ideal user. Understanding the difference is the first step to choosing the right path for you.

Visual guide about Can I Turn My Bike into a Stationary Bike
Image source: oglf.org
Method 1: The Bike Trainer (The Most Popular Choice)
A bike trainer is a triangular or A-frame stand that clamps onto your bike’s rear axle. The rear wheel is lifted slightly off the ground and pressed against a resistance unit—which can be a fan, magnetic flywheel, fluid chamber, or electronic brake. As you pedal, the wheel spins against this unit, creating drag. This is the gold standard for serious cyclists because it provides a very realistic road-feel and highly adjustable resistance. Trainers are known for being robust and stable, making them suitable for high-intensity efforts like sprint intervals or hill climbs.
There are several types of trainers:
- Wheel-On Trainers: Your bike’s actual rear wheel stays on and spins against the roller. They are the most common and affordable. The primary wear point is on your trainer tire (or a special trainer-specific tire you put on your wheel), not your regular road tire.
- Direct-Drive Trainers: You remove your rear wheel entirely. The bike’s chainrings engage directly with a heavy cassette and resistance unit built into the trainer. These are quieter, often more accurate for power measurement, and eliminate tire wear, but they are more expensive and require you to swap wheels if you want to ride outside again.
For most people starting out, a quality wheel-on magnetic or fluid trainer offers the best blend of performance, realism, and value.
Method 2: Stationary Stands & Rollers (The Balance-Focused Option)
This method involves placing your entire bike onto a platform that holds it upright. There are two main flavors here:
- Stationary Bike Stands (or “Bike Stands”): These are simple, often foldable frames that cradle your bike’s front and rear wheels. The bike remains completely intact. They provide zero resistance on their own; you rely on your bike’s own gears for difficulty. They are the absolute cheapest and simplest option but offer a very basic, non-resisted workout. They are great for light spinning, physical therapy, or if you already have a smart trainer on a different bike and just need to hold this one steady.
- Bike Rollers: These are three long cylinders (two under the rear wheel, one under the front) mounted on a frame. Your bike balances on top of them. To stay upright, you must actually ride the bike and balance, which engages your core significantly. They provide no artificial resistance—the difficulty comes only from your pedaling and balancing against the rolling drums. They offer a unique, “real” riding feel but have a steep learning curve and are less stable for hard efforts.
For a true stationary bike *experience* with resistance, a bike trainer is almost always the superior and more versatile choice.
Step-by-Step: How to Set Up Your Bike on a Trainer
Let’s assume you’ve chosen the most common and effective path: a wheel-on bike trainer. Setting it up is straightforward, but doing it correctly ensures safety, stability, and a better ride.
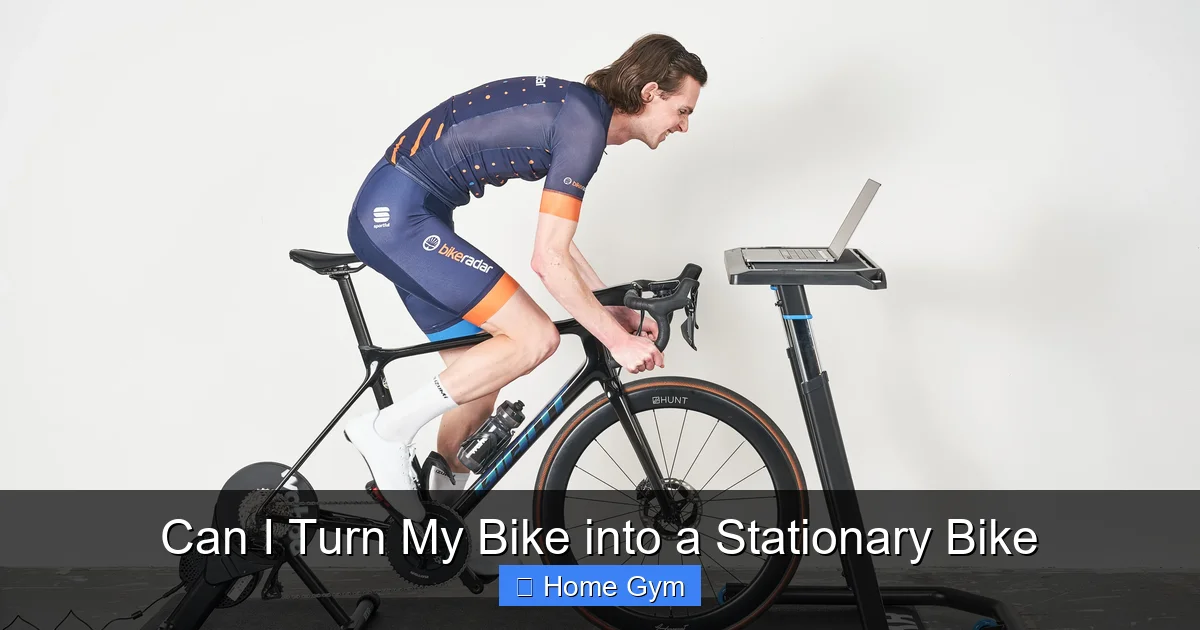
Visual guide about Can I Turn My Bike into a Stationary Bike
Image source: c02.purpledshub.com
What You’ll Need (The Essential Kit)
Before you even touch the trainer, gather these items:
- Your Bicycle: Most standard adult bikes (with 26″, 27.5″, or 700c wheels) work. Check the trainer’s compatibility list for axle types (quick release skewer vs. thru-axle).
- The Bike Trainer: The main event.
- A Front Wheel Riser Block: This is a small, sturdy plastic or rubber block that lifts your front wheel to level the bike. This is not optional. Without it, your bike will be tilted forward, putting strain on your neck, shoulders, and back, and making the ride feel unnatural.
- A Thick Mat or Rug: Protects your floor from sweat and potential tire marks, and dampens vibration and noise.
- A Fan: You will sweat more indoors. A fan blowing directly on you is a game-changer for comfort and performance.
- Towel & Water Bottle: Standard workout gear.
- (Optional) Trainer-Specific Tire: These are harder rubber tires designed to withstand the heat and friction of trainer use without wearing out quickly or picking up debris from the roller.
The Setup Process: A Stable Foundation is Everything
Follow these steps in order for a secure and wobble-free setup.
- Prepare Your Bike: If your trainer came with a special skewer (a thicker, stronger quick-release rod), install it in your rear wheel hub. This is crucial for a solid clamp. If you have a thru-axle bike, ensure you have the correct adapter for your trainer.
- Position the Trainer: Place the trainer on your mat on a flat, solid surface. Concrete or a heavy, sturdy floor is ideal. Avoid thin carpet or rugs that can shift.
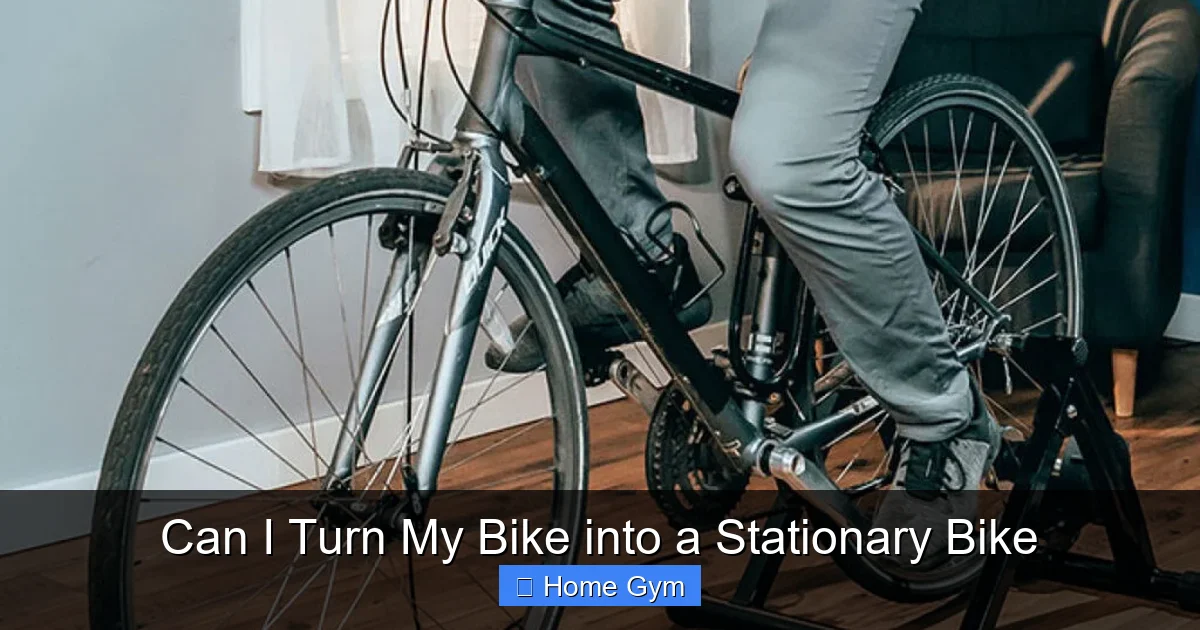
- Mount the Rear Wheel: With the trainer’s clamping arms open, roll your bike backward so the rear axle locks into the trainer’s jaws. Tighten the clamp knob/lever firmly. Give the wheel a strong tug to ensure it’s locked. The wheel should now be pressing against the resistance roller.
- Level the Bike: This is the most important physical step. Place the riser block under your front wheel. Adjust the height (most blocks have 1-3 levels) until your bike is perfectly level. A quick check: place a book or level on the top tube of your bike frame; it should sit flat.
- Final Safety Checks: Spin the pedals by hand. The rear wheel should spin freely against the roller without rubbing. Squeeze the front brake and gently rock the bike forward and backward. There should be minimal side-to-side play. The whole unit should feel solid as a rock.
- Gear Up and Ride: Start in a low gear to get moving, then shift up to your desired resistance level. Remember, resistance on a trainer is not like shifting gears on a hill. You often set a baseline resistance on the trainer unit (e.g., 30% on a smart trainer) and then use your bike’s gears to fine-tune the effort for different simulated slopes.
Choosing the Right Trainer or Stand for Your Bike and Goals
With the method clear, the next big question is: which specific product should you buy? The market is vast, but you can narrow it down by considering a few key factors.
Visual guide about Can I Turn My Bike into a Stationary Bike
Image source: bikeavenger.com
Assess Your Primary Use Case
Ask yourself: Why am I doing this?
- For High-Intensity Interval Training (HIIT) or Racing: You need stability and robust resistance. Look at sturdy wheel-on trainers from brands like Tacx, Wahoo (Kickr Snap), or Kinetic. A direct-drive trainer like the Wahoo Kickr or Tacx Neo is the ultimate for power accuracy and silence but represents a significant investment.
- For Steady-State Cardio & Light Training: A basic magnetic or fluid trainer will suffice. These are quieter and provide smooth, progressive resistance. Brands like Blackburn, Minoura, or Sunlite offer reliable entry-level models.
- For Casual Use, Physical Therapy, or Low-Impact Movement: A simple stationary stand might be all you need. It’s the cheapest and easiest to set up and take down.
- For Improving Balance and Core Engagement: Consider rollers. They are a fantastic skill-builder but are not for everyone, especially for very hard efforts.
Critical Compatibility Checks
Before you click “buy,” double-check these specs:
- Wheel Size: Trainers are designed for specific wheel diameters. 700c (most road bikes) and 26″/27.5″ (most mountain bikes) are standard, but confirm.
- Axle Type: This is the #1 reason for returns. Does your bike have a traditional quick release (QR) skewer or a modern thru-axle? Most inexpensive trainers only support QR. If you have a thru-axle (common on newer MTBs and gravel bikes), you must buy a trainer that includes the correct thru-axle adapter or purchase it separately.
- Maximum Tire Width: Trainers have a limit. If you have a very wide mountain bike tire (e.g., 2.4″+), you may need a trainer specifically rated for wide tires or plan to swap to a narrower wheel for trainer use.
Noise, Vibration, and “Feel”
If you live in an apartment or with others, noise is a huge concern.
- Fan-based (Air) Trainers: Loudest, as they use a fan to create resistance. The sound is a rushing whoosh, which some find motivating, but it’s not apartment-friendly.
- Magnetic Trainers: Generally quiet. The resistance unit is silent; any noise comes from the tire on the roller.
- Fluid Trainers: Often hailed as the quietest and smoothest for wheel-on models. The fluid chamber provides a progressive, road-like feel with minimal noise.
- Direct-Drive & Smart Trainers: The quietest of all, as there is no tire-on-roller contact. The resistance unit is internal and designed for low noise.
Consider where you’ll set up. A vibration-dampening mat is almost always necessary to prevent the trainer’s hum from traveling through the floor.
Maximizing Your Stationary Bike Workout: Tips and Tricks
You’ve got the gear and it’s set up. Now, how do you actually get the most out of your converted stationary bike? It’s more than just pedaling.
Create the Right Environment
Your mindset and environment are half the battle.
- Entertainment is Key: Time flies when you’re engaged. Subscribe to a cycling app like Zwift, TrainerRoad, Rouvy, or Fulgaz. These platforms use your trainer’s speed/cadence/power data (if you have sensors) to create immersive virtual worlds, structured workouts, and real-life video rides. They turn a mundane session into a game.
- Position Your Screen: Mount your tablet, laptop, or TV at eye level in front of your bike. Looking down at a low angle is terrible for your neck over time.
- Control the Climate: As mentioned, a fan is non-negotiable for longer than 20-minute sessions. Open a window if possible.
- Dedicate the Space: If you can, leave the bike on the trainer. The mental barrier of “setting up” is a real momentum killer. A permanent setup encourages consistency.
Train Smarter, Not Just Harder
A stationary bike is a precision tool. Use it that way.
- Use a Cadence Sensor: Aim for a cadence (pedal revolutions per minute) of 80-100 RPM for most efforts. Spinning too slowly (“mashing”) in a hard gear stresses your knees. A cheap cadence sensor and a phone app can track this.
- Incorporate Intervals: Don’t just plod along. Try 2 minutes hard (increase resistance or gear), 3 minutes easy. This is far more effective for fitness and calorie burn.
- Focus on Form: Since you’re not watching for traffic, check in on your form. Keep your upper body still, elbows bent, and pull up as well as push down on the pedals for a smooth stroke.
- Calibrate Your Perception: The same gear on a trainer feels much harder than on the road because there’s no coasting or momentum from wind or slight downhill. Trust your body’s perceived exertion (how hard it feels) over the gear number.
Addressing Common Concerns: Safety, Wear & Tear, and Value
It’s natural to have worries about putting your beloved bike on a contraption. Let’s address the big ones head-on.
“Will This Damage My Bike?”
The short answer is no, if used correctly. A properly mounted bike on a compatible trainer experiences forces similar to, or less than, riding on a flat road. The potential points of concern are:
- The Rear Axle/Quick Release: This is the most stressed part. Using the heavy-duty skewer that comes with the trainer (instead of your lightweight road skewer) is essential to prevent bending or failure.
- The Rear Tire: On a wheel-on trainer, the tire will wear out. This is a consumable. Using a trainer-specific tire (which is harder and smoother) drastically extends its life and prevents debris from your trainer roller from getting embedded in your regular road tire.
- The Chain and Drivetrain: You’re using them just like on the road. Keep your chain clean and lubricated. The confined space can get dusty, so a bit more frequent cleaning might be needed.
- Frame Stress: Modern bike frames are designed to handle significant stress. The clamping force of a trainer is distributed and not concentrated in a way that would damage a sound frame.
The biggest risk is user error: not securing the clamp properly, which could lead to the wheel slipping. Always perform the “tug test” before mounting.
Is It Really More Cost-Effective Than Buying an Exercise Bike?
Almost always, yes. Let’s do some quick math.
- Mid-Range Wheel-On Trainer: $200 – $400
- Entry-Level Direct-Drive Trainer: $700 – $1,200
- Good Quality Stationary Bike (non-smart): $400 – $900
- High-End Smart Bike / Peloton: $1,500 – $4,000+
If you already own a bike, you’re simply adding the trainer cost. Even a $300 trainer + $50 riser block + $30 mat = $380 for a very capable setup. For a comparable experience to a $800-$1000 exercise bike, you might spend $700 on a direct-drive trainer. The value is undeniable. Plus, you maintain your bike’s utility for outdoor rides.
The Stability Question: Will It Wobble?
A quality trainer on a solid floor, with the bike properly clamped and leveled, will be very stable. The slight side-to-side movement you feel is normal and mimics the natural sway of riding. However, a wobbly, creaky setup usually means:
- The trainer is on an uneven or soft surface (carpet).
- The rear clamp is not fully tightened.
- The bike is not level (missing or improperly placed riser block).
- The trainer itself is a very cheap, flimsy model.
Investing in a reputable brand and following the setup steps eliminates 95% of stability issues.
The Verdict: Is It Worth It?
For the vast majority of people seeking a home cardio solution, turning your bike into a stationary bike is an outstandingly smart move. It’s the ultimate form of equipment repurposing. You leverage an asset you already own and understand, and you create a tailored workout station that can range from basic to pro-level.
The benefits are compelling: massive cost savings, minimal space requirement (especially compared to a treadmill or rower), and the preservation of your bike’s dual life as an outdoor vehicle. The learning curve is gentle—if you can change a tire, you can set up a trainer. The fitness benefits are identical to a dedicated bike: excellent cardiovascular conditioning, strong leg development (quads, hamstrings, glutes, calves), and a low-impact workout that’s easy on the joints.
The main drawbacks are the initial setup process and the potential for noise/vibration if not managed. But these are minor hurdles with easy solutions (a mat, a fan, proper leveling).
Ultimately, if you have a functioning bicycle and a desire to cycle indoors for fitness, there is almost no scenario where trying the trainer route isn’t the recommended first step. Start with a reliable mid-range wheel-on trainer, get the setup perfect, and experience the joy of a great indoor ride without the guilt of buying another bulky piece of equipment. Your garage bike is ready for its second act.
Frequently Asked Questions
Can I use any bike on a trainer?
Most standard adult bicycles with 26″, 27.5″, or 700c wheels are compatible. The most critical factor is axle type. You must ensure your trainer supports your bike’s specific quick release (QR) or thru-axle system. Always check the trainer manufacturer’s compatibility list before purchasing.
Will using a trainer wear out my bike tire quickly?
Yes, the rear tire that contacts the trainer roller will experience wear. To minimize this and protect your good road tire, it’s highly recommended to use a dedicated, inexpensive trainer-specific tire (made of harder rubber) for your indoor sessions. This is a small, replaceable cost.
Is a bike trainer safer than an exercise bike?
Safety depends entirely on proper setup. A correctly mounted bike on a stable trainer is very safe. The primary risk is the rear wheel slipping if the clamp is not tight enough. Always perform a firm “tug test” on the wheel before starting your ride. A dedicated exercise bike has a fixed, integrated design, but a well-set-up trainer is equally safe for indoor use.
How much space do I need for a bike on a trainer?
You need a footprint roughly the size of your bike plus the trainer’s base, typically about 4-5 feet long and 2 feet wide. You also need clearance behind the bike to move it into position. The great advantage is that many trainers and stands are foldable, allowing you to store the entire setup vertically against a wall when not in use, requiring very little permanent floor space.
What’s the difference between a magnetic, fluid, and smart trainer?
Magnetic trainers use magnets to create resistance; they are affordable and quiet but can have a “step” feel. Fluid trainers use a sealed fluid chamber; they are prized for their incredibly smooth, progressive, and quiet road-like resistance. Smart trainers (which can be magnetic or direct-drive) contain electronics that allow them to connect to apps like Zwift to automatically adjust resistance to match virtual hills or programmed workouts, and they measure power output accurately.
Can I turn my bike into a stationary bike without buying anything?
Not in a functional, resisted way. You could simply place your bike on a stationary stand, which holds it upright but provides no resistance, making it a very light workout. To get a real cardio and strength workout that mimics cycling, you need a device that provides resistance—a trainer is that device. The minimal investment in a basic trainer is what enables the true stationary bike transformation.