
How to Air Up Tires on a Road Bike
Properly inflating your road bike tires is a non-negotiable fundamental for safety, performance, and comfort. It’s not just about adding air; it’s about hitting the precise pressure range printed on your tire sidewall using the correct technique for your valve type. Mastering this simple task prevents flats, reduces rolling resistance, and ensures your bike handles predictably. Forget guesswork—this guide gives you the definitive, foolproof method to air up your road bike tires like a pro mechanic.
Ever hopped on your road bike, pushed off, and felt that weird, squishy, slow-motion sensation? Or maybe you heard a rhythmic “thump-thump-thump” that wasn’t the chain. Chances are, your tires are under-inflated. Knowing how to air up tires on a road bike is the single most important piece of basic maintenance you can master. It’s the foundation of everything else: your speed, your safety, your comfort, and the longevity of your expensive components. It seems trivial, but doing it wrong—or not doing it at all—is the root cause of countless poor rides, avoidable flats, and even crashes. This guide will walk you through every single detail, from understanding what those numbers on your tire actually mean to the final satisfying click of a perfectly inflated valve. Let’s get you rolling on properly pressurized rubber.
Key Takeaways
- Pressure is Paramount: Always inflate to the PSI range printed on your tire’s sidewall, not the rim. This range balances speed, comfort, and grip.
- Know Your Valve: Road bikes use Presta valves almost exclusively. You must unscrew the tiny tip before pumping and tighten it securely after.
- Use the Right Pump: A quality floor pump with a pressure gauge is the gold standard. Avoid gas station pumps, which can overinflate and damage tires.
- Check Cold: Measure and adjust tire pressure when tires are cold (not ridden for several hours) for an accurate reading.
- Listen & Feel: A properly inflated tire feels firm, has minimal sidewall bulge when pressed, and makes a distinct “tap” sound, not a “thump.”
- Regular Checks are Key: Check pressure before every ride. Road bike tires can lose several PSI per week through natural seepage.
- Don’t Overthink It: Within the recommended range, slightly lower pressure can offer more comfort on rough roads, while slightly higher pressure may be faster on smooth pavement.
📑 Table of Contents
- Why Tire Pressure Is Your #1 Performance Lever
- Decoding the Sidewall: Finding Your Magic Numbers
- The Tools of the Trade: What You Actually Need
- Step-by-Step: The Definitive Guide to Airing Up
- Troubleshooting: What’s That Sound/Feeling?
- Maintenance and Best Practices for Longevity
- Safety and the Law of Diminishing Returns
- Conclusion: Your First Step to a Better Ride
Why Tire Pressure Is Your #1 Performance Lever
Before we touch a pump, we need to understand *why* this matters so much. Tire pressure isn’t a “set it and forget it” number. It’s a dynamic tuning knob that affects every aspect of your ride. Think of it as the suspension system for your bike—because, in a very real way, it is.
The Physics of Rolling Resistance
Your goal is to minimize energy loss. An under-inflated tire deforms excessively as it rolls. This constant squirming and reshaping of the rubber absorbs your pedaling power and turns it into heat instead of forward motion—this is rolling resistance. An over-inflated tire, conversely, can’t conform to small road imperfections, causing the bike to bounce and vibrate, which also saps energy and makes you fatigue faster. The “sweet spot” within your tire’s recommended range is where the tire is supple enough to dampen vibrations but firm enough to minimize deformation, offering the lowest rolling resistance and thus, the most efficient power transfer from your legs to the pavement.
Grip, Handling, and Comfort
Pressure dictates how much of your tire’s tread actually contacts the road. Lower pressure increases the contact patch, which generally improves grip, especially on rough or wet surfaces. It also allows the tire to act as a form of suspension, smoothing out bumps and reducing road buzz transmitted to your hands and body—a huge factor in long-ride comfort. However, go too low, and you risk “snakebite” flats (two parallel pinch flats from hitting a sharp edge) or, in extreme cases, a tire rolling off the rim. Higher pressure reduces the contact patch, which can feel faster on perfectly smooth asphalt but will feel harsh and slippery on anything less. It also makes the bike more “twitchy” and sensitive to steering inputs. Finding your personal balance within the manufacturer’s range is key.
Safety First: Preventing the Worst
An severely under-inflated tire is a safety hazard. It can overheat and fail catastrophically, especially on long descents. It also makes the rim more vulnerable to damage from potholes and curbs. An over-inflated tire is a ticking time bomb for a sudden blowout, where the casing separates from the bead. Both scenarios can lead to a loss of control. Correct pressure ensures the tire stays securely on the rim and operates within its engineered safety limits.
Decoding the Sidewall: Finding Your Magic Numbers
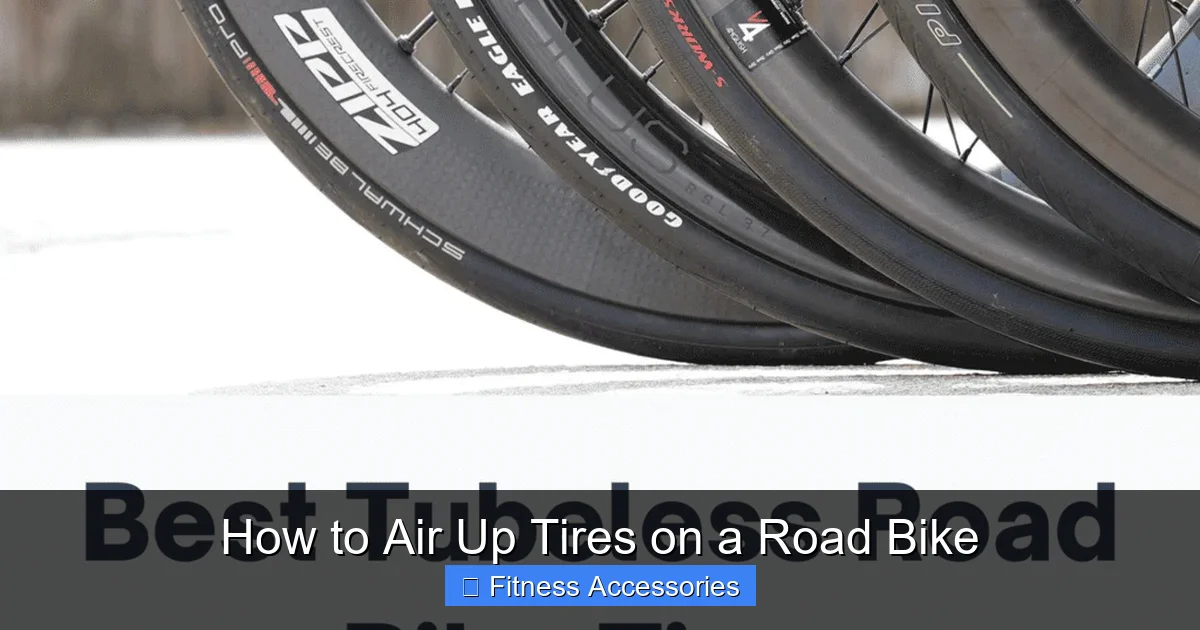
Look closely at the smooth, curved surface of your tire. You’ll see a jumble of text, including the brand, model, and size (e.g., 700x25c). Buried in there is the critical information: the recommended inflation pressure. It’s usually expressed as a range, like “85-115 PSI” or “5.8-8.0 BAR.”
Visual guide about How to Air Up Tires on a Road Bike
Image source: thumbs.dreamstime.com
PSI vs. BAR: What’s the Difference?
Pounds per Square Inch (PSI) is the standard unit in the United States. BAR (or atmospheres) is the metric equivalent, commonly used in Europe and on many tire labels. 1 BAR is approximately 14.5 PSI. Your pump’s gauge will read in one or the other. Don’t mix them up! If your tire says “6-8 BAR,” that’s roughly “87-116 PSI.” Digital pumps often let you switch units.
The Range Is Your Playground, Not a Single Target
That range exists for a reason. The lower end (e.g., 85 PSI) prioritizes comfort and grip for heavier riders or rough roads. The higher end (e.g., 115 PSI) prioritizes low rolling resistance and reduced pinch-flat risk for lighter riders on smooth roads. Your weight is the primary variable. A 120-pound rider will likely be happy at 85 PSI on 25mm tires. A 200-pound rider will likely need 100-110 PSI to prevent the rim from bottoming out. Start in the middle of the range, ride, and adjust. If the bike feels harsh and you’re getting buzzed, drop 5 PSI. If you feel every little crack and worry about pinch flats, add 5 PSI.
Width Matters Too
Modern road tires are wider than ever (25mm, 28mm, even 32mm). Wider tires at the same pressure have a larger contact patch and can be run at lower pressures for the same rolling resistance and comfort benefits, while also being more puncture-resistant. A 28mm tire at 70 PSI can feel faster and more comfortable than a 23mm tire at 100 PSI. Don’t be afraid to experiment within your tire’s stated limits.
The Tools of the Trade: What You Actually Need
You can’t air up tires on a road bike with just your lungs. You need the right tools. Let’s break them down from essential to nice-to-have.
Visual guide about How to Air Up Tires on a Road Bike
Image source: mrmamil.com
The Pump: Your Best Friend
This is your most important tool. There are three main types:
- Floor Pump (The Champion): This is what you should own. It has a large barrel that allows you to put a lot of air into the tire with each stroke, making the job quick and easy (usually 30-40 strokes to go from flat to 100 PSI). It has a built-in pressure gauge, a sturdy base, and a long hose. It’s accurate, efficient, and the only pump you should use for regular inflation. Invest in a good one (e.g., from Lezyne, Topeak, Silca). It will last a decade.
- Mini Pump / Frame Pump (The Emergency Backup): Small, light, and designed to be carried on your bike for roadside flats. It takes *many* more strokes (100+) to reach road bike pressures, so it’s for emergencies only. Most have a basic pressure indicator that is notoriously inaccurate. Use it to get home, not for precise daily inflation.
- CO2 Inflator (The Race-Day Tool): A small cartridge of compressed CO2 and a tiny regulator. Insanely fast—fills a tire in seconds. Great for racing or when you’re in a huge hurry. However, CO2 seeps out of tires faster than air (about 1-2 PSI per day), so you’ll still need to top up with regular air later. The cartridges are a recurring cost and create waste.
Critical Note: Never use a gas station air compressor. These are designed for car tires (30-35 PSI). They will over-inflate and likely blow your delicate road bike tire off the rim in seconds. Avoid them at all costs.
The Valve: Understanding Presta vs. Schrader
Road bikes almost exclusively use the Presta valve (also called a French valve). It’s slender, with a tiny knurled metal nut at the top. You must unscrew this nut counter-clockwise before you can pump. Once unscrewed, you’ll hear a slight hiss of air—this is the valve opening. When you’re done, screw it back down tightly to seal. This design allows for higher pressures and a narrower rim hole.
The Schrader valve (American or car valve) is thicker, with a spring-loaded pin in the center. You simply press the pin to let air out. You’ll sometimes see these on very inexpensive hybrid bikes or older bikes. Most modern floor pumps have a universal head that fits both, but you often need to flip a reversible gasket or screw a different attachment on. If your pump has two separate holes (one small for Presta, one large for Schrader), use the small one for Presta.
The Gauge: Your Pressure Window to the World
Your pump’s built-in gauge is your primary tool. For a floor pump, it should be reasonably accurate. For mini pumps, treat the gauge as a rough estimate only. If you want absolute precision, consider a separate, high-quality analog or digital pressure gauge (like from SKS or Topeak). You can check your pump’s accuracy against a known-good gauge occasionally.
Step-by-Step: The Definitive Guide to Airing Up
Now, the moment of truth. Here is the foolproof, safe procedure for inflating a road bike tire with a Presta valve using a floor pump.
Visual guide about How to Air Up Tires on a Road Bike
Image source: media.kunduz.com
Step 1: Preparation and Inspection
First, ensure your tire is seated correctly on the rim. Look at the tire line—the molded line running along the sidewall—and make sure it’s parallel to the rim all the way around. If it’s wobbling, the tire is poorly seated and could blow off when inflated. Spin the wheel and look for any embedded debris (glass, thorns) in the tread. Remove any you see with a gloved hand or plastic tool.
Step 2: Connect the Pump (The Most Common Mistake)
This is where people struggle. Unscrew the tiny nut at the top of your Presta valve all the way (counter-clockwise). You’ll hear a small puff of air—that’s the valve opening. Now, take your pump head. If it’s a universal head with a flip-this/switch-that mechanism, set it for Presta (usually the smaller hole, or a lever in the “open” position). Press the pump head firmly straight down onto the valve stem. You should feel it engage. Now, flip the lever on the pump head to the “locked” or “closed” position (or screw the collar down). This creates an airtight seal. You should not hear air leaking around the connection. If you do, reseat it. A tight seal is non-negotiable for an accurate reading.
Step 3: Pump and Monitor
Begin pumping with strong, full strokes of the floor pump’s barrel. Keep an eye on the gauge. Your target is somewhere in the middle of your tire’s range to start (e.g., if it says 85-115 PSI, aim for 100 PSI). Pump until the needle lands on your target. You’ll feel the tire get very firm. The last few PSI will require significantly more effort as the tire resists.
Step 4: The Final Check and Disconnect
Once at your target pressure, give the tire a firm squeeze with your thumb on the sidewall. It should feel rock-hard with almost no give. You can also give it a tap with your knuckle; it should make a high-pitched “tap” sound, not a dull “thump.” Now, disengage the pump. Flip the lever on the pump head back to “open” or unscrew it. You’ll hear a brief hiss—that’s the pressure equalizing. Immediately pull the pump head straight off the valve. Now, and this is crucial, screw the tiny nut on the Presta valve back down tightly clockwise until snug. Don’t over-tighten, but ensure it’s finger-tight. This small nut is what keeps the valve from slowly leaking air and from getting damaged.
Step 5: Repeat and Verify
Do the exact same for the other tire. After both are done, give them one more quick squeeze to confirm firmness. It’s good practice to re-check the pressure with your gauge after 5-10 minutes. Sometimes, if the tire was very low, the bead needs a moment to fully seat, and pressure can drop slightly.
Troubleshooting: What’s That Sound/Feeling?
Even with the steps down, you might encounter issues. Here’s how to diagnose them.
“My tire feels soft even though the gauge reads 100 PSI!”
This is the most common complaint. First, confirm your gauge is accurate. Compare it to another pump or a separate gauge. Second, are you checking the pressure when the tire is warm? Riding generates heat and increases pressure. Always check and set pressure on cold tires (not ridden for 3+ hours). Third, you may simply be used to a much higher pressure. Try a 5 PSI drop and see if the “soft” feeling is actually a more compliant, comfortable ride.
“Air is leaking around the pump head!”
The seal is bad. Reseat the pump head. Make sure it’s pushed all the way down. If it’s a universal head, ensure you’ve selected the correct valve setting (Presta) and flipped/screwed the locking mechanism properly. Sometimes a tiny bit of dirt on the valve stem prevents a seal. Wipe it clean with a cloth.
“I can’t get the pressure up; the gauge barely moves.”
You likely have a major leak. First, check the valve connection again. If that’s solid, listen. Can you hear a hissing sound *from the tire itself*? You may have a puncture or a bad valve core. Remove the pump, listen closely at the valve stem. If it’s leaking there, the valve core may be loose (try tightening it slightly with a valve core tool) or faulty. If the leak is in the tire, you’ll need to repair it.
“The pump gauge says 100 PSI, but when I disconnect, the tire is only at 80 PSI!”
This indicates a leak at the valve core. When you pump, you’re forcing air past a slightly leaking core. The gauge on the pump reads the pressure you’re *applying*, not necessarily what’s staying in the tire. The hiss will be very obvious once the pump is off. Tighten the valve core (the small nut at the top of the Presta valve, which you already unscrewed) a quarter-turn with a valve core tool or small pliers. If that doesn’t work, the core is faulty and needs replacing (they are cheap and universal).
Maintenance and Best Practices for Longevity
Inflation isn’t a one-time event. It’s a habit. Here’s how to integrate it seamlessly into your routine.
How Often Should You Check?
Before every single ride. It takes 10 seconds. Road bike tires, especially at high pressures, lose air naturally through the rubber and valve—a phenomenon called permeation. You can lose 5-10 PSI in a week. Checking with a quick squeeze or a digital gauge should be as automatic as putting on your helmet.
The Art of the “Top-Up”
You don’t need to deflate and start from zero every time. If your tires are reading 90 PSI and your target is 100 PSI, just add the 10 PSI you need. This is the beauty of having a gauge on your pump. A quick top-up takes 5-10 pumps.
Storing Your Bike
If you’re not riding for a while (winter storage, long vacation), it’s actually better to store your bike with the tires at the lower end of the recommended pressure range. Fully inflated tires for months can develop flat spots or stress the casing. A slightly lower pressure takes this static load off the tire structure.
Rotating Tires and Tracking Wear
If you have two sets of tires (e.g., a training set and a race set), rotate them. The rear tire wears faster due to weight and drive torque. Swap front and rear tires every 500-1,000 miles to even out wear. While you’re checking pressure, inspect the tread for cuts, cracks, or worn-down rubber. A tire with a deep cut in the casing is a blowout waiting to happen—replace it.
Safety and the Law of Diminishing Returns
Let’s address the extremes and the fanatics.
Don’t Max Out the Sidewall (Usually)
That maximum number on the sidewall is a *burst pressure*—the absolute limit the tire can hold before failing. It is not a recommended riding pressure. Running at max pressure gives you a harsh, dangerous ride with almost no grip. It’s for very specific scenarios like short, smooth time trials, and even then, most pros run slightly below max. For everyday riding, stay comfortably within the range.
The “Squirm Test” for Lower Pressures
If you want to experiment with lower pressures for comfort (especially on wider tires), do so cautiously. After inflating to your lower target (say, 75 PSI on 28mm tires), ride a short, safe loop. Pay attention to how the tire feels under hard cornering or when hitting a curb. If you feel the tire folding or rolling under you, or if the rim bottoms out with a harsh “clunk” on bumps, the pressure is too low. Increase by 5 PSI increments until the squirm disappears.
The Ultimate Goal: Confidence
The correct pressure gives you confidence. You trust that your bike will grip when you lean into a corner, that it will roll efficiently on the straights, and that it will absorb the bumps without complaint. You won’t be distracted by a vague sense of slowness or a worrying vibration. Your connection to the road becomes direct and positive. That’s the real payoff of mastering this fundamental skill. It’s not about chasing an abstract number; it’s about crafting the ride that feels right for you on your roads.
Conclusion: Your First Step to a Better Ride
Knowing how to air up tires on a road bike is your gateway to a more enjoyable, efficient, and safe cycling experience. It’s a five-minute ritual that pays dividends in every single ride. Remember the core tenets: find the pressure range on your tire, use a good floor pump with a gauge, respect the Presta valve procedure, check cold tires before every ride, and adjust within the range based on your weight and road conditions. This isn’t mechanic-level work; it’s basic hygiene. Make it a habit, and you’ll immediately notice the difference in how your bike feels, handles, and performs. Now, go find that pump, check those pressures, and feel the difference a properly inflated tire makes on your next ride.
Frequently Asked Questions
What is the ideal tire pressure for my road bike?
The ideal pressure is always within the range printed on your tire’s sidewall. Start in the middle of that range (e.g., 100 PSI for a 85-115 PSI tire) and adjust based on your weight and road quality. Heavier riders generally need higher pressure; rougher roads benefit from slightly lower pressure for comfort.
What’s the difference between Presta and Schrader valves, and which do I have?
Road bikes almost always use Presta valves—they are narrow, with a small knurled nut at the top that you must unscrew before pumping. Schrader valves are thicker, like a car tire valve, with a spring-loaded pin. Your pump head must be set correctly for your valve type to seal properly.
Can I use a gas station air pump for my road bike?
Absolutely not. Gas station pumps are designed for car tires (30-35 PSI) and are extremely high-volume. They will instantly overinflate and likely blow your delicate road bike tire off the rim, causing a dangerous failure. Always use a bicycle-specific pump with a pressure gauge.
What happens if I overinflate my road bike tires?
Overinflation makes for a harsh, uncomfortable ride with poor traction, as the tire can’t conform to the road. It increases the risk of a sudden blowout from an impact (like a pothole) and places excessive stress on the rim and tire casing. Always stay within the manufacturer’s maximum range.
How often should I check my road bike tire pressure?
Check the pressure before every single ride. Road bike tires can lose 5-10 PSI per week through natural seepage. A quick squeeze or a 10-second gauge check should be as routine as putting on your helmet.
Should I inflate my tires to the maximum pressure printed on the sidewall?
No. The maximum pressure is a safety limit, not a recommendation. For everyday riding, aim for the middle of the recommended range. Only approach the maximum for very specific, short-duration efforts on perfectly smooth roads, like a time trial. For most riders, max pressure reduces comfort and grip without a meaningful speed benefit.


