How to Jump Rope Without Getting Shin Splints
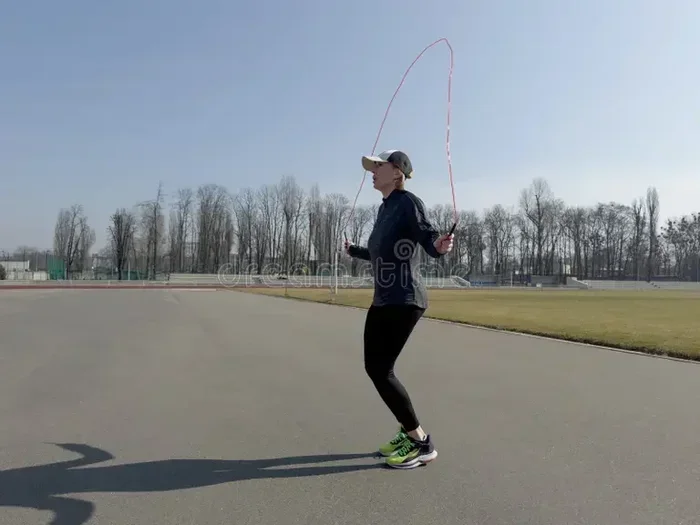
Jumping rope is one of the best cardio exercises, but shin splints can sideline you fast. This guide covers proper technique, the right rope length, footwear choices, and a progressive training plan to keep your shins healthy. You will learn exactly how to jump rope without getting shin splints through simple, actionable steps that work for beginners and experienced athletes alike.
Jumping rope is a fantastic workout. It burns calories fast, builds coordination, and strengthens your entire body. But there is a dark side that many people discover the hard way: shin splints. That sharp, aching pain along the front of your lower leg can make every step miserable. The good news is that you can absolutely enjoy all the benefits of jump rope training without the pain.
Whether you are brand new to jump rope exercise or you have been skipping for years, this guide will show you exactly how to protect your shins. We will cover everything from proper rope length to landing technique to recovery strategies. By the end, you will have a clear plan to train pain-free and keep your legs feeling strong.
Key Takeaways
- Use the right rope length: A properly sized rope reduces unnecessary impact and strain on your shins.
- Land softly on the balls of your feet: This simple technique change dramatically lowers shin stress.
- Wear proper footwear: Shoes with good shock absorption and ankle support are essential for shin protection.
- Start slow and progress gradually: Building up duration and intensity prevents overuse injuries like shin splints.
- Strengthen your lower legs: Targeted exercises for your calves and tibialis anterior support shin health.
- Choose the right surface: Jumping on forgiving surfaces reduces the impact transmitted to your shins.
📑 Table of Contents
- Why Do Shin Splints Happen When Jumping Rope?
- How To Set Up Your Jump Rope Correctly
- Master the Proper Jumping Technique
- Choose the Right Gear to Protect Your Shins
- Build Your Routine Gradually to Avoid Overuse
- Strengthen Your Lower Legs for Long-Term Protection
- Warm Up and Cool Down Like a Pro
- Common Mistakes That Cause Shin Splints
- When To See a Doctor
- Conclusion
Why Do Shin Splints Happen When Jumping Rope?
Understanding the cause is the first step to prevention. Shin splints, also called medial tibial stress syndrome, happen when the muscles, tendons, and bone tissue around your tibia become overworked. The repetitive impact of jumping puts constant stress on your lower legs.
Several factors make shin splints from jumping rope more likely:
- Too much too soon: Jumping for long periods before your body adapts is the number one cause.
- Poor landing mechanics: Landing flat-footed or on your heels sends shock straight up your tibia.
- Wrong rope length: A rope that is too short forces you to jump higher than necessary, increasing impact.
- Hard surfaces: Concrete and asphalt do not absorb shock, so all that force goes into your legs.
- Weak lower leg muscles: Underdeveloped calf muscles and tibialis anterior leave your shins vulnerable.
- Worn-out shoes: Footwear with little cushioning or support fails to protect your joints.
The great thing is that almost all of these causes are within your control. You do not have to accept shin pain as a normal part of jump rope workouts. With the right approach, you can train hard and stay healthy.
How To Set Up Your Jump Rope Correctly
Your rope setup matters more than most people realize. A properly configured rope changes everything about how your body absorbs impact during each jump.
Find the Right Rope Length
An incorrectly sized rope is one of the biggest hidden causes of shin pain. When your rope is too short, you have to jump higher to clear it. This extra height means a harder landing and more stress on your shins.
To find your ideal length, step on the middle of the rope and pull the handles up. The handles should reach roughly to your armpits. If you are unsure about your measurements, check out our guide on how to measure a jump rope for your height for a detailed walkthrough.
Adjust the Rope to Fit You
Many ropes come with adjustable length settings. Once you know the right length, make the adjustment and test it out. You want just a few inches of slack when the rope touches the ground beneath your feet. If you need help with the adjustment process, our article on how to adjust the length of a jump rope covers the steps in detail.
Also, consider the rope material. Beaded ropes provide a steady rhythm and are great for beginners. Cable ropes are faster and more compact but require better timing. Choose the one that matches your skill level and fitness goals.
Master the Proper Jumping Technique
Technique is the single most powerful tool you have for preventing shin splints. Small changes in how you jump can dramatically reduce the stress on your lower legs.
Land on the Balls of Your Feet
This is the golden rule of jump rope without shin splints. When your foot hits the ground, it should be on the front part of your foot, not your heel. Landing on the balls of your feet allows your calf muscles to act as natural shock absorbers. This spreads the impact across more muscle groups instead of concentrating it on your shins.
Think of it like a cat landing. Cats always land softly on the front of their paws because their muscles absorb the force. You want to mimic that same soft, controlled landing.
Keep Your Jumps Low
You do not need to jump high. In fact, you should barely leave the ground at all. Just enough clearance for the rope to pass under your feet is all you need. Higher jumps mean harder landings, and harder landings mean more shin stress.
A good target is to keep your jumps between one and two inches off the ground. This might feel strange at first, but it is much easier on your legs and actually helps you maintain a faster, more efficient rhythm.
Use a Relaxed Grip and Gentle Wrist Motion
Many beginners grip the handles tightly and swing the rope with their arms. This creates unnecessary tension that travels down through your body. Instead, hold the handles loosely and use your wrists to turn the rope. Your forearms should do most of the work, not your shoulders.
A relaxed grip also helps you maintain a steady, controlled pace. When you are tense, you tend to rush, which leads to sloppy form and harder landings.
Choose the Right Gear to Protect Your Shins
Your equipment choices play a huge role in shin splint prevention. Investing in the right gear pays off big time in comfort and longevity.
Wear Shoes with Good Cushioning
Your shoes are your first line of defense against impact. Look for footwear that offers shock absorption in the heel and forefoot areas. Running shoes with good cushioning are usually a solid choice for jump rope training.
Avoid flat-soled shoes like canvas sneakers or dress shoes. They offer almost no cushioning and do very little to protect your shins. If you are serious about jump rope exercise, consider shoes specifically designed for cross-training or high-impact activities.
Consider an Insoles or Orthotics
If your favorite shoes lack enough support, add a quality insole. Insoles with arch support and gel cushioning can significantly reduce the impact on your lower legs. This is a simple and affordable upgrade that makes a real difference.
Pick the Right Surface
Where you jump matters just as much as how you jump. Hard concrete and asphalt are the worst surfaces for shin health. They do not absorb any shock, so all the impact goes straight into your bones and muscles.
Better surfaces include:
- Rubber gym flooring: The best option for indoor jump rope training.
- Wooden floors: A good compromise that offers some give.
- Grass: Naturally forgiving, though it can be uneven.
- Exercise mats: Thick rubber mats absorb impact well and are portable.
Avoid jumping on tile, concrete, or other extremely hard surfaces whenever possible. If you only have hard floors available, place a rubber mat or carpet remnant down to create a more forgiving surface.
Build Your Routine Gradually to Avoid Overuse
The most common mistake people make is doing too much too fast. Your shins, calves, and tendons need time to adapt to the demands of jump rope training. A gradual approach builds strength and resilience without overwhelming your legs.
Start with Short Sessions
If you are new to jump rope exercise, start with just five to ten minutes per session. That might feel surprisingly challenging, and that is okay. The goal is not to max out your duration on day one. The goal is to build a foundation.
During these early sessions, focus on maintaining proper form. Keep your jumps low, land softly, and listen to your body. If you feel any ache or discomfort in your shins, stop and rest.
Increase Duration Slowly
Once you can comfortably complete ten-minute sessions without pain, add a few minutes each week. A good rule of thumb is to increase your total jump time by no more than ten percent per week. This gives your muscles and connective tissues time to adapt to the growing workload.
For a structured approach to session length, check out our guide on how long to jump rope for a good workout. It provides clear recommendations based on your fitness level and goals.
Mix in Rest Days
Rest days are not optional. They are essential. Your shins need recovery time to repair the tiny micro-tears that occur during jumping. Without adequate rest, these micro-tears accumulate and lead to inflammation and pain.
Aim for at least one or two rest days between jump rope sessions, especially in the early stages. On rest days, you can focus on stretching, foam rolling, or gentle lower leg strengthening exercises.
Strengthen Your Lower Legs for Long-Term Protection
Stronger muscles and tendons are more resilient and less prone to injury. Adding targeted exercises to your routine builds the foundation your shins need to handle the demands of jump rope training.
Calf Raises
Calf raises are one of the simplest and most effective exercises for shin health. Stand on the edge of a step with your heels hanging off. Slowly raise up onto your toes, then lower back down below the step level. Do three sets of fifteen to twenty reps.
This exercise strengthens both the gastrocnemius and soleus muscles in your calves, which act as shock absorbers every time you land a jump.
Tibialis Raises
Your tibialis anterior is the muscle along the front of your shin. Strengthening it directly targets the area most affected by shin splints. To do tibialis raises, sit on the floor with your legs straight. Loop a resistance band around your forefoot and gently pull your toes toward your shin against the band’s resistance.
Do three sets of twelve to fifteen reps on each leg. This exercise builds the anterior muscle strength that helps stabilize your lower leg during jumping.
Toe Walks and Heel Walks
These simple drills build endurance in your lower leg muscles. Walk across the room on your toes for twenty to thirty seconds, then walk back on your heels. Repeat for three to four rounds.
These exercises might look easy, but they work your shins, calves, and ankles in a way that directly supports jump rope performance. Add them to your warm-up or cool-down routine.
Warm Up and Cool Down Like a Pro
Skipping your warm-up is one of the fastest ways to invite shin splints into your workout. A proper warm-up increases blood flow to your lower legs and prepares your muscles for the impact ahead.
Dynamic Warm-Up Routine
Before you start jump rope exercise, spend five to ten minutes on dynamic movements:
- Ankle circles: Rotate each ankle ten times in each direction to loosen the joints.
- Leg swings: Swing each leg forward and back gently to activate your hip flexors and hamstrings.
- Bodyweight squats: Do ten to fifteen squats to warm up your entire lower body.
- Light marching in place: March for one to two minutes at a low intensity to get your heart rate up gradually.
- calf raises: Do ten slow calf raises to prepare your lower legs for the jumping ahead.
Cool Down and Stretch
After your session, take time to stretch your calves, shins, and Achilles tendons. Hold each stretch for twenty to thirty seconds. Gentle stretching after jump rope training helps reduce muscle tightness and promotes recovery. This simple habit can make a huge difference in how your legs feel the next day.
For more tips on protecting your legs during cardio exercise, our guide on how to not get shin splints on a treadmill covers additional prevention strategies that apply to all impact-based exercises.
Common Mistakes That Cause Shin Splints
Knowing what to avoid is just as important as knowing what to do. Here are the most common mistakes that lead to shin splints from jump rope:
- Jumping with stiff legs: Locked knees transfer all impact directly into your shins. Keep a slight bend in your knees at all times.
- Wearing the wrong shoes: Flat shoes, sandals, or barefoot jumping on hard surfaces are a recipe for pain.
- Skipping the warm-up: Cold muscles are tight muscles. Tight muscles are injury-prone muscles.
- Jumping on concrete: This is the single worst surface choice for your shins. Always find a more forgiving surface.
- Ignoring pain: Pushing through shin pain makes the injury worse. Rest at the first sign of discomfort.
- Doing too much volume too fast: More is not always better. Progressive overload is the key to long-term progress without injury.
Avoiding these mistakes alone can prevent the vast majority of shin splint cases. Combine them with the positive strategies in this guide, and you will be well on your way to pain-free jump rope training.
When To See a Doctor
Most cases of shin pain from jump rope exercise respond well to rest and technique adjustments. However, there are times when professional help is necessary. If you experience any of the following, it is time to see a healthcare provider:
- Sharp, localized pain that does not improve with rest.
- Swelling or redness along your shin bone.
- Pain that worsens with every session despite changing your technique.
- Numbness or tingling in your lower leg or foot.
- Pain that interferes with daily walking or normal activities.
Early intervention prevents small problems from becoming serious injuries. Do not hesitate to seek professional advice if something does not feel right.
Conclusion
Jumping rope without getting shin splints is entirely achievable when you approach your training with the right knowledge and habits. Start with a properly sized rope, master soft landings on the balls of your feet, wear supportive shoes, and choose a forgiving surface. Build your routine gradually, strengthen your lower legs, and always warm up before you jump.
These steps work together to create a training environment where your shins can thrive. You do not have to choose between great cardio workouts and healthy legs. With the techniques in this guide, you can have both. Now get out there, grab your rope, and start jumping the smart way.
Frequently Asked Questions
Can beginners get shin splints from jumping rope?
Yes, beginners are especially vulnerable because their lower leg muscles and tendons have not yet adapted to the impact of jumping. Starting with short sessions and focusing on proper form greatly reduces this risk.
How long should I rest if I get shin splints from jump rope?
Rest for at least one to two weeks, or until the pain has completely resolved. Returning to jump rope exercise too soon can worsen the injury. Use this time to stretch, strengthen, and address the root cause.
Is jumping rope on a treadmill bad for your shins?
Not necessarily. Treadmills offer some shock absorption compared to concrete. However, you should still wear proper shoes and use a soft surface. For more specific tips, see our article on how to not get shin splints on a treadmill.
What type of jump rope is best for shin splint prevention?
An adjustable, beaded rope is ideal for beginners because it provides a steady rhythm and allows you to focus on landing softly. Make sure the rope is the correct length for your height to avoid jumping too high.
Do compression sleeves help prevent shin splints during jump rope?
Compression sleeves can provide some support and improve blood flow to the lower legs. They are not a replacement for proper technique and strength training, but they can be a helpful addition to your jump rope workout gear.
How often should I jump rope to avoid shin splints?
Start with two to three sessions per week, allowing rest days between each. As your legs adapt, you can increase frequency. The key is to listen to your body and never push through shin pain.
=== META TITLE ===
How to Jump Rope Without Getting Shin Splints
=== URL SLUG ===
/how-to-jump-rope-without-getting-shin-splints/