How to Use a Gym Rowing Machine 2
Learning how to use a gym rowing machine 2 is easier than you think. This guide walks you through proper form, machine settings, and effective workouts so you get the most out of every session. Whether you are a beginner or returning to the gym, you will find clear steps to improve your rowing technique and avoid common mistakes.
Key Takeaways
- Correct form matters: Using the right rowing technique prevents injury and boosts results.
- Machine settings are key: Adjusting resistance and foot placement changes your entire workout.
- Start slow and build up: Beginners should focus on consistency before pushing intensity.
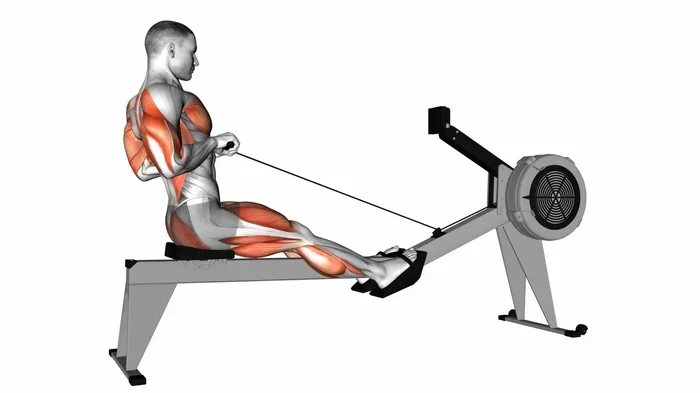
- Full body engagement: A gym rowing machine works your legs, back, arms, and core together.
- Avoid common mistakes: Overarching your back and rushing the stroke are the top errors to watch for.
- Track your progress: Monitoring split time and calories helps you stay motivated and improve.
📑 Table of Contents
- How to Use a Gym Rowing Machine 2: A Complete Guide
- Setting Up the Rowing Machine Correctly
- Mastering the Proper Rowing Form
- Understanding the Monitor and Your Metrics
- Beginner Rowing Machine Workout Plan
- How Often Should You Use the Rowing Machine?
- Quick Tips for a Better Rowing Session
- Rowing Machine vs Other Gym Equipment
- Final Thoughts
How to Use a Gym Rowing Machine 2: A Complete Guide
Walking into a gym and seeing a rowing machine can feel intimidating. The seats are low. The handles are attached to chains. And the monitor displays numbers you do not understand yet. But here is the truth. Using a gym rowing machine is one of the simplest and most effective workouts you can do. Once you learn the basics, you will wonder why you did not start sooner.
This guide covers everything you need to know. We will walk through proper form, machine setup, common mistakes, and sample workouts. By the end, you will feel confident stepping up to the machine and getting a great rowing workout every single time.
Why the Gym Rowing Machine Is Worth Your Time
Rowing machines are often called the best kept secret in the gym. And for good reason. They deliver a full body workout that builds muscle and burns fat at the same time. Unlike treadmills that mostly work your lower body, rowing engages over 80 percent of your muscles.
Here are some quick benefits of adding rowing to your routine:
- Low impact on joints: Rowing is gentle on your knees and hips, making it a great option for people who need low impact exercise.
- Burns calories fast: A moderate session can burn 400 to 600 calories per hour depending on your weight and intensity.
- Improves cardiovascular health: Regular rowing strengthens your heart and lungs over time.
- Builds endurance and strength: You get both aerobic and resistance benefits in one movement.
- Reduces stress: The rhythmic motion of rowing can be meditative and calming.
If you want to learn more about how rowing helps with weight loss, check out our guide on how to use a rowing machine to lose weight for additional tips.
Setting Up the Rowing Machine Correctly
Before you start rowing, you need to set the machine up properly. A wrong setup leads to poor form and uncomfortable workouts. Take a few extra minutes to get this right every time.
Adjusting the Foot Straps
Start with your feet. Place your feet in the foot plates and tighten the straps. Your straps should be snug but not too tight. The strap should sit across the widest part of your foot, right over the ball of your foot. This gives you a solid base to push off from during each stroke.
Quick Tip: If your feet slide around during rowing, the straps are too loose. Adjust them until your feet feel secure.
Setting the Damper
The damper controls how much air flows into the flywheel. Think of it like a gear on a bicycle. A higher damper setting means more resistance. A lower setting means less resistance.
For most gym sessions, a damper setting between 3 and 5 works well. Do not set it to 10 just because it looks impressive. That level is way too hard for most people and can strain your back.
| Damper Setting | Feel | Best For |
|---|---|---|
| 1-2 | Light and easy | Warm ups and recovery |
| 3-5 | Moderate resistance | Most workouts and beginners |
| 6-7 | Challenging | Intermediate rowers |
| 8-10 | Very heavy | Experienced athletes only |
Checking the Seat and Handle
Slide the seat back and forth gently. It should move smoothly along the rail. If it feels stuck or jerky, tell gym staff. The handle should attach to the chain without tangling. Make sure the chain is not twisted before you start rowing.
Mastering the Proper Rowing Form
This is the most important part of your entire workout. Proper rowing form makes every stroke more effective and protects your body from injury. Let us break it down step by step.
If you want a detailed walkthrough of each phase, our step by step rowing machine guide has visual breakdowns that make it even easier to follow.
The Catch
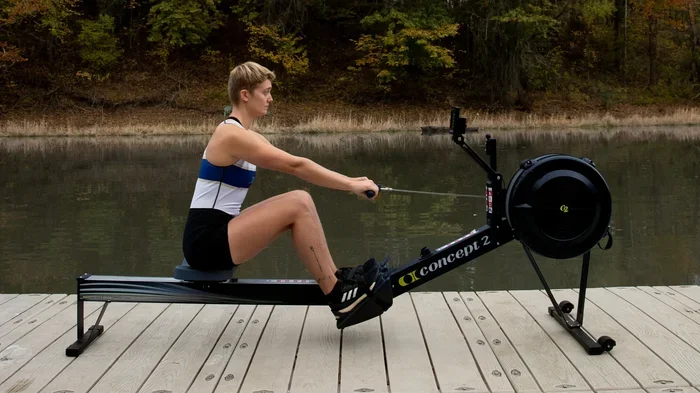
The catch is the starting position. Sit tall with your knees bent and shins vertical. Reach forward with your arms extended and grab the handle lightly. Your shoulders should be relaxed and slightly forward. Your back should be straight, not rounded.
Think of this position like a coiled spring. You are loaded and ready to push.
The Drive
The drive is where the power happens. Follow this sequence:
- Push with your legs: Extend your legs fully while keeping your arms relaxed.
- Lean back slightly: Once your legs are straight, lean your torso back about 15 degrees.
- Pull with your arms: Draw the handle toward your lower chest, keeping your elbows close to your body.
The order matters a lot. Legs first, then back, then arms. This sequence creates a smooth, powerful stroke that protects your lower back.
The Recovery
The recovery is the return to the catch position. It should be slow and controlled. Follow the reverse order:
- Extend your arms: Push the handle away from your chest.
- Lean forward: Return your torso to an upright position.
- Bend your knees: Slide forward to the catch position.
Take your time during the recovery. This is where you rest and prepare for the next powerful drive.
Common Form Mistakes to Avoid
- Rounding your back: This puts unnecessary strain on your spine. Keep your chest lifted and core engaged.
- Overgripping the handle: A death grip wastes energy and causes forearm fatigue. Hold the handle lightly.
- Banging your knees: If your knees hit the handle, your foot placement is wrong. Adjust your foot plates.
- Rowing too fast: Speed without control leads to sloppy form. Focus on smooth, even strokes first.
Understanding the Monitor and Your Metrics
The monitor on a gym rowing machine can feel overwhelming at first. But once you know what the key numbers mean, it becomes a powerful tool for tracking progress.
Key Metrics to Watch
- Split Time: This shows how long it takes to row 500 meters. A lower split time means faster rowing. Most beginners aim for a split time between 2:00 and 2:30 per 500 meters.
- Stroke Rate: Measured in strokes per minute (SPM). A comfortable range is 20 to 30 SPM for steady rowing.
- Calories Burned: An estimate based on your weight and workout intensity. Use this as a general guide, not an exact number.
- Distance: Total meters or miles rowed during your session.
- Pace: How fast you are rowing overall, usually shown per 500 meters.
You do not need to watch every metric at once. Pick one or two numbers to focus on during each workout. Over time, you will naturally start checking more data.
Beginner Rowing Machine Workout Plan
Now that you know the form and the settings, let us put it all together. Here is a simple workout plan designed for beginners. This plan builds confidence and endurance without overwhelming you.
Workout 1: The Foundation Row
This workout focuses on building a solid technique base.
- Warm up: Row easy for 3 minutes at a low resistance.
- Main set: Row 4 x 500 meters with 1 minute rest between each piece.
- Cool down: Row easy for 3 minutes and stretch your legs and back.
Focus on keeping your form clean throughout. Do not worry about speed. Smooth and steady wins the race here.
Workout 2: The Interval Push
Once you feel comfortable with the basic stroke, try this interval workout.
- Warm up: 3 minutes of easy rowing.
- Interval set: Row hard for 1 minute, then easy for 2 minutes. Repeat 5 times.
- Cool down: 3 minutes of light rowing and stretching.
This type of interval training boosts your cardiovascular fitness and burns more calories than steady rowing alone.
Workout 3: The Endurance Row
For a longer, steady session, try this plan:
- Warm up: 5 minutes easy.
- Main set: Row continuously for 20 minutes at a moderate pace.
- Cool down: 5 minutes easy rowing and full body stretching.
Endurance rows build stamina and teach your body to sustain effort over longer periods. Keep your stroke rate steady and your breathing even.
How Often Should You Use the Rowing Machine?
The frequency of your rowing sessions depends on your fitness level and goals. For most people, rowing 3 to 5 times per week is a great starting point. This gives your muscles enough time to recover between sessions while still building consistent progress.
If you are brand new to rowing, start with 2 to 3 sessions per week. Each session should last between 15 and 30 minutes. As your fitness improves, you can increase the duration and intensity gradually.
Expert Insight: Rowing is a demanding full body exercise. Unlike running, it uses your upper body just as much as your lower body. This means you need more recovery time between sessions. Listen to your body and take rest days when you feel sore or fatigued.
Quick Tips for a Better Rowing Session
- Warm up for at least 3 minutes before pushing hard. Cold muscles are more prone to injury.
- Stay hydrated. Keep a water bottle nearby and take small sips between intervals.
- Use your legs. About 60 percent of your power comes from your legs. Do not rely too much on your arms.
- Keep your core tight. A strong core protects your lower back and improves your stroke efficiency.
- Cool down and stretch. Spend at least 5 minutes cooling down after every session to reduce muscle soreness.
- Track your workouts. Write down your split times and distances. Seeing progress keeps you motivated.
Rowing Machine vs Other Gym Equipment
How does rowing compare to other popular gym machines? Here is a quick look at the differences:
| Machine | Primary Muscles | Impact Level | Calories per Hour (avg) |
|---|---|---|---|
| Rowing Machine | Full body (legs, back, arms, core) | Low | 400-600 |
| Treadmill | Legs, glutes | High | 500-800 |
| Elliptical | Legs, glutes, arms | Low | 350-550 |
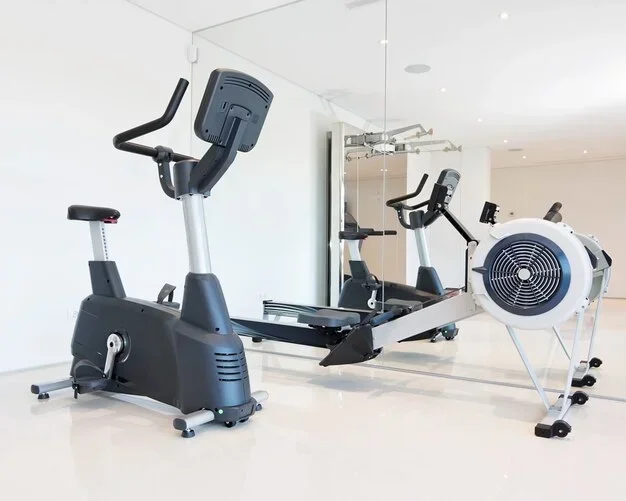
| Stationary Bike | Legs, glutes | Low | 300-500 |
Rowing stands out because it delivers a balanced full body workout with low impact on your joints. It is a great alternative to running, especially for people with joint concerns or those who want to mix up their routine.
Final Thoughts
Using a gym rowing machine is one of the smartest choices you can make for your fitness. It works your entire body, burns serious calories, and is gentle on your joints. The key is to start with proper form, set the machine up correctly, and build your routine gradually.
Do not let the monitor numbers intimidate you. Every expert rower started exactly where you are now. Focus on smooth strokes, consistent effort, and good technique. The results will follow. If you are ready to take your rowing to the next level, explore our complete rowing machine resources and find the plan that fits your goals best.
Frequently Asked Questions
Is rowing a good exercise for beginners?
Yes, rowing is excellent for beginners. It is low impact, easy to learn, and works your entire body. Start with short sessions at a comfortable pace and focus on learning the proper rowing stroke before increasing intensity or duration.
How long should a beginner row on the machine?
Beginners should aim for 15 to 30 minutes per session, 2 to 3 times per week. This gives your body time to adapt to the new movement pattern without causing excessive soreness or fatigue.
Does the gym rowing machine help with weight loss?
Absolutely. Rowing burns a significant number of calories and engages multiple muscle groups at once. Combined with a balanced diet, regular rowing sessions can support healthy and sustainable weight loss over time.
What should I set the damper to as a beginner?
Start with a damper setting between 3 and 5. This provides moderate resistance that is challenging but manageable. Higher settings are not better for beginners and can lead to poor form and muscle strain.
Can I use the rowing machine every day?
While rowing is low impact, using it every day may lead to overuse injuries, especially for beginners. Aim for 3 to 5 sessions per week with rest days in between to allow your muscles and joints to recover properly.
What is the correct breathing pattern while rowing?
Breathe naturally and steadily throughout your stroke. Exhale during the drive phase (when you push and pull) and inhale during the recovery phase (when you return to the starting position). Do not hold your breath at any point.