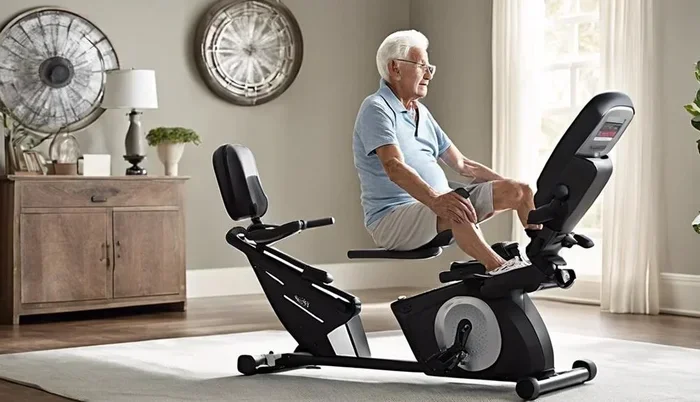
How to Turn Your Bike into Stationary Bike

Turning your bike into a stationary bike is easy, affordable, and perfect for indoor workouts. You can use a bike trainer stand, rollers, or a conversion kit to keep your bike in place while you pedal. This guide walks you through every step, from picking the right equipment to setting up your bike for a safe and effective ride.
Have you ever looked at your bike and thought, “I wish I could ride this indoors?” The good news is that you absolutely can. Turning your bike into a stationary bike is one of the smartest moves you can make for your fitness routine. Whether you want to train during winter, avoid bad weather, or just ride in the comfort of your home, a stationary setup gives you all the benefits of outdoor cycling without leaving your house.
The process is simpler than most people think. With the right equipment and a little know-how, you can have your bike ready for indoor riding in under an hour. In this guide, we will walk you through every step. You will learn about different conversion methods, how to set everything up correctly, and how to get the best workouts from your new stationary setup.
We also cover common mistakes to avoid and tips to make your indoor rides more enjoyable. By the end, you will have everything you need to start pedaling indoors with confidence. Let us dive in and show you exactly how to make this happen.
Key Takeaways
- A bike trainer stand is the easiest way to convert your bike into a stationary setup without buying a new one.
- Rollers offer a more natural riding feel but require better balance and skill to use safely.
- Converting your bike saves money compared to buying a dedicated stationary or exercise bike.
- Proper setup matters for comfort, safety, and getting the most out of your indoor rides.
- Indoor cycling workouts can burn serious calories and build endurance right at home.
- Maintenance tips keep your converted bike running smoothly and lasting longer.
📑 Table of Contents
- Why Turn Your Bike Into a Stationary Bike?
- Methods to Convert Your Bike Into a Stationary Bike
- How to Set Up Your Bike for Indoor Riding
- Essential Gear for Indoor Cycling
- Common Mistakes to Avoid When Converting Your Bike
- Getting the Most Out of Your Indoor Rides
- Maintenance Tips for Your Converted Setup
- Final Thoughts
Why Turn Your Bike Into a Stationary Bike?
There are many reasons why people choose to convert their regular bike into a stationary setup. The biggest one is convenience. You do not need to drive anywhere or worry about traffic. Just roll your bike into a room, clip in, and start riding.
Another big reason is cost. A quality stationary bike can cost several hundred dollars. But if you already own a bike, a trainer stand or roller setup costs a fraction of that price. You get a great workout without spending a lot of money.
Health and Fitness Benefits
Indoor cycling is a fantastic cardiovascular workout. It strengthens your legs, improves endurance, and burns a significant number of calories. A typical stationary cycling workout can burn between 400 and 600 calories per hour, depending on intensity.
Riding indoors also puts less stress on your joints compared to running. This makes it a great option for people who want a low-impact exercise that still delivers results. You can ride every day without worrying about wear and tear on your knees and ankles.
Weather and Time Freedom
One of the best parts of a convert bike to stationary setup is that you are not at the mercy of the weather. Rain, snow, or extreme heat will not stop your workout. You can ride at any time of day, early morning or late at night, without leaving your home.
This freedom also means you save time. No commute to a trail or park. No waiting for a gym to open. Your living room becomes your personal cycling studio. Over time, this convenience adds up and helps you stay consistent with your training.
Methods to Convert Your Bike Into a Stationary Bike
There are several ways to turn a regular bike into a stationary one. Each method has its pros and cons. The right choice depends on your budget, skill level, and how you plan to use the setup.
Bike Trainer Stand
A bike trainer stand is the most popular method. It holds your bike upright and locks the rear wheel off the ground. You pedal in place while the wheel spins freely. Trainer stands come in different types, including fluid, magnetic, and direct-drive models.
Fluid trainers offer a realistic road feel because the resistance changes with your pedaling speed. Magnetic trainers let you adjust resistance manually. Direct-drive trainers replace the rear wheel and connect directly to the flywheel for a premium feel. For most people, a basic magnetic trainer stand is the best starting point. It is affordable, quiet, and easy to set up.
Bike Rollers
Bike rollers are another option. Instead of holding the bike in place, rollers create a narrow platform that the bike sits on. You ride the bike while balancing on the rollers. This method feels very natural and helps improve your balance and pedaling technique.
Rollers take more practice to use. Beginners may wobble and fall a few times before they get the hang of it. But once you do, many riders prefer rollers because they mimic the feeling of riding on the road more closely than a trainer stand does.
Bike Conversion Kit
A bike conversion kit is a more permanent solution. These kits include a frame and flywheel that replace parts of your bike. The result is a machine that looks and feels like a dedicated stationary bike. Conversion kits work well if you plan to use your bike exclusively indoors.
However, this method removes your bike from outdoor use. If you still want to ride outside sometimes, a trainer stand or rollers is a better choice. Kits also tend to cost more than a simple stand, so keep that in mind when deciding.
How to Set Up Your Bike for Indoor Riding
Once you have your trainer stand or rollers, the next step is setting everything up correctly. A proper setup makes a huge difference in comfort, efficiency, and safety. Take your time with this process and do not rush it.
Start by placing your trainer stand on a flat, hard surface. Carpet can make the setup unstable and cause the bike to shift while riding. A garage floor, basement, or even a piece of plywood on carpet works great. Make sure there is enough space around the bike for air to flow and for you to move freely.
Adjusting the Seat and Handlebars
Your seat height is critical for a comfortable ride. When the pedal is at the lowest point, your leg should be almost fully extended with a slight bend in the knee. If the seat is too low or too high, you will feel discomfort in your knees or hips after just a few minutes.
The handlebar position matters too. You want a slight bend in your elbows when your hands are on the bars. If the handlebars are too low, you may experience back pain. Too high, and you lose an aerodynamic position that makes pedaling easier. Take a few minutes to fine-tune these adjustments before every ride.
Securing the Bike Properly
Make sure the trainer stand grips the bike frame tightly. A loose stand can cause the bike to tip or shift during intense pedaling. Check all clamps and bolts before each ride. If you are using a convert bicycle to stationary setup with a rear wheel removal, make sure the axle is seated correctly in the trainer.
Place a towel or mat under the trainer to catch any sweat and protect your floor. This small step goes a long way in keeping your workout area clean and preventing damage to your flooring. It also reduces noise slightly, which is a nice bonus.
Essential Gear for Indoor Cycling
You do not need a lot of gear to start riding indoors, but a few key items make the experience much better. Here is what we recommend.
- A fan. Indoor riding generates a lot of heat. A good box fan or two keeps you cool and comfortable during long sessions.
- A towel. Place it over your bike frame and handlebars to catch sweat and protect your bike from corrosion.
- Water bottle. Stay hydrated. Keep a bottle within arm’s reach at all times.
- Comfortable cycling shorts. Padded shorts reduce discomfort on longer rides and make indoor training more enjoyable.
- A heart rate monitor. Tracking your heart rate helps you train at the right intensity and measure progress over time.
If you want to track your workouts, consider connecting your bike to a fitness app or device. Many modern trainer stands work with apps that display your speed, distance, and power output. This adds a fun, gamified element to your indoor rides and helps you stay motivated.
Common Mistakes to Avoid When Converting Your Bike
Even though setting up a stationary bike is straightforward, people still make avoidable mistakes. Here are the most common ones and how to prevent them.
Skipping the Setup Adjustment
One of the biggest mistakes is riding right away without adjusting the seat and handlebars. An improper fit leads to discomfort and can even cause injuries over time. Always take five minutes before each ride to check your position and make small tweaks as needed.
Using the Bike on an Uneven Surface
Riding on an uneven or soft surface like a thick rug can be dangerous. The bike may wobble or the trainer can slide. Always place your setup on a hard, flat surface. If you must ride on carpet, put down a piece of plywood or a dedicated bike mat underneath.
Forgetting to Secure the Bike
A loose trainer stand or improperly seated rear wheel can cause the bike to shift mid-ride. This is not just uncomfortable, it is also dangerous. Always double-check all clamps and locks before you start pedaling. A quick check takes seconds and prevents accidents.
Neglecting Your Bike After Indoor Use
Indoor riding causes sweat to build up on your bike, especially on the frame, handlebars, and drivetrain. Wipe down your bike after every session. A little maintenance goes a long way in preventing rust and keeping your bike in great shape for both indoor and outdoor use.
Getting the Most Out of Your Indoor Rides
Now that your bike is set up, it is time to start riding. But how do you make sure you are getting the most from each session? Here are some tips to maximize your results.
Start with a warm-up. Pedal at a comfortable pace for 5 to 10 minutes. This gets your muscles ready and reduces the risk of injury. After the warm-up, you can increase the intensity with intervals, hill simulations, or steady-state riding.
Use the resistance on your trainer to simulate different terrains. Low resistance mimics flat roads. Higher resistance simulates climbing hills. Mixing up your resistance levels throughout the ride keeps things interesting and challenges different muscle groups.
Set goals for each session. Maybe you want to ride for 30 minutes at a steady pace, or maybe you want to complete a 20-minute interval workout. Having a clear purpose keeps you focused and makes your workouts more productive. Over time, track your progress to see how your fitness improves.
Remember that consistency beats intensity. Riding for 30 minutes four times a week is better than one long, exhausting session. Build a routine that fits your schedule and stick with it. The results will come.
Maintenance Tips for Your Converted Setup
Taking care of your bike and trainer stand ensures everything lasts longer and performs well. Here are a few simple maintenance tips.
- Clean your bike after every ride. Wipe down the frame, handlebars, and drivetrain to remove sweat and dirt.
- Check the trainer stand regularly. Tighten any loose bolts or clamps to keep the setup stable.
- Lubricate the chain. Indoor riding still wears down the chain. Apply a light bike chain lubricant every few weeks.
- Inspect the rear wheel. If you are using a trainer stand that holds the rear wheel, check the tire for wear and keep it properly inflated.
- Store the bike properly. When not in use, keep the bike in a dry area away from moisture and direct sunlight.
These small habits add up and keep your converted setup in excellent condition. A well-maintained bike rides better, feels safer, and lasts much longer than one that is neglected.
Final Thoughts
Turning your bike into a stationary bike is one of the best investments you can make for your home fitness. It is affordable, practical, and opens up a world of indoor riding possibilities. Whether you choose a trainer stand, rollers, or a full conversion kit, the process is straightforward and the results are worth it.
Remember to set up your bike correctly, use the right gear, and stay consistent with your training. Indoor cycling can be just as effective as outdoor riding when done right. You will build strength, improve cardiovascular health, and enjoy the freedom of riding no matter the weather or time of day.
Start small, stay patient, and enjoy the ride. Your stationary setup is waiting. Get on that bike and start pedaling toward your fitness goals today.
Frequently Asked Questions
Can I use any bike for a stationary conversion?
Most bikes can be converted, including road bikes, mountain bikes, and hybrid bikes. The key is making sure your bike is compatible with the trainer stand or rollers you choose. Check the specifications of your equipment to confirm it fits your bike’s wheel size and frame style.
Is it cheaper to convert a bike than buy a stationary bike?
Yes, converting your existing bike is usually much cheaper. A quality trainer stand costs between $100 and $400, while a good stationary bike can cost $500 or more. You get the benefits of indoor cycling without the big upfront investment.
Do I need special shoes to ride on a stationary bike setup?
Regular athletic shoes work fine for most setups. However, if you use clipless pedals, you will need compatible cycling shoes that clip into the pedals. Some riders also prefer using toe clips and straps for better foot retention during intense rides.
How noisy is a bike trainer stand?
Noise levels vary by trainer type. Magnetic trainers are the quietest and work well in apartments or homes. Fluid trainers are louder because the fluid inside creates resistance. Rollers can also be noisy, especially if the tires are not properly inflated.
Can I still ride my bike outside after converting it?
Absolutely. If you use a trainer stand or rollers, your bike remains fully functional for outdoor rides. You simply remove the bike from the stand and go for a ride outside. Only permanent conversion kits remove your bike from outdoor use.
How long should my indoor cycling sessions be?
For beginners, 20 to 30 minutes per session is a great starting point. As your fitness improves, you can gradually increase to 45 or 60 minutes. Listen to your body and rest when needed. Consistency matters more than session length, so aim for regular rides rather than marathon sessions.