Inflating a Presta valve is a simple but essential cycling skill. It requires a specific pump or adapter and a few easy steps to unlock the valve core. Mastering this process ensures your tires are correctly pressurized for safety, efficiency, and a comfortable ride. This guide breaks down everything you need to know, from identifying your valve to troubleshooting problems, so you can confidently maintain your bike anywhere.
Key Takeaways
- Presta valves are distinct: Recognizable by their thin, long stem and locking nut, they are standard on most road and many mountain bikes, requiring a different technique than Schrader valves.
- You need the right tool: A pump with a Presta-compatible head or a universal head is essential. A separate Presta-to-Schrader adapter allows use with standard gas station pumps.
- The 4-step process is key: 1) Loosen the tiny locking nut. 2) Press down to release air and unseal. 3) Attach pump securely. 4) Inflate, then retighten the nut.
- Pressure matters: Always check your tire’s sidewall for the recommended PSI range. Proper inflation prevents flats, improves speed, and enhances control.
- Listen and feel for success: A secure pump connection is silent. A hissing leak means a poor seal. The tire should feel firm, not rock-hard, when correctly inflated.
- Troubleshooting is simple: Most issues stem from a loose locking nut, a poor pump seal, or a damaged valve core. These are usually quick fixes.
- Regular checks are crucial: Tire pressure naturally decreases over time. Check and top up your Presta valve tires at least once a week for optimal performance.
📑 Table of Contents
- Unlocking the Mystery: Your Guide to the Presta Valve
- Gathering Your Gear: Tools for the Job
- The Step-by-Step: How to Inflate a Presta Valve (The 4-Step Dance)
- Finding Your Sweet Spot: Understanding Tire Pressure
- Troubleshooting: Why Your Presta Valve Won’t Hold Air
- Maintenance and Best Practices for Longevity
- Conclusion: Confidence in Your Hands
Unlocking the Mystery: Your Guide to the Presta Valve
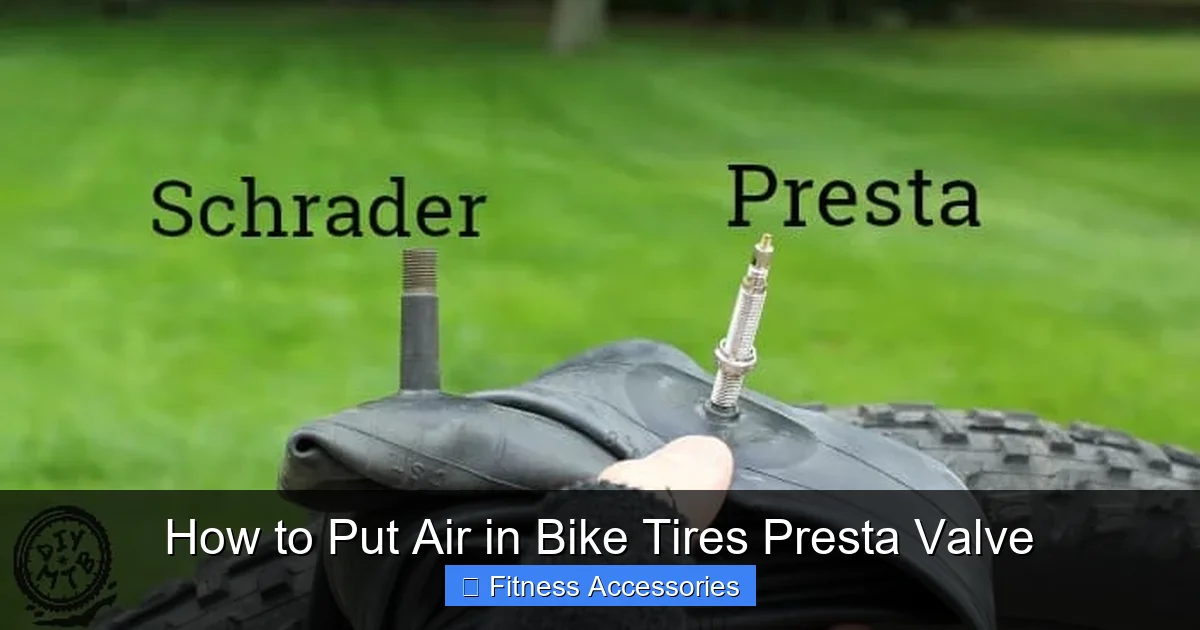
So you’re standing beside your bike, pump in hand, staring at a skinny little valve that looks nothing like the one on your car tire. That, my friend, is a Presta valve. It’s the elegant, European-designed standard on virtually all road bikes and an increasingly common sight on high-performance mountain bikes, cyclocross bikes, and even some sleek city cruisers. If you’ve ever wondered how to put air in bike tires Presta valve, the first step is understanding what makes it special. Unlike the robust, spring-loaded Schrader valve (the “car tire valve”), the Presta valve is all about precision and weight savings. Its core is held closed by air pressure alone, secured by a tiny knurled nut at the top. This design is lighter and can withstand higher pressures, making it perfect for skinny road tires that need pumping up to 100 PSI or more. But that same elegant design can be confusing the first time you encounter it. The process isn’t harder, just different. This guide will walk you through every single step, from identifying your valve to achieving the perfect, squeaky-clean seal. We’ll turn that moment of confusion into a two-second routine you can do blindfolded.
Gathering Your Gear: Tools for the Job
Before you can even think about the mechanics of inflation, you need the right equipment. Trying to force a Schrader-only pump onto a Presta valve is a recipe for frustration and a very slow air leak. Let’s get your toolkit sorted.
Visual guide about How to Put Air in Bike Tires Presta Valve
Image source: m.media-amazon.com
The Essential: A Presta-Compatible Pump
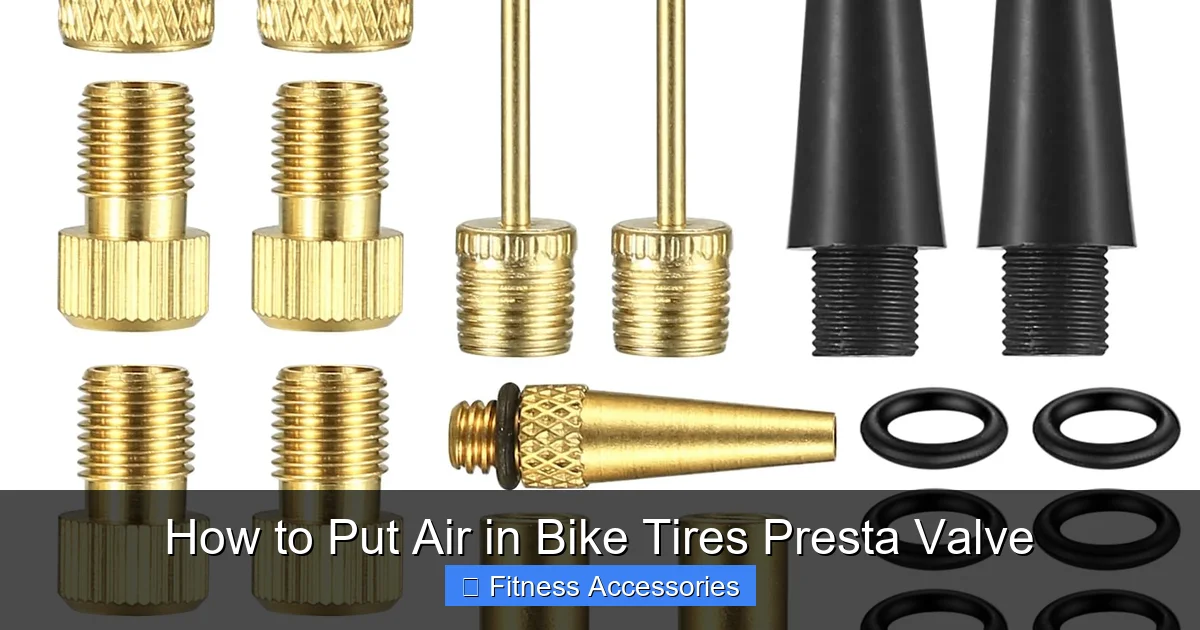
This is your non-negotiable. Modern bike pumps often come with a clever, universal head that can fit both Presta and Schrader valves. You’ll know it’s universal because it has two holes or a clever sliding/changing mechanism. If your pump has a fixed head, look at the opening. A Presta head is a small, round hole designed to fit over the narrow 6mm stem. A Schrader head is a larger, circular hole designed to fit over the wider 8mm stem. Many floor pumps have a dual-head design on a pivot—simply flip it to the correct side. Always ensure the pump head is specifically rated for Presta valves. Using the wrong head won’t seal, and you’ll be pumping into thin air (literally).
The Adapter: Your Bridge to the Gas Station
Ever been stranded with a flat and only a gas station air compressor in sight? That compressor is designed for Schrader valves. Fear not. For a few dollars, you can buy a tiny brass adapter—a Presta-to-Schrader converter. You screw this onto your Presta valve stem first, transforming it into a Schrader-compatible fitting. Then you can use the public compressor. It’s a cyclist’s secret weapon for emergency roadside repairs. Keep one in your saddlebag or repair kit.
The Helper: A Pressure Gauge
While many pumps have a built-in gauge, they can be inaccurate, especially on cheaper models. For true precision—especially if you ride a road bike—a separate, high-quality floor pump with an accurate dial gauge or a separate handheld gauge is a worthy investment. Proper pressure is not about “feeling firm”; it’s about hitting the specific PSI (pounds per square inch) or BAR range printed on your tire’s sidewall. A good gauge removes the guesswork.
The Step-by-Step: How to Inflate a Presta Valve (The 4-Step Dance)
Alright, gear is ready. Tire is mounted on the rim. Let’s dance. The process is a simple, repeatable sequence of four actions. Get these down, and you’ll never fumble again.
Visual guide about How to Put Air in Bike Tires Presta Valve
Image source: cdn2.shopify.com
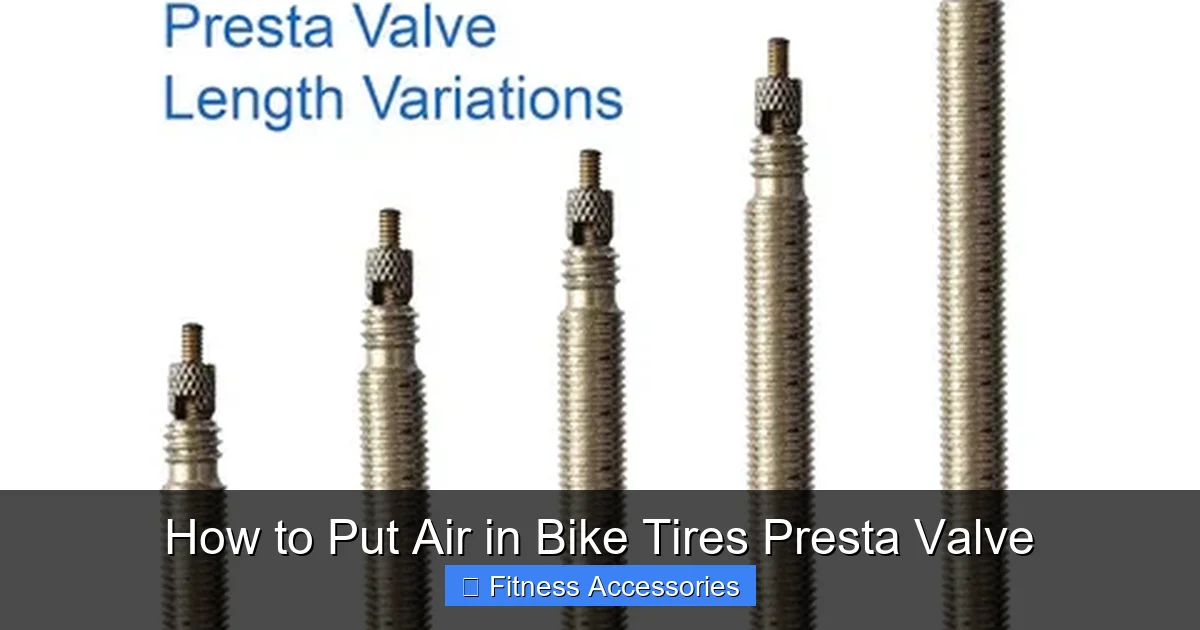
Step 1: Unlock the Nut
Loosen the tiny knurled (ridged) nut at the top of the valve stem. Turn it counter-clockwise (lefty-loosey) with your fingers. You only need to unscrew it a few turns—usually 2 or 3 is plenty. You’ll feel it become free. This nut does not hold air in; it simply protects the delicate valve core from being accidentally depressed and damaged when the tire is not being inflated. Leaving it loose during pumping is a common mistake that can cause a slow leak later. Always loosen it before you press the pump on.
Step 2: “Burp” the Valve and Prime the Pump
This is the most critical step for a good seal. Press down firmly on the top of the valve stem (the little pin in the center) with your finger or thumb. You should hear a quick pssssht of air escaping. What you’re doing is forcing the valve core open briefly to release any residual sealant or debris and to equalize pressure. Now, before you even touch the pump, take a moment to check your pump head. If it has a lever lock, make sure it’s in the “open” position. If it’s a threaded head, unscrew the collar slightly.
Step 3: Attach the Pump Head Securely
Place the pump head squarely over the Presta valve stem. It should slide on easily. For a lever-lock head, push the lever down while pressing the head onto the valve. The lever will snap into the locked position. You should feel a firm, solid connection. For a threaded head, screw the collar down hand-tight until it’s snug against the valve stem. The golden rule: The pump head must be perfectly aligned and pressed straight onto the valve. Angling it is the #1 cause of leaks. You’ll know you have a good seal because the loud hissing sound will stop instantly.
Step 4: Pump, Then Lock It Down
Now, pump! Use strong, full strokes if using a floor pump. Watch your gauge. Stop when you reach the recommended pressure on your tire’s sidewall (e.g., “80 PSI MAX”). Do not over-inflate. Once at pressure, gently pull the pump head off the valve. For a lever-lock head, lift the lever first, then pull the head straight off. You might hear a tiny puff of air—that’s normal. Immediately screw the knurled locking nut back down finger-tight. This protects the valve. You’re done! Give the tire a quick squeeze to confirm firmness. That’s the entire how to put air in bike tires Presta valve process.
Finding Your Sweet Spot: Understanding Tire Pressure
Inflating to the right pressure is just as important as the act of inflation itself. Too little pressure, and you risk “snake bite” pinch flats, poor handling, and excessive rolling resistance. Too much pressure, and you get a harsh, uncomfortable ride, reduced traction, and a higher risk of blowouts off curbs or rough terrain.
Visual guide about How to Put Air in Bike Tires Presta Valve
Image source: diymountainbike.com
Decoding the Sidewall: Your Pressure Bible
Look closely at the side of your tire. You’ll see a range, like “85-125 PSI” or “6.0-8.5 BAR.” The lower number is the minimum for your weight and riding style; the higher is the maximum the tire can safely hold. For road bikes, a heavier rider or smoother pavement might call for the higher end. For mountain bikes, lower pressures (e.g., 25-35 PSI) increase traction and comfort on rough trails. Your weight, the terrain, and personal preference all play a role. Start in the middle of the range and adjust from there.
The “Feel Test” vs. The Gauge
Experienced riders often develop a “feel” for proper inflation. Squeeze the tire sideways with your thumb. It should feel firm, with a little bit of give—like a ripe avocado, not a rock or a sponge. However, this is subjective. For Presta valves, especially on high-pressure road tires, a gauge is your best friend. A difference of 5 PSI can significantly change the ride quality. Invest in a good pump with a reliable gauge, or a separate quality gauge, and trust the numbers.
Factors That Change Your Needs
Pressure isn’t static. Consider these variables:
- Rider Weight: Heavier riders need higher pressure to prevent rim damage and pinch flats.
- Terrain: Rough, rocky trails benefit from slightly lower pressure for grip. Smooth pavement rewards higher pressure for speed.
- Temperature: Air expands when warm. A tire inflated in a warm garage will read higher pressure outside in the cold. Check pressure when tires are cool.
- Tubeless Tires: If you have a tubeless setup (common with Presta valves), you typically run slightly lower pressures than with tubes, as there’s no tube to pinch.
Troubleshooting: Why Your Presta Valve Won’t Hold Air
You followed all the steps, but the tire is going flat overnight. Don’t panic. Most Presta valve issues are simple fixes.
The Dreaded Slow Leak
If the tire loses pressure over hours or days, the culprit is usually one of three things:
- The Locking Nut: Did you forget to tighten it after inflating? A loose nut can very slowly leak air. Finger-tighten it.
- A Bad Seal at the Pump Head: If you didn’t get a perfect seal while pumping, a tiny defect in the valve stem can cause a slow leak. Re-inflate, ensuring the pump head is perfectly aligned and locked.
- A Faulty Valve Core: The tiny internal mechanism can get dirty or damaged. The good news: Presta valve cores are replaceable! You can buy a cheap pack of spares and use a small wrench (or needle-nose pliers) to unscrew and replace the core. This is a pro-level fix that saves a tire.
The Hissing Sound During Pumping
If you attach the pump and hear a constant, loud hiss, you have a poor seal. Stop pumping immediately. Remove the pump head. Check: Is the locking nut fully loosened? Is the pump head for Presta (not Schrader)? Is the head seated straight and pushed all the way on? Is the lever fully engaged? Re-seat it correctly. If the hiss persists, the valve stem might be slightly bent or the pump head seal might be worn out.
The Valve Core Won’t Move (Stuck)
Sometimes, the valve pin (the little button you press to “burp”) can get stuck due to corrosion or old sealant. Do not force it. Try gently wiggling it side-to-side with a fingernail or a plastic tool. A tiny drop of penetrating oil (like WD-40) on the stem can help, but be sure to wipe it off before inflating, as it can damage rubber. If it’s completely stuck, you may need to replace the core.
Maintenance and Best Practices for Longevity
Your Presta valve is a reliable piece of engineering. With a little care, it will last the life of your tire and tube.
Regular Inspection is Key
Every time you check your pressure (which should be weekly), give the valve a quick visual. Look for:
- Corrosion or dirt around the base of the stem.
- Bends or damage to the thin stem.
- A missing or cross-threaded locking nut.
Wipe away any dirt with a rag. A clean valve is a happy valve.
Storage and Transport
When transporting a bike or a wheel, it’s a good idea to screw the locking nut all the way down to protect the valve stem from impacts. For long-term storage (like winter), deflate the tires slightly to relieve stress on the tire beads and valve stems.
When to Replace a Valve or Tube
If you’ve tried replacing the core and the valve still leaks, the problem may be the base where the core screws into the tube. At that point, replacing the entire inner tube is the most economical solution. Tubes are cheap; your time and a safe ride are not. Always carry a spare tube and a mini-pump or CO2 inflator on rides. Knowing how to put air in bike tires Presta valve is useless if you can’t fix a puncture!
Conclusion: Confidence in Your Hands
There you have it. The enigmatic Presta valve is no longer a source of roadside anxiety. It’s a simple, elegant system that, with a little practice, becomes second nature. Remember the core sequence: Loosen, Burp, Attach, Pump, Tighten. Arm yourself with the right pump or adapter, respect the pressure numbers on your tire, and perform quick weekly checks. Mastering this fundamental skill connects you more deeply to your bicycle. It’s not just about keeping rubber on the road; it’s about understanding your machine, ensuring your safety, and unlocking a smoother, faster, more enjoyable ride every single time. So go ahead, grab your pump, and give those tires some air. You’ve got this.
Frequently Asked Questions
Can I use a regular car tire pump on a Presta valve?
Not directly. A standard gas station pump is designed for Schrader valves. You need a small, inexpensive Presta-to-Schrader adapter that screws onto your Presta valve stem first, converting it to fit the Schrader head.
What happens if I over-inflate my Presta valve tire?
Over-inflation is dangerous. It can cause the tire to blow off the rim, especially under load or heat, leading to a serious crash. It also results in a harsh, uncomfortable ride and reduced traction. Always stay within the PSI range printed on your tire’s sidewall.
My Presta valve leaks air even when the nut is tight. What’s wrong?
The most likely culprit is a faulty or dirty valve core. Try removing and reinstalling the core (use small pliers or a core wrench). If that doesn’t work, replace the core—they are cheap and easy to swap. If the leak is from the base of the valve where it meets the tube, the tube itself is faulty and needs replacing.
Do I need to loosen the locking nut every time I add air?
Yes, always loosen the knurled nut a few turns before pressing the pump on. If you try to attach the pump with the nut fully tightened, you risk damaging the valve stem or preventing a proper seal, causing a leak.
Why does my pump head keep falling off my Presta valve?
This means you don’t have a proper seal. Ensure you are using a pump head specifically for Presta valves. Press it on straight and firmly, and if it has a lever, make sure the lever is fully engaged and locked down. A worn-out seal inside the pump head may also need replacement.
Is it normal for a little air to escape when I remove the pump?
Yes, a small puff of air is normal as the pump head breaks the seal. The valve core will snap shut immediately. If a large amount of air hisses out continuously after removal, the valve core may be stuck open or damaged, and you should inspect or replace it.