How Much Air in a 29 Inch Bike Tire
Finding the correct air pressure for your 29-inch bike tire isn’t a one-number-fits-all answer. It depends on your specific tire width, your weight, and the terrain you ride. The sidewall of your tire has a maximum pressure rating, but your ideal, or “golden,” pressure is usually much lower. Proper inflation is the single most effective and free tune-up for your bike, drastically improving grip, rolling speed, and comfort while preventing flats and rim damage. Always use a reliable gauge and experiment within safe ranges to find what works best for you.
You just got your shiny new 29-inch mountain bike, or maybe you’ve had it for a while and are finally getting serious about your setup. You look at the tire, see numbers like “29 x 2.2” and “Max PSI 65,” and think, “Okay, I’ll just fill it to 65 PSI and be done.” If that’s your plan, I’m here to tell you that you’re likely leaving a huge amount of performance, comfort, and safety on the table. The question “How much air in a 29-inch bike tire?” is one of the most common and important ones in cycling, and the answer is beautifully nuanced. It’s not about a magic number; it’s about understanding a system. Think of your tire pressure as the fundamental tuning knob for your entire bike’s interaction with the ground. Get it right, and you’ll float over rocks, stick to corners, and ride farther with less fatigue. Get it wrong, and you’ll be fighting your bike, wasting energy, and risking preventable flats or damage. This guide will walk you through everything you need to know, from decoding those sidewall markings to finding your personal, perfect pressure for any trail or path.
Key Takeaways
- There is no single “correct” PSI for all 29-inch tires. The ideal pressure is a personal calculation based on tire width, rider weight, and terrain.
- The sidewall printing shows the MAXIMUM pressure, not the recommended. Your actual riding pressure should be significantly lower for safety, traction, and comfort.
- Wider tires (2.3″+) run at much lower pressures (often 20-30 PSI) than narrower tires (2.0″-) which can run 35-50+ PSI.
- Heavier riders need higher pressures; lighter riders can run lower pressures. Adjust in 2-3 PSI increments to find your sweet spot.
- Lower pressure increases traction and comfort on rough terrain but risks rim strikes and pinch flats. Higher pressure rolls faster on smooth pavement but feels harsh and bounces on roots/rocks.
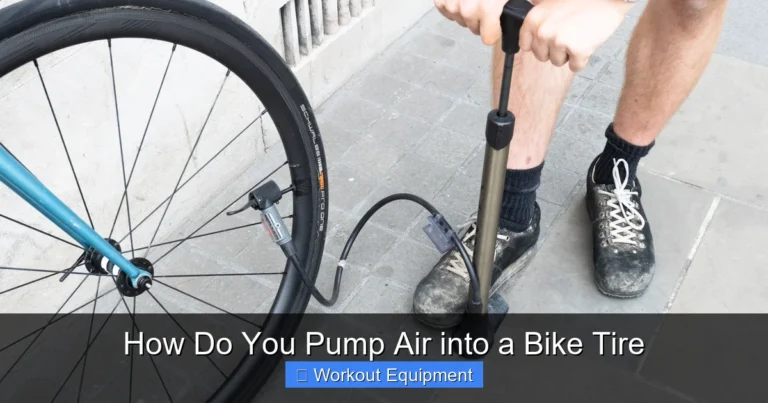
- Always check pressure before every ride with a proper gauge. Floor pumps with built-in gauges are the most accurate home tool.
- Temperature and altitude affect pressure. Tires lose about 1 PSI for every 10°F drop in temperature and gain pressure with altitude loss.
📑 Table of Contents
- Understanding 29-Inch Bike Tires and Sizing: It’s Not Just 29
- Decoding the Pressure Rating: PSI vs. BAR and Sidewall Markings
- The Golden Range: Recommended Pressures for Common 29″ Tires
- Factors That Influence Your Ideal Tire Pressure
- How to Check and Adjust Your 29-Inch Tire Pressure Correctly
- The Real-World Impact: Performance, Safety, and Tire Longevity
- Practical Tips and Advanced Considerations
- Conclusion: Your Pressure, Your Ride
Understanding 29-Inch Bike Tires and Sizing: It’s Not Just 29
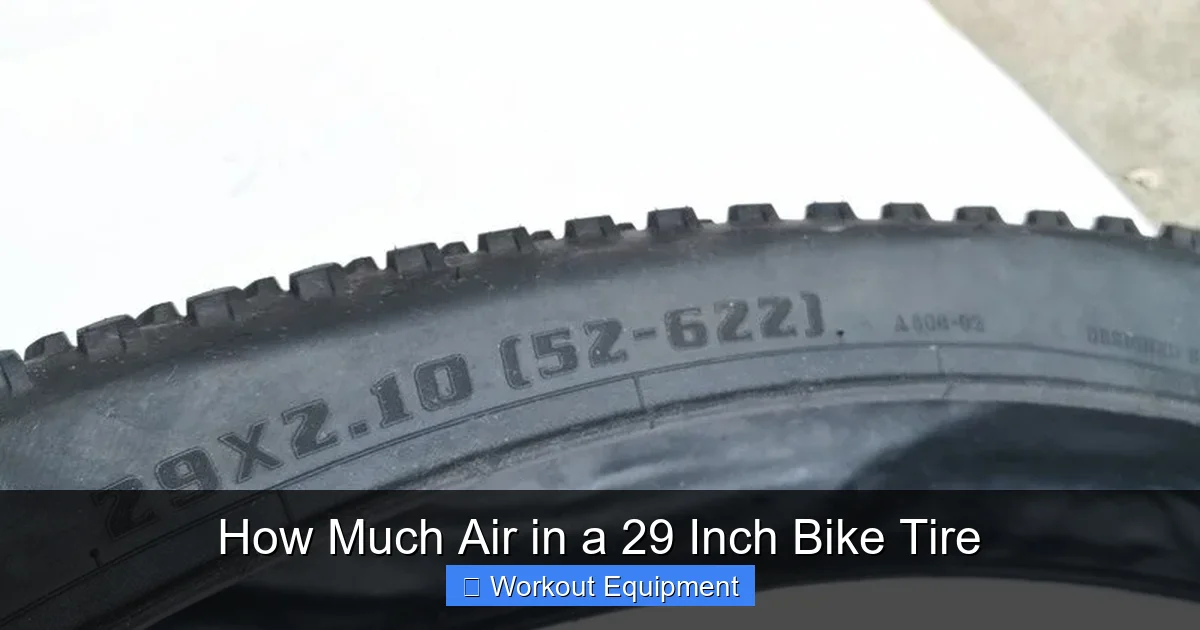
Before we even talk about air, we need to clear up a common point of confusion. When we say “29-inch bike tire,” we’re usually referring to the diameter of the wheel/rim, which is 622mm (the ISO/ETRTO standard). But the critical number for pressure is the width. A “29 x 2.0” tire and a “29 x 2.6” tire are worlds apart in their pressure needs, even though they both fit on the same 29-inch rim. This is why you’ll often hear terms like “29er” for the wheel size and “2.2” or “2.4” for the tire width. The wider the tire, the more volume of air it can hold at a lower pressure. A narrow 29 x 1.9 tire might need 50+ PSI to feel responsive, while a plus-sized 29 x 2.8 tire might be perfectly happy at 18 PSI. Your first step is to look at the sidewall of your tire and note both numbers: the diameter (29″) and, more importantly, the width (e.g., 2.2, 2.4, 2.6).
The ISO/ETRTO Number is Your Best Friend
If you want to be absolutely precise, look for a smaller set of numbers on your tire sidewall, usually formatted as “62-622” or “58-622.” The first number is the tire width in millimeters, and the second is the bead seat diameter (the rim diameter) in millimeters. For a standard 29-inch wheel, the second number will always be 622. The first number (e.g., 62) is the *exact* width. A tire marked 62-622 is 62mm wide, which is 2.44 inches. This metric measurement is the most accurate way to shop for tires and understand your exact model. A 29 x 2.2″ tire is roughly 56-58mm, a 2.4″ is about 60-62mm, and a 2.6″ is about 66-68mm. This width is the primary variable in your pressure equation.
Decoding the Pressure Rating: PSI vs. BAR and Sidewall Markings
Now, find the pressure recommendation on your tire. It will say something like “INFLATE 25-65 PSI” or “MAX PRESSURE 4.5 BAR.” Let’s break it down.
Visual guide about How Much Air in a 29 Inch Bike Tire
Image source: 333fab.com
PSI vs. BAR: What’s the Difference?
PSI (Pounds per Square Inch) and BAR (a metric unit of pressure) are simply two different scales for measuring the same thing. They are not interchangeable numbers. 1 BAR is approximately 14.5 PSI. A common max pressure of 65 PSI equals about 4.5 BAR. Most digital gauges and many floor pumps let you switch between the two. In the US, PSI is king. In Europe and much of the world, BAR is more common. Your pump gauge will tell you which it’s using. Don’t try to convert mentally; just use the same unit your gauge displays. If your tire says “MAX 4.5 BAR,” and your gauge reads PSI, you know 4.5 BAR x 14.5 = ~65 PSI is your absolute ceiling.
The “MAX PSI” is a Ceiling, Not a Target
This is the most critical concept in this entire article. The number printed on your tire sidewall—whether it says “MAX 65 PSI” or “INFLATE 30-65 PSI”—is the absolute maximum pressure the tire casing and bead are engineered to safely hold. It is a safety limit, not a recommendation. Running your tire at this maximum pressure is almost always a bad idea for off-road riding. It makes the tire rock-hard, minimizes the contact patch, kills traction, creates a harsh, jarring ride, and increases the risk of a pinch flat (where the tube is pinched between the rim and a rock) because the tire can’t deform to absorb impacts. Think of the max PSI as the redline on your car’s tachometer—you might briefly touch it, but you should never operate there.
The Golden Range: Recommended Pressures for Common 29″ Tires
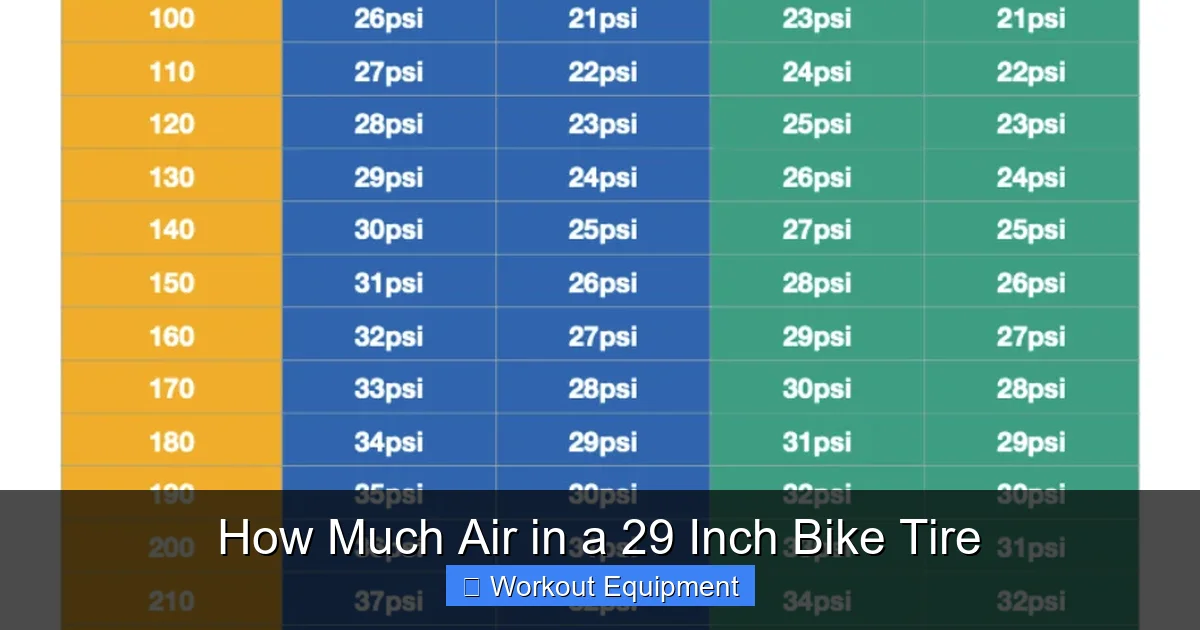
So, if max is too high, where should you start? We can establish some general “golden range” guidelines based on tire width and typical rider weight (say, 150-180 lbs or 68-82 kg). Remember, these are starting points for experimentation.
Visual guide about How Much Air in a 29 Inch Bike Tire
Image source: images.nexusapp.co
For Narrow Trail Tires (29 x 1.9″ – 29 x 2.2″)
These are often found on cross-country bikes or lighter hardtails. They have less air volume.
- Typical Range: 30 – 45 PSI (2.1 – 3.1 BAR)
- Starting Point: For a 160 lb rider on mixed dirt/gravel, start at 32-35 PSI front, 35-38 PSI rear (rear gets 2-3 PSI more due to more weight).
- Why: They need enough pressure to prevent rim strikes on rocks and to roll efficiently on harderpacked trails. Going below 25 PSI on a narrow tire often results in frequent rim taps and a squirmy, unstable feel.
For Standard Trail/All-Mountain Tires (29 x 2.3″ – 29 x 2.5″)
This is the most common width for modern trail and enduro bikes. They offer a great balance of volume and weight.
- Typical Range: 22 – 35 PSI (1.5 – 2.4 BAR)
- Starting Point: For a 160 lb rider, try 24-26 PSI front, 26-28 PSI rear on typical singletrack.
- Why: The extra volume allows for lower pressures that dramatically increase traction and comfort without a high risk of rim damage. This is the sweet spot for most riders.
For Wide & Plus Tires (29 x 2.6″ – 29 x 3.0″)
These “plus” or “fatter” tires are designed to run at very low pressures, mimicking a suspension effect.
- Typical Range: 15 – 25 PSI (1.0 – 1.7 BAR)
- Starting Point: For a 160 lb rider, 18-20 PSI front, 20-22 PSI rear can be a revelation.
- Why: The huge air volume means the tire acts like a big, soft spring. Extremely low pressures provide phenomenal grip on loose or technical terrain but require very smooth lines to avoid rim strikes. They are not for aggressive rock gardens at 15 PSI unless you’re very light and skilled.
Important Note on Tubeless: If you are running tubeless (which is highly recommended for 29ers), you can safely run 2-3 PSI lower than you could with a tube. The elimination of pinch flats and the slight sealant benefit allows you to exploit the traction benefits of lower pressure more aggressively. The ranges above assume tubeless setup. With tubes, add 3-5 PSI as a safety buffer against pinch flats.
Factors That Influence Your Ideal Tire Pressure
The ranges above are just maps. You need to navigate your own terrain. Here are the key variables that should adjust your pressure up or down.
Visual guide about How Much Air in a 29 Inch Bike Tire
Image source: measuringstuff.com
1. Rider Weight and Weight Distribution
This is the single biggest factor. The pressure in your tire must support the weight pressing down on it. A 120 lb rider can run pressures 5-10 PSI lower than a 220 lb rider on the same tire. Also, consider weight distribution. You typically have about 40-45% of your weight on the front wheel and 55-60% on the rear wheel. That’s why your rear tire is almost always inflated 2-5 PSI higher than your front. If you’re a very aggressive rider who shifts weight forward on descents, you might even run the front 1-2 PSI higher than the rear, but the standard rear-higher rule works for 90% of riders.
2. Terrain and Trail Conditions
Smooth, hardpacked, or pavement: You can run higher pressures (toward the upper end of your range). The bike will roll faster and feel more efficient because the tire isn’t deforming as much. There’s less risk of rim strikes on flat, hard surfaces.
Loose, sandy, or rooty terrain: Drop your pressure. Lower pressure allows the tire to conform to irregularities, increasing the contact patch and “squirming” less. This gives you grip in loose corners and traction on off-camber roots. Aim for the lower-mid part of your range.
Rocky, technical, or very rough terrain: This is the trickiest balance. You want low pressure for grip, but you also need to avoid constant rim strikes on sharp rocks. Here, you might find a compromise—not the absolute lowest, but 3-5 PSI higher than your “loose soil” pressure. Some riders carry a small pump or CO2 to adjust pressure at the top of a long descent if they know it’s brutally rocky.
3. Temperature and Altitude
Air pressure changes with temperature. For every 10°F (5.5°C) drop in temperature, your tire will lose about 1-2% of its pressure (roughly 1 PSI on a 30 PSI tire). This means a tire set at 25 PSI in a warm garage could be at 22 PSI on a cold morning trailhead. Always check and adjust when the tire is cold (before you ride). Riding heats the tire and air inside, increasing pressure by a few PSI—this is normal and not a reason to let air out mid-ride. Altitude also plays a role: as you descend, air pressure increases slightly; as you climb, it decreases. The effect is minor for most rides but noticeable on big mountain ascents/descents.
How to Check and Adjust Your 29-Inch Tire Pressure Correctly
Knowing the numbers is useless without the right tools and technique.
The Essential Tool: A Good Gauge
Forget the little pencil-style gauges that come with cheap pumps. They are notoriously inaccurate. Invest in a good quality floor pump with a built-in, accurate gauge (brands like Lezyne, Topeak, Specialized, and Blackburn make reliable ones). Even better, buy a separate, high-accuracy digital gauge (like from Schraeder or Presta-specific brands) to periodically check your pump’s accuracy. Digital gauges are more precise and easier to read. Consistency is key—use the same gauge every time so you learn what “28 PSI” feels and looks like on your specific tires.
The Proper Technique: The “Bite” Test and Visual Check
1. Remove the valve cap. Press the pump head or gauge firmly onto the valve stem (Presta valves require unscrewing the small tip first). You should hear a slight hiss of air if it’s sealed properly.
2. Check the current pressure. Note the reading.
3. Adjust slowly. Add or release air in small increments (2-3 PSI at a time). After each adjustment, check the pressure again.
4. The “Squeeze” Test (a rough guide): After inflating, try to squeeze the tire sidewall with your thumb and forefinger. At the correct pressure, it should have a slight give, but you shouldn’t be able to easily pinch the casing against the rim. If it’s rock-hard, it’s overinflated. If you can pinch the sidewall until the inner tube/rim tape is visible, it’s likely underinflated. This is just a gross check—always trust your gauge.
5. Visual Check: Look at the tire from the side. The contact patch (the flat part touching the ground) should be slightly flattened but not excessively so. A wildly bulging contact patch on a wide tire at low pressure is normal. On a narrow tire, a huge, flat contact patch means it’s underinflated.
Finding Your Sweet Spot: The Experimentation Protocol
Start with the “golden range” suggestion for your tire width and your weight. For your first ride, set your front and rear pressures (e.g., Front: 25 PSI, Rear: 27 PSI). Ride a familiar trail with a mix of corners, roots, and small bumps.
- Did you feel harsh? If every small rock and root jarred your hands and felt slow, try dropping pressure by 2 PSI front and rear.
- Did you get rim strikes? If you heard/feelt a loud “clunk” on rocks or felt a sudden loss of traction, your pressure is too low. Raise it by 2-3 PSI.
- Did you feel squishy or vague in corners? The tire is folding under lateral load. Raise pressure by 1-2 PSI.
- Did you get a pinch flat? You were definitely too low. Raise pressure by at least 5 PSI, especially on the rear.
Make one change at a time and ride the same section again. Keep a small notebook or notes app with your final, proven settings for different tire widths and conditions. This is your personal pressure bible.
The Real-World Impact: Performance, Safety, and Tire Longevity
Why does all this effort matter? Because pressure is the direct link between your bike and the earth. It affects everything.
Traction and Control
This is the #1 reason to get pressure right. Lower pressure increases the size and conformity of the tire’s contact patch. More rubber is in touch with the ground at any given moment, which means more grip. This is most noticeable in loose corners (the tire holds a line instead of sliding out) and on wet roots/rocks (the tire molds to the surface instead of hydroplaning). The correct pressure also allows the tire to act as a miniature suspension, absorbing small bumps and maintaining contact, which is crucial for braking and steering traction. Overinflation causes the tire to bounce and skip over irregularities, breaking contact and reducing control.
Rolling Resistance and Speed
Contrary to popular belief, lower pressure does not always mean slower rolling. On rough, natural terrain, a slightly lower pressure allows the tire to deform around bumps instead of bouncing over them. This means less energy is lost to the bike and rider being launched into the air. The tire maintains forward momentum better. On perfectly smooth pavement or hardpacked dirt, a higher pressure *does* reduce rolling resistance because the tire deforms less. This is why road bikes run high pressures. For the mixed conditions of most mountain biking, the traction benefit of a slightly lower pressure almost always outweighs any minuscule rolling resistance penalty on the smooth sections. You’ll actually be faster overall because you can carry more speed through corners and technical sections without losing traction.
Comfort and Fatigue
A bike with properly inflated tires is a comfortable bike. Lower pressures absorb high-frequency, small-scale vibrations—the kind that buzz up your hands and into your shoulders and back over a two-hour ride. This reduces muscle fatigue and joint stress, allowing you to ride longer and feel better the next day. An overinflated tire transmits every single rock and root directly to your skeleton. It’s not just about comfort; it’s about endurance.
Preventing Flats and Damage
Pinch Flats (Snake Bites): These occur when the tire compresses so hard against a rock or edge that it pinches the inner tube against the rim, slicing it. Underinflation is the primary cause. Correct pressure gives the tire enough volume to compress without the bead hitting the rim.
Rim Damage: Hitting a rock hard enough with an underinflated tire can bend or crack your expensive aluminum or carbon rim. The tire is your first line of defense; if it’s too soft, the impact goes straight to the rim.
Tire Casing Damage: Consistently running at or above the max PSI stresses the tire’s fabric casing and can lead to premature casing failures or sidewall splits. It also increases the chance of a blow-off the rim.
Tread Wear: Incorrect pressure can cause uneven wear. Overinflation often wears the center of the tread prematurely. Severe underinflation can cause the sidewall knobs to wear down quickly as the tire flexes excessively.
Practical Tips and Advanced Considerations
Armed with the theory, here are some actionable pro-tips.
Always Use a Pump with a Gauge. No Exceptions.
“By feel” or “using the gas station air hose” is a recipe for disaster. Those public gauges are often wildly inaccurate. Your own, calibrated floor pump is your single most important tire tool.
Check Pressure Cold, Before Every Ride
Make it a ritual. Tires naturally lose a few PSI per week through the rubber and valve. A tire that was perfect last weekend could be 3-5 PSI low today. Riding on low pressure is one of the most common causes of preventable flats and rim damage. A 30-second check saves hours of frustration.
Adjust Front vs. Rear Separately
Don’t just set both tires to the same number. Remember the weight distribution. Start with the rear 2-4 PSI higher than the front. If you’re a very aggressive descender who brakes hard and shifts weight forward, you might experiment with equalizing them or even going 1 PSI higher in the front for better steering precision on steep, technical downs.
Tubeless Changes the Game
If you’re not tubeless, consider converting. The ability to run lower pressures without fear of pinch flats is a massive performance upgrade. The sealant also automatically seals small punctures from thorns and goatheads. For a 29-inch tire, the benefits of tubeless are arguably greater than for any other wheel size due to the larger volume and lower operating pressures.
Don’t Be Afraid to Experiment (Safely)
The “perfect” pressure is the one that works for *you*, on *your* bike, in *your* local trails. The guidelines here are a starting point. If you weigh 250 lbs and ride very rocky trails, you might find your 2.4″ tire needs 35 PSI to avoid rim strikes. That’s fine! Conversely, a 110 lb rider on smooth flow trails might run a 2.6″ tire at 16 PSI. Find your zone. Just never exceed the tire’s max PSI, and always be mindful of rim strike risks as you go lower.
Conclusion: Your Pressure, Your Ride
So, how much air goes in a 29-inch bike tire? The definitive, final answer is: it depends. It depends on your tire’s width, your body weight, the trail under your wheels, and your personal preference for feel. The sidewall max pressure is a hard limit, not a suggestion. Your journey to the perfect pressure starts by identifying your tire’s exact width, using a reliable gauge, and beginning within the general ranges provided for your tire category. From there, it’s a cycle of small adjustments, riding, and listening to what your bike is telling you. Did it feel fast and grippy, or sluggish and bouncy? Did you hear the tell-tale clunk of a rim strike? Use that feedback to fine-tune. Taking control of your tire pressure is the single most impactful and cost-free upgrade you can make to your bike. It transforms the ride from a generic experience into one perfectly tuned for you. So grab your pump, check those pressures, and get out there to find your golden number. Your trails—and your sore muscles—will thank you.
Frequently Asked Questions
Can I use a car tire inflator or gas station air hose for my bike tires?
Technically, you can if it has a Presta valve adapter, but it’s not recommended. Gas station gauges are notoriously inaccurate, and the high-flow air can inflate your tire too quickly, leading to overinflation before you can react. It’s also easy to damage a Presta valve. A manual floor pump with a good gauge is always the safer, more controlled option.
What happens if I overinflate my 29-inch mountain bike tire?
Overinflation makes your tire rock-hard, which severely reduces traction as the contact patch shrinks. It creates a harsh, vibrating ride that increases fatigue. It also makes the tire more prone to blow off the rim in a severe impact and increases the risk of a casing failure. You’ll feel every small bump and likely be slower on technical terrain.
What’s the biggest risk of running my 29er tires with too little air?
The primary risks are pinch flats (where the tube is pinched between the rim and a rock) and rim strikes (hitting a rock so hard you dent or crack your rim). Underinflation also causes the tire to feel unstable and “squirmy” in corners and can lead to excessive sidewall wear. With tubeless, pinch flats are eliminated, but rim strikes remain a serious concern.
How often should I check my bike tire pressure?
You should check the pressure before every single ride. Tires naturally lose air over time—typically 1-5 PSI per week depending on the tire and conditions. A tire that was perfect last weekend could be dangerously low today. A quick 30-second check with your gauge is the best habit a cyclist can form.
My tire says “Max 65 PSI.” Can I safely run 65 PSI on smooth pavement?
While running at the maximum is physically possible, it’s still not ideal. Even on pavement, you’ll sacrifice comfort and potentially traction on imperfect surfaces. A better approach for pavement or very smooth bike paths is to run 5-10 PSI below the max. For a max 65 PSI tire, 55-60 PSI would be a much more efficient and comfortable pavement pressure while still being safe.
Does my riding style affect what pressure I should use?
Absolutely. An aggressive rider who lands jumps, plows through rock gardens, and brakes hard on descents puts far more dynamic force on their tires than a smooth, casual rider. The aggressive rider will typically need to run 2-4 PSI higher than a smooth rider of the same weight to prevent rim strikes and casing damage. If you’re new or cautious, start at the lower end of the recommended range and increase only if you experience rim taps or instability.