Turn your Total Gym into a versatile rowing machine for low‑impact, full‑body cardio. This guide shows you how to set up the equipment, master proper form, and create effective rowing workouts—all without buying a separate rower. Follow our simple steps and start rowing at home today.
Key Takeaways
- Easy conversion: With just a few adjustments, the Total Gym can mimic the motion of a rowing machine.
- Full‑body engagement: Rowing on the Total Gym works legs, core, back, and arms simultaneously.
- Low impact: The gliding sled provides a smooth, joint‑friendly workout ideal for all fitness levels.
- Customizable resistance: Use the Total Gym’s weight stack or add bands to match your strength.
- Progressive programming: Follow sample routines that build endurance, power, and calorie burn.
- Safety first: Proper setup, foot placement, and grip protect your spine and shoulders.
- Space‑saving solution: One piece of equipment replaces a dedicated rowing machine, freeing up room.
📑 Table of Contents
- Introduction: Why Row on a Total Gym?
- 1. Setting Up Your Total Gym for Rowing
- 2. Mastering the Rowing Technique on a Total Gym
- 3. Designing Rowing Workouts on the Total Gym
- 4. Adding Variety: Combining Rowing With Other Total Gym Moves
- 5. Safety, Maintenance, and Troubleshooting
- Conclusion: Rowing at Home Has Never Been Simpler
Introduction: Why Row on a Total Gym?
If you own a Total Gym, you already have a piece of equipment that can do far more than the typical strength‑training moves. One of the most underrated uses is turning it into a rowing machine. Rowing is famous for delivering a high‑calorie burn, strengthening the posterior chain, and improving cardiovascular health—all while being gentle on the joints.
But buying a separate rowing machine can be pricey, and not every home gym has the floor space. The Total Gym’s sliding sled, adjustable resistance, and ergonomic handles make it a perfect stand‑in for a rower. In this article we’ll walk you through the exact steps to set up, use, and program your Total Gym for rowing‑style workouts.
1. Setting Up Your Total Gym for Rowing
1.1 Choose the Right Model
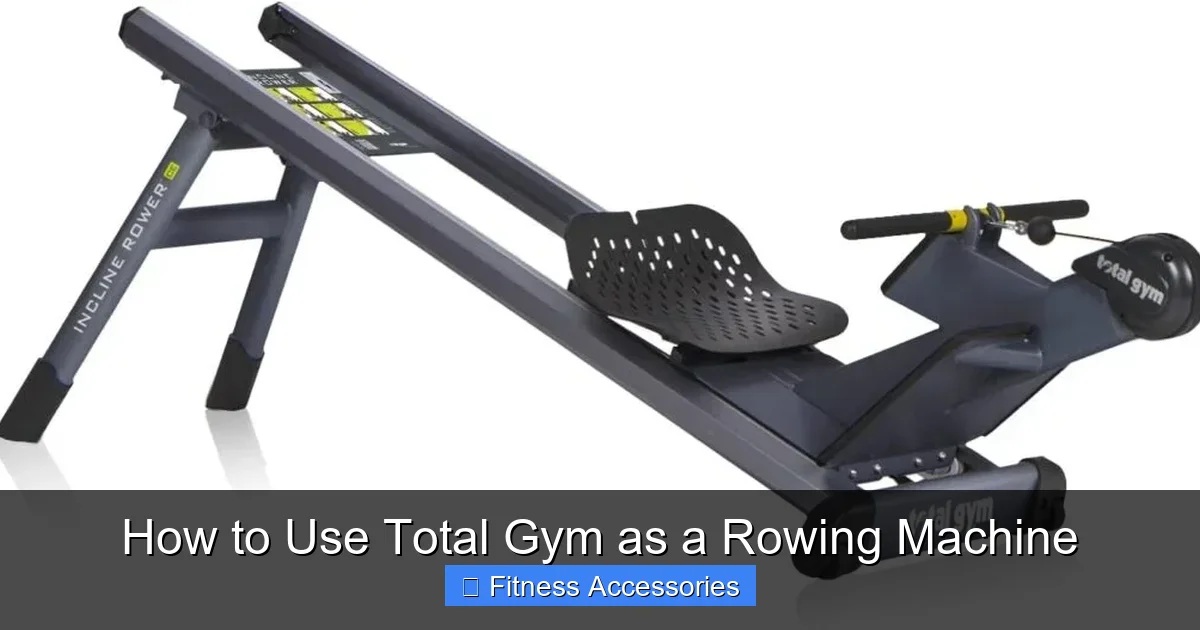
Most Total Gym models—such as the GTS, XLS, and Trainer—have a glide‑board and a resistance stack that can be adjusted in small increments. The key is a sled that moves smoothly on a low‑friction track. If your model uses a “pull‑up bar” only, you’ll need the glide board attachment (often sold separately).
Visual guide about How to Use Total Gym as a Rowing Machine
Image source: gymirons.com
1.2 Position the Glide Board
- Place the glide board on a flat, non‑slippery surface (carpet, rubber mat, or wooden floor).
- Ensure the board is centered so the sled can travel equally forward and backward.
- Lock the board’s safety strap if your model includes one.
1.3 Adjust the Resistance
Start with a low to moderate resistance (around 30–40 % of the stack) to get the feel of the rowing motion. You can increase weight in 10‑lb increments as you become comfortable. For a more intense interval, add a resistance band to the sled’s front handle; this creates a “peak” resistance similar to the “fly‑wheel” feel of a traditional rower.
1.4 Set Up Foot Placement
Slide the footplates forward until the straps are snug around the balls of your feet. Your knees should be slightly bent (about 20‑30°) when you’re at the “catch” position (the start of the stroke). This mirrors the rowing position where the shins are nearly vertical.
1.5 Grab the Handles Correctly
Most Total Gym kits include a set of “rowing handles” with a neutral grip (palms facing each other). If you only have the standard push‑up handles, hold them with a neutral grip as well. Keep your wrists straight and elbows close to the body throughout the movement.
2. Mastering the Rowing Technique on a Total Gym
2.1 The Four Phases of a Row
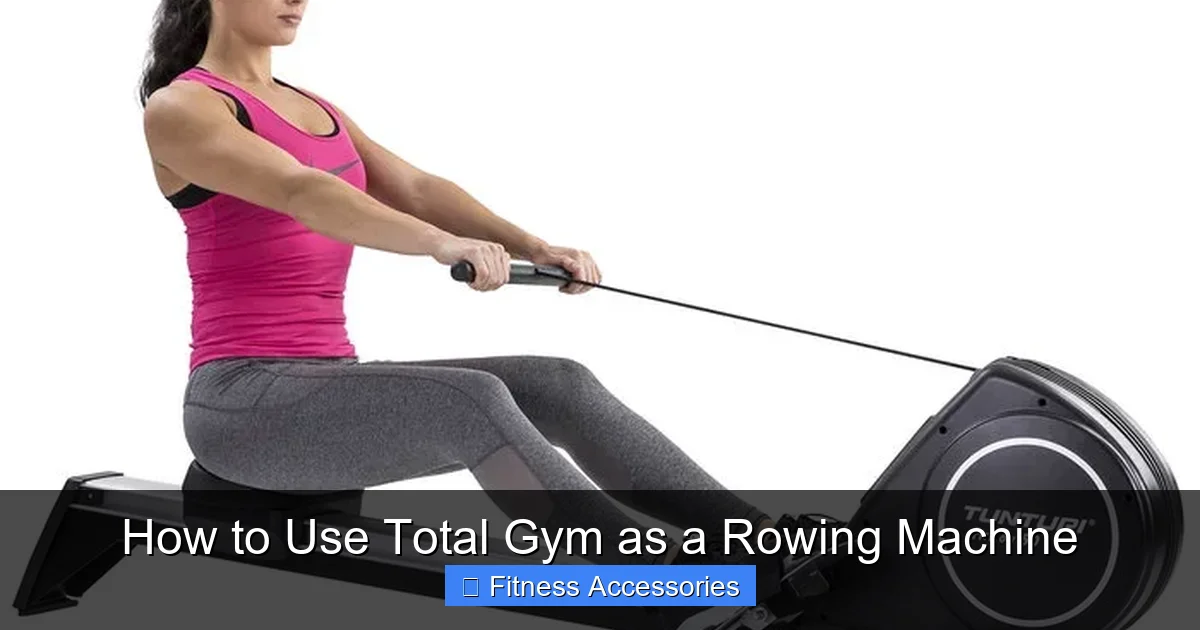
Think of rowing as four distinct phases: catch, drive, finish, and recovery. Practicing each phase separately helps you develop a smooth, efficient stroke.
Visual guide about How to Use Total Gym as a Rowing Machine
Image source: cdn.webshopapp.com
- Catch: Sit tall, hinge at the hips, extend your arms, and lean forward slightly. Your shins are vertical, and the sled is at the front of the glide board.
- Drive: Push through your heels, straighten your legs, then pull the handles toward your chest while leaning back a few inches. The power comes primarily from the legs.
- Finish: At the end of the drive, your legs are straight, torso slightly leaned back (≈10°), and elbows tucked beside your ribs. The handles should be close to your mid‑chest.
- Recovery: Extend your arms first, hinge forward from the hips, then bend the knees to slide the sled back to the catch.
2.2 Breathing Pattern
Inhale during the recovery (when you’re sliding forward) and exhale during the drive (when you’re pushing back). This rhythm stabilizes your core and improves oxygen flow.
2.3 Common Mistakes & Fixes
- Rounding the back: Keep a neutral spine by engaging the core before each drive.
- Using the arms too early: Focus on leg drive first; the arms should finish the pull.
- Over‑extending the hips: Stop the backward lean when your torso reaches a 10‑15° angle; too far back stresses the lower back.
- Foot slippage: Re‑adjust the foot straps each session to keep the heels grounded.
3. Designing Rowing Workouts on the Total Gym
3.1 Beginner Routine (15‑20 minutes)
Goal: Build technique, improve cardio base.
- Warm‑up: 5 minutes of light gliding (no resistance) – focus on smooth catch/recovery.
- Interval Set: 10 × 30‑second strokes at moderate resistance, 30‑second easy glide between each.
- Cool‑down: 3 minutes of very low resistance, slow pace, deep breathing.
3.2 Intermediate Routine (30 minutes)
Goal: Increase endurance and calorie burn.
- Warm‑up: 5 minutes, gradually add resistance each minute.
- Steady‑State Row: 12 minutes at 60 % of your max resistance, maintaining a consistent stroke rate (20‑22 strokes per minute).
- Power Intervals: 6 × 1‑minute high‑intensity rows (80‑90 % resistance) with 1‑minute recovery.
- Cool‑down: 5 minutes easy glide, stretch hamstrings, hips, and shoulders.
3.3 Advanced HIIT Row (20‑25 minutes)
Goal: Maximize calorie burn, develop explosive power.
- Warm‑up: 4 minutes, include 2 × 10‑second “explosive” drives (push hard, then glide).
- HIIT Set: 8 × 45‑second all‑out rows (use the highest resistance you can sustain) followed by 15‑second full recovery.
- Active Recovery: 4 minutes of moderate gliding, focusing on perfect form.
- Finish: 3 minutes slow rowing, then stretch.
3.4 Tracking Progress
Use a simple spreadsheet or a fitness app to log:
- Date and workout type.
- Resistance level (weight stack + band).
- Stroke count or time.
- RPE (Rate of Perceived Exertion) on a 1‑10 scale.
Seeing numbers improve week over week keeps motivation high.
4. Adding Variety: Combining Rowing With Other Total Gym Moves
4.1 Row‑to‑Push‑up Circuit
Perform 1‑minute rows, then immediately drop into 10 push‑ups on the glide board. Repeat 5 rounds for a total‑body blast.
4.2 Row‑and‑Pull‑Up Superset
After a 30‑second row, do 5 pull‑ups (or assisted pull‑ups) using the Total Gym’s overhead bar. This targets the back and biceps while keeping the heart rate up.
4.3 Row‑and‑Leg‑Press Combo
Use the leg‑press attachment (if available) for 12‑reps, then row for 45 seconds. Alternate for 4 cycles to build leg power and cardio simultaneously.
5. Safety, Maintenance, and Troubleshooting
5.1 Safety Checks Before Each Session
- Confirm the glide board is stable and not wobbling.
- Check that foot straps are tight and the sled moves freely.
- Make sure the resistance pins are fully engaged.
5.2 Joint‑Friendly Tips
If you feel knee or lower‑back discomfort, lower the resistance and focus on hip hinge mechanics. Adding a thin yoga mat under the board can reduce impact on hardwood floors.
5.3 Common Issues & Fixes
- Sled sticks mid‑stroke: Clean the rail with a dry cloth; dust can cause friction.
- Handles wobble: Tighten the handle bolts or replace worn bushings.
- Footplate slides forward: Re‑adjust the strap and ensure the plate sits flush against the board.
5.4 Maintenance Routine
Every month, wipe down the sled, rail, and footplates with a damp cloth. Lubricate the rail lightly with a silicone spray if the glide feels gritty. Store resistance bands away from direct sunlight to avoid degradation.
Conclusion: Rowing at Home Has Never Been Simpler
Transforming your Total Gym into a rowing machine is a cost‑effective, space‑saving way to enjoy one of the best full‑body cardio workouts available. By following the setup steps, mastering the four‑phase stroke, and using the sample workout plans, you can reap the cardiovascular and muscular benefits of rowing without ever buying a separate machine.
Remember, consistency beats intensity. Start with the beginner routine, focus on perfect form, and gradually increase resistance and duration. In a few weeks you’ll notice stronger legs, a tighter core, and a noticeable boost in stamina—all from the same piece of equipment you already own.
So grab your Total Gym, set the glide board, and let’s get rowing!
Frequently Asked Questions
Can I use any Total Gym model as a rowing machine?
Yes. Most models with a glide board and adjustable resistance (GTS, XLS, Trainer) can be set up for rowing. You may need the rowing‑handle attachment if it isn’t included.
How much resistance should I start with?
Begin with about 30‑40 % of the total weight stack. This allows you to focus on technique. Increase by 10‑lb increments as you become comfortable.
Is rowing on a Total Gym low impact?
Absolutely. The sliding sled provides a smooth glide, reducing joint stress compared to high‑impact cardio like running.
How many calories can I burn rowing on a Total Gym?
Burn rate varies by intensity and body weight, but a 30‑minute moderate session can expend 250‑350 calories for most adults.
Do I need a separate rowing strap?
No. Use the standard foot straps that come with the Total Gym. Just ensure they’re snug around the balls of your feet.
Can I combine rowing with other Total Gym exercises?
Yes. Pair rows with push‑ups, pull‑ups, or leg‑presses for a full‑body circuit that keeps your heart rate high and muscles engaged.