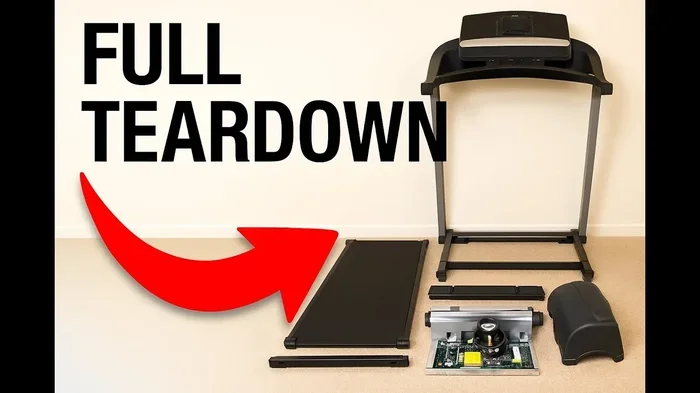
How to Replace Walking Belt on Horizon Treadmill

Replacing the walking belt on your Horizon treadmill is easier than you think. With the right tools and a little patience, you can swap out a worn belt yourself and save hundreds on repair costs. This guide walks you through every step, from spotting the signs of a worn belt to adjusting the tension on your new one. You will learn how to properly measure, install, and maintain your replacement belt for long-lasting performance.
Replacing the walking belt on your Horizon treadmill might feel intimidating at first. But honestly, it is one of the most satisfying DIY repairs you can do at home. Whether your belt is worn thin, slipping, or making strange noises, a fresh belt can make your treadmill feel brand new again. In this guide, we will walk you through how to replace walking belt on Horizon treadmill in clear, simple steps. You do not need to be a mechanic or a tech expert to get this done.
Most people put off belt replacement because they think it will be complicated or expensive. The truth is, buying a new belt and doing the work yourself costs a fraction of what a service call would charge. Plus, you learn something valuable about your machine. By the end of this article, you will feel confident tackling the job on your own. Let us get started.
Key Takeaways
- Spot the warning signs early: Look for fraying, slipping, or unusual noise to know when your belt needs replacing.
- Gather the right tools first: You only need a few basic household tools and a compatible replacement belt.
- Follow each step carefully: Proper removal and installation prevent damage and ensure smooth operation.
- Adjust tension correctly: A belt that is too loose or too tight will wear out fast or cause safety issues.
- Maintain your new belt regularly: Simple cleaning and lubrication habits extend the life of your replacement significantly.
- Know when to call a pro: Some issues like roller damage need professional attention beyond a simple belt swap.
📑 Table of Contents
Signs Your Horizon Walking Belt Needs Replacement
Before you dive into the replacement process, it helps to know the warning signs. A worn-out belt does not just fail overnight. It gives you plenty of clues along the way. Catching these signs early saves you from bigger problems down the road.
Visible Wear and Tear
The most obvious sign is visual damage. Run your hand along the walking surface. Do you feel rough patches, cracks, or thinning spots? Over time, the belt material wears down from friction against the deck. You might also notice fraying along the edges. If the belt looks shiny or glazed in certain areas, the surface has lost its grip. These are all clear signals that replacement time has come.
Slipping or Losing Grip
Does your belt slide around when you walk or run? A healthy belt grips the deck firmly. If you feel like your feet are slipping backward, the belt is losing its traction. Sometimes this happens because the belt is worn out. Other times, it is a tension issue. If adjusting the tension does not fix the slipping, the belt itself is probably the problem. You can also check how to fix a slipping belt on a treadmill for quick troubleshooting tips before committing to a full replacement.
Unusual Noises During Use
A squeaking, grinding, or thumping sound is never a good sign. These noises often come from a belt that is rubbing unevenly against the deck. Worn belts can also create a sticky drag instead of gliding smoothly. If you hear new sounds every time you use your treadmill, inspect the belt closely. Sometimes the noise is just a loose roller, but often it points to belt degradation that needs a full replacement.
Visible Delamination or Layer Separation
Treadmill belts are made of layered materials. Over time, these layers can separate. You might see peeling or bubbling on the surface. This is called delamination. Once delamination starts, the belt loses its structural integrity. No amount of tightening will fix this. Replacement is the only real solution.
Tools and Parts You Will Need
Having everything ready before you start makes the process much smoother. You do not want to pause halfway through because you are missing a screwdriver. Here is what you need to gather before you begin.
Replacement Belt
First and most importantly, you need the correct replacement belt. Horizon treadmills use specific belt sizes and designs. Check your model number before ordering. The model number is usually printed on a sticker near the power plug or on the frame near the console. Measure your current belt as well. You need both the length and the width. Most replacement belts come with installation instructions, so keep the packaging handy. Finding the right treadmill belt size ensures a perfect fit and smooth operation from day one.
Basic Tools
You will need only a few common household tools:
- Allen wrench set — Most Horizon treadmills use hex bolts for the deck and roller components.
- Phillips and flathead screwdrivers — These help with removing side panels and deck covers.
- Adjustable wrench — Useful for loosening and tightening roller bolts.
- Rag or cloth — You will need this to clean the deck surface before installing the new belt.
- Treadmill lubricant — Silicone-based lubricant keeps the new belt gliding smoothly from day one.
Workspace Setup
Clear a flat area with enough room to lay out the treadmill parts. Working on a hard floor is easier than carpet. If you must work on carpet, place a protective sheet underneath. You also want good lighting so you can see small screws and alignment marks clearly. A clean, organized workspace prevents accidents and keeps you focused throughout the job.
Step-by-Step Guide to Replacing Your Walking Belt
Now for the part you have been waiting for. Here is the full process for how to replace walking belt on Horizon treadmill. Take your time and follow each step in order.
Step 1: Unplug the Treadmill
Safety always comes first. Unplug the treadmill from the wall outlet. Do not skip this step. Even when the machine is off, there is residual power in the console and motor. Wait at least five minutes after unplugging before you touch any internal parts. This lets capacitors discharge fully and keeps you safe throughout the process.
Step 2: Remove the Side Panel
Most Horizon treadmills have a side panel held on by a few screws. Use your screwdriver to remove them. Set the screws in a small bowl so they do not get lost. Gently pull the panel away from the frame. Some panels may have clips instead of screws. Work slowly to avoid breaking the clips. Keep track of which screws came from which panel if your model has multiple removable covers.
Step 3: Loosen the Belt Tension
Before you can remove the old belt, you need to release the tension. Locate the rear roller bolts. Use your adjustable wrench to turn them counterclockwise. This pulls the belt slack. Do not remove the bolts entirely, just loosen them enough that the belt moves freely. If you are unsure about tension settings, you can refer to how to adjust the belt on a treadmill for general guidance on tension mechanics and proper alignment.
Step 4: Remove the Old Belt
Once the tension is released, lift the belt at the front end and pull it toward you. The belt should come off the rollers and deck fairly easily. If it is stuck, check for any remaining tension points or debris underneath. Set the old belt aside. You can use it as a reference for measuring the new one. Compare the old and new belts side by side to confirm you have the correct replacement.
Step 5: Clean the Deck and Rollers
This step is often overlooked but it is very important. Use a dry rag to wipe down the deck surface. Remove any dust, sweat residue, or old lubricant. Also clean the rollers and the area underneath where the new belt will sit. A clean surface ensures the new belt adheres properly and lasts longer. Think of this as prepping a fresh canvas before painting.
Step 6: Position the New Belt
Lay the new belt flat on the deck. Make sure it is centered on both sides. The belt should overlap the deck rollers evenly. If your belt has a directional arrow, check that it points in the correct running direction. Misalignment at this stage causes problems later, including uneven wear and tracking issues. Take your time with this step.
Step 7: Reattach the Rear Roller
Slide the rear roller back into position. Hand-tighten the bolts first, then use your wrench to snug them up. Do not overtighten at this stage. You will adjust the final tension in the next phase. Hand-tightening first prevents cross-threading and makes fine-tuning easier later.
Step 8: Reinstall the Side Panel
Place the side panel back onto the frame. Replace all screws and tighten them firmly. Double-check that no tools or rags are left inside the treadmill before moving on. A forgotten screwdriver inside the machine can cause serious damage when you power it on.
Step 9: Plug In and Test
Plug the treadmill back in. Turn it on and let it run at a slow walking pace for about two minutes. Listen for any unusual sounds. Feel for any catching or dragging. If everything sounds and feels smooth, you are in good shape. If something feels off, turn it off and recheck your work. A quick test run saves you from bigger headaches later.
Adjusting and Tensioning the New Belt
A new belt needs proper tension to perform well. A belt that is too loose will slip. A belt that is too tight will strain the motor and wear out quickly. Getting the tension right is the key to a successful replacement.
How to Check Belt Tension
The general rule is that you should be able to twist the belt about three inches at the center with your hand. If it twists more easily than that, it is too loose. If you cannot twist it at all, it is too tight. Most Horizon models have adjustment bolts at the rear of the treadmill. Turning these bolts clockwise tightens the belt. Turning them counterclockwise loosens it. Make small adjustments and test frequently.
When to Adjust the Tension
After installing a new belt, check the tension after the first hour of use. New belts stretch slightly during the break-in period. You may need to retighten the bolts once or twice. If the belt continues to slip after adjustment, you might want to check what to do if treadmill belt is slipping for additional troubleshooting steps before assuming the belt itself is defective. Sometimes the issue is a misaligned roller or a dirty deck surface rather than the belt.
Using the Right Lubricant
Silicone lubricant is essential for a new walking belt. Apply a thin, even layer across the deck surface before installing the belt. Most manufacturers recommend reapplying lubricant every three to six months. Using too much lubricant can create a messy buildup that attracts dust. A little goes a long way. Look for lubricants specifically designed for treadmills to get the best results.
Common Mistakes to Avoid During Belt Replacement
Even with the best instructions, mistakes happen. Here are the most common errors people make when replacing their treadmill belt.
Skipping the Cleaning Step
Dirt and debris under a new belt cause premature wear. Always clean the deck thoroughly before installing the replacement. This one simple step adds months to the life of your new belt. Many people rush through this part and regret it later when the new belt wears out faster than expected.
Overtightening the Bolts
It is tempting to crank everything down as tight as possible. Resist that urge. Overtightened bolts put unnecessary stress on the deck and rollers. They can also warp the frame over time. Snug is good. Tight enough to hold is perfect. Use a torque wrench if you have one for the most precise result.
Using the Wrong Belt Size
Not all treadmill belts are the same. Using a belt that is too short or too wide causes alignment problems and poor performance. Always double-check your model number and measurements before purchasing a replacement. A belt that does not fit properly will cause tracking issues and may damage other components of your treadmill.
Forgetting to Lubricate
A new belt without lubricant creates friction. That friction wears down both the belt and the deck. Always apply silicone lubricant before the first use of a new belt. This small step makes a huge difference in longevity. Skipping lubrication is one of the most common mistakes new belt owners make, and it is also the easiest one to avoid.
Maintaining Your New Belt and Knowing When to Seek Help
You just invested time and money into replacing your belt. The last thing you want is to wear it out again too soon. A little regular maintenance goes a long way toward keeping your treadmill in top shape.
Clean the Belt Regularly
Wipe down the belt surface after each workout. Sweat and dirt build up over time and break down the belt material. A quick wipe with a damp cloth keeps things fresh. Make this part of your post-workout routine so it becomes second nature.
Lubricate on Schedule
Set a reminder to lubricate your deck every three months. Most treadmill owners forget this step until something goes wrong. Staying on top of lubrication prevents belt wear and keeps your runs smooth. Set a recurring calendar event so you never forget.
Check Tension Monthly
Give the belt a quick twist check once a month. If it feels loose, tighten it slightly. Catching tension issues early prevents bigger problems like slipping or misalignment. This takes less than a minute and can save you from an expensive repair later.
Inspect for Wear and Tear
Every few months, look over the belt closely. Check for fraying, thinning, or separation. Catching minor damage early means you can replace the belt before it fails completely during a workout. Early detection is the key to avoiding interruptions in your fitness routine.
Keep the Area Around the Treadmill Clean
Dust and debris from the floor can work their way under the belt. Place a mat or tray underneath your treadmill to catch fallout. This is especially important if you have hardwood floors or carpet. If you are curious about what to place under your treadmill, check out what to put under treadmill on hardwood floor for helpful ideas and recommendations.
When to Call a Professional
DIY replacement works great for most people. But sometimes, professional help is the smart choice. If you notice damage to the rollers, deck, or motor during the replacement process, stop and call a technician. Also, if you feel unsure about any step, it is perfectly fine to seek professional assistance. A trained technician can spot problems you might miss. Your safety and your treadmill both matter. There is no shame in asking for help when you need it.
Conclusion
Replacing the walking belt on your Horizon treadmill is a rewarding job that saves you money and keeps your machine running at its best. How to replace walking belt on Horizon treadmill is a skill that anyone can learn with the right guidance. You now know the warning signs, the tools you need, the step-by-step process, and how to maintain your new belt for the long haul. Take your time, follow each step carefully, and trust your instincts. A well-installed belt makes every workout better. Your treadmill will thank you for it, and your wallet will too.
Frequently Asked Questions
How long does it take to replace a walking belt on a Horizon treadmill?
Most people complete the replacement in about 30 to 60 minutes. If you are new to the process, give yourself an extra 15 to 20 minutes. Having all your tools and the replacement belt ready before you start helps a lot. The more familiar you become with your treadmill’s layout, the faster it gets.
Can I replace the walking belt on my Horizon treadmill myself?
Absolutely. The process is designed to be user-friendly. You do not need special training or professional tools. Most replacements require only basic household tools like screwdrivers and wrenches. As long as you follow the steps carefully, you can do it successfully at home without any outside help.
How do I know what size replacement belt I need for my Horizon treadmill?
Check your model number first, which is usually found on a sticker near the power plug or on the frame near the console. Then measure your current belt for both length and width. You can also find the correct belt size in your owner’s manual or by contacting Horizon customer support directly. Ordering the exact size ensures a perfect fit and smooth operation.
How often should I replace the walking belt on my Horizon treadmill?
Most walking belts last between 3 to 5 years with regular use. Heavier users or those who run frequently may need to replace sooner. Regular maintenance like cleaning and lubricating can extend the belt’s lifespan significantly. Watch for signs like slipping, fraying, or unusual noise as early indicators that replacement is needed.
Do I need to lubricate the new belt immediately after installation?
Yes, you should apply silicone lubricant to the deck before installing the new belt. Reapply lubricant every three to six months after installation. Proper lubrication reduces friction and prevents premature wear. Skipping this step is one of the most common mistakes new belt owners make, and it is also the easiest to avoid.
What should I do if the new belt still slips after replacement?
First, check the belt tension. You should be able to twist the belt about three inches at the center. If it is too loose, tighten the rear adjustment bolts slightly. If the tension is correct and the belt still slips, the deck surface may need cleaning or the belt may be defective. Contact the manufacturer if you suspect a manufacturing issue with the replacement belt.