How to Proof Yeast And Make Your Bread Rise Perfectly
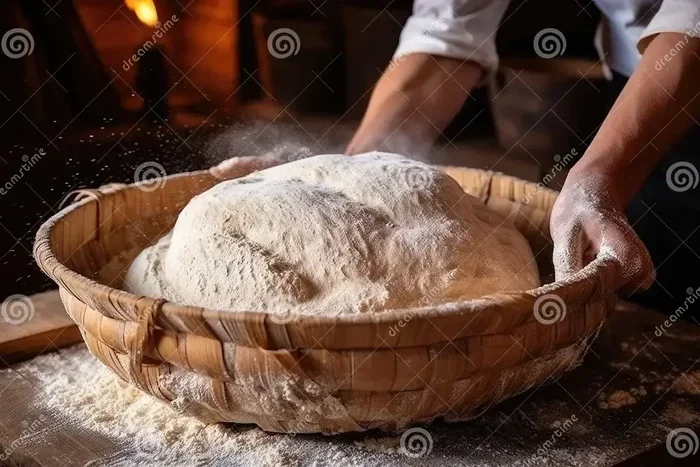
Proofing yeast is the easiest way to make sure your bread rises beautifully every single time. This guide walks you through the how to proof yeast process step by step, so you can skip the guesswork and bake with confidence. Whether you use active dry yeast or instant yeast, these simple tips will help you get perfect bread rising results at home.
There is nothing more disappointing than mixing up a batch of bread dough and waiting hours for it to rise, only to find a flat, lifeless loaf. The culprit is often dead or inactive yeast. Learning how to proof yeast saves you from that frustration and helps you bake perfect bread every time.
Yeast proofing is simply checking that your yeast is still alive and ready to work. Think of it as a quick health check before you add it to your bread dough. This small step takes just a few minutes but makes a huge difference in your bread baking results.
In this guide, we will walk you through everything you need to know about yeast activation. You will learn the right water temperature, how to spot active yeast, and the common mistakes that ruin your rise time. By the end, you will feel confident enough to bake baking bread like a pro.
Key Takeaways
- Proofing yeast confirms it is still alive: A simple test with warm water and sugar tells you if your yeast will work.
- Use the right water temperature: Water that is too hot kills yeast, while too-cold water slows activation.
- Active dry yeast and instant yeast proof differently: Knowing the difference helps you get better results every time.
- Watch for foamy bubbles: Foamy yeast means it is active and ready to make your bread dough rise.
- Avoid common mistakes: Using old yeast, wrong temperatures, or too much salt can ruin your proofing.
- Fresh yeast lasts longer when stored properly: Keep yeast in a cool, dry place for the best bread baking experience.
📑 Table of Contents
What Is Yeast Proofing and Why Does It Matter
Yeast proofing means dissolving yeast in warm water with sugar and watching it grow. When yeast is alive, it eats the sugar and produces carbon dioxide gas. Those tiny yeast bubbles are what make your bread dough puff up and rise.
Without proofing, you are basically guessing whether your yeast will work. Sometimes old yeast sits in your pantry for months, and you have no idea if it is still good. A quick proofing test takes away all the guesswork.
Why Proofing Is Worth Your Time
Here are a few reasons why proofing yeast should be part of your bread baking tips routine:
- It saves time: If your yeast is dead, you find out immediately instead of waiting three hours for flat bread.
- It saves ingredients: You avoid wasting flour, water, and salt on dough that will never rise.
- It builds confidence: Knowing your yeast is active gives you peace of mind before you start kneading.
- It improves bread quality: Active yeast creates better gluten development and a lighter, airier bread loaf.
Think of proofing as an insurance policy for your bake. It costs you almost nothing but protects you from a wasted afternoon in the kitchen.
Types of Yeast You Can Proof
Not all yeast is the same. The three main types you will find in stores are active dry yeast, instant yeast, and fresh yeast. Each one behaves a little differently, and knowing the difference helps you get the best dough fermentation results.
Active Dry Yeast
Active dry yeast is the most common type found in grocery stores. The granules are larger and drier than other types. Before you add active dry yeast to your dough, you usually need to dissolve it in warm water first. This is where yeast activation comes in.
Active dry yeast has a longer shelf life than fresh yeast. You can store it in a cool, dry place for up to a year. However, older packets may need a longer proofing time to show signs of life.
Instant Yeast
Instant yeast has smaller granules and is more finely milled. It works faster than active dry yeast and does not always need to be proofed first. Many bakers skip the proofing step with instant yeast and add it directly to the dry ingredients.
That said, proofing instant yeast still works as a helpful test. If you are unsure whether your instant yeast is fresh, a quick proofing test gives you peace of mind. The rise time is usually shorter with instant yeast compared to active dry yeast.
Fresh Yeast
Fresh yeast comes in small blocks or cubes and has a very high moisture content. It is soft, crumbly, and pale beige in color. Fresh yeast is very perishable and must be stored in the refrigerator. It has a strong, earthy smell when it is fresh and alive.
You can proof fresh yeast the same way as dry yeast. Simply crumble it into warm water with a pinch of sugar and wait for yeast bubbles to form. Fresh yeast is a favorite among professional bakers because it produces a rich, complex flavor in the bread dough.
| Yeast Type | Shelf Life | Needs Proofing | Activation Speed |
|---|---|---|---|
| Active Dry | Up to 1 year | Yes (recommended) | Moderate |
| Instant | Up to 2 years | Optional | Fast |
| Fresh | 2 to 4 weeks (refrigerated) | Yes | Fast |
How to Proof Yeast: Step-by-Step Guide
How to proof yeast is simpler than most people think. You only need a few household items and about 10 minutes of patience. Follow these steps for reliable yeast activation every time.
Step 1: Gather Your Supplies
You will need the following items before you start:
- 1 packet of yeast (about 2 and 1/4 teaspoons)
- 1/4 cup of warm water (around 110 degrees Fahrenheit)
- 1 teaspoon of granulated sugar
- A small bowl or measuring cup
- A fork or whisk for stirring
The water temperature is critical. If the water is too hot, it will kill the yeast. If it is too cold, the yeast will not wake up. Aim for warm water that feels comfortably warm on your fingertip, like a baby bottle temperature.
Step 2: Add Water and Sugar
Pour the warm water into your bowl. Add the teaspoon of sugar and stir gently until the sugar dissolves. The sugar acts as food for the yeast. Without it, the yeast has no energy to produce the yeast bubbles you are looking for.
Some recipes call for flour in the proofing liquid, but sugar alone works perfectly for a simple test. The sugar gives the yeast a quick energy boost to start activating.
Step 3: Add the Yeast
Sprinkle the yeast evenly across the surface of the water. Do not stir it in yet. Let it sit for about 30 seconds. This allows the dry yeast to soften on the surface before you mix it.
If you are using active dry yeast, you can gently stir it in at this point. For instant yeast, simply let it sit undisturbed. Both approaches work well for yeast activation.
Step 4: Wait and Watch
Set a timer for 5 to 10 minutes. During this time, the yeast should start to foam and bubble on the surface. The mixture will look creamy and expand slightly, forming a thick layer of foam.
This foamy mixture is your signal that the yeast is alive and active. If you see a good layer of foam, your yeast is ready to use. If nothing happens, the yeast is likely dead and you should start over with a fresh packet.
Step 5: Add to Your Dough
Once your yeast is proofed, you can add it directly to your bread dough. Mix it into the flour and other wet ingredients as your recipe directs. The dough fermentation process will begin right away, and you should see your dough rise within the first hour.
For the best bread rising results, make sure your dough is in a warm spot. A drafty or cold area slows down fermentation and can lead to dense bread.
Common Mistakes When Proofing Yeast
Even experienced bakers sometimes make mistakes when proofing yeast. Knowing what to avoid helps you get consistent results every time you bake baking bread at home.
Using Water That Is Too Hot
The most common mistake is using water that is too hot. Water above 120 degrees Fahrenheit starts to damage yeast cells. At 140 degrees, yeast dies completely. Always use a thermometer if you are unsure. Warm water should feel like a comfortable bath temperature, not hot.
Using Expired or Old Yeast
Yeast has a shelf life, and using expired yeast is a recipe for disappointment. Check the expiration date on your packet before you start. Even if the date looks fine, yeast can lose potency over time, especially if it has been stored in a warm or humid environment. Always store yeast in a cool, dry place, and consider proofing yeast if the packet has been open for more than a few months.
Adding Salt Directly to the Yeast Mixture
Salt is essential for bread, but it can inhibit yeast growth if it comes into direct contact. Never add salt directly to your proofing mixture. Instead, add salt to the flour and mix the yeast into the water first. This separation gives the yeast time to activate before the salt affects it.
Skipping the Sugar
Sugar feeds yeast and helps it produce carbon dioxide. Some people skip it during proofing, but this makes it harder to see if the yeast is actually working. A small amount of sugar gives the yeast a quick boost and creates the visible foam that confirms activation.
Not Giving It Enough Time
Patience is key when proofing yeast. Some types of yeast, especially older active dry yeast, may take up to 15 minutes to show foam. Do not give up after two minutes. Wait the full recommended time before deciding the yeast is dead.
How to Tell If Your Yeast Is Still Active
Knowing the signs of yeast freshness helps you avoid wasted ingredients and failed bakes. Here is what to look for during your proofing test.
Signs of Active, Healthy Yeast
- Thick foam on the surface: A creamy, bubbly layer forms within 5 to 10 minutes.
- A yeasty, earthy smell: Fresh yeast has a distinct, pleasant aroma that is easy to recognize.
- Expansion of the liquid: The mixture rises slightly and fills more of the bowl.
- Visible yeast bubbles: Tiny bubbles rise to the surface and pop gently.
Signs of Dead or Inactive Yeast
- No foam at all: The surface stays flat and clear after 10 minutes.
- No bubbles: You do not see any movement or fizzing in the liquid.
- No smell: There is no yeasty aroma, which suggests the yeast is no longer alive.
- Yeast sinks to the bottom: The granules settle and dissolve without any reaction.
If you see any of the signs of dead yeast, do not add it to your bread dough. Simply discard it and start with a fresh packet. Using inactive yeast will lead to dense, flat bread that never rises properly.
Tips for Perfectly Risen Bread Every Time
Once you master how to proof yeast, the next step is creating the ideal environment for your bread dough to rise. These bread baking tips help you get the best oven spring and a light, fluffy bread loaf.
Create a Warm, Draft-Free Spot
Yeast thrives in warm environments. After you mix your dough, place it in a spot that stays between 75 and 85 degrees Fahrenheit. An oven with just the light turned on works great. You can also place the dough near a warm appliance, but avoid direct heat sources.
Use Quality Ingredients
The quality of your flour, water, and yeast affects the final result. Use fresh yeast and store it properly. Choose bread flour for a chewier texture, or all-purpose flour for a softer crumb. Good dough consistency starts with quality ingredients.
Do Not Rush the Rise
Bread needs time to ferment. A first rise of 1 to 2 hours is typical, but the exact rise time depends on the temperature and the type of yeast you use. Rushing the process leads to poor gluten development and a dense texture. Let the dough do its work.
Check Dough Consistency
Well-proofed dough should be soft, slightly sticky, and elastic. When you poke it with a floured finger, the indentation should slowly spring back. If the dough feels tight and does not stretch easily, it may need more time to ferment and develop gluten development.
Consider a Second Rise
Many bread recipes call for a second rise after shaping. This dough fermentation step creates a more complex flavor and a better texture. Cover the shaped loaf with a damp towel or plastic wrap and let it rise for 30 to 60 minutes before baking.
Following these simple tips transforms your baking bread experience. You will notice a bigger bread loaf with a better crumb and a beautiful golden crust. Consistent proofing and rising make all the difference.
Frequently Asked Questions About Proofing Yeast
Can I proof yeast with milk instead of water?
Yes, you can use warm milk instead of water for proofing. Milk adds a richer flavor and slightly feeds the yeast through its natural sugars. Just make sure the milk is warm, not hot, and watch for the same foamy signs of activation.
What temperature water is best for proofing yeast?
The ideal temperature is between 105 and 115 degrees Fahrenheit. Water in this range is warm enough to activate yeast but not so hot that it kills it. Using a thermometer removes all guesswork and gives you consistent results every time.
How long should I wait to see yeast bubbles form?
You should see foam and bubbles within 5 to 10 minutes. Active dry yeast may take a little longer, while instant yeast usually activates faster. If you see no signs after 15 minutes, the yeast is likely inactive and should be replaced.
Can I reuse yeast after proofing it?
No, you should not reuse proofed yeast. Once yeast has been activated in the proofing liquid, it is already working and should be added to your dough immediately. Discard any leftover proofing liquid and use fresh yeast for your next bake.
Why did my yeast not foam during proofing?
If your yeast did not foam, it is likely dead or expired. Other causes include water that was too hot or too cold, or yeast that has been stored improperly. Always check the expiration date and store yeast in a cool, dry place to maintain yeast freshness.
Do I need to proof instant yeast every time I bake?
No, instant yeast does not need to be proofed every time. Many bakers add it directly to the dry ingredients. However, proofing is a helpful habit, especially if you are unsure whether your yeast is still fresh. It only takes a few minutes and gives you confidence in your bread rising results.
Conclusion
How to proof yeast is one of the simplest yet most important skills you can learn for baking bread at home. A quick proofing test takes just minutes and saves you from wasted ingredients and disappointing results. Whether you use active dry yeast or instant yeast, the process is the same: warm water, sugar, and a little patience.
Remember to check your yeast freshness before every bake, use the right water temperature, and watch for those yeast bubbles and foam. Avoid common mistakes like adding salt directly to the yeast or using water that is too hot. These small habits make a big difference in your bread dough quality.
Once you get comfortable with yeast activation, you will notice better rise time, lighter bread, and a more enjoyable baking experience. Proofing yeast is your first step toward perfect bread rising and bread baking success. Start today, and your bread loaf will thank you for it.