How to Make Your Exercise Bike Seat More Comfortable

Don’t suffer through painful workouts. A comfortable exercise bike seat is achievable through a combination of proper bike fit, strategic padding, and specialized gear. This guide reveals immediate fixes like padded shorts and seat covers, crucial adjustment techniques, and advanced accessories that transform your ride from agony to enjoyment. Prioritize your sit bones and gradual adaptation to build tolerance and make every mile comfortable.
Key Takeaways
- Pain is not normal: A properly fitted seat should cause pressure, not sharp pain or numbness. Discomfort is a signal to adjust your setup or gear.
- Padding isn’t always the answer: Too much soft padding can increase friction and heat. Targeted gel or cutaway designs that support your sit bones are often more effective.
- Your bike fit is foundational: No accessory can fix a fundamentally poor fit. Correct seat height, fore/aft position, and handlebar reach are the first steps to comfort.
- Padded cycling shorts are a game-changer: They provide strategic, seamless padding exactly where you need it and are the single most effective upgrade for most riders.
- Break-in is real: Your body and a new seat need time to adapt. Start with shorter sessions and gradually increase duration to build tolerance.
- Seat choice is personal: There is no “best” seat for everyone. Your anatomy, riding style, and flexibility determine your ideal seat shape and width.
📑 Table of Contents
- Understanding the “Bike Seat” Problem: Why It Hurts and What “Comfort” Really Means
- Section 1: The Foundation – Non-Negotiable Bike Fit & Seat Adjustments
- Section 2: Immediate, Low-Cost Fixes – Padding & Apparel
- Section 3: The Long-Term Solution – Choosing or Modifying the Seat Itself
- Section 4: Advanced Comfort Hacks & Accessories
- Section 5: Listen to Your Body – The Adaptation Period and When to Worry
- Section 6>Maintenance and Longevity – Keeping Your Comfort System Working
- Conclusion: The Journey to Your Perfect Ride
Understanding the “Bike Seat” Problem: Why It Hurts and What “Comfort” Really Means
Let’s be honest. That tiny, hard-looking saddle on your exercise bike is often the first thing to get a bad reputation. We’ve all been there: five minutes in, you’re squirming, shifting, and mentally counting down the seconds until you can stand up. It feels like a design flaw, a cruel joke played by fitness equipment manufacturers. But here’s the thing: the discomfort you’re feeling isn’t necessarily because the seat is “bad.” It’s usually a mismatch between the bike’s setup, the seat’s design, and your unique body. True comfort on an exercise bike seat isn’t about sinking into a cloud; it’s about proper support. Specifically, it’s about supporting your ischial tuberosities—the two bony points you sit on, commonly called your “sit bones.” When these bones are properly supported on a firm surface, your weight is distributed correctly. Pain, numbness, and chafing happen when your soft tissue is bearing the brunt of your weight, or when friction and pressure points are created by constant movement on an ill-fitting surface.
Making your exercise bike seat comfortable is a process of elimination and optimization. It starts with understanding that comfort is a system, not a single product. You can buy the most expensive “comfort” seat in the world, but if your bike is set up incorrectly, you’ll still be miserable. Conversely, a perfectly adjusted basic seat can be tolerable, even pleasant. This guide will walk you through that entire system, from the non-negotiable adjustments you must make to the affordable accessories that can be absolute game-changers. We’ll move from foundational fixes to advanced tweaks, ensuring you have a complete toolkit to transform your riding experience. Say goodbye to the dread of sitting down and hello to focused, pain-free cardio.
Section 1: The Foundation – Non-Negotiable Bike Fit & Seat Adjustments
Before you spend a single dollar on accessories, you must master your bike’s adjustment knobs. An improperly fitted bike will make any seat feel terrible. Think of this as building a house: you need a solid foundation before adding furniture. The three key adjustments are height, fore/aft position, and handlebar reach. Getting these right solves the problem for many people.

Visual guide about How to Make Your Exercise Bike Seat More Comfortable
Image source: i.ytimg.com
Mastering Seat Height
This is the most critical adjustment. A seat that’s too low forces your knees to bend excessively at the bottom of the pedal stroke, creating immense pressure on the front of your sit bones and the patella tendon. A seat that’s too high causes your hips to rock side-to-side on each pedal stroke, which slams your sit bones against the seat with every revolution. The correct height allows for a slight bend (about 25-30 degrees) in your knee when the pedal is at its lowest point, with your foot flat on the pedal. A professional fitting uses the “heel-on-pedal” method: place your heel on the pedal at the bottom of the stroke; your leg should be perfectly straight. When you move your foot to the proper ball-of-foot position, you’ll have that crucial micro-bend. Spend 10 minutes just dialing this in. The difference is night and day.
Finding the Perfect Fore/Aft Position
This adjustment slides the seat forward and backward on its rails. Its goal is to position your knee directly over the pedal axle when the cranks are horizontal. A simple way to check: drop a plumb line from the front of your kneecap. It should hit the center of the pedal axle. If it’s behind, you’re too far forward (putting pressure on the front of your sit bones). If it’s in front, you’re too far back (straining your hamstrings and putting pressure on the rear). This adjustment also affects your reach to the handlebars, which leads us to the next point.
Handlebar Reach and Stack
If you’re stretched too far forward, you’ll be pulling yourself up and out of the saddle with your arms and core, putting all your weight on the narrow front section of the seat. This is a classic cause of perineal numbness. On most upright exercise bikes, you can adjust the handlebar stem height or angle. On spin bikes, you may need to move the handlebars up or down. Your goal is a slight bend in your elbows (about 30 degrees) and a neutral spine. You shouldn’t be leaning on your wrists. Raising the handlebars (increasing stack) shifts more weight back onto your sit bones and rear of the saddle, which is generally more comfortable for longer rides. Don’t be a hero—set your handlebars at a comfortable height, especially when starting out.
Section 2: Immediate, Low-Cost Fixes – Padding & Apparel
Once your bike is fitted, you can address the seat itself. The market is flooded with solutions, but not all are created equal. Let’s separate the effective from the gimmicky.

Visual guide about How to Make Your Exercise Bike Seat More Comfortable
Image source: exercisebikeacademy.com
The Gold Standard: Padded Cycling Shorts
If you do nothing else from this article, do this. Invest in a good pair of padded cycling shorts. This is the single most effective upgrade you can make. Why? Because the chamois (the padded insert) is designed to sit directly against your skin, providing seamless, targeted cushioning exactly where your sit bones contact the saddle. It eliminates seams and fabric bunching that cause chafing. The padding is strategically placed and shaped to fill the gap between your anatomy and the saddle. Look for shorts with a multi-density foam or gel chamois. Gel provides a softer feel, while high-quality foam offers more support and less “bottoming out.” The key is a chamois that is wide enough to match your sit bone spacing. Brands like Pearl Izumi, Castelli, and Gore offer excellent entry-level options. Wear them without underwear. The seamless construction is vital. This isn’t just for road cyclists; it’s essential for anyone spending more than 20 minutes on a stationary bike.
Seat Covers: Gel vs. Foam vs. Sheepskin
For those who can’t or don’t want to wear cycling shorts (though you really should), a seat cover is the next best thing.
- Gel Covers: These are the most popular. A gel pad is enclosed in a stretchy, often non-slip cover. They add a layer of soft, conforming cushioning. They’re great for immediate relief from a rock-hard saddle. The downside is they can trap heat and sometimes slide around if not fitted perfectly.
- Foam Covers: Typically made of high-density foam. They provide firm, supportive padding rather than soft squishiness. This is often better for long-term comfort as it supports rather than collapses. Look for ones with a cutaway or relief channel in the center to reduce perineal pressure.
- Sheepskin Covers: A classic. Natural sheepskin is incredibly soft, wicks moisture well, and provides a cushion that molds to your body. It’s excellent for temperature regulation. The main cons are cost and the need for occasional cleaning.
Pro Tip: Whichever cover you choose, ensure it has a secure attachment system—grommets to lace through the saddle’s existing eyelets or strong elastic straps. A sliding cover is worse than no cover at all.
The “Quick Fix” That Can Backfire: The Donut Pillow
You’ve seen them: the red, ring-shaped cushions with a hole in the middle. They’re designed to relieve pressure on the perineum. Use extreme caution with these on an exercise bike. While they can help for people with specific medical conditions (like prostate issues), for the average rider, they often create new problems. The ring design concentrates all your weight onto the much smaller ring of material, dramatically increasing pressure on your sit bones. This can lead to more pain, not less. They also tend to be unstable, causing you to wobble and shift, which increases friction. Unless specifically recommended by a doctor for your condition, skip the donut pillow.
Section 3: The Long-Term Solution – Choosing or Modifying the Seat Itself
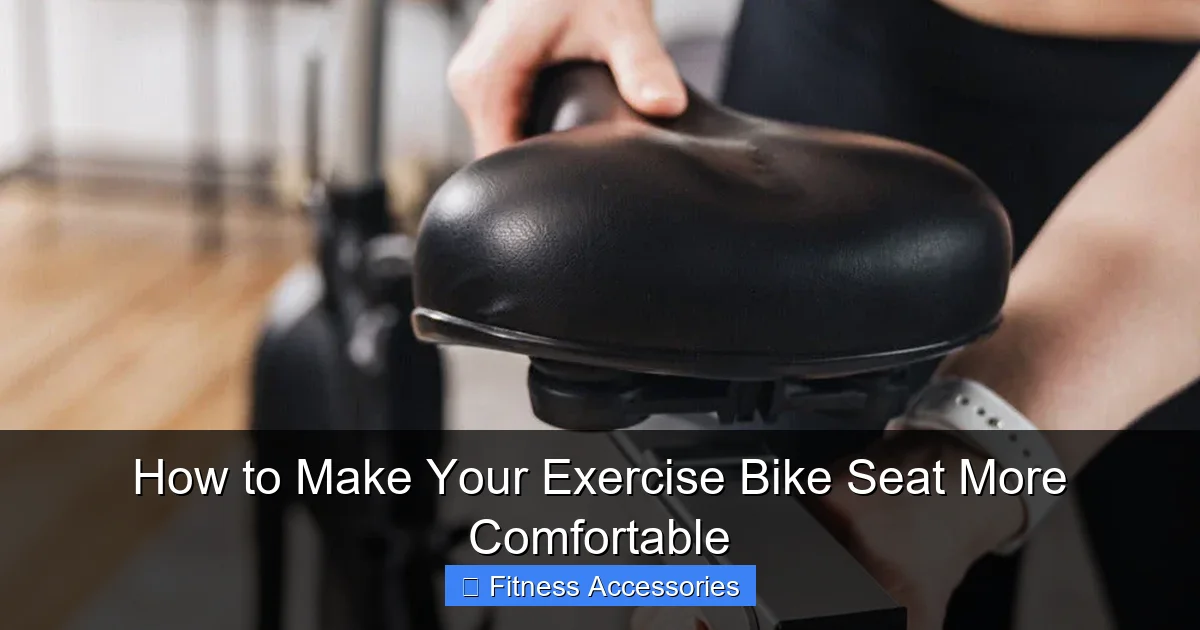
If you’ve optimized your fit and used padding, but still find yourself wincing, it might be time to address the saddle itself. Replacing the saddle on your exercise bike is a fantastic and often overlooked upgrade.
Visual guide about How to Make Your Exercise Bike Seat More Comfortable
Image source: movewithascend.com
How to Choose the Right Saddle Shape & Width
Saddle choice is deeply personal and anatomical. The two main factors are shape and width.
- Width: This is the most important factor. Your saddle width should match the distance between your sit bones. Sit on a piece of corrugated cardboard or a specialized sit bone measurement tool. The two indentations left behind measure your sit bone spacing. A saddle that’s too narrow will have your sit bones hanging off the sides, causing pain on the edges. One that’s too wide will cause your thighs to rub. For most recreational riders on upright bikes, a medium width (around 140-150mm) is a good starting point. For more aggressive, forward-leaning positions (like on a spin bike), a narrower saddle is often used.
- Shape:
- Relaxed/Upright: Wider, often with a slight swoop shape. The widest part is at the back, supporting you in a more upright position. Ideal for recumbent bikes and upright exercise bikes.
- Performance/Racing: Narrower, longer, and flatter. Designed for a forward-leaning position where weight is distributed between the saddle and handlebars. The nose is often tapered.
- Cutaway/Relief Channel: Many modern saddles feature a longitudinal groove or cutout in the center. This is designed to reduce pressure and improve blood flow to soft tissue. It’s a feature worth seeking if you experience any numbness.
Material Matters: Leather saddles (like Brooks) mold to your shape over time but are heavy and require care. Synthetic covers (vinyl, plastic) are waterproof and easy to clean but can be slippery. Look for a saddle with a textured or perforated top layer to improve grip and ventilation.
Swapping Your Saddle: What You Need to Know
Most exercise bikes and spin bikes use a standard saddle clamp. You’ll need a few basic tools (usually an Allen key) to release the clamp. Take your old saddle to a local bike shop. Explain your discomfort and your riding position (upright vs. leaning). They can let you sit on a few different models and recommend a good starting point. You can often find excellent used saddles online to try without a big investment. When installing, ensure the rails are securely clamped and the saddle is level (use a small bubble level). A nose that’s tilted up or down can cause major issues.
Section 4: Advanced Comfort Hacks & Accessories
You’ve done the basics. You’re still good. But you want that luxury level of comfort for those 60-minute endurance rides. Here are the pro-level tweaks.
Double-Dipping: Combining Shorts and a Cover
For ultra-long sessions, many dedicated riders use both padded shorts and a gel seat cover. This provides a “cushion sandwich”—the conforming cover on top, and the anatomically shaped, moisture-wicking chamois underneath. The key is ensuring the cover’s material doesn’t create excessive friction against the shorts’ fabric. A high-quality, non-slip gel cover works best here. This setup is overkill for a 20-minute ride but can be a savior for a 90-minute steady-state session.
Handlebar Tape or grips
Wait, what does this have to do with the seat? Everything. If your hands are sore, you’ll subconsciously grip tighter and shift your weight more erratically in the saddle, creating instability and pressure points. Comfort is a full-body experience. Upgrading to softer, more ergonomic handlebar grips or adding a layer of comfort-oriented bar tape (even on exercise bike handlebars, if they’re round) can reduce upper body fatigue, allowing you to maintain a stable, relaxed core and pelvis position. This stability directly translates to a more consistent and comfortable sitting position.
Climate Control: Ventilation and Sweat Management
A hot, sweaty saddle is a recipe for chafing and discomfort. Look for saddles with a perforated (vented) top or a cutaway channel that allows airflow. A breathable seat cover can also help. More importantly, wear moisture-wicking clothing. Cotton shorts and t-shirts hold sweat, creating a damp, abrasive environment. A good chamois in padded shorts will also wick moisture away from your skin. Some riders even apply a small amount of anti-chafe balm (like Body Glide) to the inner thighs and sit bone area before a long ride to reduce friction.
Vibration Damping
Some high-end exercise bikes, especially those with heavy flywheels or less refined engineering, can transmit vibration through the frame and seatpost. This subtle buzz can become a major irritant over time. If you suspect this, check if your bike’s seatpost is a standard diameter. You can sometimes replace a metal seatpost with a carbon fiber one, which is an excellent vibration damper. Alternatively, a gel seat cover with a thick, viscoelastic layer can absorb high-frequency vibrations that a thin foam pad cannot.
Section 5: Listen to Your Body – The Adaptation Period and When to Worry
You’ve made all the changes. The seat still feels… different. Not painful, but present. This is normal. Your body needs time to adapt to a new pressure distribution. This is the “break-in” period, and it applies to both you and, in some cases, a new leather saddle.
The 2-Week Rule
Commit to a new saddle or major adjustment for at least two weeks of regular riding (3-4 times per week). Start with shorter, 20-30 minute sessions. Your body is learning a new “sit.” Muscles you didn’t know you had will engage to stabilize you. The initial awareness will fade. If, after two weeks of consistent use, you still experience sharp pain, numbness, tingling, or pain that persists hours after riding, it’s a sign the setup is still wrong. Soreness or a dull awareness that disappears quickly after you get off the bike is part of the process. Numbness is never normal and indicates excessive pressure on nerves and blood vessels. Stop and reassess your fit and equipment immediately if this occurs.
Common Pain Points and Their Likely Causes
- Pain in the “front” of the sit bones (perineal area): Usually from a seat that’s tilted nose-up, a handlebar reach that’s too far (forcing weight forward), or a seat that’s too narrow.
- Pain on the very edges of the sit bones: Classic sign of a saddle that’s too narrow. Your bones are hanging off the sides.
- Chafing on the inner thighs: Caused by a saddle that’s too wide, causing your legs to rub against the nose of the saddle on each pedal stroke. Also caused by poor fabric (cotton) or a poorly fitting short chamois.
- Numbness or tingling: The most serious sign. Indicates pressure on the pudendal nerve and blood vessels. Caused by a seat that’s too wide, a nose that’s too long and tilted up, or excessive forward lean on the handlebars.
Section 6>Maintenance and Longevity – Keeping Your Comfort System Working
Your comfort solutions need care to remain effective. A neglected seat cover or worn-out shorts can become a source of discomfort themselves.
Caring for Your Seat Cover
Gel and foam covers can absorb sweat and odor. Most have a removable cover that can be machine-washed on a gentle cycle. The gel/foam pad itself should be wiped down with a damp cloth and mild soap. Let it air dry completely before reattaching. Sheepskin covers require more specific care—often just airing out and brushing. Never submerge a leather saddle.
Replacing Your Padded Shorts
The chamois is a wear item. With repeated use and washing, the foam compresses and loses its supportive shape. A good rule of thumb is to replace your padded shorts every 300-500 hours of riding. You’ll know it’s time when the chamois feels flat, lumpy, or the stitching starts to irritate your skin. Don’t try to extend the life of a worn-out chamois; it will cause more problems than it solves.
Bike Maintenance for Comfort
A loose pedal or a creaky bottom bracket can create vibrations that travel up into the saddle. Ensure your pedals are tight and your cranks are secure. Check that all bolts on the seatpost and saddle clamp are snug. A stable platform is a comfortable platform.
Conclusion: The Journey to Your Perfect Ride
Making your exercise bike seat comfortable is not about finding a magic bullet. It’s a systematic approach that starts with the fundamentals of bike fit. You wouldn’t drive a car with the seat pushed all the way forward and the steering wheel in your lap; treat your bike with the same respect. Begin by spending 20 minutes with a tape measure and your adjustment knobs, ensuring your seat height and fore/aft position are dialed in. Then, invest in the tool that works with your body, not against it: a quality pair of padded cycling shorts. This combination solves the problem for the vast majority of riders.
If discomfort persists, view your saddle as an interchangeable component. Your sit bone width is unique, and a saddle that matches it is worth seeking out. Remember the principle of support over softness. A firm, well-shaped saddle that supports your sit bones will always be more comfortable for longer than a soft, shapeless one that causes you to sink and creates pressure points. Embrace the short adaptation period, listen to the specific signals your body is sending (numbness = stop, ache = adjust), and maintain your gear. By following this layered strategy—from fit to apparel to equipment—you can transform your exercise bike from an instrument of torture into a reliable partner for countless hours of effective, enjoyable, and truly comfortable cardiovascular training. Your seat should be the last thing you think about during your workout, allowing you to focus on the burn in your legs and the rhythm of your breath. That’s the goal, and it’s absolutely within your reach.
Frequently Asked Questions
How long should it take for a new exercise bike seat to feel comfortable?
Expect a break-in period of 1-2 weeks with regular riding (3-4 times per week). Start with shorter 20-30 minute sessions. Soreness or awareness that fades quickly after riding is normal. Persistent sharp pain, numbness, or discomfort that lasts hours after your ride means the fit or seat is wrong and needs adjustment.
Are gel seat covers better than foam ones for comfort?
It depends on your preference and needs. Gel covers provide a softer, more conforming feel and are great for immediate relief from a very hard saddle. Foam covers, especially high-density foam, offer firmer, more supportive padding that is often better for longer durations as it doesn’t “bottom out.” Look for either with a central cutaway to relieve perineal pressure.
Can I use regular bike shorts on my recumbent exercise bike?
Absolutely. Padded cycling shorts are designed to work with any saddle, regardless of the bike’s position. The chamois provides cushioning and reduces friction at the contact point. The key is a proper fit—the shorts should be snug but not restrictive, and the chamois should be centered over your sit bones.
Why does my exercise bike seat still hurt even with a padded cover and shorts?
This usually points to a fundamental fit issue. Re-check your seat height (knee bend at bottom of stroke), fore/aft position (knee over pedal axle), and handlebar reach (elbows bent, no reaching). If your weight is too far forward, all the padding in the world won’t fix the pressure on the front of the saddle. A seat that is too narrow or too wide for your anatomy will also cause pain despite padding.
What is the single most important thing for preventing saddle soreness?
Wearing proper padded cycling shorts. They provide anatomically-shaped, seamless padding directly where you need it, eliminate fabric seams that cause chafing, and wick moisture away from the skin. This addresses the two main causes of soreness: pressure points and friction/chafing.
Should I get a wider or narrower saddle for my upright exercise bike?
For an upright riding position (common on most exercise bikes), a wider saddle is generally more comfortable. This is because your pelvis is in a more neutral, weight-bearing position, and a wider saddle supports the full width of your sit bones. Measure your sit bone spacing or visit a bike shop for a fitting to find your ideal width. Narrow saddles are typically for aggressive, forward-leaning positions where the sit bones are closer together.