
How to Make a Regular Bike a Stationary Bike
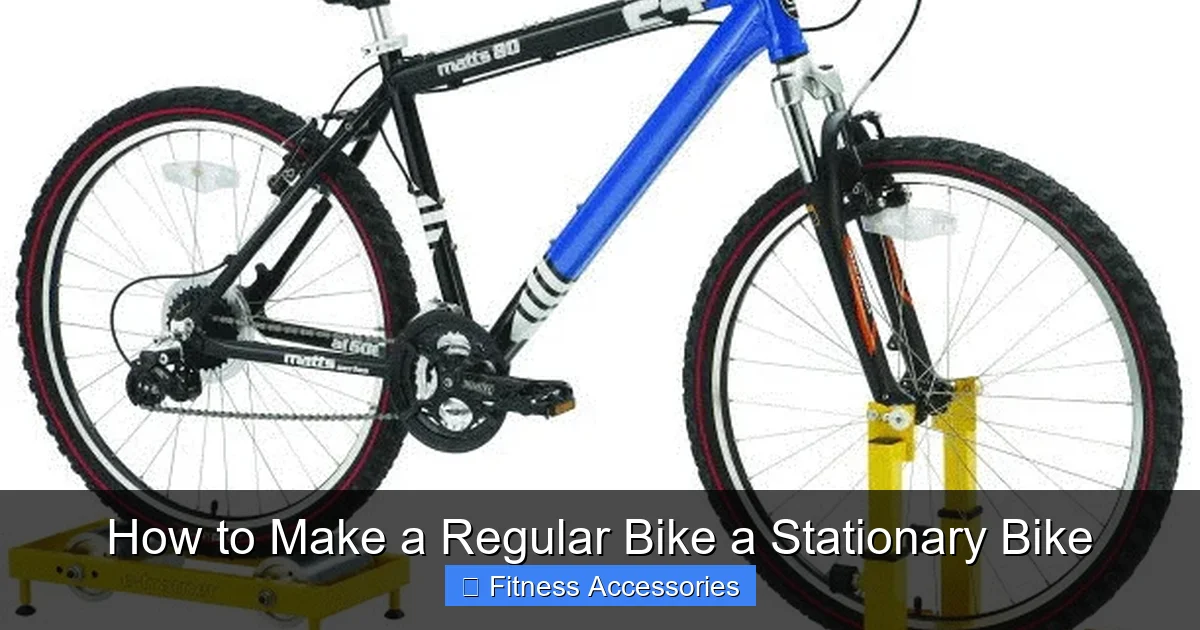
Transform your regular bike into a versatile stationary trainer instantly and cost-effectively by using a simple bike trainer stand, which lifts the rear wheel and provides adjustable resistance. This easy-to-install solution lets you ride indoors for fitness or training without sacrificing your existing bike, and most stands fold away for compact storage when not in use.
Key Takeaways
- Choose the right conversion method: A bike trainer is simplest, while a stand offers more stability.
- Prioritize stability above all: Ensure the bike is perfectly level and cannot tip during use.
- Adjust resistance deliberately: Use the trainer’s dial or your gear shifts to control workout intensity.
- Secure the bike properly: Tighten all clamps and skewer nuts to prevent movement and frame damage.
- Consider budget-friendly DIY: A rear-wheel lift stand can be a low-cost alternative to commercial trainers.
- Account for space and storage: Ensure you have enough room and a plan for storing the stationary setup.
- Inspect regularly for wear: Check the trainer’s contact point and bike tires for excessive friction and tear.
📑 Table of Contents
- How to Make a Regular Bike a Stationary Bike
- Why Convert Your Bike? The Smart Fitness Choice
- Method 1: The Bike Trainer – Your Most Popular Path
- Method 2: Rollers – The Skill-Based Classic
- Method 3: DIY Stationary Bike Stand – The Budget Hacker’s Route
- Safety, Comfort, and Ergonomic Must-Dos
- Cost Comparison: Making the Smart Financial Decision
- Conclusion: Your Journey to an Indoor Oasis Begins Now
How to Make a Regular Bike a Stationary Bike
Remember that feeling? The rain is lashing against your window, or a bitter wind is howling outside, but your legs are itching for that pedal-stroke rhythm. You glance at your trusty road or mountain bike leaning in the garage, a silent sentinel of summer adventures, and sigh. The gym feels crowded and impersonal, and buying a dedicated, expensive stationary bike seems like a luxury you can’t justify. What if I told you that the key to your next great indoor workout is already on your wall? Learning how to make a regular bike a stationary bike is not only possible but a smart, cost-effective, and surprisingly simple project that unlocks a world of fitness right at home.
This isn’t about some complicated, permanent garage modification. We’re talking about accessible, reversible solutions that let you transform your two-wheeled companion into a stable, sweat-inducing machine in minutes. Whether you’re a seasoned cyclist looking to maintain your base through the off-season or a fitness newbie wanting a low-impact cardio option, converting your existing bike is a brilliant hack. It saves money, saves space, and lets you use a saddle and handlebars you already know and love. Over the next few thousand words, we’re going to walk through every method, piece of gear, and safety consideration you need to know. Think of me as your friend who’s been down this road (or, more accurately, on this trainer) and is here to share the honest, no-nonsense details.
Why Convert Your Bike? The Smart Fitness Choice
Before we dive into the “how,” let’s solidify the “why.” The decision to make a regular bike a stationary bike stems from a cluster of very practical benefits that often outweigh buying a standalone piece of equipment. It’s a choice driven by economy, ecology, and ergonomics.

Visual guide about How to Make a Regular Bike a Stationary Bike
Image source: images-na.ssl-images-amazon.com
Unbeatable Cost Savings
Let’s talk numbers. A decent new upright or recumbent stationary bike from a big-box store starts around $300 and can easily soar into the thousands for commercial-grade models. In contrast, the most effective conversion tool—a quality bike trainer—can be found for $100 to $400. You’re leveraging the $200, $500, or even $2000 you already invested in your bicycle. For the cost of a mid-range stationary bike, you could buy a top-tier trainer and a new set of cycling tires. The financial logic is hard to argue with.
Superior Realism and Feel
This is the secret weapon. When you make a regular bike a stationary bike, you’re not just getting a place to pedal; you’re getting your exact bike. That means your specific saddle height, your preferred handlebar reach, your clipless pedal system, and the exact geometry you’re accustomed to. There’s no awkward adjustment period. The ride feel is authentic—the resistance is applied directly to your rear wheel, mimicking the true physics of road cycling far better than many budget stationary bikes, which often have a lightweight, twitchy flywheel. For training specificity, especially for cyclists, this is huge.
Space Efficiency and Minimal Footprint
A full-sized stationary bike is a permanent piece of furniture. It’s wide, often heavy, and demands a dedicated spot. A bike trainer or a set of rollers, however, is an accessory. When you’re done, you can fold it up and tuck it into a closet, under a bed, or against a wall. Your regular bike can be removed and returned to its wall mount or floor stand in seconds. For apartment dwellers or anyone with precious square footage, this flexibility is a game-changer.
Environmental and Practical Upside
You’re giving a second life to a product you already own, reducing waste. Practically, you only have one bike to maintain, one set of tires to replace, and one drivetrain to keep clean. It simplifies your cycling ecosystem. Plus, on days when the weather is good, you simply unclip from the trainer and hit the open road with the same machine.
Method 1: The Bike Trainer – Your Most Popular Path
When people think of how to make a regular bike a stationary bike, the image that comes to mind is almost always a bike trainer. It’s the gold standard for a reason. A trainer is a sturdy, A-frame stand that cradles your bicycle’s rear axle, lifting the rear wheel off the ground. The front wheel stays planted, and the bike is secured at two points: the rear axle and the front fork (via a clamp or a simple block). Resistance is provided by a mechanism inside the trainer’s “drum” that the rear wheel presses against.

Visual guide about How to Make a Regular Bike a Stationary Bike
Image source: oglf.org
Types of Bike Trainers: Finding Your Resistance
The core difference between trainers lies in how they generate that all-important resistance. Here’s a breakdown of the main types you’ll encounter.
- Wind Trainers: The simplest and often cheapest. They use a fan blade that spins as you pedal, creating air resistance. The faster you go, the harder it gets. Pros: Very affordable, no power needed, a realistic “road feel” with a slight breeze. Cons: Can be noisy (think desk fan on steroids), resistance curve isn’t as smooth, and they offer no programmed workouts.
- Magnetic Trainers: Use magnets to create resistance. A flywheel with magnets moves closer or further away from a metal disk as you adjust a dial or lever. Pros: Extremely quiet operation, smooth resistance, very reliable with no parts to wear out. Cons: Can feel a bit “static” or lack the progressive feel of road riding, often require a power source for the magnet control.
- Fluid Trainers: The fan favorite for serious indoor cyclists. They combine a fan with a sealed fluid chamber (usually silicon-based). The fan spins a paddle inside the fluid, creating viscous drag. Pros: Incredibly smooth, quiet, and progressive resistance that feels remarkably like climbing a real hill. They handle high power outputs well. Cons: More expensive, can develop tiny leaks over many years (though modern ones are very reliable), slightly heavier.
- Smart/Interactive Trainers: The new elite class. These are almost always fluid-based but include electronic components. They connect via Bluetooth or ANT+ to apps like Zwift, TrainerRoad, or Rouvy. The app can control the resistance automatically to match simulated gradients, create workouts, or race against others. Pros: The ultimate immersive experience, fantastic for structured training, highly engaging. Cons: The most expensive option, requires a compatible device and often a subscription to the apps.
Setting Up Your Trainer: A Step-by-Step Guide
Getting your bike onto a trainer is designed to be intuitive, but a few key steps ensure safety and stability.
- Read the Manual: Seriously. Every model has a unique quick-release skewer or through-axle adapter. The manual will specify the correct size and torque.
- Swap the Skewer: Your bike’s quick-release skewer is usually aluminum and not designed for the high clamping forces of a trainer. You must use the heavy-duty steel skewer that comes with the trainer. A failure here can be dangerous.
- Secure the Rear Axle: Open the trainer’s axle holder, place the bike’s rear axle into it, and tighten the knob/lever firmly. You should not be able to move the axle side-to-side.
- Position the Front Wheel: Most trainers require the front wheel to be slightly elevated to level the bike. This is done with a “front riser block” or a simple book. Your bike should be perfectly level or with a very slight downward slope from saddle to handlebars. An unlevel bike can cause the rear wheel to slip out of the trainer.
- Final Check: Give the bike a firm wiggle side-to-side and front-to-back. It should feel rock-solid. Spin the pedals by hand to ensure the wheel clears the resistance unit and there’s no rub.
Method 2: Rollers – The Skill-Based Classic
If trainers are the reliable sedan of indoor cycling, rollers are the manual-transmission sports car. They consist of three cylindrical drums (usually aluminum or PVC) mounted on a frame. The bike rides on top of these drums, with the front wheel on a single drum and the rear wheel on two. There is no physical clamping; balance and momentum are what keep you upright. This is the purest, most engaging way to make a regular bike a stationary bike.

Visual guide about How to Make a Regular Bike a Stationary Bike
Image source: practicalmechanic.com
The Unique Challenge and Reward of Rollers
You cannot simply plop your bike on rollers and start sprinting. It requires and dramatically improves your balance, core stability, and smooth pedal stroke. The learning curve is real; the first few sessions will be wobbly and short. But once you get it, it’s incredibly rewarding. The feeling of riding a “real” bike with no resistance unit attached is unparalleled. Your entire bike is free to move subtly, engaging your stabilizer muscles in a way a clamped trainer never can. Many professional road cyclists use rollers for high-cadence drills and warm-ups precisely for this reason.
Choosing and Using Rollers Safely
Rollers come in two main forms: basic rollers (just the three drums on a frame) and resistance rollers (which have a fan or magnetic unit inside one or more drums to add difficulty). For a beginner, starting with a basic, smooth-drum set is actually easier because there’s no variable resistance to fight against while you’re trying to balance.
Safety is paramount with rollers. Always use them in a wide-open space with a smooth, non-slippery floor (carpet is bad). Have a sturdy object like a counter or a heavy chair next to you to grab for your first few attempts. Set your bike up in a low gear. The key is to start moving, get your speed up to a stable cadence (70-90 RPM is a good target), and then focus on looking ahead, not down at your front wheel. Your body will naturally make the micro-adjustments. It’s a skill that comes with practice, and the first time you ride for 30 minutes without touching the floor is a huge victory.
Method 3: DIY Stationary Bike Stand – The Budget Hacker’s Route
For the ultimate in cost-consciousness and the satisfaction of a project, you can create a very basic stationary setup with materials from a hardware store. This method won’t provide adjustable resistance, but it will securely hold your bike for a low-intensity spin, recovery ride, or to keep your legs moving while you watch TV.
Building a Simple Front Fork Stand
The goal here is to support the front of your bike so the rear wheel can spin freely. You’re essentially building a block that the front fork rests on.
- Materials Needed: Two sturdy blocks of wood (e.g., 4×4 or 2×6, ~6-8 inches tall), a wide, flat board (to span between them for stability), and some non-slip material like rubber matting or yoga mat scraps.
- Construction: Place the two blocks parallel to each other, about the width of your front fork plus a few inches. Secure the wide board on top of them to create a solid platform. Attach the non-slip material to the top surface. This platform goes on the floor in front of your bike.
- Usage: With your bike upright (you may need a rear stand to keep it level), carefully roll it forward until the front fork dropouts rest securely on your platform. You may need to adjust the height with books or additional wood until the bike is level. The rear wheel will now be off the ground and free to spin.
Critical Warnings and Limitations
This is for very low-speed, low-resistance use only. There is no mechanism to prevent the front wheel from slipping off the block if you push hard or suddenly. It is not suitable for high-intensity interval training, sprinting, or climbing simulations. The rear tire will wear unevenly without resistance. The primary use is for gentle spinning. Always ensure the stand is on a non-slip surface and test it gently before committing to a full workout. This method is about function, not performance or safety under load.
Safety, Comfort, and Ergonomic Must-Dos
You’ve chosen your method and have your bike mounted. Before you dive into that first sweat session, a few critical adjustments and accessories are non-negotiable for a safe and comfortable experience when you make a regular bike a stationary bike.
Ventilation is Not Optional
Indoor cycling generates a lot of heat with little to no natural airflow. A dedicated fan, preferably a powerful one aimed at your torso, is essential. Overheating is a real performance and health killer. Hydration is equally critical—have a water bottle within easy reach on your bike’s frame or the trainer stand.
Protect Your Floor and Your Bike
The rear tire will be spinning against a resistance unit or, in the DIY case, just in the air. On a trainer, a special trainer tire is highly recommended. These are harder, slicker, and designed to dissipate heat without degrading as quickly as a standard road tire. They cost $30-50 and will save your good tires from premature wear and potential blowouts from heat buildup. For rollers, a smooth, non-knobby tire is best. Additionally, place a thick mat, old rug, or piece of plywood under your setup. This protects your floor from sweat, scuffs, and the weight of the equipment, and it dampens vibration and noise.
Ergonomic Tweaks for the Saddle
Outdoor riding involves shifting weight, standing on climbs, and coasting. Indoor cycling is 90% seated, in a static position. This puts more pressure on your sit bones. Consider a saddle cover or a different saddle specifically for indoor use. Gel covers are a cheap fix. Many cyclists have a wider, more padded “trainer saddle” they swap in for long indoor sessions. Also, ensure your bike is perfectly level. A slight nose-down tilt can cause you to slide forward, increasing pressure on your perineum.
The Essential Accessory Trio
- A Trainer Mat: As mentioned, for floor protection and noise/vibration dampening.
- A Front Wheel Riser/Block: Almost always needed to level the bike on a trainer. Some trainers include one; others require you to find a suitable book or block.
- A Fan: Seriously. A $20 box fan is one of the best fitness investments you can make for indoor training.
Cost Comparison: Making the Smart Financial Decision
Let’s lay the numbers on the table. The goal here is to see the true cost of making a regular bike a stationary bike versus buying a new one. We’ll consider entry-level to premium options.
| Method | Estimated Cost (USD) | Key Advantages | Key Drawbacks | Best For |
|---|---|---|---|---|
| DIY Wooden Stand | $15 – $40 | Extremely cheap, uses simple materials | No resistance, unsafe for hard efforts, front wheel can slip | Very light recovery spins, minimal budget |
| Basic Wind Trainer | $80 – $150 | Cheapest functional trainer, no power needed, realistic road feel | Quite loud, basic resistance curve, not smart | Budget-conscious riders, casual use, no noise constraints |
| Magnetic Trainer | $150 – $300 | Very quiet, smooth, reliable | Can feel “static,” often needs power for adjustability | Apartment dwellers, those wanting quiet operation, general fitness |
| Fluid Trainer | $250 – $450 | Smooth, progressive, quiet, handles high power | Higher cost, slight risk of long-term fluid leak | Serious indoor trainers, cyclists, those wanting a premium feel |
| Smart Trainer | $400 – $1,200+ | Interactive, app-controlled, ultimate engagement & training tool | Highest cost, requires tech setup, often needs subscription | Tech-savvy cyclists, Zwift/TrainerRoad users, structured training |
| Basic Rollers | $100 – $250 | Purest ride feel, improves balance & technique, very engaging | Steep learning curve, not for high power/sprints, requires space | Cyclists wanting skill development, warm-ups, those who dislike being clamped |
| Resistance Rollers | $250 – $500 | Roller feel with added difficulty, good for high-cadence work | Learning curve + resistance complexity, can be bulky | Experienced rollers users wanting more challenge |
| New Basic Stationary Bike | $300 – $600 | All-in-one, no bike needed, often has programs | Not your bike, often poor ergonomics, less realistic feel, bulky | Non-cyclists, those without a suitable bike, very casual users |
As you can see, for the price of a mediocre new stationary bike, you can acquire a very good fluid or magnetic trainer that will work with your high-quality road bike. The value proposition of converting is overwhelmingly strong for anyone who already owns a decent bicycle.
Conclusion: Your Journey to an Indoor Oasis Begins Now
So, there you have it. The mystery of how to make a regular bike a stationary bike is solved, and it’s far more accessible than you might have thought. It’s a journey that starts with a simple question—”Can I use my bike indoors?”—and ends with a personalized, high-performance fitness station that fits your budget, your space, and your specific riding style.
Remember the core trade-offs: trainers offer stability, power, and ease for most people; rollers offer unparalleled realism and skill development but demand patience; DIY offers a minimal-cost entry point but with significant limitations. Your path depends on your goals. Are you a cyclist training for a century? A smart or fluid trainer is your best friend. A beginner just wanting to watch Netflix while moving? A basic magnetic or wind trainer will be perfect. A purist who loves the feel of the bike? Give rollers a dedicated month to learn.
The beauty of this approach is its reversibility. You can dip your toes in with a $150 magnetic trainer, love it, and later upgrade to a smart fluid trainer. You can try rollers for a season and sell them if they’re not for you. You are not locked into a massive, dusty piece of equipment. You are empowering your existing asset.
Now, go check your bike’s axle compatibility (quick-release vs. thru-axle), measure your tire clearance, and set a budget. The winter won’t stop you. The rain won’t stop you. Your garage, living room, or basement is about to become your favorite cycling destination. All you need is the right tool and the will to turn that first pedal stroke indoors. Happy training!
Frequently Asked Questions
What’s the easiest way to make a regular bike a stationary bike?
The easiest method is using a bicycle trainer, which is a stand that lifts your rear wheel and provides resistance. Simply clamp your rear axle into the trainer’s cups, and your bike is ready to ride indoors. This requires minimal setup and no permanent modifications to your bike.
What tools do I need to convert my bike to a stationary one?
For a basic bike trainer, you typically only need the trainer itself and possibly a quick-release skewer if your bike doesn’t already have one. If using a roller or building a custom stand, you may need wrenches, a saw, and woodworking tools. Always check your specific product’s manual for required tools.
Is it cheaper to make a regular bike stationary or buy a stationary bike?
Converting a regular bike is almost always significantly cheaper than purchasing a dedicated stationary bike. A good quality magnetic or fluid trainer costs a fraction of the price of a new exercise bike. This approach lets you use your existing, often higher-quality, bicycle for indoor training.
Will my bike be stable and safe as a stationary bike?
Yes, when used correctly with a proper trainer or stand, your bike will be very stable. Ensure the trainer is on a flat, solid surface and that your bike is securely clamped. For extra stability, especially with older bikes, a front wheel stand or a block under the front wheel can prevent tipping.
Can I use my makeshift stationary bike on carpet?
You can use it on carpet, but a protective mat is highly recommended to prevent carpet damage and improve trainer stability. The mat also prevents the trainer’s feet from sinking into the pile. For the best experience and to protect your floors, a rubber exercise mat is ideal on any surface.
Is it worth it to make a regular bike a stationary bike?
For most cyclists, it is absolutely worth it to make a regular bike a stationary bike. It’s a cost-effective way to maintain fitness during bad weather without sacrificing the feel of your own bike. The main trade-off is that basic trainers lack the built-in programs and metrics of commercial stationary bikes.


