How to Install Curtain Rod
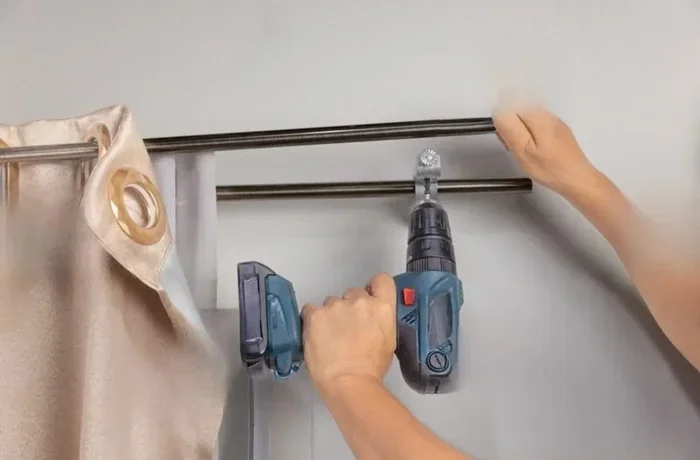
Our complete guide teaches you exactly how to install curtain rod in your home with confidence. You will learn the right tools, accurate measuring, and easy bracket mounting steps. Follow our tips to hang curtains like a pro without hiring help.
Installing a curtain rod might seem tricky. But it is actually one of the easiest home projects you can do. With the right tools and a little patience, you can hang curtains in under an hour. This guide walks you through every step of how to install curtain rod like a pro.
Whether you are replacing an old rod or hanging curtains for the first time, you are in the right place. We will cover everything from measuring to mounting. You will also learn about different rod types and common mistakes to avoid. Let us get started.
Before you pick up a drill, you need to gather a few things. Having everything ready saves time and keeps you from running back and forth. Here is what you will need.
Essential Tools
- Drill with drill bits for making holes in the wall
- Screwdriver (Phillips or flathead, depending on your brackets)
- Measuring tape for accurate curtain rod length
- Pencil for marking bracket positions
- Level to keep your rod straight
- Wall anchors if you are drilling into drywall
- Step stool or ladder for high windows
Hardware You Will Need
Most curtain rod kits come with brackets and screws. But check your package first. You may also need wall anchors for extra support. If your curtains are heavy, choose heavy duty curtain rod brackets that can handle the weight. For lighter curtains, standard plastic brackets work fine.
Now that you have your tools ready, it is time to measure. Accurate measuring is the most important part of this whole project. A small mistake here can lead to curtains that do not fit right.
Key Takeaways
- Measure twice, drill once: Always double-check your curtain rod measurements before marking holes on the wall.
- Use the right hardware: Wall brackets and anchors make a huge difference in holding the rod securely.
- Level matters: A crooked rod ruins the whole look, so use a level during every step.
- Choose the right rod type: Ceiling mount, wall mount, and tension rods each work best for different spaces.
- Finish with style: Finials and curtain rings add a polished touch to your finished window treatment.
- Organize your space: A well-installed curtain rod can also help organize areas like home gyms, similar to how you might hide a treadmill in your living room.
📑 Table of Contents
How to Measure for Your Curtain Rod
Measuring for a curtain rod is simple but needs attention to detail. You need to know three things: the width of your window, how far out you want the rod to extend, and the height where the rod will sit.
Width and Extension
Start by measuring the width of your window frame. Then add extra inches on each side. This lets curtains pull back fully and lets light in. A good rule is to add 3 to 6 inches on each side. This also prevents the fabric from bunching against the wall.
Height Placement
For a tall window look, mount the rod 4 to 6 inches above the frame. For a more dramatic effect, go all the way to the ceiling. Ceiling mount curtain rods make rooms feel bigger and more elegant. Just make sure the rod is level before you mark any holes.
Double Check Your Marks
Use your pencil to mark where each bracket will go. Hold your level across the marks to confirm they are even. This one small step saves a lot of headaches later. It is the difference between a crooked rod and a perfect hang.
Step-by-Step Guide to Install Curtain Rod
Now for the fun part. Follow these steps in order and you will have a clean, secure mount in no time. This is the same process whether you are doing a wall mount or ceiling mount setup.
Step 1: Mark Your Bracket Positions
Hold the brackets against the wall at your marked spots. Use your pencil to trace the screw holes. If you are working with drywall, you will need wall anchors. These small inserts give your screws something to grip onto. Without them, heavy curtains can pull the brackets right out of the wall.
Step 2: Drill Your Holes
Drill pilot holes where you marked. Use a drill bit that matches the size of your wall anchors. Go slow and steady. If you are mounting into a stud, you can skip the anchors. Studs provide the strongest hold for any curtain rod bracket.
Step 3: Install the Brackets
Screw the brackets into place. Tighten them firmly but do not over-tighten. You want them snug and secure. Use your level again to make sure each bracket is straight. A slightly off bracket will show once the rod is up.
Step 4: Mount the Curtain Rod
Slide the rod through the curtain rings or pockets first. Then rest it on the brackets. Some rods have a simple snap-in design. Others need you to tighten set screws. Check your rod type and follow the instructions that come with it.
Step 5: Hang Your Curtains
Finally, hang your curtains on the rod. Slide them onto the rings or pull them through the pocket. Step back and check the look. Adjust the fabric so it hangs evenly. Add finials to the ends for a decorative touch.
Types of Curtain Rods and When to Use Each
Not all curtain rods are the same. Different types work better in different situations. Here is a quick look at the most common options.
Wall Mount Curtain Rods
This is the most popular style. It mounts directly to the wall above the window frame. Wall mount rods work great for most rooms. They are simple to install and come in many finishes. Use them in bedrooms, living rooms, and home offices.
Ceiling Mount Curtain Rods
These rods attach to the ceiling instead of the wall. They pull the eye upward and make windows look taller. Ceiling mount rods are perfect for rooms with high ceilings or for creating a dramatic effect. They also work well in spaces where wall mounting is difficult.
Tension Rods
Tension rods use pressure to stay in place. No drilling or screws needed. They are great for renters or temporary setups. However, they work best with lighter curtains. Heavy drapes will pull a tension rod out of position over time.
Double Curtain Rods
Double rods let you layer sheer curtains with heavier ones. You get light control and privacy at the same time. They are a popular choice for living rooms and master bedrooms. Just know that they require more brackets and a wider rod span.
Common Mistakes to Avoid When You Install Curtain Rod
Even simple projects have pitfalls. Here are the most common mistakes people make. Avoid these and your project will go smoothly.
- Skipping the level: A crooked rod is very noticeable once curtains are up. Always use a level.
- Not adding enough support: Heavy curtains need heavy duty brackets. Lightweight brackets will sag over time.
- Measuring only the frame: Remember to extend the rod past the frame on both sides. Otherwise your curtains will block light at the edges.
- Forgetting wall anchors: Drywall alone cannot hold brackets long term. Always use anchors unless you hit a stud.
- Choosing the wrong rod diameter: Thin rods bend under heavy fabric. Match the rod thickness to your curtain weight.
Another thing to keep in mind is your room setup. If you have a home gym or workout space near your windows, think about how the curtains will work with your setup. For example, if you are organizing a room where you also keep fitness gear like resistance bands or kettlebells, a well-installed curtain rod can add privacy and style. Similarly, people who hide equipment like a treadmill in their living room often use curtains on rods to create a clean look. The same principle applies when you are setting up a room that doubles as a workspace or exercise area.
Tips for a Perfect Finish
Once your rod is up and curtains are hanging, a few finishing touches make all the difference. These small details take your window treatment from basic to beautiful.
Add Finials
Finials are the decorative ends on your curtain rod. They come in many shapes and styles. Ball finials give a classic look. Knob finials work well in modern spaces. Choose ones that match your room decor.
Use Curtain Rings
Curtain rings help curtains slide open and close smoothly. They also add a nice drape to the fabric. Ring clips work well with thicker fabrics. Tab-top curtains do not need rings at all.
Check for Stability
After hanging, give the rod a gentle tug. It should feel solid with no wobble. If it moves, check your brackets and anchors. Tighten any loose screws right away. A secure rod lasts for years.
Match Your Hardware
Try to match your rod finish with other hardware in the room. If you have brushed nickel door handles, choose a brushed nickel rod. This small detail ties the whole room together. It shows attention to detail and makes your space feel polished.
Expert Insights on Curtain Rod Installation
Professional installers agree on a few key principles. First, always locate studs when possible. Studs provide the strongest anchor point. Use a stud finder if you are not sure where they are. Second, do not rush the measuring phase. Take your time and make sure every mark is accurate before you drill. Third, invest in quality brackets. They may cost a little more, but they hold up much better over time.
If you are working in a space that serves multiple purposes, such as a room that doubles as a home gym or storage area, think about how your curtain setup fits into the bigger picture. For instance, people who organize their living spaces to hide fitness equipment or create dedicated workout corners often use curtain rods as part of their room divider or window treatment strategy. Much like how you might organize a room to store a folding treadmill or organize resistance bands, the right curtain rod adds both function and style to a multi-purpose space.
One more tip from the pros: paint your brackets the same color as your wall before installation. This creates a seamless look. The brackets blend in and the focus stays on your beautiful curtains. It is a small step that makes a big visual difference.
Final Thoughts
Learning how to install curtain rod is a rewarding DIY project. It saves you money and gives you full control over your window treatments. You do not need special skills or expensive tools. Just follow the steps, take your time, and enjoy the process.
Start with accurate measurements. Gather your tools and hardware. Mark your holes carefully. Drill, mount, and hang. In less than an hour, you will have curtains that look professional and feel great. The satisfaction of completing this project is real. You will look at your windows differently from now on.
Remember, the key to a great result is preparation. Measure carefully, choose the right rod type for your space, and avoid the common mistakes we covered. Whether you are hanging sheer curtains in the bedroom or heavy drapes in the living room, this guide gives you everything you need to succeed. Now grab your drill and get to work.
Frequently Asked Questions
What is the best height to install a curtain rod?
Mount the rod 4 to 6 inches above the window frame for a standard look. For a taller, more dramatic effect, go all the way to the ceiling. Ceiling mount rods make any room feel more spacious and elegant.
Do I need wall anchors for a curtain rod?
Yes, if you are drilling into drywall without hitting a stud. Wall anchors give your screws something to grip and prevent the brackets from pulling out. For heavy curtains, always use anchors or mount directly into studs.
Can I install a curtain rod by myself?
Absolutely. This is a beginner-friendly project that requires only basic tools like a drill, screwdriver, and level. Most people finish the job in 30 to 60 minutes with no help.
What type of curtain rod is best for heavy curtains?
Choose a heavy duty curtain rod with metal brackets and a thick diameter. Wall mount rods with solid construction handle heavy fabric best. Avoid tension rods for heavy curtains as they may sag over time.
How do I make sure my curtain rod is level?
Use a bubble level after marking your bracket positions. Place it across the marks and adjust until the bubble sits in the center. This small step prevents a crooked rod and makes your curtains hang perfectly straight.
What is the difference between a wall mount and ceiling mount curtain rod?
A wall mount rod attaches to the wall above the window, while a ceiling mount rod connects directly to the ceiling. Ceiling mounts pull the eye upward and make windows appear taller. Wall mounts are simpler to install and work well in most standard rooms.