How to Fill Air in Bike Tires at Home
Filling your bike tires at home is a quick, essential skill that saves money, ensures safety, and optimizes performance. You just need the right pump and gauge, know your tire’s recommended PSI, and understand your valve type. By checking pressure regularly and inflating correctly, you’ll enjoy a smoother ride, better traction, and fewer flats. It’s a fundamental maintenance task every cyclist can master in minutes.
Ever hopped on your bike, only to feel like you were pedaling through thick mud? Or noticed your rim is dangerously close to scraping on every little bump? Chances are, your tires are under-inflated. Many beginners and even experienced riders overlook this simple piece of maintenance, but mastering how to fill air in bike tires at home is one of the most impactful skills you can learn. It directly affects your speed, comfort, safety, and the longevity of your expensive bike components. Forget the hassle of finding a gas station with a working compressor or paying a shop for a two-minute job. With the right knowledge and a few basic tools, you can keep your tires perfectly pressurized in the comfort of your own garage or hallway, ensuring every ride is your best ride.
The process is deceptively simple, but doing it correctly matters. Too little air leads to “pinch flats,” rim damage, and sluggish handling. Too much air creates a bone-jarring ride, reduces traction, and can even cause the tire to blow off the rim. This guide will walk you through every single step, from decoding that mysterious number on your tire sidewall to confidently handling both common valve types. We’ll talk tools, technique, troubleshooting, and best practices. By the end, you’ll not only know how to fill air in bike tires but understand why proper pressure is the foundation of a great cycling experience. Let’s get rolling.
Key Takeaways
- Check Your Sidewall: The tire’s sidewall always lists the recommended minimum and maximum pressure (PSI) for safe inflation.
- Know Your Valve: Identify if your bike has a Presta (narrow, with a lock nut) or Schrader (wide, like a car tire) valve, as this determines pump compatibility.
- Use a Floor Pump: A good floor pump with a built-in gauge is the most efficient, accurate, and effortless way to inflate tires at home.
- Check Pressure Cold: For an accurate reading, always check and inflate tires when they are at room temperature, not after a ride.
- Don’t Over-Inflate: More pressure isn’t always better. Over-inflation leads to a harsh ride, reduced traction, and a higher risk of blow-offs.
- Listen & Feel: A properly inflated tire feels firm and makes a light “thump” when tapped. A soft, squishy feel means it needs air.
- Seal the Valve: After inflating, securely tighten the valve cap and, for Presta valves, ensure the lock nut is finger-tight to prevent slow leaks.
📑 Table of Contents
Why Proper Tire Pressure is Non-Negotiable
Before we even touch a pump, it’s critical to understand why this task is so important. Tire pressure isn’t about achieving a single, magic number. It’s about finding the optimal balance for your specific bike, your weight, and the terrain you ride. Think of your tire as a suspension component. It’s the first and last line of defense against bumps, cracks, and debris.
The Triad of Benefits: Speed, Safety, and Comfort
Correctly inflated tires deliver a trifecta of benefits. First, speed and efficiency. An under-inflated tire deforms excessively as it rolls, creating more surface area in contact with the road and increasing rolling resistance. You’ll work harder to maintain the same speed. Properly inflated tires roll smoother and faster with less effort. Second, safety and control. The right pressure ensures the tire maintains its intended shape, providing predictable cornering, responsive braking, and adequate cushioning over obstacles. A blowout from over-inflation or a sudden collapse from a pinch flat can lead to a crash. Third, comfort and component longevity. Your tires absorb shock. Too much pressure transmits every vibration directly to your hands, arms, and back. Too little pressure allows the rim to impact the ground, which can dent lightweight rims and damage spokes. It also increases wear on the tire casing itself.
Reading the Sidewall: Your Pressure Bible
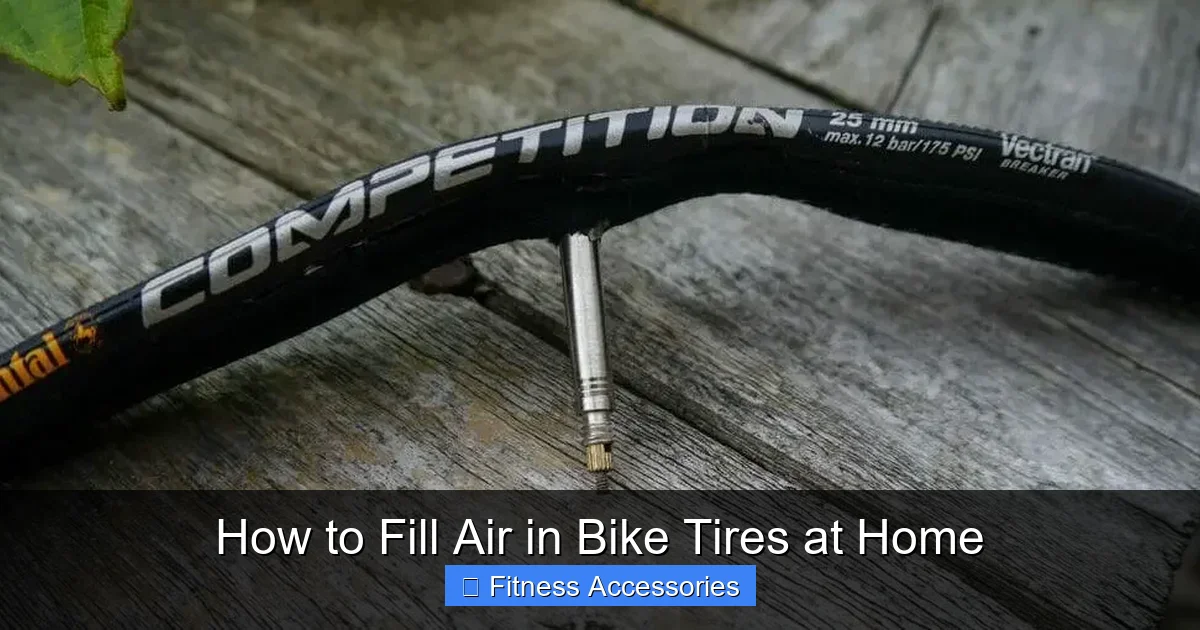
Every bike tire has its pressure range printed on the sidewall, usually in PSI (Pounds per Square Inch). You’ll see something like “Inflate to 65-100 PSI” or “Max 120 PSI.” This is your starting point, not a strict rule. The minimum pressure should be enough to support your weight without the tire “bottoming out” (the rim hitting the ground). The maximum is the absolute limit the tire carcass can safely handle. For most riders on smooth roads, aiming for the middle to higher end of the range is efficient. For mountain bikers on rocky trails, running lower pressures (within the safe range) increases traction and cushion. Your weight is a major factor—heavier riders generally need higher pressures within that range.
Tools of the Trade: What You Actually Need
You don’t need a professional mechanic’s toolbox. In fact, you can get started with just one item, but having the right tools makes the job foolproof and accurate.
Visual guide about How to Fill Air in Bike Tires at Home
Image source: toolrom.com
The Pump: Your Primary Weapon
There are three main types of pumps, each with pros and cons.
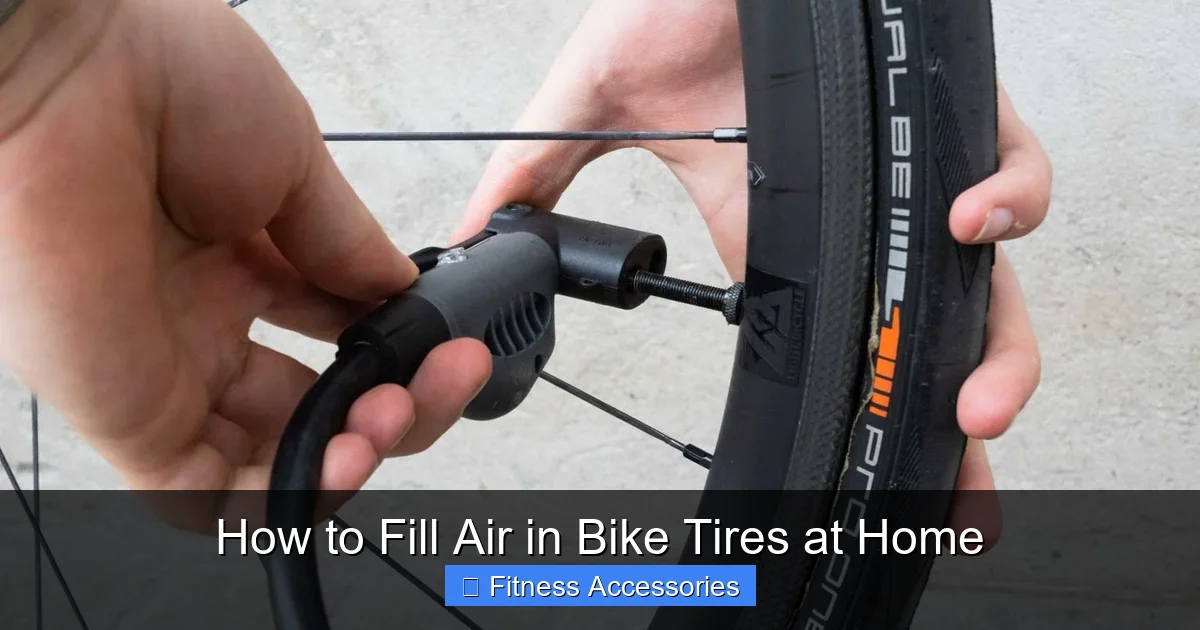
- Floor Pump (The Champion): This is the gold standard for home use. Its large chamber and long stroke move a huge volume of air with minimal effort. The best models have a built-in, high-quality pressure gauge, a sturdy base, and a dual-head that fits both Presta and Schrader valves without switching parts. It’s fast, accurate, and gentle on your back. Invest in a good one; it will last a lifetime.
- Hand Pump (The Portable Backup): Compact and great for on-the-go emergencies or if storage space is tight. However, they require significant effort to reach high pressures (like for road bikes), and many lack an accurate gauge. They are a secondary tool, not your primary home inflator.
- Electric/Compressor Pump (The Convenience Option): Plug-in pumps or 12V car adapters are fast and require zero effort. They are excellent for inflating multiple tires quickly (like on a family cargo bike). The downside is they can be less accurate, and some cheaper models can overheat or damage delicate Presta valves if not monitored carefully.
The Pressure Gauge: Accuracy is Everything
Do not trust the gauge on a cheap hand pump or a gas station compressor. They are notoriously inaccurate. A standalone, quality analog or digital pressure gauge is a $10-$30 investment that pays for itself in proper tire wear and performance. Many high-end floor pumps have excellent gauges built-in. For the most precise readings, a separate digital gauge is unbeatable.
Other Helpful Extras
A few small items make life easier: tire levers (only for removing the tire if you have a puncture), a valve adapter (to fit a Schrader pump head onto a Presta valve), and of course, valve caps. The caps keep dirt and moisture out of the valve core, preventing slow leaks.
Step-by-Step: The Inflation Process
Now, the core procedure. It’s a simple sequence of steps that, once memorized, takes under 30 seconds per tire.
Visual guide about How to Fill Air in Bike Tires at Home
Image source: tirehubz.com
Step 1: Identify Your Valve Type
Look at the little metal or rubber protrusion where air goes in. You’ll have one of two types:
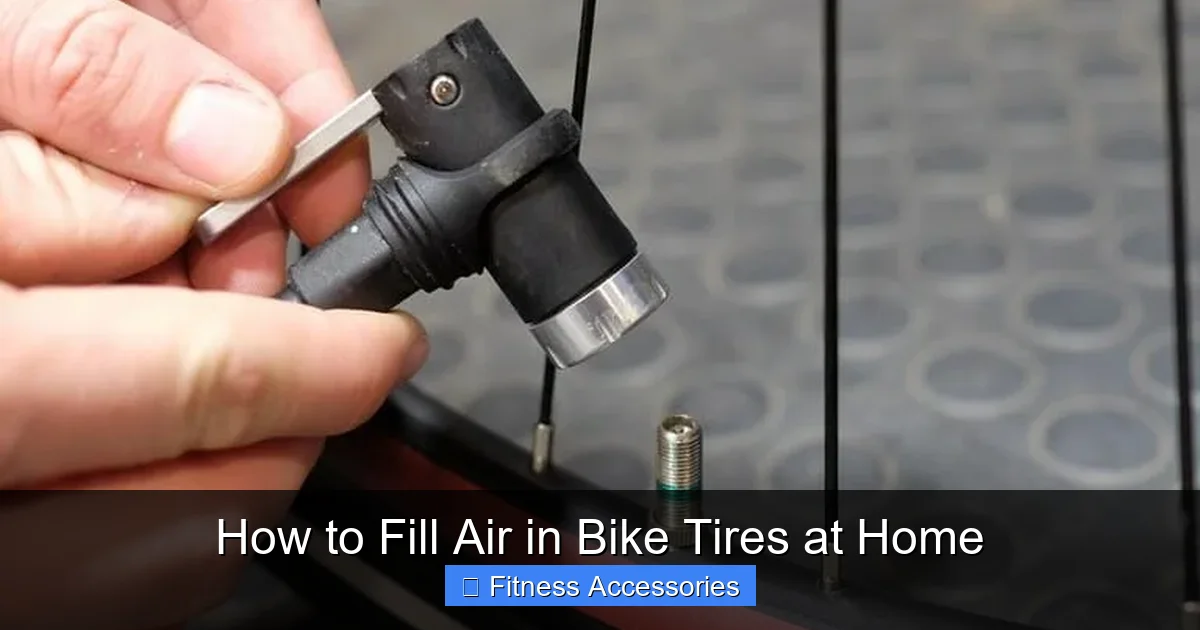
- Presta Valve: Narrower (about 6mm), made of metal. It has a small knurled lock nut at the top that you unscrew to open. Common on road bikes, high-end mountain bikes, and e-bikes. You often need to press the valve stem down slightly to “burp” any initial air before attaching the pump.
- Schrader Valve: Wider (about 8mm), identical to the valve on your car tire. It has a small metal pin in the center that you press with a tool (or your fingernail) to release air. Common on hybrid bikes, cruisers, kids’ bikes, and lower-end mountain bikes.
Your pump head must match. Most modern floor pumps have a clever universal head that works on both. You simply flip a collar or push a lever to change the size. If yours doesn’t, you’ll need a Presta-to-Schrader adapter.
Step 2: Prepare the Valve and Pump
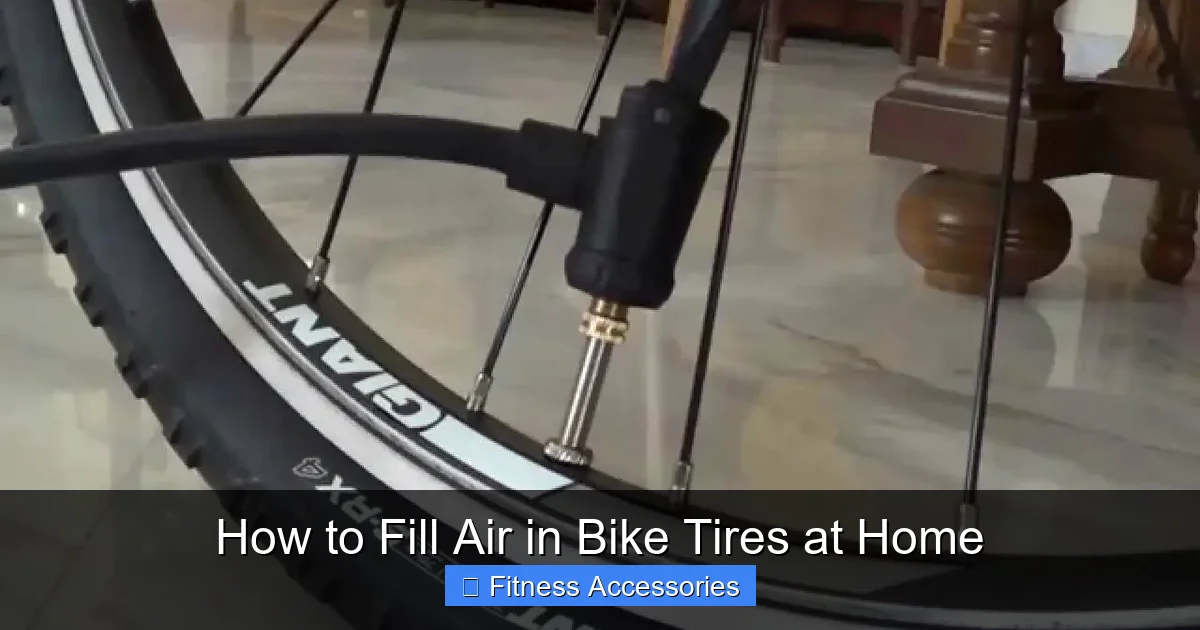
For a Presta valve: Loosen the small lock nut at the top by turning it counter-clockwise a few turns. You should be able to tap the valve and hear a tiny puff of air—this means it’s open. Do not remove the nut entirely. For a Schrader valve, simply remove the plastic cap. Press the center pin briefly with a tool to ensure it’s not stuck. Now, attach your pump head. Push it firmly onto the valve stem. For Presta, you may need to press it down to engage the seal. You should hear a hiss of escaping air stop, indicating an airtight seal. Engage the pump head’s locking lever if it has one—this is crucial to prevent it from popping off under pressure.
Step 3: Inflate and Monitor the Gauge
Start pumping with steady, full strokes. If using a floor pump, use your body weight on the downstroke for maximum efficiency. Keep your eye on the pressure gauge. Do not blindly pump until you “think” it’s full. Pump until the gauge needle reaches your target PSI (the number you determined from your tire sidewall and weight). If you overshoot slightly, it’s easy to let a little air out. It’s much harder to add air to an already perfectly inflated tire without over-doing it.
Step 4: Disconnect Correctly
This is where many people mess up. Before you remove the pump head, you must depressurize the hose slightly. For most lever-lock pump heads, simply flip the lever to the “open” position. You’ll hear a quick hiss of air escaping from the hose, not the tire. This releases the pressure that was sealing the head to the valve. Now, pull the pump head straight off. For Presta valves, immediately tighten the lock nut. Screw the plastic valve cap back on finger-tight. Your tire is now properly inflated.
Special Considerations: Road vs. Mountain, Tubeless, and More
The basic process is the same, but different bike types have nuanced needs.
Visual guide about How to Fill Air in Bike Tires at Home
Image source: e7yp5tq4unz.exactdn.com
High-Pressure Road Bike Tires
These tires often require 80-120 PSI. The narrow volume means a few pumps make a big difference. Use a pump with a precise gauge. A slight over-inflation can feel like a rock-hard ride. A slight under-inflation increases rolling resistance dramatically. Experiment within the sidewall range to find your personal “sweet spot” for comfort vs. speed on your typical roads.
High-Volume Mountain Bike Tires
These run much lower pressures, typically 20-35 PSI, especially for tubeless setups. The large air volume means you’ll be pumping for a while with a hand pump. A floor pump is almost essential here. Lower pressure increases traction and cushioning on rough trails but increases the risk of rim strikes and snake flats (pinch flats) if you hit a sharp edge. Adjust pressure based on trail conditions—softer for mud, harder for hard-packed dirt.
The Tubeless Revolution
Tubeless tires (sealed with liquid sealant) require a bit more initial setup. To seat the bead (the tire edge sealing to the rim), you often need a sudden surge of high-volume air, which a standard floor pump may not provide. Many tubeless setups use a dedicated air compressor or a high-volume tubeless inflator (like a booster canister). Once seated, topping up air is the same process, but you must periodically check and add sealant. The benefit is you can run much lower pressures without fear of pinch flats.
Troubleshooting: Common Problems and Fixes
What if you follow all the steps and something still feels wrong?
The Tire Feels Soft Immediately After Inflation
First, re-check your gauge against a known good one. Second, you might have a leak. Listen for a hissing sound near the valve or tire. Submerge the tire in water (or use soapy water) and look for bubbles. A leaking valve core can often be tightened with a valve core tool (or very carefully with pliers). A hole in the tire requires a patch or a new tube/tire.
The Pump Head Won’t Stay On
This is almost always a seal issue. For Presta valves, ensure the lock nut is loosened and you’ve pressed the valve stem down to engage. Check the pump head’s rubber seal for debris or damage. Make sure you’re pushing the head on straight and far enough. Engage the locking lever fully.
I Can’t Reach the Recommended Pressure
Your pump may be faulty or inefficient. Hand pumps are notorious for this, especially with high-pressure road tires. You may also have a slow leak that you’re fighting against. Isolate the problem by checking the gauge on another pump or using a separate gauge. If your pump is old, the seals inside may be worn out, requiring replacement or a new pump.
Over-Inflated! What Now?
Don’t panic. To let air out, simply press the center pin of a Schrader valve with a small tool (or the back of your gauge). For Presta, gently depress the valve stem with the lock nut loosened. Do this in short bursts, checking the gauge frequently, until you hit your target. It’s better to start slightly under and add more air than to start over and have to bleed off.
Building a Habit: Maintenance and Best Practices
Inflating your tires shouldn’t be a “set it and forget it” task. It’s part of regular bike maintenance.
How Often Should You Check Pressure?
Check your tire pressure before every single ride. Tires naturally lose air over time through the rubber and valve (a process called permeation). Road bike tires can lose 5-10 PSI per week, while mountain bike tires lose less. Temperature changes also affect pressure—cold weather lowers it. A quick squeeze and a glance at a gauge takes 10 seconds and prevents problems.
Finding Your Personal Optimal Pressure
The sidewall range is a safety guideline. Your ideal pressure depends on your total weight (rider + gear) and terrain. A 150 lb rider on smooth pavement might run 90 PSI on 25mm road tires. That same rider on rough gravel might drop to 60 PSI for more comfort and grip. A 200 lb rider would need to add 5-10 PSI to both scenarios to prevent excessive bottoming. Experiment! Note your weight and the pressure you used, then adjust up or down by 2-3 PSI increments and feel the difference in ride quality and handling.
Storage and Seasonal Care
During long storage periods (winter), it’s best to deflate tires to about half their normal pressure. This prevents flat spots from the bike’s weight sitting in one spot and reduces stress on the tire beads. Before storing, give the tires a quick wipe-down with a dry cloth to remove brake dust and road grime, which can degrade rubber over time.
Frequently Asked Questions
Can I use a gas station air pump for my bike tires?
Yes, but with caution. Gas station compressors are high-volume and can fill a tire very quickly, but they are often inaccurate and can easily over-inflate a sensitive bike tire. They also typically only have a Schrader valve fitting. You would need a Presta adapter. Always use your own gauge to verify the pressure and fill in short bursts, checking frequently.
How often should I really check my bike tire pressure?
The expert consensus is to check your tire pressure before every ride. Tires naturally lose air over time through the rubber and valve (permeation), and temperature swings affect pressure. A quick 10-second check with a gauge ensures you’re always at your optimal pressure for safety, efficiency, and performance.
What’s the difference between Presta and Schrader valves, and why does it matter?
Presta valves are narrower, lighter, and have a lock nut. They are standard on performance bikes (road, MTB) as they seal better at high pressures and fit through smaller rim holes. Schrader valves are wider, like car tires, and are common on casual bikes. The difference matters because your pump head must match the valve. Using the wrong one won’t seal. Most modern pumps have dual heads or you can use a cheap adapter.
Is there a “correct” pressure for all bikes?
No. The “correct” pressure is a range printed on your tire’s sidewall (e.g., 50-85 PSI). Your ideal pressure within that range depends on your body weight, the terrain (smooth road vs. rocky trail), and personal preference for comfort vs. speed. Heavier riders and those on smooth pavement generally need higher pressures within the range.
My tire feels hard, but the gauge says it’s low. What’s wrong?
This usually means your pressure gauge is inaccurate. Cheap, built-in gauges on hand pumps or public air stations are often unreliable. The solution is to purchase a standalone, quality analog or digital pressure gauge ($10-$30). Use it to verify your pump’s reading or as your primary tool.
What happens if I over-inflate my tires?
Over-inflation creates a harsh, uncomfortable ride as the tire can’t absorb bumps. It reduces the tire’s contact patch, leading to poorer traction, especially in wet conditions. Most critically, it significantly increases the risk of a blowout—where the tire casing fails and the inner tube explodes off the rim, which can cause a crash. Always stay within the maximum PSI listed on your tire sidewall.