How to Convert a Bike to an Exercise Bike
Converting your regular bicycle into a stationary exercise bike is a smart, cost-effective way to build a home gym. This process primarily involves using a bike trainer or rollers to provide resistance and stability. By adding smart technology and focusing on safety, you can create a versatile and powerful indoor training setup tailored to your fitness goals.
Have you ever looked at your trusty bicycle gathering dust in the garage and thought, “There has to be a way to use this for my indoor workouts”? You’re not alone. Many fitness enthusiasts are discovering the brilliant, budget-friendly secret of how to convert a bike to an exercise bike. Instead of investing in a bulky, expensive dedicated stationary bike, you can transform your existing two-wheeler into a powerful, versatile indoor training machine. This guide will walk you through every single step, from choosing the right equipment to setting up a smart, app-connected rig that rivals any commercial gym setup. Let’s roll up our sleeves and get your bike ready for the indoor season.
Key Takeaways
- Core Method: Conversion is achieved using a bike trainer (wheel-on or direct-drive) or rollers, which provide resistance and hold the bike steady.
- Bike Compatibility: Most standard road and mountain bikes can be converted, but you must check your bike’s axle type, frame clearance, and drivetrain compatibility with the trainer.
- Resistance Control: Choose between manual, magnetic, fluid, or smart electronic resistance; smart trainers connect to apps for immersive, data-driven workouts.
- Essential Accessories: A front wheel riser block, a protective mat, and a good fan are critical for stability, floor protection, and cooling.
- Safety First: Regularly inspect your bike’s condition, secure the bike firmly on the trainer, and ensure your setup is on a level, stable surface to prevent accidents.
- Enhanced Experience: Integrate with training apps like Zwift or TrainerRoad via Bluetooth/ANT+ for structured plans, virtual worlds, and detailed performance metrics.
- Cost vs. Benefit: Conversion is vastly cheaper than buying a dedicated exercise bike, allows you to use your own bike, and offers greater flexibility and realism for training.
📑 Table of Contents
- Why Convert? The Benefits of a DIY Exercise Bike
- Choosing Your Path: Trainers vs. Rollers
- Essential Components and Compatibility Checklist
- Setting Up for Success: Installation and Safety
- Smartening Up: Connecting to Apps and Devices
- Safety, Maintenance, and Troubleshooting
- Beyond the Basics: Advanced Modifications and Optimizations
- Conclusion: Your Journey to a Smarter Indoor Ride Starts Now
Why Convert? The Benefits of a DIY Exercise Bike
Before we dive into the “how,” let’s talk about the “why.” Converting your bike offers a unique set of advantages that standalone exercise bikes often can’t match.
Unbeatable Cost-Effectiveness
The most obvious benefit is the cost. A good quality bike trainer starts around $100, while a high-end smart direct-drive trainer might cost $800-$1,200. Compare that to a decent dedicated exercise bike, which easily starts at $500 and can soar into the thousands for premium models. You already own the most important part—the bike! This approach saves you hundreds, if not thousands, of dollars.
Superior Realism and Bike Fit
You are riding your actual bike. This means you’re using your own saddle, handlebars, and crankset. There’s no adjusting to a new bike geometry. This is a massive advantage for cyclists training for specific events, as it promotes an exact replica of your outdoor riding position. It also means any custom fittings, like a raised handlebar stem or a special saddle, come with you indoors.
Versatility and Seasonal Flexibility
Your conversion kit isn’t a one-trick pony. When the weather is nice, you simply remove the bike from the trainer and hit the roads or trails. The trainer itself is often foldable and can be stored in a closet. This seasonal flexibility is something a permanent indoor bike can’t offer. You’re not dedicating permanent floor space to a single piece of equipment.
Enhanced Training Data and Engagement
Modern smart trainers open up a world of data. They measure power output (watts), cadence, and speed with high accuracy. This data streams to apps like Zwift, TrainerRoad, RGT Cycling, or Wahoo SYSTM. You can join virtual group rides, race against your past self, or follow structured training plans that automatically adjust the resistance. This level of interactive engagement makes indoor training something you actually look forward to, rather than dread.
Choosing Your Path: Trainers vs. Rollers
The first major decision in your conversion journey is selecting the core piece of hardware. There are two primary categories: bike trainers and rollers. They offer vastly different riding experiences.
Visual guide about How to Convert a Bike to an Exercise Bike
Image source: icebike.org
Bike Trainers: The Stable, Resistant Choice
A bike trainer is a stand that lifts your bike’s front wheel and clamps onto the rear axle, holding the bike rigidly in place. You don’t need to balance; the bike is completely stable. This is the most common and beginner-friendly option.
- Wheel-On (Classic) Trainers: Your bike’s rear wheel remains on. A roller (the “flywheel”) presses against the tire to create resistance. They are the most affordable option ($100-$300). The downside is tire wear and potential for slippage on very high resistance. They often require a specific trainer tire for best performance.
- Direct-Drive (Smart) Trainers: These replace your rear wheel entirely. You remove your rear wheel and attach the bike’s frame directly to the trainer’s cassette (which you install). The trainer has its own large, heavy flywheel. This is the gold standard for serious cyclists. It provides incredibly smooth, realistic road feel, zero tire wear, and the highest power measurement accuracy. They are almost always “smart” trainers.
Rollers: The Skill-Based, Dynamic Choice
Rollers are a set of three (or sometimes two) cylindrical drums on a frame. You place your bike’s wheels on these drums. To ride, you must balance the bike—there is no physical clamp holding it upright. This requires more skill and focus but provides a unique, fluid, and dynamic workout that engages your core and balance muscles.
- Pros: Very realistic road feel (the bike can sway slightly), excellent for working on pedal stroke efficiency and core stability, generally quieter than wheel-on trainers, and no tire wear.
- Cons: Steep learning curve; falling off is common for beginners. Not ideal for very high-intensity intervals where you might rock the bike violently. Most rollers are not “smart” (they don’t provide resistance or power data), though “smart roller” systems do exist.
Recommendation for Beginners: Start with a basic wheel-on trainer or an entry-level smart direct-drive trainer. For most people seeking a stable, hassle-free way to convert a bike to an exercise bike, a trainer is the clear winner. Rollers are best for experienced riders focusing on smooth pedal technique.
Essential Components and Compatibility Checklist
You can’t just buy any trainer and expect it to work. You must verify your bike’s compatibility with your chosen trainer. This step is critical to avoid a frustrating return or a damaged bike.
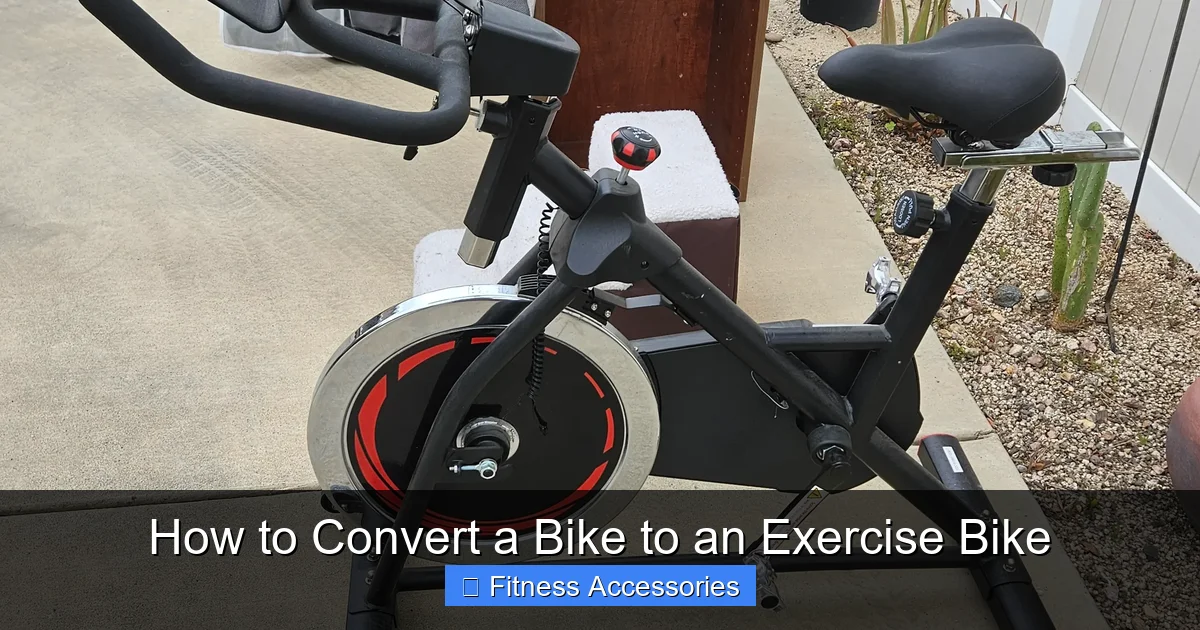
Visual guide about How to Convert a Bike to an Exercise Bike
Image source: patch.com
Axle and Dropout Compatibility
This is the most common point of failure. The trainer must securely grip your bike’s rear axle.
- Quick Release (QR): The traditional skewer system. Most basic trainers and many smart trainers come with QR adapters. You simply swap your bike’s quick release skewer for the trainer’s longer, reinforced one.
- Thru-Axle: A solid, threaded axle that threads directly into the frame. Common on modern mountain bikes and some gravel/cyclocross bikes. You MUST buy a trainer that specifically supports your bike’s thru-axle size (e.g., 12x142mm, 12x148mm). Adapters sometimes exist, but it’s best to get a trainer with the correct thru-axle interface included.
Frame Clearance and Geometry
Look at the space between your rear tire and your bike’s frame (the chainstays and seatstays). When the trainer clamps on, it pushes the rear wheel slightly to the side. Ensure there is enough clearance so the tire or the trainer’s mechanism doesn’t rub against your frame. This is rarely an issue with road bikes but can be with some modern MTBs with very wide tires and tight frame clearance. Also, consider the bottom bracket height; some trainers work better with certain geometries.
Drivetrain and Cassette Compatibility
For direct-drive trainers, you will be removing your rear wheel and its cassette. You must install a cassette onto the trainer’s freehub body. The freehub type must match your cassette (e.g., Shimano/SRAM 8/9/10/11-speed, Shimano Micro Spline for 12-speed, SRAM XD for 11/12-speed). Most direct-drive trainers ship with a Shimano/SRAM 11-speed freehub, which is the most common. Check your current cassette and the trainer’s specs. You may need to buy a different freehub body or a new cassette.
The Crucial Front Wheel Riser Block
When you lift the front wheel of the bike, it sits lower than the rear. This changes the bike’s geometry, making you feel like you’re constantly riding downhill. A front wheel riser block (or just a sturdy book) is placed under the front wheel to level the bike. This is essential for a natural riding position, proper weight distribution, and accurate power measurement on some trainers. Many trainers include one, but a good, stable one is worth buying separately.
Setting Up for Success: Installation and Safety
With your equipment in hand, proper installation is non-negotiable for a safe and effective workout.

Visual guide about How to Convert a Bike to an Exercise Bike
Image source: images.contentstack.io
Step-by-Step Trainer Attachment
1. Prepare Your Bike: Shift the chain to the smallest cog on the rear cassette and the smallest chainring on the front. This reduces tension and makes clamping easier.
2. Secure the Trainer: Place the trainer on a solid, level floor. Fold-out legs should be fully locked. If it’s a direct-drive, install your cassette on the trainer first (following the manufacturer’s torque specs!).
3. Mount the Bike: For a wheel-on trainer, loosen the resistance unit and swing it to the side. Place the bike’s rear axle into the trainer’s jaws. For QR, insert the trainer’s skewer through the axle and tighten the nuts/levers firmly. For thru-axle, thread it in and tighten to the specified torque (often 12-15 Nm). Ensure the axle is centered and fully seated.
4. Attach the Riser: Place the riser block under the front wheel. Adjust until the bike is level. You can use a bubble level on the top tube or saddle to check.
5. Final Checks: Spin the pedals by hand. The wheel should spin freely without rubbing on the trainer frame or your brake pads. Apply the brake lever a few times to ensure the wheel is true and not rubbing. Give the bike a firm side-to-side shake to confirm it’s locked in place.
The Non-Negotiable Mat
Always use a thick, durable trainer mat or an old yoga mat under your entire setup. This protects your floor from sweat, tire debris, and the weight of the trainer. It also significantly reduces noise and vibration transmission to your floor and neighbors—a major benefit if you live in an apartment.
Cooling and Ventilation
You will sweat. Profusely. Indoor training generates a lot of heat with no wind to cool you. Position a powerful fan directly in front of you. A simple 20-inch box fan works wonders. Good airflow prevents overheating, maintains performance, and makes the session bearable. Consider a dedicated sweat guard or towel to protect your bike’s handlebars and stem from corrosive sweat.
Smartening Up: Connecting to Apps and Devices
If you have a smart trainer (either direct-drive or a “smart” wheel-on model with electronic resistance), you’ve unlocked the ultimate indoor experience. These trainers communicate via Bluetooth Smart (BLE) or ANT+ protocols.
What Data Do They Send?
Your trainer can broadcast several data streams:
- Power (Watts): The most important metric for measuring actual work output. Smart trainers are calibrated to be highly accurate.
- Cadence: Your pedal strokes per minute (RPM).
- Speed: Virtual speed, calculated based on power and the chosen “virtual bike” in an app.
- Resistance Control: The app can command the trainer to increase or decrease resistance automatically.
Choosing Your Training Platform
The software is what brings everything to life.
- Zwift: The massive virtual world where you ride an avatar in a colorful, game-like environment. Great for motivation, group rides, and racing. Requires a monthly subscription.
- TrainerRoad: Focused purely on structured, science-based training plans. No virtual world, just data-driven workouts designed to make you faster. Also subscription-based.
- RGT Cycling & Wahoo SYSTM: Offer a mix of virtual worlds and structured plans, often with more realistic physics and scenic routes.
- Free Alternatives: Apps like Rouvy (augmented reality rides) or Fulgaz have free tiers. You can also use your bike’s native speed/cadence sensors (if you have them) with free apps like Strava or Komoot, but you won’t get controlled resistance.
The Simple Connection Process
1. Install the chosen app on your phone, tablet, or computer.
2. Ensure your trainer is powered on (some need a USB charge or a power adapter).
3. In the app’s device/sensor settings, scan for Bluetooth or ANT+ sensors.
4. Select your trainer from the list. You’ll typically pair it for both “Controllable” (so it can change resistance) and “Power/Cadence” (so it sends data).
5. Calibrate! Every smart trainer has a calibration procedure (a spin-down test). This is usually a 10-second process in the app and ensures power accuracy. Do this before your first ride and periodically thereafter.
6. Start your workout! The app will now control the trainer’s resistance based on the terrain in a virtual world or the demands of your interval plan.
Safety, Maintenance, and Troubleshooting
A safe setup is a fun setup. Here’s how to keep your converted bike running smoothly and securely for years.
Pre-Ride Safety Inspection
Make this a habit before every indoor session:
- Check the Clamp: Ensure the trainer’s axle clamp is fully tight. Give the bike a firm wiggle. There should be no movement at the axle.
- Inspect the Tire: For wheel-on trainers, check the rear tire for wear, cuts, or embedded debris. Maintain proper tire pressure (often a few PSI higher than outdoor pressure for better grip).
- Secure the Riser: Make sure the front wheel is properly seated on the riser block and isn’t going to slip off.
- Clear the Area: Ensure you have enough space around you. Pedals and handlebars can extend further than you think. Remove tripping hazards.
Routine Maintenance for Your Bike and Trainer
Indoor training is actually harder on some components than outdoor riding due to the constant, high-torque load without coasting.
- Clean Your Drivetrain: Sweat and dust create an abrasive paste. Wipe down your chain, chainrings, and cassette after every few rides. Re-lube the chain regularly.
- Check Trainer Wear Parts: For wheel-on trainers, the roller that contacts the tire can wear down or get covered in rubber debris. Clean it periodically. For direct-drive trainers, ensure the cassette is tight and the freehub is clean.
- Bike Inspection: Pay extra attention to your rear dropout area (where the axle attaches to the frame). Ensure there are no cracks or stress marks. This is a high-stress point when clamped in a trainer.
Common Issues and Quick Fixes
- Slipping (Wheel-On): Increase tire pressure. Clean the trainer roller and your tire. Ensure the roller is tightened against the tire with adequate force (but not so much it causes extreme drag).
- Noise/Vibration: Ensure the trainer is on a solid, level surface. The mat is crucial. Tighten all bolts on the trainer’s legs and clamp. A slightly under-inflated tire can cause a “thumping” noise.
- Inaccurate Power: Perform a calibration. Ensure your tire pressure is correct and consistent. For wheel-on trainers, tire pressure and temperature significantly affect power readings.
- App Won’t Find Trainer: Make sure Bluetooth is on and you’re not connected to other devices. Restart the trainer and your phone/tablet. Check the trainer’s battery (if applicable).
Beyond the Basics: Advanced Modifications and Optimizations
Once you’re comfortable with the fundamentals, you can fine-tune your setup for maximum performance and comfort.
Optimizing Your Bike for Indoor Use
Many cyclists set up a dedicated “indoor bike.” This is often a less-expensive, durable bike that stays on the trainer permanently. This saves the hassle of constant mounting/dismounting and protects your nicer outdoor bike from the unique stresses of trainer use. You can outfit this indoor bike with a comfortable saddle, ergonomic bar tape, and a handlebar-mounted device holder for your phone or tablet.
Ergonomics and Comfort
Indoor riding is static. Small discomforts become big problems over a 60-minute session.
- Saddle Position: You might prefer a slightly different saddle setback or height for indoor vs. outdoor. Don’t hesitate to make small adjustments.
- Handlebar Height: You can raise your handlebars more indoors for a more upright, comfortable position since you don’t need to worry about aerodynamics or handling.
- Ventilation: As mentioned, a fan is non-negotiable. Consider a dual-fan setup or a high-velocity floor fan aimed at your torso and head.
Integrating Additional Sensors
While smart trainers have great built-in sensors, you can add more.
- Heart Rate Monitor (HRM): A chest strap or optical armband is the most accurate way to monitor effort. Pair it with your app for a complete physiological picture (power + heart rate = fitness tracking).
- Cadence Sensor: If your trainer doesn’t measure cadence, a simple magnet-based or Bluetooth cadence sensor on your crank arm is cheap and effective.
- Footpod: For runners who also cycle, some apps use a footpod for speed calibration on rollers.
Conclusion: Your Journey to a Smarter Indoor Ride Starts Now
Learning how to convert a bike to an exercise bike empowers you to take control of your indoor training. It’s a project that pays dividends in cost savings, training specificity, and sheer enjoyment. You’ve moved from a dusty bicycle to a dynamic, data-rich fitness machine that connects you to global communities and structured plans. Remember the core principles: choose the right trainer for your needs and bike, prioritize safety and stability with a good mat and riser, and embrace the smart ecosystem to stay motivated. The open road may be closed, but your journey to fitness is just getting started. Now, go spin those pedals and feel the burn—all from the comfort of your living room.
Frequently Asked Questions
Can any bike be converted to an exercise bike?
Most standard road, mountain, and hybrid bikes with quick-release or common thru-axles can be converted. The key is checking axle compatibility, frame clearance, and drivetrain match with your chosen trainer. Very old bikes or those with unusual axle standards may require adapters or may not be compatible.
Are bike trainers or rollers better for beginners?
For absolute beginners, a bike trainer is the far better choice. It provides complete stability, so you don’t have to balance, making it safer and less intimidating. Rollers require significant balance skill and have a steeper learning curve, often leading to falls for new users.
Do I need a special tire for my bike trainer?
For wheel-on trainers, a dedicated trainer tire is highly recommended. These are made from harder, more heat-resistant rubber that lasts much longer than standard road or MTB tires and provides better grip on the trainer’s roller. Using your regular outdoor tire will cause it to wear out very quickly and can create more slippage.
Will using a trainer damage my bike?
Not if used correctly. The main stress points are the rear dropout ( axle area) and the drivetrain. Ensure the axle clamp is secure but not over-tightened (use a torque wrench if possible). Keep your drivetrain clean and well-lubed, as indoor training creates a lot of torque and heat. Regularly inspect these areas for any signs of stress or wear.
How much does a good conversion setup cost?
The cost varies widely. A basic, stable wheel-on trainer with a riser block and mat can be found for $150-$250. A mid-range smart direct-drive trainer (which is the best long-term investment) with all accessories typically costs $700-$1,200. This is still significantly less than a quality dedicated exercise bike ($1,000+).
Is a smart trainer worth the extra money?
For most serious cyclists and anyone who finds motivation a challenge, absolutely yes. The ability to connect to apps like Zwift for immersive, game-like experiences or to follow structured, adaptive training plans that automatically control resistance is a game-changer. It turns a monotonous indoor session into an engaging activity you’ll actually stick with. The accurate power data is also invaluable for tracking fitness gains.