How to Change Car Oil at Home
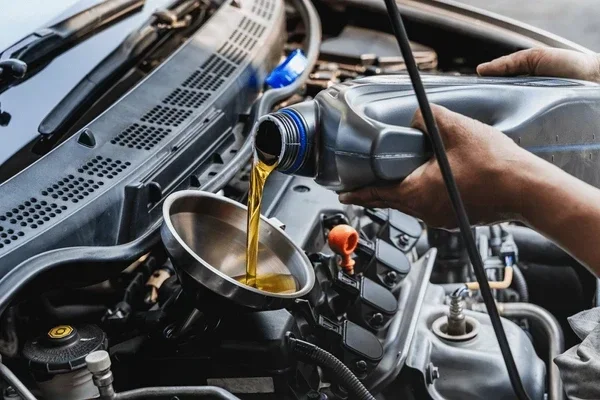
Changing your car oil at home is one of the easiest ways to save money and keep your engine running strong. With basic tools, the right oil, and a little patience, anyone can learn how to change car oil at home in under an hour. This guide walks you through every step from gathering supplies to proper disposal, making it the perfect starting point for beginners.
Your car’s engine is the heart of your vehicle, and oil is its lifeblood. Over time, oil breaks down, picks up debris, and loses its ability to lubricate properly. When that happens, your engine suffers. The good news is that how to change car oil at home is a skill anyone can learn. It does not require fancy equipment or years of mechanical experience. In fact, once you do it a couple of times, you will wonder why you ever paid a mechanic to do it.
Learning how to change car oil at home gives you control over the quality of parts you use and the timing of your maintenance. You also save a significant amount of money. A typical oil change at a shop costs between $50 and $100. Doing it yourself? You can spend as little as $20 to $40 on supplies. Over the life of your car, those savings add up fast.
This guide covers everything you need to know. From the tools you will need to the step-by-step process, we have you covered. Whether you are a complete beginner or someone who has never popped a hood, you will feel confident after reading this.
Key Takeaways
- Save Money: Changing oil at home costs a fraction of what a shop charges.
- Simple Process: You only need a few basic tools and about 30-60 minutes.
- Right Oil Matters: Always use the oil type and weight recommended by your car’s manufacturer.
- Safety First: Use jack stands and never work under a car supported only by a jack.
- Dispose Properly: Used motor oil must be recycled at a designated facility.
- Regular Changes Extend Engine Life: Staying on top of oil changes prevents costly repairs.
📑 Table of Contents
- Why Changing Your Oil at Home Makes Sense
- What You Will Need to Get Started
- Step-by-Step Guide to Changing Your Car Oil
- Choosing the Right Oil for Your Vehicle
- Common Mistakes to Avoid When Changing Oil at Home
- How Often Should You Change Your Oil?
- Quick Tips for a Smooth Oil Change
- Expert Insights
- Conclusion
Why Changing Your Oil at Home Makes Sense
There are many reasons to learn how to change car oil at home. The biggest one is cost. But there are other benefits too. When you do it yourself, you know exactly what goes into your car. No upsells, no mystery additives, no guesswork.
Save Money on Every Oil Change
Shop oil changes charge a premium for labor. The oil itself is only a small part of the cost. When you change your oil at home, you pay for the oil and the filter, and that is it. You can buy quality oil and filters in bulk, which saves even more money over time.
Learn More About Your Vehicle
Doing your own how to change car oil at home routine teaches you a lot about how your car works. You get familiar with the oil pan, the drain plug, the filter housing, and the dipstick. This knowledge helps you spot problems early before they become expensive repairs.
Set Your Own Schedule
When you go to a shop, you are at their mercy. They might tell you to come back every 3,000 miles even if your car does not need it. When you handle your own oil changes, you follow the schedule that makes sense for your driving habits and your vehicle.
What You Will Need to Get Started
Before you start, gather everything you need. Having all your supplies ready makes the process smooth and stress-free. Changing oil is a how to change car oil at home task that requires minimal tools, but you do need the right ones.
Essential Tools and Supplies
Here is a list of what you will need for your DIY oil change at home:
- New engine oil (check your owner’s manual for the correct type and amount)
- New oil filter (match it to your vehicle model)
- Oil drain pan (large enough to catch all the old oil)
- Socket wrench and the right socket size (usually 14mm or 17mm)
- Oil filter wrench (for stubborn filters)
- Jack and jack stands (or drive onto ramps)
- Funnel (for pouring new oil without spills)
- Gloves and safety glasses
- Rags or paper towels (for cleanup)
- Disposable drain pan or old cardboard for under the car
Safety Equipment You Should Not Skip
Working under a car can be dangerous if you do not take precautions. Always use jack stands and never rely on a jack alone. The jack is only for lifting; the stands hold the weight. Wear gloves to protect your hands from hot oil and sharp edges. Safety glasses keep oil splashes out of your eyes.
Step-by-Step Guide to Changing Your Car Oil
Now for the fun part. Follow these steps carefully, and you will have a clean, successful oil change. This is the core of how to change car oil at home, so pay close attention to each step.
Step 1: Warm Up the Engine
Start your car and let it run for about 5 to 10 minutes. Warm oil flows much better than cold oil. It drains out faster and carries more contaminants with it. Do not let the engine get hot enough to burn you, though. Just a brief warm-up is perfect.
Step 2: Lift the Vehicle Safely
Use a floor jack to lift the front of the car. Place jack stands under the designated lift points. Give the car a gentle push to make sure it is secure on the stands. Never crawl under a car that is only supported by a jack. Think of it like how you would approach how to workout with dumbbells at home for beginners where you build up gradually and prioritize safety over speed.
Step 3: Locate the Oil Drain Plug
Crawl under the car and find the oil pan at the bottom of the engine. The drain plug is a bolt on the bottom of the pan. Place your drain pan directly beneath it. Have your socket wrench ready.
Step 4: Drain the Old Oil
Turn the drain plug counterclockwise to loosen it. Remove it slowly and let the old oil flow into the drain pan. The oil will be warm, so be careful. Let it drain completely. This usually takes about 10 to 15 minutes.
Step 5: Remove the Old Oil Filter
Use an oil filter wrench to loosen the old filter. Turn it counterclockwise. It may be tight, so use steady pressure. Be ready for some residual oil to spill out. Have your rags handy.
Step 6: Prepare the New Oil Filter
Before installing the new filter, rub a thin layer of fresh oil around the rubber gasket. This creates a better seal and makes it easier to remove next time. Screw the new filter on by hand until it is snug, then tighten it just a quarter turn. Do not overtighten.
Step 7: Replace the Drain Plug
Once all the old oil has drained, reinstall the drain plug. Tighten it firmly but do not strip the threads. A good snug fit is all you need.
Step 8: Add New Oil
Lower the car off the jack stands. Open the oil filler cap on top of the engine. Place a funnel in the opening and pour in the new oil. Add the amount recommended by your manufacturer. Replace the filler cap.
Step 9: Check the Oil Level
Wait a few minutes for the oil to settle. Pull out the dipstick, wipe it clean, reinsert it, and pull it out again. Check the level. It should be between the minimum and maximum marks. Add more oil if needed.
Step 10: Clean Up and Dispose of Old Oil
Dispose of the old oil properly. Never pour it down a drain or onto the ground. Pour it into a sealed container and take it to a recycling center or auto parts store. Many stores accept used oil for free.
Choosing the Right Oil for Your Vehicle
Not all oil is the same. Picking the right one is a crucial part of how to change car oil at home. The wrong oil can reduce engine performance and even cause damage over time.
Conventional vs Synthetic Oil
Conventional oil is the standard choice for most vehicles. It works well for normal driving conditions and is more affordable. Synthetic oil offers better protection in extreme temperatures and lasts longer between changes. It costs more but provides superior performance.
Understanding Oil Viscosity Ratings
You will see numbers on oil bottles like 5W-30 or 10W-40. The first number (with the W) represents viscosity in cold temperatures. The second number represents viscosity at operating temperature. Always use the rating your owner’s manual recommends.
High-Mileage Oil Considerations
If your car has over 75,000 miles, consider using high-mileage oil. It contains additives that help reduce leaks and protect older engine components. It is a simple upgrade that can make a real difference.
Common Mistakes to Avoid When Changing Oil at Home
Even experienced DIYers make mistakes. Knowing what to avoid helps you do a cleaner, safer job every time.
Overtightening the Drain Plug
This is one of the most common errors. Overtightening can strip the threads or crack the oil pan. Hand-tight plus a quarter turn with the wrench is usually enough. Think of it the way you would approach how to do weight lifting at home without dumbbells where using proper form and not overexerting yourself prevents injury.
Forgetting to Replace the Oil Filter
Some people change the oil but skip the filter. Old filters trap contaminants that get released back into the engine when they become saturated. Always install a new filter with every oil change.
Using the Wrong Amount of Oil
Too little oil means poor lubrication. Too much oil can cause foaming and pressure problems. Always add the exact amount specified in your owner’s manual. Use the dipstick to verify the level after adding oil.
Skipping the Warm-Up Step
Cold oil is thick and does not drain well. Skipping the warm-up means old oil and sludge stay behind in the engine. A few minutes of running the engine makes a big difference.
Not Checking for Leaks
After you add new oil, start the engine and let it run for a minute. Check under the car for any drips. Look at the drain plug and the oil filter. Catching a leak early saves you from a messy problem later.
How Often Should You Change Your Oil?
The old rule of changing oil every 3,000 miles is outdated for most modern vehicles. Many cars today can go 5,000 to 7,500 miles between changes. Some synthetic oils can even last 10,000 miles.
Check your owner’s manual for the manufacturer’s recommendation. You will also find this information in the maintenance schedule section. Factors like driving in extreme heat, towing heavy loads, or frequent short trips can shorten the interval. In those cases, you may want to change your oil more frequently.
Keep a log of your oil changes. Write down the date, mileage, and type of oil used. This helps you stay on track and gives you a record if you ever sell the car. A simple notebook or a phone app works great for this.
Learning how to change car oil at home is a skill that pays for itself quickly. The first few times might feel a little intimidating, but after that, it becomes second nature. You will feel proud every time you finish a change, and your engine will thank you for it.
Quick Tips for a Smooth Oil Change
- Change your oil on a level surface so it drains properly.
- Keep a small flashlight handy for seeing under the car.
- Use a magnetic drain plug if your car supports it. It catches metal particles.
- Take a photo of the old oil filter before removing it for reference.
- Recycle the old oil and filter responsibly.
- Keep a small amount of extra oil on hand for top-offs between changes.
Expert Insights
Many professional mechanics agree that regular DIY oil changes keep engines healthier in the long run. When you handle the process yourself, you notice small issues early. A slightly noisy engine, a slight leak, or unusual oil color can all be signs of bigger problems. Catching these early saves you hundreds of dollars in repairs.
Experienced DIYers also recommend keeping a small maintenance kit in your garage. Stock up on oil, filters, and basic tools so you are always ready when it is time for a change. This way, how to change car oil at home becomes a quick, routine task rather than a big project.
One final tip: do not rush the process. Take your time, follow each step, and do not skip the safety checks. A careful oil change protects your engine and keeps you safe.
Conclusion
How to change car oil at home is one of the most valuable skills any car owner can learn. It saves money, builds confidence, and keeps your vehicle running at its best. With the right tools, the correct oil, and a little practice, anyone can master this essential maintenance task.
Start with your first change today. Follow the steps in this guide, take your time, and enjoy the satisfaction of doing it yourself. Your car will run better, and your wallet will thank you. Remember, every oil change you do at home is one less trip to the shop and one more skill in your toolkit.
Frequently Asked Questions
How long does it take to change car oil at home?
Most people complete a home oil change in 30 to 60 minutes. The first time might take a little longer as you get familiar with the process. Once you have done it a few times, you will be able to knock it out in under 30 minutes.
What type of oil should I use for my car?
Check your owner’s manual for the recommended oil type and viscosity rating. Most modern cars use 5W-30, but some require different weights. Always follow what the manufacturer specifies for the best engine protection.
How often should I change my oil at home?
Check your vehicle’s maintenance schedule in the owner’s manual. Most cars today need an oil change every 5,000 to 7,500 miles. If you drive in harsh conditions, you may need to change it more often.
Can I reuse the old oil filter?
No, you should always install a new oil filter with every oil change. Old filters become saturated with contaminants and debris. Reusing them puts dirty oil back into your engine, which can cause damage over time.
Is it safe to change oil at home?
Yes, changing oil at home is safe as long as you follow proper safety precautions. Always use jack stands, wear gloves and safety glasses, and work on a level surface. Never crawl under a car supported only by a jack.
Where can I dispose of old motor oil?
Take your used oil to a recycling center, auto parts store, or a municipal hazardous waste facility. Many auto parts stores accept used oil for free. Never pour old oil down a drain, into a storm sewer, or onto the ground.