How Much Air Should Go in a Bike Tire
Finding the correct air pressure for your bike tires is a non-negotiable factor for performance, safety, and ride quality. It’s not a one-size-fits-all number; your ideal pressure depends on your specific bike, your weight, the terrain, and even the weather. The sidewall pressure range is a crucial starting guide, but your total weight (rider + gear) is the primary variable for dialing it in. Mastering this simple adjustment transforms your ride from a jarring, sluggish experience to a fast, efficient, and comfortable one.
Remember your first flat tire? That sudden thwump-thwump-thwump and the struggle to get the wheel off? Or maybe the bone-jarring vibration of riding on severely under-inflated tires that made your hands go numb? For many of us, the mysterious number inside our bike tires—measured in PSI (pounds per square inch) or sometimes BAR—feels like a secret code. We see the range printed on the sidewall, maybe 40-65 PSI, and we just… pick a number halfway and hope for the best. But what if I told you that mastering this one simple adjustment is perhaps the single most impactful and cost-free performance upgrade you can make to your bike? Getting your bike tire pressure right is the foundation of a great ride. It affects everything: your speed, your comfort, your control, your safety, and even how quickly your tires wear out. Let’s crack the code together.
This isn’t about memorizing a magic number. It’s about understanding the principles. Think of your tire as a carefully tuned suspension spring. Too hard (over-inflated), and it bounces off every little imperfection, wasting your energy and reducing traction. Too soft (under-inflated), and it squirms uncontrollably, feels sluggish, risks a pinch flat (a “snakebite”), and can damage your rim. The “Goldilocks Zone” of pressure—just right—is a dynamic sweet spot that balances rolling resistance, traction, comfort, and puncture protection based on you and where you’re riding. By the end of this guide, you won’t just be guessing. You’ll be a tire pressure tactician, able to dial in the perfect pressure for any situation.
Key Takeaways
- The Sidewall is a Guide, Not a Rule: The maximum pressure printed on your tire is a safety limit for the tire casing, not your target. Your target is almost always lower.
- Your Weight is the Primary Variable: Heavier riders need higher pressure to prevent rim strikes and tire squirm; lighter riders can run lower pressure for more comfort and grip.
- Bike Type Dictates the Ballpark: Road bikes need high pressure for low rolling resistance; mountain bikes need low pressure for traction and cushioning; hybrids/gravel bikes fall in a wide middle ground.
- Conditions Trump Numbers: Wet roots, loose gravel, or smooth pavement demand different pressures. Adjust lower for technical off-road, higher for smooth, fast road.
- Temperature Affects Pressure: Tire pressure changes about 1 PSI for every 10°F (5.5°C) change in temperature. Check pressure when tires are cold.
- Use a Good Pump with a Gauge: Your fingers are terrible at judging pressure. Invest in a reliable floor pump with an accurate built-in gauge for consistent, correct inflation.
- Regular Checks are Essential: Tires naturally lose 1-5 PSI per week. Check before every long or important ride to maintain optimal performance and safety.
📑 Table of Contents
- Why Bike Tire Pressure Isn’t a “Set It and Forget It” Number
- How to Find Your Starting Point: Decoding the Sidewall and Your Weight
- The Science of Fine-Tuning: Factors That Change Your Perfect PSI
- Bike-Specific Pressure Guides: Road, MTB, and Everything In-Between
- Tools, Techniques, and Maintenance: The Practical Side of Perfect Pressure
- Conclusion: Your Ride, Your Pressure
Why Bike Tire Pressure Isn’t a “Set It and Forget It” Number
Before we dive into the “how,” we must understand the “why.” Why does this matter so much? Why can’t we just use the middle of the range on the tire and be done with it? The answer lies in the fundamental physics of a pneumatic tire interacting with the ground.
The Three Pillars: Rolling Resistance, Traction, and Comfort
Every time your tire rolls, it deforms. That deformation absorbs energy, which is rolling resistance. Higher pressure reduces this deformation, making the tire roll more efficiently on perfectly smooth surfaces like a velodrome or fresh asphalt. But on real-world roads with cracks, gravel, and debris, a slightly lower pressure allows the tire to conform and “float” over these obstacles, actually reducing overall resistance and vibration. It’s a trade-off.
Traction is all about the tire’s contact patch—the area of rubber actually touching the ground. Under-inflation creates a wobbly, elongated contact patch that can fold under cornering, losing grip. Over-inflation creates a tiny, round contact patch that can’t “bite” into loose surfaces. The ideal pressure maximizes the usable contact patch for your specific terrain.
Comfort is the most immediately felt benefit. Your tires are your first line of suspension. Lower pressure allows the tire itself to absorb high-frequency, small-scale bumps—the rumble strips, the gravel, the broken pavement—before that shock even reaches your fork and frame. This reduces fatigue and arm/hand numbness significantly. For mountain bikers, it’s the difference between being pummeled by rocks and flowing over them.
The Dangers of Being Wrong
Riding with the wrong pressure isn’t just inefficient; it’s dangerous. Over-inflation makes the ride harsh, reduces traction (especially on wet or loose surfaces), and increases the risk of a blowout if you hit a sharp edge or pothole. It also causes premature wear in the center of the tread. Under-inflation is a silent killer. It causes excessive sidewall flex, which builds up heat and can lead to tire failure. It dramatically increases the chance of a pinch flat when you hit a curb or rock. It damages rims if you hit something hard enough to collapse the tire. It makes steering sluggish and imprecise. For a cyclist, correct tire pressure is as critical as properly inflated tires are for a car.
How to Find Your Starting Point: Decoding the Sidewall and Your Weight
So where do we begin? Every journey to the perfect PSI starts with two pieces of information: what your tire is capable of, and what your bike needs to support.
Visual guide about How Much Air Should Go in a Bike Tire
Image source: 333fab.com
Step 1: The Sidewall Range is Your Safety Cage
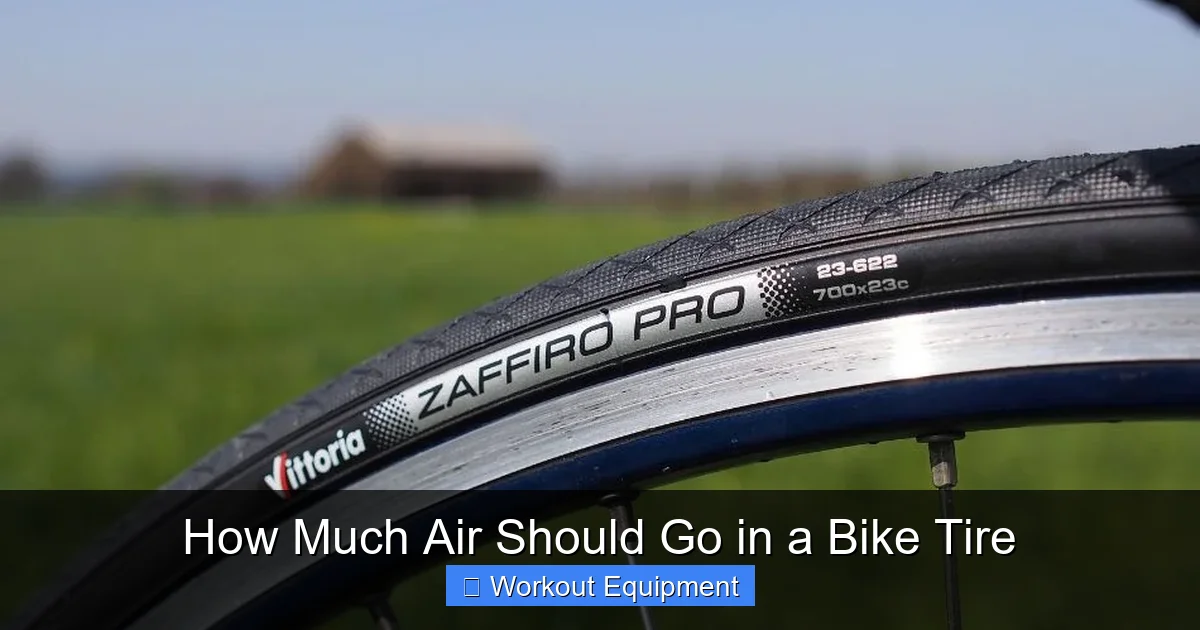
Look at your tire. On the sidewall, you’ll see something like: “Inflate to 40-65 PSI” or “2.5-4.1 BAR.” This is the manufacturer’s recommended operating range for that specific tire casing and bead design. The maximum number is the absolute limit—the pressure at which the tire structure is at risk of failure. Never exceed this. The minimum number is a bit more nuanced. It’s often the pressure below which the tire may not hold its shape on the rim or provide adequate support for the bike’s design. For most riders on most surfaces, your target will fall somewhere in the middle to lower-middle of this range, heavily influenced by your weight.
Step 2: Your Weight is the Primary Dial
This is the single most important factor you control. The tire must support the total weight of the bike + rider + gear + water bottles. A 120-pound rider on a 20-pound bike has a much different load per tire than a 220-pound rider on the same bike. Heavier loads require higher pressure to prevent the tire from bottoming out (hitting the rim on bumps) and to reduce excessive sidewall flex. Lighter riders can experiment with significantly lower pressures for more comfort and grip without these risks.
Practical Example: Take a standard 700x28c road tire with a 60-80 PSI range. A 130lb rider might run 60-65 PSI for comfort on rough roads. A 200lb rider on the same tire might need 75-80 PSI to feel secure and avoid rim strikes. The tire’s range allows for both, but the number is dictated by mass.
Step 3: The Bike Type Blueprint
While weight is key, the general design intent of your bike provides a crucial ballpark.
- Road Bikes: Designed for speed on smooth pavement. Narrow tires, high pressure. Typical range: 70-120 PSI for 25-28mm tires. The goal is minimal rolling resistance. Start near the higher end for lighter riders, lower end for heavier riders or rough roads.
- Mountain Bikes (MTB): Designed for off-road traction and cushioning. Wide tires, low pressure. Typical range: 15-35 PSI for modern 2.2”-2.6” tires. The goal is a large, compliant contact patch. Start lower for more technical trails, higher for hard-packed dirt or to prevent rim strikes on very rocky terrain.
- Hybrid/Fitness Bikes: A compromise for pavement and light paths. Medium-width tires (28c-42c). Typical range: 40-70 PSI. Aim for the middle to lower end for comfort on bike paths and rough roads.
- Gravel Bikes: The wild card. Designed for mixed surfaces. Tire widths vary wildly (35c-50c+). Pressure is highly terrain-dependent. Often run 25-45 PSI. Lower for loose gravel, higher for smooth gravel or pavement segments.
- Cyclocross Bikes: Similar to gravel but often with more aggressive tread and slightly narrower tires. Pressure is critical for fast cornering on grass and mud, typically 30-50 PSI for 33c tires.
The Science of Fine-Tuning: Factors That Change Your Perfect PSI
You’ve found a number that feels good on your regular route. Great! But the beauty of bike tire pressure is its adjustability. A “set it and forget it” approach leaves performance on the table. Here are the variables to consider for fine-tuning.
Visual guide about How Much Air Should Go in a Bike Tire
Image source: flatironbike.com
Terrain and Surface: The Biggest Variable
This overrides almost everything else. If you change what’s under your tires, change your pressure.
- Smooth Asphalt: Higher pressure within your safe range. Less deformation, less rolling resistance. The road is your friend.
- Rough, Cracked Asphalt / Chip Seal: Lower your pressure by 5-10 PSI. The tire can now absorb the small bumps instead of transmitting them. You’ll be faster and more comfortable.
- Loose Gravel / Sand: Significantly lower pressure. You need the tire to “sink in” slightly to create a wider, flatter contact patch that doesn’t dig in and slide. This is where fat tires at low pressure shine.
- Hard-Packed Dirt / Rocky Trails: A medium-low pressure. Enough to prevent rim strikes on rocks, but low enough for the tire to conform to roots and small obstacles for grip.
- Mud: Can be tricky. Sometimes slightly higher pressure to cut through the mud to the harder ground below. Sometimes lower to create a “paddle” effect. Experiment based on mud type (sticky vs. greasy).
Weather and Temperature: The Invisible Force
Air expands when it heats up and contracts when it cools down. Tire pressure changes by approximately 1 PSI for every 10°F (5.5°C) change in temperature. This means:
- Your tires read higher on a hot afternoon than on a cold morning.
- If you fill your tires in a warm garage and ride into cold weather, they will lose pressure.
- Riding hard generates heat in the tire from friction, which can increase pressure by a few PSI during a long ride.
Rule of Thumb: Always check and adjust your tire pressure when the tires are cold—meaning they haven’t been ridden on for at least 2-3 hours. This gives you a consistent, accurate baseline. If you’re traveling from a cold to a hot climate (or vice versa), re-check your pressure after a day.
Tube vs. Tubeless: A Game-Changer for Pressure
This is a monumental shift in modern cycling.
- With Tubes: You have a small, flexible inner tube inside. Under hard impacts, the tube can be pinched against the rim, causing a “snakebite” or pinch flat. This sets a practical lower limit on pressure. You need enough air to prevent the tire from bottoming out and pinching the tube.
- Tubeless Setup (with sealant): This removes the inner tube. The tire and rim form an airtight system. The benefits for pressure are huge:
- You can run much lower pressures (often 5-10 PSI lower) without fear of pinch flats. This is the #1 reason mountain bikers went tubeless.
- The sealant automatically seals small punctures from thorns and goatheads.
- Lower pressure with tubeless provides more traction, comfort, and control on technical terrain.
If you are tubeless, your pressure floor drops dramatically. A tire that might need 30 PSI with a tube could safely run 22 PSI tubeless on the same trail.
Bike-Specific Pressure Guides: Road, MTB, and Everything In-Between
Let’s get concrete. Here are practical starting points for the most common bike categories. Remember, these are starting points. Your weight and terrain will move you up or down from here.

Visual guide about How Much Air Should Go in a Bike Tire
Image source: giyopumps.com
Road Bikes (700c tires, 23-32mm width)
The old “pump it to the max on the sidewall” mentality is outdated. Modern wider road tires (28-32mm) perform brilliantly at lower pressures.
- 23-25mm tires: 80-100 PSI for a 150lb rider on smooth roads. Adjust ±5 PSI for weight.
- 28-32mm tires: 60-80 PSI for a 150lb rider. Experiment with the lower end for comfort on rough roads. A 200lb rider might stay at 75-85 PSI.
- Key Tip: For road tires, there is a “sweet spot” where the tire feels fast and supple, not squishy. If you hit a small bump and the tire feels like it’s folding, you’re too low. If every road imperfection feels like a hammer strike, you’re too high.
Mountain Bikes (26”, 27.5”, 29” wheels, 1.9”-2.6” tires)
This is where low pressure artistry happens. The trend is toward wider tires and lower pressures.
- Cross-Country (XC) / Hardtail: 18-25 PSI for a 150lb rider on 2.2-2.4” tires. Prioritizes rolling efficiency and rim protection on fast, smooth trails.
- Trail / All-Mountain: 16-22 PSI for a 150lb rider on 2.3-2.5” tires. The sweet spot for most riders. Balances traction, cushion, and control.
- Enduro / Downhill: 12-20 PSI for a 150lb rider on 2.4-2.6” tires. Very low for maximum traction and absorption on extremely rough, steep terrain. Requires sturdy rims and tubeless setup.
- Key Tip: The “squish test” is your friend. Get on the bike, bounce your weight, and watch the tire. You want a slight, controlled bulge, but it shouldn’t fold over or rub the frame/fork on hard cornering.
Gravel & Cyclocross (700c or 650b, 33c-50c+)
This category is all about adaptation. Your pressure will change from one mile to the next.
- Pavement-heavy gravel: 40-50 PSI on 38-42c tires. Feels more like a robust road bike.
- Mixed, chunky gravel: 28-38 PSI on 40-45c tires. The most common zone. Good traction without excessive drag.
- Loose, sandy, or very technical: 20-30 PSI on 45-50c+ tires. Get as low as you can without the tire collapsing under cornering or causing rim strikes.
- 650b wheels with wider tires: Can often run 5-8 PSI lower than an equivalent 700c setup for the same traction level, due to the smaller diameter and higher volume.
- Key Tip: On long gravel rides, carry a pump and adjust pressure at aid stations if the terrain changes dramatically (e.g., from hard-packed to soft, loose sections).
Hybrid & City Bikes (700c or 26”, 35c-42c)
Comfort and puncture resistance are key. These tires have a lot of volume.
- Pavement & bike paths: 50-65 PSI for a 150lb rider. Lower end for comfort, higher end for efficiency.
- Rough pavement / cobbles: 40-50 PSI. The extra volume means you can go quite low and still feel stable.
- Key Tip: Don’t be afraid to run these tires at the lower end of their range. The high volume means they won’t feel “squirmy” like a low-pressure MTB tire, just plush.
Tools, Techniques, and Maintenance: The Practical Side of Perfect Pressure
Knowledge is power, but you need the right tools to execute.
The Pump & Gauge: Your Most Important Tool
Your garage floor pump with the little plastic gauge on it is likely inaccurate by 5-15 PSI. It’s good for getting you “in the ballpark,” but for precision, you need better.
- Floor Pump with Quality Gauge: This is the #1 investment. Look for pumps with a large, easy-to-read dial gauge (like those from Lezyne, Topeak, or Blackburn). They are far more consistent and accurate.
- Dedicated Pressure Gauge: A standalone digital or high-quality analog gauge (like from Schraeder or Presta) is the gold standard. Keep it in your saddlebag and use it to check your pump’s accuracy and verify pressures on the go.
- CO2 Inflator: Great for emergency fixes on the road/trail, but CO2 gas is more temperature-sensitive and leaks out faster than air. Re-inflate with regular air at the next opportunity.
Remember: Always check pressure with your own gauge. Don’t trust the gauge on a public air compressor at a bike shop or gas station. They are often wildly inaccurate.
The Ritual: How to Check and Inflate Correctly
- Check Cold: Ideally, check first thing in the morning or before you ride. Press the gauge firmly onto the valve. For Presta valves, unscrew the tiny tip first, then press down slightly to let air escape and reset the valve core.
- Record Your Numbers: Keep a simple log (notes app or notebook) of your “baseline” pressures for each bike/tire combination. Note the conditions (e.g., “Rocket Ron 2.4” on gravel, 22 PSI, 180lb rider, dry”). This builds your personal knowledge base.
- Inflate in Bursts: Especially with high-volume MTB or gravel tires, inflate in 5 PSI bursts, checking the gauge each time. It’s easy to overshoot.
- Listen and Feel: As you approach your target, the sound of air entering changes. The pump handle will get stiffer. This is your secondary cue.
- Final Check: After inflating, give the tire a firm squeeze with your thumb. It should feel firm, not rock-hard, but not soft enough that you can noticeably deform the sidewall with one hand. Compare to your previous successful setups.
When to Re-Check: The Pressure Decay Timeline
Tires are not perfectly airtight. They naturally lose pressure.
- Latex Tubes/Tubeless: Lose pressure fastest (1-3 PSI per day). Check before every ride.
- Butyl Tubes (standard): Lose about 1-5 PSI per week. Check at least once a week, and always before a long or fast ride.
- Tubeless with Sealant: Can hold pressure very well for weeks, but sealant can dry out. Re-check monthly and top up sealant as per manufacturer (typically every 2-3 months).
Environmental factors speed up loss: Temperature drops, altitude changes, and porous rim tapes or old valve cores can cause faster leaks. If you find you’re losing more than 5 PSI a week on a butyl tube setup, inspect the valve core (tighten it slightly with pliers) and check for embedded thorns or rim tape issues.
Conclusion: Your Ride, Your Pressure
We’ve covered a lot of ground, from the fundamental physics to the nitty-gritty of valve types. But the core message is simple and empowering: you are in control of your ride quality. That number on the sidewall is a limit, not a target. Your body weight is the primary dial. The terrain is the final trim adjustment.
Start by finding a safe, reasonable pressure within your tire’s range based on your weight and bike type. Then, become an experimenter. Next time you ride your usual route, try adjusting in 2-3 PSI increments. How does it feel? Is it smoother? Faster? More sure-footed in corners? Keep a mental or physical note. The “perfect” pressure is the one that makes you smile at the end of the ride because your body feels fresh, your bike felt connected to the ground, and you didn’t get a single buzz through the handlebars.
This isn’t a set-it-once achievement. It’s a continuous, simple calibration. A few minutes with a good pump before you ride is all it takes to unlock a safer, faster, and far more enjoyable cycling experience. So go ahead, grab your pump, and start tuning. Your ideal ride is waiting for you, one PSI at a time.
Frequently Asked Questions
Can I use the maximum PSI printed on my tire?
No. The maximum PSI is a safety limit for the tire’s structure, not your recommended pressure. Running at the max makes for a harsh, unsafe ride with poor traction. Your ideal pressure is almost always lower, based on your weight and terrain.
What’s the single most important factor in setting pressure?
Your total weight (rider + gear + bike). Heavier riders need higher pressure to prevent the tire from bottoming out and damaging the rim. Lighter riders can run significantly lower pressure for more comfort and grip without those risks.
How often should I check my bike tire pressure?
Check before every long or important ride. Tires naturally lose 1-5 PSI per week. For high-performance setups (tubeless, latex tubes), check before every single ride. Always check when tires are cold for an accurate reading.
Do I need different pressures for wet vs. dry conditions?
Yes. In wet conditions, slightly lower pressure (2-4 PSI less) can increase the size of the contact patch and improve grip on slick surfaces. However, be cautious of sharp debris that lower pressure might make you more susceptible to. The biggest adjustment is for terrain (mud, sand) rather than just moisture.
My tire says “40-65 PSI” but I’m a heavy rider. Can I go over 65?
Never exceed the maximum pressure printed on the tire sidewall. It is a structural limit for that specific tire model. If you are a heavier rider and feel you need more than the max for safety on rough terrain, you need a tire with a higher maximum pressure rating or a wider tire that can support your weight at a lower pressure.
What’s the difference between Presta and Schrader valves, and does it matter for pressure?
Presta valves (narrow, with a small knob) are common on performance bikes. Schrader valves (wide, like a car tire) are common on hybrids and kids’ bikes. The valve type does not affect the pressure you can run; it only affects which pump head you need. Both can hold the same high pressures if the tire and rim are rated for it.